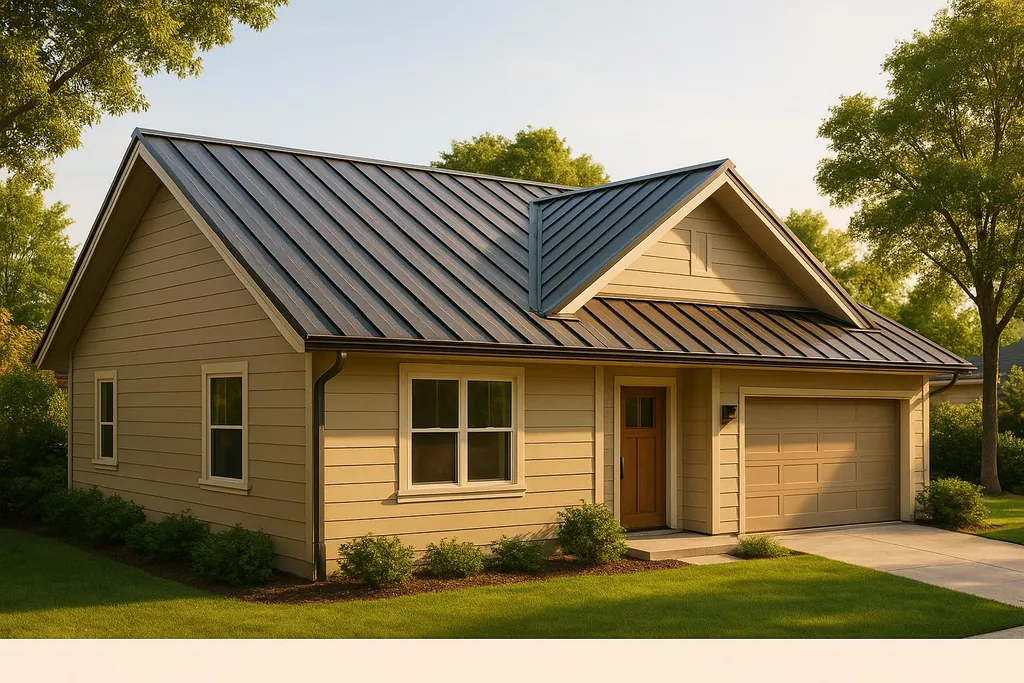
Learn how to install recycled metal roofing for a durable, eco-friendly solution that enhances energy efficiency and adds value to your home.
How to Install Recycled Metal Roofing
Want a roof that lasts decades, saves energy, and helps the planet? Recycled metal roofing is durable (40–70 years), reduces cooling costs by 10–25%, and is 100% recyclable. While initial costs are higher ($4–$30/sq ft vs. $0.70–$4 for asphalt shingles), it pays off with fewer replacements, lower energy bills, and even a potential 6% boost in home value.
Key Benefits of Recycled Metal Roofing:
- Durability: Lasts 40–70 years (vs. 15–30 years for asphalt shingles).
- Eco-Friendly: Made from 30–85% recycled content and fully recyclable.
- Energy Savings: Reflects heat, cutting cooling costs by up to 25%.
- Safety: Class A fire rating, ideal for wildfire-prone areas.
- Water Management: Smooth surface supports rainwater harvesting.
Quick Comparison:
| Material | Lifespan | Cooling Cost Reduction | Recyclability |
|---|---|---|---|
| Recycled Metal | 40–70 years | 10–25% | 100% recyclable |
| Asphalt Shingles | 15–30 years | None | Minimal |
Ready to install? Here's what you need: inspect recycled panels for rust or damage, gather tools (metal shears, safety harness), and check your roof structure. Follow steps like adding underlayment, securing panels, and sealing seams for a weatherproof finish. With regular cleaning and rust prevention, your roof will stay strong for decades.
Building the BEST House: Full Metal Roof Installation Details
Planning and Preparation
To take full advantage of the eco-friendly benefits of metal roofing, proper preparation is key. A well-thought-out plan can mean the difference between a smooth installation and costly errors. Before you get started, it's important to evaluate your materials, gather the right tools, and ensure your roof can handle the weight and structure of new metal panels.
Checking Recycled Materials
Recycled metal panels can often be found at salvage yards, metal recycling centers, or construction reuse stores. These panels, typically salvaged from renovations of homes or commercial buildings, are a great way to minimize waste.
When inspecting these panels, prioritize structural integrity. Avoid panels with deep dents (over ¼ inch), as they can interfere with water drainage and weaken the roofing. Check edges for sharp burrs or damaged flanges, which could cause issues with proper panel overlap.
Rust is another critical factor. While surface rust that flakes off can often be treated, panels with deep pitting or holes should be avoided. For copper roofing, a natural patina is a good sign - it protects against further corrosion.
Measure each panel for consistency and inspect fastener holes to ensure they haven't been enlarged or damaged. Sorting panels by size and condition will help you plan your layout more effectively.
> "Metal roofing and siding panels are made with the highest recycled content from the most recyclable materials on earth, making them a great choice not only for today, but also for future generations to use." - MCA Metal University [[1]](https://metalconstruction.org/index.php/online-education/recycled-content-of-metal-roofing-and-siding-panels)
Tools and Safety Equipment You'll Need
Installing metal roofing requires specific tools and safety gear. According to OSHA, falls are the leading cause of fatalities in the construction industry [[2]](https://firstamericanroofing.com/blog/roof-safety-equipment). This makes safety equipment an absolute necessity.
For tools, you'll need metal shears to cut panels, a cordless drill with magnetic bit holders, and the correct fasteners. A torque-controlled screw gun is better than an impact driver, as it reduces the risk of fracturing screws [[4]](https://sheffieldmetals.com/learning-center/metal-roofing-tools-101). When cutting panels, blade cutters are recommended for smoother edges compared to handheld grinders [[5]](https://www.rpsmetalroofing.com/recommended-tools-to-install-a-metal-roof).
Safety gear is just as important. Start with a properly fitted harness system, a vertical lifeline, and a complete roof safety kit. Rubber-coated gloves will protect your hands from sharp edges, and forearm guards made of chainmail or Kevlar offer additional protection [[3]](https://www.abcmetalroofing.com/blog/using-ppe-to-safely-install-metal-roofs).
| Safety Equipment | Price | Purpose |
|---|---|---|
| Universal Fit Safety Harness | $52.00 | Fall protection |
| 50' Vertical Lifeline | $74.60 | Anchor point connection |
| Rubber Coated Gloves | $3.75 | Hand protection |
| Complete Roof Safety Kit | $169.99 | Comprehensive protection |
Wear fitted clothing to avoid snags on sharp materials, and keep a first aid kit nearby. If you're working near traffic, reflective vests can help ensure you're visible [[3]](https://www.abcmetalroofing.com/blog/using-ppe-to-safely-install-metal-roofs).
Checking Your Roof Structure
Before installation, confirm that your roof meets local building codes for weight limits. Typically, these codes require a dead load capacity of 10–20 lb/ft² and a live load capacity of 20–40 lb/ft². Look for any signs of sagging or water damage, and consult a contractor if you're unsure.
Start by reviewing your building blueprints for details about load distribution [[7]](https://master-roofinginc.com/how-to-determine-roof-load-bearing-capacity). Inspect the trusses in your attic, checking for sagging, cracks, or prior repairs that could indicate structural issues. The age and maintenance history of your home play a big role in determining load capacity [[6]](https://overthetoproofing.com/blog/roof-maintenance/roof-load-capacity-101-how-much-weight-roof-can-handle) [[7]](https://master-roofinginc.com/how-to-determine-roof-load-bearing-capacity). Older homes may need reinforcement, which can often be done by attaching 2x4s to existing trusses [[7]](https://master-roofinginc.com/how-to-determine-roof-load-bearing-capacity).
Clear your roof of debris, snow, or any unnecessary equipment before starting the installation to avoid overloading it [[6]](https://overthetoproofing.com/blog/roof-maintenance/roof-load-capacity-101-how-much-weight-roof-can-handle). If you notice any concerns about your roof's structural integrity, consult a qualified contractor for a professional assessment [[7]](https://master-roofinginc.com/how-to-determine-roof-load-bearing-capacity) [[8]](https://www.nachi.org/metal-roofs-part7-116.htm).
With your materials inspected, tools and safety gear ready, and roof structure verified, you're prepared to move forward with the installation process.
Installation Steps
Now that you're all set, it's time to install your recycled metal roof. This process is broken down into three key steps: laying the underlayment, positioning and securing the panels, and finally, sealing and weatherproofing the roof.
Installing Underlayment
Start with a clean, smooth, and dry roof deck. Clear away any debris and sand the surface if needed. Begin by installing the drip edge along the eave. Next, roll out the synthetic underlayment horizontally, ensuring the anti-slip side faces up. Start at the lowest roof eave, leaving a 1.5-inch overhang along both the eave and rake edges. Later, you'll cover the rake edge with metal trim. Avoid stretching the material too tightly; it should rest loosely over valleys to allow for natural expansion and contraction.
Secure the underlayment with 1-inch diameter plastic cap roofing nails. Drive the nails straight down at a 90° angle into the roof deck. Nail spacing depends on wind conditions:
- Normal wind zones: Space nails 6 inches apart along head and end laps, and 24 inches apart in the field area.
- High-wind or coastal zones: Reduce spacing to 4 inches for laps and 12 inches for field areas.
Use these overlap guidelines based on your roof pitch:
| Roof Pitch | Horizontal Overlap | Vertical Overlap |
|---|---|---|
| 3:12 or greater | 4″ minimum | 12″ minimum |
| 1.5:12 to less than 3:12 | 6″ minimum | 20″ minimum |
When dealing with roof protrusions, extend the underlayment at least 6 inches up the vertical surface and seal it using adhesive or tape. Keep in mind that the final roofing material must be installed within one year of applying the underlayment. Once this step is complete, you're ready to move on to positioning and fastening the panels.
Positioning and Fastening Panels
Proper panel placement is key to a functional and professional-looking roof. Start by marking a square reference line using the 3-4-5 method to ensure accurate alignment. Before placing the first panel, secure foam closure strips along the eave, about one inch from the edge, using butyl tape. These strips help block insects and moisture. Carry panels on their side and support their full length during installation to avoid bending or damage.
Position the first panel so its top and bottom edges are evenly spaced from your reference line. This alignment will guide the placement of subsequent panels. As you overlap panels, ensure their edges fit snugly together, accounting for any slight irregularities in the recycled materials.
For fastening, use a screw gun set to the manufacturer's recommended speed and torque. Place screws in rows no more than 24 inches apart, with one screw at each rib on the overlapping side. Tighten screws just enough to compress the rubber gasket without overtightening, as this could compromise the seal and lead to leaks. Screws should sit flush against the surface to create a watertight seal.
Sealing and Weatherproofing
After securing the panels, focus on sealing the roof to prevent moisture intrusion. Look for potential leak points such as loose fasteners, damaged panels, missing trim, gaps in seams, or rust spots. Apply sealant when the temperature is above 50°F, avoiding direct sunlight and rain during application.
For panel seams and overlaps, use butyl tape, which resists shrinkage better than traditional gun-grade sealants. Place the tape on the top shoulder of the panel ribs, on the weather side of the fasteners, ensuring the upslope panel overlaps the downslope panel correctly. For areas requiring liquid sealant, use a caulk gun with a retractable plunger for controlled application.
Different sealants have varying properties:
- Silicone: UV-resistant and flexible but prone to cracking over time.
- Butyl: Hardens quickly but lacks UV resistance.
- Polyurethane: UV-resistant and paintable, making it ideal for exterior use.
Seal around chimneys, sidewall flashings, and roof penetrations. For round openings, use rubber boot jacks with aluminum compression rings. For rectangular penetrations, install a two-piece flashing system to allow for thermal movement. Seal the joint between roof panels and ridge caps with sealant tape, and carefully seal eaves, hips, and valleys to prevent leaks. Allow the sealant to cure according to the manufacturer's instructions to ensure long-lasting protection, typically lasting 10–20 years. Regular upkeep will keep your recycled metal roof in top condition for years to come.
Maintenance for Long-Term Performance
Your recycled metal roof is installed and ready to face the elements. Now, the key to keeping it in top shape for years to come lies in consistent maintenance. Taking the time to care for your roof can help you avoid costly repairs and extend its lifespan.
Preventing Rust and Corrosion
Rust happens when metal comes into contact with moisture and oxygen. Factors like storms, high humidity, and sudden temperature changes can speed up this process - especially on recycled materials that have already weathered some wear and tear.
The best way to fight rust? Seasonal inspections. Check your roof twice a year - once in spring and again in fall - to spot any trouble early. Pay close attention to areas around fasteners, panel overlaps, and gutters, as water tends to collect in these spots, making them more vulnerable to rust.
If you notice rust starting to form, act quickly. Clean the area with a wire brush or sandpaper, then apply a rust-inhibiting primer and finish it off with metal-safe paint. This simple fix can stop a small issue from turning into a big headache.
Water management is another critical factor. Keep your gutters clear of leaves and debris, and trim any overhanging branches to prevent scratches and standing water.
Proper ventilation control is equally important. Condensation can create the moist conditions rust thrives in, so make sure your attic is well-insulated and equipped with vapor barriers. Adding ridge or soffit vents can also help reduce moisture buildup.
By staying on top of inspections and addressing rust promptly, you can keep your roof looking and performing like new.
Regular Inspection and Cleaning
Routine inspections and cleaning are essential for maintaining your roof's performance and appearance.
> "Regular metal roof maintenance is a critical part of preserving and protecting your investment. Not only does it save you time and make sure your roof continues to look and perform well, but it also ensures that you don't have to spend money on costly repairs in the future." – Sheffield Metals [[9]](https://sheffieldmetals.com/learning-center/metal-roof-maintenance)
In mild climates, inspecting your roof once a year is usually enough, but in areas with extreme weather or high humidity, more frequent checks might be necessary.
Pay close attention to fasteners. Metal roofs expand and contract with temperature changes, which can loosen screws over time. Tighten them as needed, but be careful not to overtighten, as this could damage the rubber gaskets and compromise the waterproof seal.
When it's time to clean, use a soft brush and mild detergent to remove dirt and debris. Start at the top of the roof and work your way down, following the natural flow of water. Avoid harsh chemicals, pressure washers, or abrasive tools, as these can damage the coating. Be extra thorough in valleys and other areas where debris tends to gather and trap moisture.
Every 5 to 10 years, reapply sealant around penetrations and panel overlaps. For added protection, consider recoating the entire roof with weather-resistant paint or sealant every 10 to 15 years. If you're installing additional components like satellite dishes or HVAC units, make sure to use compatible materials or isolation techniques to avoid contact between dissimilar metals, which can cause corrosion.
Conclusion: Your Completed Recycled Metal Roof
Congratulations on installing a recycled metal roof that will protect your home for decades. By opting for recycled materials, you've not only reduced waste but also chosen a roofing solution built for durability and efficiency.
This roof is designed to stand the test of time, requiring fewer replacements and cutting down on the amount of discarded materials heading to landfills. Its energy efficiency will start making a difference right away, especially during those sweltering summer months when cooling costs tend to skyrocket.
Financially, this decision is a win. Metal roofs can boost your home's resale value by 1.5× compared to traditional shingle roofs[[10]](https://todayshomeowner.com/roofing/guides/metal-roof-recycling-a-sustainable-solution-for-reducing-air-pollution-and-landfill-waste). Plus, their long lifespan and minimal upkeep mean fewer repair expenses in the future. Beyond the numbers, this roof reflects a commitment to reducing your environmental impact and supporting a circular economy.
With routine maintenance - like periodic inspections and cleaning - you can ensure your roof stays efficient and strong for years to come. You've completed a project that not only upgrades your home but also contributes to a healthier planet, creating lasting benefits for both your family and the environment.
FAQs
What should I consider when selecting recycled metal panels for a durable and safe roof?
When selecting recycled metal panels for your roof, focus on high-quality materials to avoid issues like major defects or corrosion that could compromise their strength. Make sure to choose panels with a suitable thickness (gauge) that can withstand your area's weather conditions - thicker panels generally offer better durability.
Look for panels with protective coatings or finishes designed to improve resistance to corrosion, which is key for ensuring the roof's longevity. It's also important to follow the manufacturer's recommendations for load limits and installation procedures to meet safety standards. Proper installation, including secure fastening techniques, plays a critical role in preserving the roof's structural stability.
What should I know about installing recycled metal roofing in high-wind or coastal areas?
Installing recycled metal roofing in areas prone to high winds or near the coast comes with specific challenges, but with the right approach, you can ensure both safety and durability.
In high-wind zones, roofs must handle wind speeds exceeding 140 mph. This often requires using stronger fasteners and implementing extra anchoring methods to prevent the roof from being lifted by intense gusts. Meanwhile, coastal environments present a different issue - salt exposure. To combat corrosion, materials like aluminum or stainless steel are ideal choices, as they hold up well against the damaging effects of salt air.
The installation process itself also plays a big role. Techniques such as using standing seam panels can significantly boost the roof's ability to endure these harsh conditions. By focusing on these details, you can help your roof stay secure and perform well, even when faced with extreme weather.
How can I maintain a recycled metal roof to prevent rust and increase its lifespan?
To keep your recycled metal roof in top shape and avoid rust, regular maintenance is essential. Begin by inspecting the roof at least twice a year. Check for rust spots, loose fasteners, or any signs of corrosion. If you notice rust, address it quickly using rust-inhibiting primers or paints to prevent further issues.
Cleaning the roof is just as important. Clear away debris, leaves, and dirt that can hold moisture and encourage rust. Use a soft brush and mild detergent to gently clean the surface at least once a year. This not only helps preserve the roof's appearance but also protects its structure and supports its energy-saving benefits. With consistent care, your roof will remain strong and environmentally friendly for years to come.