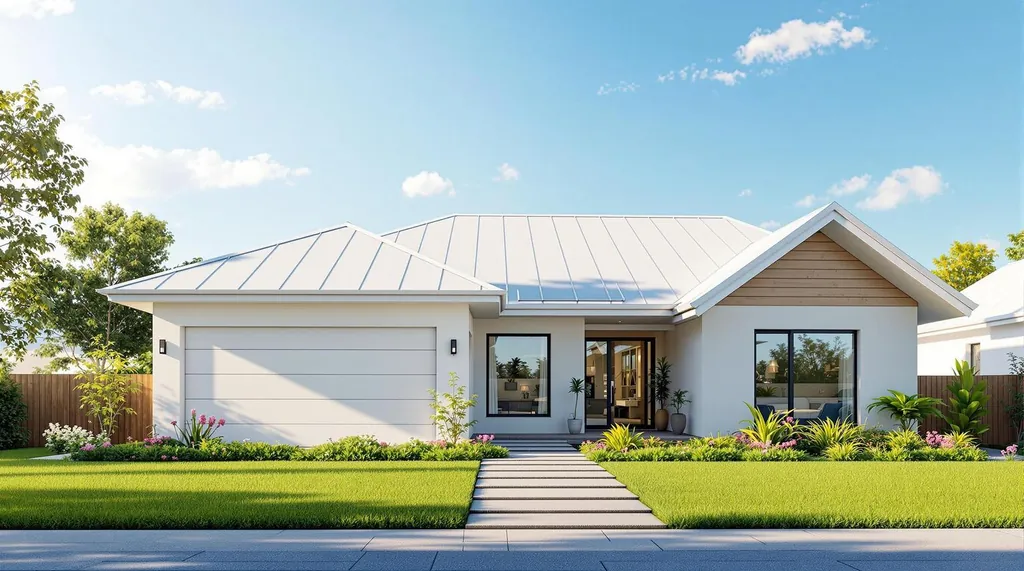
Learn how cool roofs can reduce energy bills, improve comfort, and extend roof lifespan with DIY-friendly options for every budget.
Ultimate Guide to Cool Roofs for DIYers
Want to save on energy bills and keep your home cooler? Cool roofs are the answer.
Cool roofs reflect sunlight and absorb less heat, staying up to 50°F cooler than traditional roofs. They lower cooling costs by 10–30%, improve indoor comfort, and even extend your roof's lifespan. Whether you're building new or upgrading an existing roof, there are DIY-friendly options like reflective coatings, shingles, or tiles to fit your budget and skill level.
Key Benefits of Cool Roofs:
- Energy Savings: Reduces cooling demand by up to 27%.
- Lower Costs: Cuts cooling expenses by up to 20% annually.
- Durability: Extends roof lifespan by reducing heat stress.
- Eco-Friendly: Reduces urban heat and power plant emissions.
Popular Cool Roofing Options:
- Shingles: Affordable and easy to install.
- Metal Roofing: Durable and highly reflective.
- Roof Coatings: Budget-friendly and perfect for flat roofs.
- Tiles: Long-lasting with great airflow but heavier.
| Cool Roof Type | Best For | Cost (per sq. ft.) | Lifespan |
|---|---|---|---|
| Reflective Shingles | Pitched roofs | $0.15–$2.50 | ~25 years |
| Metal Roofing | Steep or low-slope roofs | Higher upfront | 30+ years |
| Roof Coatings | Flat/low-slope roofs | $1.50–$11 | 10–20 years |
| Cool Roof Tiles | Mediterranean styles | Expensive | 30+ years |
DIY Tip: Start simple with reflective coatings or shingles if you're new to roofing. Always check local building codes and roof conditions before starting your project. Cool roofs are a cost-effective, sustainable choice for energy-conscious homeowners. Ready to get started? Let’s dive in!
Cool Roofing Installation - How We Install a Cool Roof
Cool Roofing Materials Overview
Picking the right cool roofing material is a key step for any DIY roofing project. Each type comes with its own set of perks, costs, and installation challenges. Understanding these differences will help you make an informed choice that matches your budget, skill level, and your home’s specific needs. Below, we’ll explore the main types of cool roofing materials, along with their pros and cons, to guide your decision.
Types of Cool Roofing Materials
Cool Roof Shingles Reflective asphalt shingles, coated with granules that bounce sunlight away, are a popular choice for pitched roofs. They’re easy to install using standard techniques and widely available at home improvement stores. Plus, they come with ENERGY STAR® ratings. However, color options are limited, and they’re not as reflective as metal or tile roofing .
Cool Metal Roofing Metal roofing, made from coated steel or aluminum panels, delivers excellent reflectivity and durability. It works well on both steep and low-slope roofs and is lightweight and recyclable. On the downside, it has a higher upfront cost and can be noisy during rainstorms .
Cool Roof Tiles Reflective concrete or clay tiles are not only durable but also visually appealing. They allow airflow underneath, making them a great fit for Mediterranean-style homes or anyone wanting a classic tile look. However, they’re heavy, expensive, and may require structural reinforcements to support the added weight .
Cool Roof Coatings If you’re looking for a budget-friendly option, white or reflective elastomeric and acrylic coatings can turn an existing roof into a cool roof. They’re affordable, restore aging roofs, and reduce surface temperatures. White roof paint costs around $15 to $25 per gallon, while professional-grade coatings range from $1.50 to $11 per square foot for installation . Keep in mind, though, that coatings need periodic reapplication and work best on smooth surfaces.
> "Choosing the right roofing material involves a careful balance of durability, aesthetics, cost, and environmental impact." - Rescue My Roof
Single-Ply Membranes Materials like TPO (thermoplastic polyolefin) or PVC are ideal for commercial buildings and low-slope residential roofs. They’re highly reflective and resistant to UV rays and chemicals. However, they’re not suitable for steep-pitched roofs and often require added insulation .
| Cool Roof Type | Best For | Key Benefits | Main Drawbacks | Typical Lifespan |
|---|---|---|---|---|
| Cool Roof Shingles | Pitched residential roofs | Affordable, easy installation, widely available | Limited color options; less reflective | 25 years |
| Cool Metal Roofing | Steep or low-slope roofs | Highly reflective, lightweight, recyclable | Higher cost; rain noise | 30+ years |
| Cool Roof Tiles | Mediterranean designs, tile roofs | Long-lasting, excellent airflow, attractive | Heavy, expensive; requires support | 30+ years |
| Cool Roof Coatings | Flat or low-slope roofs | Cost-effective; restores existing roofs | Requires reapplication; needs smooth surfaces | 10–20 years |
Choosing the Right Material for Your Home
The slope of your roof is a major factor when selecting materials. Steep-pitched roofs are best suited for shingles, metal, or tile, while flat or low-slope roofs often require coatings or membrane systems . Climate also plays a big role. Cool roofs work best in warm regions with high air conditioning costs, but if you live in an area with heavy snow, hail, or high winds, you’ll need materials designed to handle those conditions . Studies show cool roofs can cut energy use by 15% to 35.7% in various climates .
Budget is another key consideration. While asphalt shingles are cheaper upfront, metal roofing offers long-term savings thanks to its durability . Cool roof coatings have the lowest initial cost but need reapplication every 10–20 years (compared to white paint, which lasts 5–10 years). These coatings have helped commercial buildings reduce cooling costs by up to 30% annually .
Installation difficulty varies too. Asphalt shingles are beginner-friendly, while materials like tile or slate require specialized skills and regular maintenance . If you’re new to roofing, starting with something simpler like shingles or coatings is a smart move before tackling more complex options like metal or tile.
Don’t forget to check your home’s structural capacity. Lightweight materials like metal are easier on your home’s framing, while heavier options like concrete tiles may require a structural assessment .
Finally, think about aesthetics. Your roofing material should complement your home’s style and fit in with neighborhood standards . White roofing products can reflect up to 90% of sunlight, while “cool colored” options offer 30–60% reflectivity for those who prefer darker tones . With most cool roofing materials lasting around 30 years - depending on the material and climate - it’s important to weigh upfront costs against long-term performance when making your decision. From here, you can assess your roof’s current condition to determine the best installation approach.
Preparing for Your DIY Cool Roof Project
Taking the time to prepare properly not only ensures your cool roof will last but also reduces the chances of mistakes or safety hazards. Careful planning and assessment are key to making sure your project goes smoothly and meets your expectations.
Evaluating Your Roof's Suitability
Before diving into your cool roof project, it’s essential to determine if your roof is ready for the upgrade. Focus on three main areas: its current condition, structural strength, and slope compatibility.
Start by inspecting your roof from the ground with binoculars. Look for debris, visible damage, or missing shingles. Inside your attic, check for leaks, moisture, or signs of rot - issues that could lead to costly repairs if ignored. Pay close attention to shingles that are buckled, curled, or damaged, and inspect areas around chimneys, dormers, and vent pipes for any wear or damage . If the damage is extensive, repairs or even a full roof replacement may be necessary before you proceed.
For those considering heavier options like green roofs, assessing your roof’s structural capacity is critical. These systems add significant weight, so your roof must be able to handle the extra load . Additionally, the slope of your roof matters. Some cool roof materials work best on low-sloped surfaces, while others are more effective on steeper pitches . If you’re uncertain about your roof’s condition or suitability, consulting a local roofing contractor with experience in cool roofs can provide clarity and guidance .
Once you’ve assessed your roof, it’s time to gather the tools and materials needed for a safe and efficient installation.
Tools and Materials Checklist
Having the right tools and safety equipment is essential to keep your project on track and avoid accidents. Here’s a quick rundown of what you’ll need:
- Basic tools: Roofing nails, a nail gun, cordless drill, roofing hammer or hatchet, utility knife, tape measure, pry bar, and a shingle cutter.
- Safety gear: Hard hats, protective eyewear, gloves, and a harness.
For example, Home Depot offers a fall protection lanyard for $43.63 and a roofing tool kit for $109.00 - both solid investments to ensure your safety on the job . Always prioritize safety by wearing a harness, gloves, hard hat, and safety glasses throughout the project .
You’ll also need fasteners and sealants. Options include Woodtite 1-inch Hex-Head Wood Screws with EPDM washers ($5.98 per 50-pack) or the 2-inch version ($6.98 per 50-pack). For sealing, Gibraltar Building Products offers a 50-ft. roll of Butyl Sealant Tape for $6.88, while Universal Seal expanding foam tape is $8.45 for a 12-ft. roll .
Your material needs will vary depending on the type of cool roof you’re installing - whether it’s reflective shingles, a coating, or a single-ply membrane . Many of these supplies are available at home improvement stores like Home Depot or specialized retailers such as Crane Point Industrial .
Lastly, plan your project around the weather. Choose a clear day to avoid interruptions from rain or extreme temperatures .
Once your tools and materials are ready, take the time to review local building codes and regulations to ensure your project complies with all requirements.
Local Codes and Standards Requirements
Cool roof installations often come with specific regulations that can influence your material choices, installation methods, and whether you’ll need permits. Federal, state, and local governments frequently include cool roofs in their building codes and energy efficiency programs . These requirements can vary depending on your climate zone, building type, and roof slope .
Cool roof standards typically focus on solar reflectance and thermal emittance values. These values can differ based on location and other factors, so it’s crucial to check with your local authorities to understand what applies to your project. In many cases, these codes are more stringent than general guidelines .
The Cool Roof Rating Council (CRRC) provides a third-party rating system for products, measuring their radiative properties like solar reflectance and thermal emittance . They test materials both when new and after weathering, as some products lose reflectiveness over time. Many building codes and rebate programs rely on these weathered ratings, so make sure your materials meet the required standards for your area .
Permit requirements can also vary. Some locations require permits for full roof replacements but not for applying reflective coatings. Others may have specific rules for cool roof installations. Contact your local building department early in the process to determine whether permits or inspections are needed.
If you live in a neighborhood governed by a Homeowners Association (HOA), check their rules as well. HOAs often have restrictions on roofing colors, materials, or styles. Get written approval before starting to avoid conflicts later.
For the most accurate compliance information, reach out to your local building authority and review the actual code language to ensure your project is set up for success.
Step-by-Step Cool Roof Installation
Once you've gathered your materials, permits, and completed a thorough assessment, it's time to start the installation process. Following the right steps for your specific roofing material is key to ensuring long-lasting performance. Begin by preparing your roof surface to set the stage for a smooth installation.
Cleaning and Preparing the Roof Surface
The first step is to make sure the roof surface is clean and ready. Start by clearing away loose debris like leaves, branches, and dirt. Pay close attention to areas around vents, chimneys, and other roof penetrations, as these spots tend to collect buildup. Inspect the roof for cracks, leaks, or remnants of old coatings, and remove them using the appropriate tools.
Once the surface is cleared, use a gentle pressure washer with a non-abrasive setting to remove any stubborn dirt, moss, or algae. Protect nearby landscaping with tarps to avoid accidental damage. Allow the roof to dry completely before moving on to the next step.
Installing Underlayment and Roofing Materials
A proper underlayment acts as a critical barrier against water infiltration and helps extend the life of your roof. Start by thoroughly cleaning the roof deck to remove any leftover debris. Install drip edge flashing along the eaves to guide water runoff effectively. To ensure even application, snap chalk lines on the deck to align the underlayment. Begin rolling out the first course of underlayment from the bottom upward, smoothing each section to eliminate bubbles. Secure it with nails or staples according to the manufacturer’s instructions. Overlap each section - typically by 4 inches for felt underlayment and about 6 inches for synthetic materials.
Pay extra attention to high-stress areas like valleys and edges, reinforcing them with additional underlayment or flashing as needed. When installing your chosen cool roofing material - whether reflective shingles, tiles, or membranes - follow the manufacturer’s guidelines carefully. For instance, white roofing products can reflect 60–90% of sunlight, while cool-colored options reflect 30–60% . Proper spacing and alignment during installation are essential for ensuring the roof’s durability and efficiency. Once the materials are in place, move on to the final checks.
Final Installation Steps and Inspection
With the roofing materials installed, it’s time for the finishing touches. Add flashing around penetrations such as chimneys, vents, and skylights to create tight seals and direct water away from these vulnerable areas. Inspect the roof to ensure the materials are uniformly aligned and securely fastened, with no loose or missing pieces.
Test the gutters by running water through them to confirm proper drainage. Check that all ventilation components - like ridge vents, soffit vents, and attic fans - are clear of obstructions to prevent moisture buildup. Clean up the work area by removing debris and stray nails.
If it’s safe, walk the roof to identify any unstable areas. Inside your home, inspect the attic and living spaces for signs of leaks, such as water stains, peeling paint, or musty odors. After the first heavy rainfall, perform a leak test to catch any issues early and address them quickly. Lastly, organize and store all warranty documents and manufacturer instructions in a secure spot for future reference.
Cool Roof Maintenance and Performance
Taking care of your cool roof not only helps maintain energy savings but also extends the life of the roof itself. With proper upkeep, a cool roof can provide energy benefits for decades. Neglecting maintenance, however, can quickly diminish these advantages.
Regular Maintenance and Cleaning
Regular inspections are key to keeping your cool roof in top shape. Aim to check your roof twice a year - once in the spring and again in the fall. During these inspections, watch for wear, damage, or debris buildup that might reduce the roof’s performance.
> "A cool roof's effectiveness in saving energy relies on keeping its reflective surface clean." - Sustainability Directory
Start by removing debris with a soft-bristle broom or a leaf blower, paying special attention to areas around vents, chimneys, and gutters where dirt tends to gather. Make sure drains are completely clear to avoid water pooling, which can lead to damage.
For a deeper clean, use a garden hose equipped with a spray nozzle and a soft-bristle brush. If stubborn stains persist, pressure washing can help - just proceed with care. Use a white 40-degree nozzle tip, keep the pressure under 2,000 psi, and start at least 18 inches away from the roof surface. Gradually move closer until the debris is removed, but avoid getting closer than 6 inches to protect the roofing material .
How often you need to clean depends on your environment. Homes near trees, industrial zones, or dusty areas might need cleaning every few months, while others can stick to twice a year. Keeping your roof clean ensures it retains its reflective properties, which helps lower cooling costs.
| Maintenance Task | Frequency | Purpose |
|---|---|---|
| Inspection | Twice yearly | Spot early signs of damage or wear |
| Cleaning | 2–4 times yearly | Maintain reflectivity and remove debris |
| Repair | As needed | Prevent further damage |
| Re-coating | Every few years | Restore reflective coating performance |
Repairs and Re-Coating
Once your roof is clean, address any damage you notice right away. Small cracks, peeling coatings, or loose materials can worsen over time if ignored. Fixing these issues promptly helps prevent bigger, costlier repairs.
> "Leaks are most commonly found along penetrations in the roofs' surface, like near skylights, vents, or other areas like valleys that experience heavy drainage." - Niki O'Brien, Renovation Company Manager
For minor cracks or gaps, roofing cement can offer a temporary solution, but lasting fixes often require professional repairs. Replace missing shingles immediately by securing new ones with roofing nails and cement. If you have a membrane roof, patch small tears using materials recommended by the manufacturer.
After completing repairs, monitor the fixed areas during the next heavy rain to ensure everything holds up. If problems persist or the damage is extensive, it’s best to call a professional to avoid further complications.
Re-coating your roof every few years is another important step. Signs that it’s time for a new coat include visible fading, a chalky surface texture, or reduced energy efficiency. If your roof looks discolored despite regular cleaning, a fresh coat can restore its reflective qualities .
Staying on top of repairs and re-coating ensures your roof continues to perform well for years to come.
Long-Term Energy Efficiency
Consistent maintenance plays a big role in keeping energy savings on track. Reflective coatings can significantly cut air conditioning costs , but these benefits depend on preserving the roof’s reflective properties through proper care.
Good ventilation is also essential. During maintenance checks, make sure ridge vents, soffit vents, and attic fans are clear and working properly. Proper airflow prevents moisture buildup, which can lead to mold, structural damage, and reduced energy efficiency.
Pay attention to your cooling bills. A sudden spike might indicate a problem with your roof’s performance, giving you a chance to address maintenance issues before they escalate.
For those who enjoy DIY projects, regular maintenance is as important as the initial installation when it comes to protecting your investment. According to [DIY Eco Homes](/), sustainable building practices include taking care of eco-friendly installations. A well-maintained cool roof can provide decades of reliable performance, making it one of the smartest energy-saving upgrades for your home.
Keep a record of all maintenance activities. This not only helps track your roof’s performance but also supports warranty claims if needed.
Conclusion
Cool roofs are a smart and budget-friendly upgrade for homeowners looking to save energy. They can stay over 50°F cooler than traditional roofs and help reduce energy bills by 10–30% , making homes more comfortable while cutting costs.
For DIY enthusiasts, cool roofing is a manageable project. Whether you have a flat roof ideal for reflective coatings or a steep-sloped roof suited for cool asphalt shingles, there’s an option to fit your skills and budget. Plus, cool roofing materials often cost no more than standard options .
> "Cool roofs are crucial today because they directly lower building cooling needs and combat urban heat effects." - Sustainability Directory
This perspective highlights the environmental advantages of cool roofs. Beyond personal savings, they can help reduce urban temperatures by as much as 2°F, showing how individual efforts contribute to a collective impact .
Cool roofs are especially effective in hot climates where air conditioning costs dominate. However, in colder regions, they may slightly increase heating needs during winter . Still, the long-term benefits are undeniable. By reducing thermal stress, cool roofs can extend the lifespan of your roof and improve comfort in spaces without air conditioning, all while lasting for decades with proper care .
With the right guidance on materials, installation, and maintenance, DIYers can confidently take on this project. As long as you follow local building codes and maintain your roof regularly, it will provide reliable energy savings and performance for years to come.
At DIY Eco Homes, we believe in empowering homeowners with practical solutions that save energy and promote sustainability. Cool roofs are a perfect example of how you can make a meaningful environmental impact while enjoying a more comfortable and cost-efficient home.
FAQs
What should I consider when selecting a cool roofing material for my home?
When choosing a cool roofing material, pay close attention to two critical factors: solar reflectance (how well it reflects sunlight) and thermal emittance (how effectively it releases absorbed heat). These properties play a big role in keeping your home cooler, cutting down energy costs, and improving comfort - especially if you live in a hot climate.
You’ll also want to consider the material’s durability, how well it suits your local climate, and whether it complies with building codes in your area. In the U.S., popular choices include reflective membranes, metal roofing, and materials like tile or slate, which are particularly effective at boosting energy efficiency in warmer regions.
Don’t forget to evaluate your budget and long-term maintenance needs. This will help you pick a roofing material that meets your goals for both performance and sustainability.
How can I make sure my cool roof installation meets local building codes and regulations?
To make sure your cool roof installation aligns with local building codes in the U.S., start by checking the specific standards for your area. These might include minimum solar reflectance and thermal emittance levels, which often depend on your climate zone. You can usually find this information through your local building department or on your city’s website.
Don’t forget to verify whether you’ll need permits for the project. It’s also crucial to ensure the materials you’re using meet fire resistance and structural safety requirements. In some areas, there might even be incentives available for installing cool roofs, so it’s worth looking into those options. If you’re tackling this as a DIY project, double-checking these details can save you from costly mistakes and help you achieve a safe and effective installation.
How can I maintain my cool roof to keep it energy-efficient and long-lasting?
To get the most out of your cool roof and keep it in top shape, here are some straightforward maintenance tips to follow:
- Inspect it regularly: Take a close look at your roof at least twice a year or after any harsh weather. Keep an eye out for damage, leaks, or signs of wear.
- Clear off debris: Sweep away leaves, dirt, or anything else that might pile up and interfere with the roof's ability to reflect sunlight effectively.
- Fix issues quickly: Address cracks, punctures, or any other damage as soon as you notice them to prevent bigger, costlier problems down the road.
- Reapply reflective coatings: Over time, the reflective coatings may wear down. Reapply them as needed to ensure your roof stays energy-efficient.
- Check the insulation: Make sure the insulation beneath your roof is in good condition to help improve its thermal performance.
By sticking to these simple steps, you can not only boost your roof's energy efficiency but also extend its lifespan - especially in hot climates where keeping heat at bay is crucial.