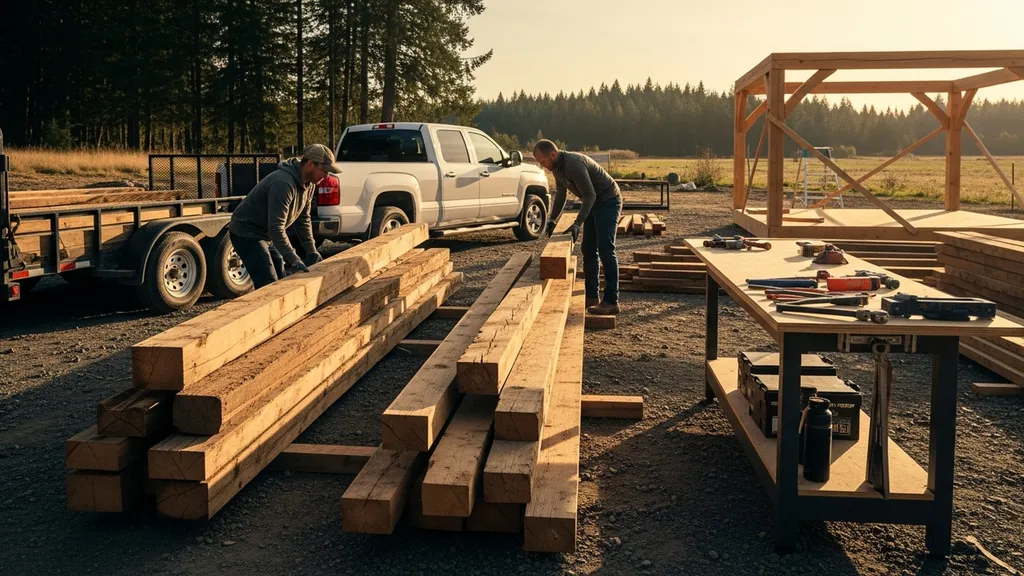
Practical guide for DIYers on sourcing, inspecting, preparing, and using reclaimed wood in sustainable home projects.
Reclaimed Wood Building: Sourcing and Using
A budget-conscious DIYer stands at a lumberyard counter weighing two options: new kiln-dried boards or a trailer-load of weathered boards pulled from an old barn. Reclaimed wood can cut embodied carbon, save on raw-material costs, and add character—but it also requires careful inspection, prep, and sometimes extra labor. This guide explains how to find, evaluate, prepare, and use reclaimed wood safely and affordably for DIY eco-building projects so you can decide where reclaimed material makes sense on your build.
TL;DR:
- Reuse can reduce embodied carbon by roughly 30–60% compared with new lumber; expect 15–30% higher labor and prep time for reclaimed flooring.
- Start with non-structural projects, document provenance for permits, and target 6–12% moisture content for interior uses.
- For sourcing, check salvage yards, deconstruction crews, and auctions; always inspect for nails, pests, and hazardous finishes before purchase.
Why Choose Reclaimed Wood for Building
Choosing reclaimed wood usually comes down to three things: environmental impact, cost, and appearance. Research and industry analyses report that reusing timber often yields large embodied carbon savings because it avoids harvesting, milling, and transport associated with new lumber; life-cycle studies often show reuse reductions in the 30–60% range depending on transport and finishing. The U.S. Environmental Protection Agency highlights construction and demolition diversion as a major landfill reduction opportunity, and reclaimed wood keeps large-volume items out of waste streams.
Cost-wise, reclaimed boards can be cheaper per board foot than premium new hardwoods but are often sold mixed-grade, so you pay more in time and prep. Typical pricing ranges: salvage boards $2–$8/board foot for wide-plank reclaimed hardwood, compared with $4–$12/board foot for comparable new domestic hardwoods depending on species and grade. Expect to add tools, de-nailing, and milling time that can raise total installed cost.
Aesthetic and longevity matter too. Species commonly found reclaimed include white oak, old-growth heartpine, Douglas fir, and chestnut; large old-growth timbers often outperform newer, fast-grown lumber for durability. Reclaimed timber typically has tight grain, dense growth rings, and character marks that are hard to match. Use reclaimed for flooring, trim, beams, millwork, and siding where character is a benefit.
Key reasons to choose reclaimed wood:
- Environmental benefit: lower embodied carbon and landfill diversion.
- Cost savings: lower material cost for some species, offset by prep labor.
- Unique aesthetics: aged patina and wide-plank character.
- Durability: old-growth timbers often have higher strength.
- Local sourcing: potential to keep materials in your community.
For readers weighing reclaimed hardwood against alternatives, see a comparison of bamboo vs hardwood and consult our broader sustainable materials guide for trade-offs against options such as hempcrete or insulated concrete forms.
Where to Source Reclaimed Wood
Sourcing options vary by scale and budget. Common sources include salvage yards, deconstruction contractors, online marketplaces and auctions, and on-site salvage from demolition or rural land. Each has pros and cons.
Salvage Yards and Deconstruction Contractors
- Pros: Consistent inventory, ability to buy mixed lots, experienced staff who can advise on provenance.
- Cons: Prices vary, pickup may require transport, inventory is mixed quality.
Contact local deconstruction crews to request scheduled releases; many offer lists or photos of incoming lots. Ask salvage yards for provenance notes—where the wood came from and any known treatments (e.g., creosote, paint). If you plan heavy pickups, arrange a truck with a 6–12 ft bed or a trailer; plan tie-downs and a friend to help unload.
Online Marketplaces, Auctions, and Reclaimed Dealers
- Pros: Access to rare species and large timbers; sometimes lower per-unit prices at auction.
- Cons: Shipping costs can be high; photos may hide defects.
When bidding, include a transport allowance and inspect photos carefully for nail density and rot. Reclaimed dealers often offer delivery and grading; their markup reflects labor to sort and de-nail.
On-site Salvage From Your Own Land or Local Demolitions
- Pros: Lowest material cost; immediate access to specific sizes; the chance to choose pieces you like.
- Cons: More time-consuming; may require rental equipment; legal/permit considerations for salvaging demolition sites.
If salvaging locally, double-check ownership and ensure you have permission. When working on demolition sites, wear PPE and expect to find hidden fasteners.
Industry data and surveys describe a mixed-market model for reclaimed wood businesses, highlighting made-to-order versus made-to-stock approaches; see an overview of the urban and reclaimed wood industry for more context at the North Carolina State bioresources repository: the case for urban and reclaimed wood in the circular economy.
If you plan to combine reclaimed wood with other recycled materials, our ultimate guide to recycled materials for DIY homes helps you match sources and schedules. For small salvages intended for outbuildings, compare sizes against plans from our workshop shed plans.
How to Inspect and Select Reclaimed Lumber
A solid inspection routine prevents surprises. Before purchase, look for species identification, expected usable yield, and hazards. Bring a small checklist or worksheet to document boards.
Identifying Species, Grade, and Usable Yield
- Note Growth rings: Tight rings suggest old-growth, dense lumber.
- Check Color and grain: Heartpine has reddish-brown heartwood; white oak shows very distinct ray flecks.
- Grade visually: Separate clear boards (minimal knots and checks) from mixed-grade. Estimate usable board feet: measure length × width × thickness for each board, convert to board feet (BF = (thickness in inches × width in inches × length in feet) / 12).
Checking for Contaminants, Pests, and Hazardous Finishes
- Visual signs: Rusted nail patterns, staining from creosote or tar, paint layers, or surface mold.
- Pests: Look for powder-post beetle galleries (tiny pinholes) and frass; active infestation is rare in seasoned boards but possible.
- Hazardous finishes: Old paint may contain lead. If the wood was part of a building constructed before 1978 in the U.S., assume possible lead-based paint. The EPA recommends testing suspect samples; follow regional guidance for lead testing and disposal.
This DIY video shows you the hands-on process:
Documenting and Measuring Boards Before Purchase
- Create a simple worksheet: Record board ID, species (if known), dimensions, visible defects (rot, checks, knots), fastener count, and estimated usable BF. Estimate yield conservatively: deduct 15–30% for waste on mixed-grade lots.
- Measure camber and twist: Lay the board flat and sight down its length; mark high spots. For beams, measure deflection against a straightedge and note any structural cuts, mortises, or notches.
- Nail and fastener count: High fastener density increases de-nailing time and tool wear—plan accordingly.
Research on reclaimed wood properties shows variability in moisture and mechanical properties; consult studies such as the TalTech report on reclaimed wood characteristics for guidance: study of the properties of reclaimed wood.
Sample inspection checklist (short):
- Species/ID:
- Dimensions (L×W×T):
- Visible rot? Yes/No
- Active pests? Yes/No
- Paint/finish present? Yes/No
- Number of nails per linear foot:
- Estimated usable BF:
Preparing, Milling, and Stabilizing Reclaimed Wood
Preparing reclaimed boards is labor plus a few key tools. Start with safety, then cleaning, de-nailing, milling, and drying.
Cleaning, De-nailing, and Initial Safety Steps
- Safety first: Use eye protection, gloves, and a respirator when working with painted or moldy boards.
- De-nailing: Use a heavy-duty cat’s paw, reciprocating saw with demolition blade, or a pneumatic nail puller. For high-volume de-nailing, consider an air-powered nail puller.
- Metal detection: Run a strong magnet over boards before planing. For expensive beams, professional X-ray services can locate embedded metal that damages blades.
Flattening, Resawing, and Jointing Techniques
- Flattening large beams: Use a router sled or a portable planer sled for beams too wide for the planer. A jointer and planer will square and surface boards; for very wide planks, resaw on a bandsaw or hire a local mill.
- Resawing: Expect to lose material to the kerf. For wide boards, resawing produces two usable faces but requires careful blade selection and feed rates.
- Repairing defects: Epoxy fills and dutchman patches are common for small rot or missing sections. For structural repairs, consult a structural engineer.
Drying Strategies and Moisture Targets
- Target moisture content (MC): For interior finish flooring and millwork, aim for 6–12% MC depending on climate; for exterior uses, higher MC (up to 12–19%) is acceptable.
- Kiln-dry vs air-dry: Kiln-drying is faster and more controlled; air-dry can take months to years depending on thickness and local humidity. Studies note reclaimed wood often starts drier than freshly cut lumber, but variability is common.
- Monitor with a calibrated moisture meter; measure core MC for thick beams.
Comparison/specs table for prep and targets:
| Use | Target MC% | Acceptable defects | Typical prep steps |
|---|---|---|---|
| Interior flooring/trim | 6–12% | Small checks, tight knots | De-nail, flatten, joint, plane, minor epoxy fills |
| Exterior siding/cladding | 8–19% | Some decay, nail holes | Remove hazardous finishes, de-nail, treat for rot, allow acclimation |
| Structural beams/posts | 8–12% (engineer to confirm) | Large splits or rot not acceptable | Metal scan, repair splice or plate, kiln or controlled drying |
Tools and shop setup basics
- Must-have tools: portable planer or shop planer, jointer (or hand-plane substitutes), bandsaw for resawing, magnetic nail puller, metal detector, moisture meter, belt sander.
- Budget options: rent a planer and jointer for a weekend; use hand planes and a router sled for flattening if needed.
- Blade risk: Embedded metal will ruin planer blades quickly—magnet sweep every board.
ScienceDirect case studies discuss structural remanufacturing and best practices for reclaim processing; see their overview for advanced techniques: structural design using reclaimed wood – a case study.
Using Reclaimed Wood in Structural and Finish Work
Reclaimed wood can be used in both structural and finish capacities, but rules and care differ.
When Reclaimed Wood is Suitable for Framing and Beams
- Non-load-bearing uses are the easiest starting point: partitions, trim, and cladding.
- Load-bearing uses require evaluation. If considering reused beams for structural members, have a structural engineer assess species, cross-section, decay, notches, and service history. Engineers may require proof of section modulus and may limit allowable stresses.
- Beam splicing example: For a compromised beam, an engineered splice can be made by bolting steel plates either side with through-bolts and epoxy filling gaps. Typical splice design: A pair of 3/8" ASTM A325 bolts per splice location with steel plates sized per engineer drawing; use washers and through-bolts with positive bearing.
Using Reclaimed Boards for Flooring, Siding, and Millwork
- Flooring: Sort clear face boards for flooring runs, and use mixed-grade boards for stair treads or furniture. Acclimate boards on-site for 1–2 weeks or until MC stabilizes.
- Siding and cladding: Reclaimed boards can be applied over modern sheathing and air barrier systems; seal seams per current airtightness practices. For guidance on sealing details when pairing old siding with modern envelopes, consult passive house sealing.
- Millwork: Reclaimed wood makes excellent mantels, shelving, and trim. Remove old finishes and de-nail before milling.
Joinery, Fasteners, and Connector Recommendations
- Fasteners: Use stainless steel or hot-dip galvanized fasteners depending on exposure. For interior dry environments, Type 304 stainless or coated screws are durable. For exterior use or coastal environments, use stainless or hot-dip galvanized to prevent staining and corrosion.
- Adhesives and fillers: Use low-VOC polyurethane or epoxy adhesives for structural splices; use compatible wood fillers for small voids.
- Connectors: When reusing timbers for primary structural elements, supplement with new steel plates or engineered connectors rather than trusting old, cut details.
Finish choices
- Penetrating oils (tung oil, tung-danish blends) accent grain and are often preferable to film-forming finishes for aged boards. Surface film finishes such as polyurethane provide abrasion resistance for flooring but may obscure patina. For finish product guidance and low-VOC options, see our sustainable products guide.
- Old finishes may affect adhesion. Remove flaky paint mechanically or chemically following local hazardous waste rules.
When integrating reclaimed siding or trim with modern sheathing and airtight strategies, consult the wall sheathing guide for proper interfaces. For interior reclaimed finishes used with modern insulation systems, see insulation for tiny houses.
Costs, Sustainability Metrics, and Code Compliance
Estimating true costs and understanding code implications help avoid surprises.
Estimating True Costs: Material, Labor, and Prep
Below is a worked example comparing reclaimed flooring versus new hardwood for a 200 sq ft installation.
Example: 200 sq ft reclaimed wide-plank flooring
- Material purchase: reclaimed boards $3.50/BF average, need ~1,000 BF → $3,500
- Waste & yield: 25% waste allowance → order $4,375 nominal
- Prep and milling: tool rental (planer/jointer) + shop time ≈ $400
- De-nailing and repairs (labor or time value): $800
- Finishing and installation: $1,200
- Total estimated installed cost: $6,775 → ≈ $33.88/sq ft
Example: 200 sq ft new kiln-dried hardwood (mid-range)
- Material purchase: $6.50/sq ft = $1,300
- Installation and finishing: $2,000
- Total estimated installed cost: $3,300 → $16.50/sq ft
Conclusion: Reclaimed flooring can cost more in installed terms due to prep and higher waste, but offers lower embodied carbon and unique aesthetics. For some species, reclaimed raw cost may be lower; labor is the main premium.
Measuring Sustainability: Embodied Carbon and Life-cycle Impacts
Life-cycle assessments and reuse studies point to large embodied carbon reductions for reused timber, since the highest carbon stages—harvest and primary milling—are avoided. For quantification and industry context, consult industry reports and LCA resources such as the Carbon Leadership Forum; these show that reuse often reduces embodied carbon by multiple tenths compared with new equivalents depending on transport distances and finishing. Consumer perception research indicates limited public awareness of reclaimed benefits; see the U.S. Forest Service consumer perceptions study: consumer perceptions toward the use of reclaimed wood.
Building Codes, Permits, and Insurance Considerations
- Codes: Most jurisdictions allow reuse of wood in buildings but require structural members to be inspected and verified. Local building inspectors may require engineering stamps for reused load-bearing elements.
- Documentation: Keep records of provenance, inspection notes, and any tests (moisture, lead paint). This helps with permit reviews and insurance inquiries.
- Insurance: Insurers may ask about nonstandard materials; document repairs and engineered splices. Engage a structural engineer for critical members and present calculations to the inspector.
When in doubt, ask a local building inspector early in the planning phase and get an engineer involved before installing reused beams in load-bearing roles.
Tools, Fasteners, and Best Practices for Diyers
A small shop with the right tools makes reclaimed work feasible.
Essential Tools and a Basic Shop Setup
- Core tools: planer (portable or shop), jointer, bandsaw (for resawing), table saw, orbital sander, magnetic nail puller, moisture meter.
- Budget alternatives: Rent a planer/jointer for weekends. Use a router sled and hand planes for flattening. A portable bandsaw can resaw smaller planks.
- Shop setup tips: Dedicated clean workspace, good lighting, and a magnet sweep area reduce blade damage. Use sacrificial outfeed supports for long boards.
Fasteners, Adhesives, and Recommended Finishes
- Fasteners: Use #8 or #10 stainless or coated screws for interior finish; 1/2" diameter through-bolts for heavy beam splices as specified by engineer.
- Adhesives: Low-VOC polyurethane or structural epoxy for splices; PVA wood glue for interior joinery.
- Finishes: Penetrating oils (tung, linseed blends) and low-VOC waterborne polyurethane for floors where durability is required. For exterior exposed reclaimed wood, consider oils with UV inhibitors and periodic maintenance.
Safety: Personal Protective Equipment and Hazardous Materials Handling
- PPE: NIOSH-rated respirators when sanding painted surfaces, eye protection, ear protection for power tools, gloves for de-nailing.
- Lead paint: Test with EPA-approved kits or labs before sanding; follow disposal rules for lead-containing waste.
- Dust control: Use HEPA-filtered shop vacuums and dust collection to minimize airborne particles. When sanding or grinding, isolate the area and ventilate.
Pairing reclaimed interiors with healthy assemblies: use complementary materials like cork insulation and avoid off-gassing finishes; see our guide on cork insulation uses for integration tips.
Key Project Examples and Material Takeoff Tips
Two small project examples and a takeoff approach.
Project 1: 10×12 tiny cabin flooring (120 sq ft)
- Coverage: 120 sq ft + 25% waste = 150 sq ft ordered
- Typical board sizes: 8–10" wide planks, average 0.75" thickness
- Required board feet ≈ (thickness in inches × total sq ft)/12 → (0.75 × 150)/12 = 9.375 BF? (This simplified conversion is wrong for wide planks; instead calculate per board: BF = T(in) × W(in) × L(ft) / 12; sum across boards)
- Practical rule: For 3/4" flooring, assume ~0.75 BF per square foot → 150 sq ft × 0.75 = 112.5 BF ordered; add extra 15–30% for defects.
Project 2: Shed cladding with reclaimed siding (100 sq ft wall area)
- Coverage: 100 sq ft + 20% waste = 120 sq ft
- Board selection: Mix of full-length clear boards for primary runs and mixed-grade for trim.
- Material allowance: Order slightly wider boards to allow resawing faces.
Estimating board feet and order allowances
- Measure in board feet per the standard formula: BF = (thickness in inches × width in inches × length in feet) / 12.
- Apply a higher waste factor for reclaimed material: commonly 15–30% depending on quality mix.
- Keep a running yield worksheet and mark boards on arrival.
Blending Reclaimed Timber with New Materials
- Match grain and profile where possible: for trim, mill new boards to match reclaimed profiles.
- Use transition pieces and reveal gaps intentionally; a consistent finish can help blend old and new.
- When combining reclaimed decking or roofing with roof-mounted systems, consider the requirements for solar mounting—see our solar panel selection guide when planning roof-mounted equipment.
For detailed quantity takeoffs and ordering practices, consult the material takeoff guide and for scope decisions on small cabins, see our comparison of cabin kit vs scratch.
The Bottom Line
Reclaimed wood delivers clear environmental and aesthetic benefits but requires extra inspection, prep, and sometimes engineering. For beginners, start with non-structural projects (trim, furniture, siding), build a supplier relationship, and master cleaning and milling before using reclaimed timbers structurally.
Frequently Asked Questions
What species of wood are most commonly reclaimed?
Common reclaimed species include white oak, old-growth heartpine, Douglas fir, chestnut, and hemlock. These species are frequently found in barns, warehouses, and older urban buildings. Old-growth timbers tend to show tighter growth rings and higher density than modern fast-grown equivalents, making them desirable for floors and beams. If species identification matters for strength or appearance, ask the salvage yard or have a sample identified by a local mill.
Is reclaimed wood safe from pests and rot?
Reclaimed wood that has been exposed and properly dried is often free from active pests; however, signs of past infestation (small galleries or old frass) can appear. Look for soft, crumbly areas that indicate rot and avoid boards with extensive decay. Active infestation and significant rot are disqualifying for structural use. For thick timbers, check internal condition by boring a small pilot hole in an inconspicuous area or consulting a professional.
How much extra does reclaimed wood add to labor?
Expect reclaimed projects to add roughly 15–30% more labor time versus equivalent new-material projects. Time is spent de-nailing, sorting, flattening, and repairing defects. Tool rental and prep work can also add cost; in many small projects this premium is the trade-off for lower material cost and character. Budget accordingly and include contingency for unexpected repairs.
Can reclaimed beams be used structurally?
They can, but only after careful inspection and, in many cases, engineering review. Structural reuse requires assessment of cross-section, rot, existing cuts or notches, and evidence of past overstress. Building officials may require an engineer’s stamp or written evaluation. For splices and repairs, use engineered steel plates, through-bolts, and appropriate adhesives as specified by a structural engineer.
Do I need to test reclaimed wood for lead paint?
Yes, if the wood comes from a building constructed before 1978 in the U.S., test for lead-based paint before sanding or planing. Use EPA-approved testing kits or send samples to a lab. If lead is present, follow local regulations for containment and disposal; use HEPA vacuums and respirators when working with painted surfaces to protect your health and that of occupants.