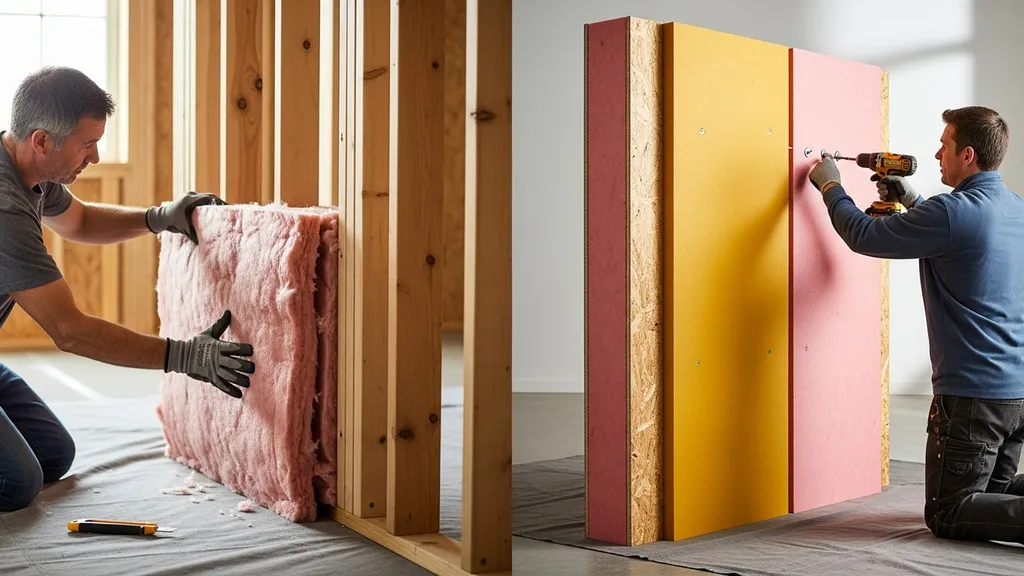
Compare insulation types, R-values, costs and DIY tips to pick the best insulation for a tiny house — walls, roof, and floor guidance for tight, efficient builds.
Best Insulation for Tiny House: Materials and R-Values
Tiny house insulation decisions determine comfort, heating fuel use, and whether an off-grid system can keep up. This article on the best insulation for tiny house builds the practical trade-offs you need: R-value per inch, moisture and air-quality risks, cost and weight for trailer platforms, and installation methods that actually work in tight cavities. Read on to learn R-targets by climate, the strengths and weaknesses of common materials, and step-by-step assembly choices for walls, roofs and floors.
TL;DR:
- Aim for R-13 to R-21 in walls and R-30 to R-60 in roofs depending on climate; continuous exterior foam can add 30–50% effective R-value without deep framing.
- Prioritize airtightness and a clear air barrier before adding more insulation; a well-sealed R-13 wall often outperforms a leaky R-19 assembly.
- For tight, mobile tiny homes use closed-cell spray foam where thickness is limited or combine cavity-fill (fiberglass/mineral wool) with thin exterior polyiso for a budget-friendly high-performance approach.
Tiny House Insulation Basics: What R-value Means for Small Builds
R-value measures thermal resistance: higher R means slower heat flow. It is an assembly-level rating based on material type, thickness and density. The U.S. Department of Energy explains how R-value varies with temperature and installation quality; see the Department of Energy's insulation primer for background on how to interpret manufacturer claims (https://www.energy.gov/energysaver/insulation). For quick reference, standard R-per-inch ranges are: fiberglass ~2.9–3.8, mineral wool ~3.0–3.3, cellulose ~3.2–3.8, polyiso ~5.6–6.5, closed-cell spray foam ~6–7.
How R-value plays out in tiny houses differs from full-size homes. With limited wall and roof depth, every inch matters. A 2x4 stud wall (3.5 in cavity) with fiberglass batts yields about R-11 to R-13; a 2x6 wall (5.5 in cavity) with denser insulation gets R-19 to R-21. But assembly performance depends on air sealing and thermal bridging through studs. Small footprints amplify heat loss proportionally: exterior surface area / volume ratios are higher, so details matter.
Key points:
- Air tightness often yields bigger practical gains than adding a few R-points. Passive House Institute US (PHIUS) and Passive House standards emphasize airtightness and continuous insulation along with high R-values.
- Thermal bridging through studs, headers and fasteners can cut effective R-value by 10–30% unless offset by continuous exterior insulation or thermal breaks.
- R-targets are climate-dependent; see the Energy Star recommended R-values table for cost-effective levels by region (https://www.energystar.gov/saveathome/seal_insulate/identify-problems-you-want-fix/diy-checks-inspections/insulation-r-values).
Research on small homes shows cavity-fill materials like cellulose can perform well in practice when installed and ventilated correctly; for example, a comparative study noted cellulose’s effectiveness in hot-dry test settings (https://f1000research.com/articles/14-226). Use R-values as a design input, not the only determinant: detailing, vapor control, and ventilation are equally important.
How to Choose Insulation for a Tiny House: Material Pros and Cons
Choosing the best insulation for tiny homes balances R/inch, cost, moisture tolerance, air-quality risk, and ease of DIY installation. Below are common choices with practical pros and cons tailored to tiny builds.
Fiberglass Batts: Low Cost, DIY-friendly
- R/inch: ~2.9–3.8
- Pros: Affordable, widely available, easy to fit in stud cavities; low embodied cost.
- Cons: Performance drops if compressed or poorly installed; low moisture tolerance; fibrous dust requires PPE during installation.
- Best use: 2x4 and 2x6 cavity fills in thermal zones where thicker options are not feasible. See the rockwool vs fiberglass comparison for more detail [/blog/rockwool-vs-fiberglass-which-insulation-best-you].
Mineral Wool (rockwool): Fire and Moisture Resistance
- R/inch: ~3.0–3.3
- Pros: Better fire resistance, holds shape, tolerates brief moisture exposure and dries faster than fiberglass.
- Cons: Slightly higher cost than fiberglass; similar installation skill level.
- Best use: Where fire safety or acoustic control matters; good choice for tiny homes on trailers with kitchens near living space. Compare rockwool vs fiberglass for specifics [/blog/rockwool-vs-fiberglass-which-insulation-best-you].
Spray Polyurethane Foam (closed-cell and Open-cell): Airtightness vs Cost and Vocs
- R/inch: Open-cell ~3.6–3.8, Closed-cell ~6–7
- Pros: Excellent air barrier and high R/inch (closed-cell), adds structural rigidity and moisture resistance when installed correctly.
- Cons: High installed cost, off-gassing/VOC concerns during and after install, needs professional-grade equipment for good results. Open-cell allows some vapor movement; closed-cell can trap moisture if assemblies are not detailed.
- Use closed-cell where thickness is constrained (mobile tiny houses) or for targeted rim-joist sealing. See the detailed comparison of spray foam and cellulose for trade-offs [/blog/spray-foam-vs-cellulose-insulation].
Rigid Foam Boards (polyiso, XPS, EPS): Continuous Insulation Options
- R/inch: Polyiso ~5.6–6.5, XPS ~3.8–5, EPS ~3.6–4
- Pros: Thin, high R per inch for polyiso; excellent for continuous exterior insulation (CI) to reduce thermal bridging without deep studs.
- Cons: Edge performance varies; XPS has higher embodied carbon and environmental concerns; boards require sealed joints for best performance.
- Best use: Exterior sheathing, roof overlay, under-slab for elevated floors. For installation steps see the exterior insulation on walls installation guide and exterior foam roof guide.
Cellulose: Recycled, Breathable Cavity Fill
- R/inch: ~3.2–3.8
- Pros: Good thermal performance, recycled content, performs well in retrofit dense-pack applications and small cabins.
- Cons: Requires blower for dense-pack installs, may settle if not installed correctly, needs careful moisture control.
- Best use: Retrofit tiny homes or new builds where breathable walls are desired and installers can dense-pack cavities. See research showing cellulose effectiveness in small dwellings (https://f1000research.com/articles/14-226).
Natural Options (sheep's Wool, Hemp, Cork) and Loose-fill Alternatives
- R/inch: Varies; wool ~3.5–3.8
- Pros: Low-VOC, renewable, good moisture buffering.
- Cons: Higher cost and limited availability in some regions; variable R-values.
- Best use: Owners prioritizing low-emission, local-sourced materials. For sourcing tips see how to source local materials for DIY homes.
For detailed manufacturer guidance and cost scenarios, the Energy Star insulation R-value recommendations are a useful baseline (https://www.energystar.gov/saveathome/seal_insulate/identify-problems-you-want-fix/diy-checks-inspections/insulation-r-values).
R-values and Recommended Targets by Component and Climate
R-targets are not absolute rules but starting points. The Department of Energy and Energy Star provide region-by-region guidance; tiny homes should aim for the same comfort targets but tailor thickness and assembly to a small footprint (https://www.energy.gov/energysaver/insulation).
| Climate band | Walls (typical) | Roof/Ceiling | Floor/Underbody |
|---|---|---|---|
| Cold (IECC zones 6–8) | R-19 to R-21 (2x6) + CI R-5 to R-10 | R-49 to R-60 (attic) or R-30+ (cathedral) | R-25 to R-30 under floor |
| Mixed (IECC zones 3–5) | R-13 to R-19 + CI R-3 to R-7 | R-30 to R-49 | R-13 to R-19 |
| Warm (IECC zones 1–2) | R-13 to R-15 | R-19 to R-30 | R-10 to R-13 |
Notes:
- Passive-house targets exceed these values; walls often aim for R-30+ and roofs for R-60+. PHIUS and Passive House Institute standards focus on airtightness, thermal breaks, and very high insulation levels for small-volume buildings.
- When wall thickness is constrained (for example, mobile tiny houses on trailers), prioritize high R/inch materials (closed-cell spray foam or polyiso CI) or a hybrid: cavity-fill plus 1–2 inches of polyiso outside the sheathing to boost effective R-value.
- For attic and roof work, see the attic R-value guide for layering and venting strategies [/blog/attic-insulation-how-much-do-you-need].
Remember that effective R is assembly-dependent. Continuous exterior insulation (CI) reduces stud thermal bridging and is the most space-efficient way to raise whole-wall performance.
Installation Methods That Matter in Tiny Houses
Installation quality frequently trumps material choice. The same R-value can perform very differently depending on sealing, compression, and thermal bridging.
Cavity Fill vs Continuous Exterior Insulation
- Cavity fill minimizes exterior depth loss but leaves studs as thermal bridges. Continuous exterior insulation (polyiso boards or exterior mineral wool) placed over sheathing adds R without increasing stud depth, and reduces bridging.
- For budget builds, use cavity batts (fiberglass or mineral wool) in studs and add 1–2 inches polyiso outside sheathing strapped over for cladding attachment. See the step-by-step exterior insulation on walls installation guide.
Air Sealing Details: Seams, Penetrations and Service Chases
- Airtightness begins at a continuous air barrier: interior gypsum, taped sheathing, or a dedicated membrane. Seal seams, window/door perimeters and mechanical penetrations with compatible tapes and gaskets.
- Tiny houses have many service penetrations for plumbing, wiring and venting; route runs through service chases and seal with grommets or spray foam to avoid patchy leakage.
- For window work and flashing sequences that meet high airtightness goals, review our window sealing tips [/blog/how-to-seal-windows-for-passive-house-standards].
Minimizing Thermal Bridging with Strapping and Insulated Headers
- Use 1x furring strips or vertical strapping over exterior foam to provide a rainscreen and attachment points while keeping the CI continuous.
- Use insulated headers or install foam over header areas to reduce the heat-sink effect where lumber concentration is high.
- For roof CI and installation sequencing see the exterior foam roof guide [/blog/complete-guide-exterior-foam-insulation-energy-efficient-roofs].
For practical install tips in tight spaces, the OneClickDIY tiny-house insulation guide offers stepwise methods and photos that match common DIY skill levels (https://oneclickdiy.com/blogs/insulation/tiny-house-insulation-guide). Quality of installation matters: taped joints, sealed penetrations and properly fitted insulation deliver more predictable results than simply adding thickness.
Moisture, Ventilation and Indoor Air Quality Risks with Insulation Choices
Tiny homes tend to be tighter by design, which creates humidity and indoor air-quality responsibilities.
Moisture Control Basics: Vapor Profiles and Drainage Planes
- Understand vapor drive in your climate: in cold climates, keep the warm, moist interior vapor from reaching cold sheathing where it can condense; in hot-humid climates, allow exterior drying and avoid interior vapor barriers that trap moisture.
- Provide a continuous drainage plane and breathable cladding systems when using moisture-tolerant cavity fills like mineral wool or cellulose.
- The U.S. Department of Energy outlines moisture and insulation interactions and why assembly thinking matters (https://www.energy.gov/energysaver/insulation).
Vocs and Off-gassing: Choosing Low-emission Products
- Spray foams have VOC and isocyanate concerns during application and curing. If choosing spray foam, consult low-VOC alternatives and best practices, including full curing times and forced ventilation during and after installation. See safer product options and practices in the safer spray foam alternatives guide [/blog/safer-alternatives-spray-foam-insulation-performance].
- Natural fiber products and mineral wool typically present lower long-term VOC risks.
Ventilation Strategies for Tight Tiny Homes (MVHR, Continuous Exhaust)
- Tight tiny houses require mechanical ventilation. For small footprints, simple continuously running bathroom/kitchen exhaust fans balanced with passive inlets can work, but heat-recovery ventilation (HRV/ERV) provides the best comfort and energy savings for cold and mixed climates.
- For detailed system selection and installation, consult the ultimate ventilation guide for small eco homes [/blog/ultimate-guide-to-ventilation-for-small-eco-homes].
- Balanced ventilation reduces condensation risk in walls and roofs by keeping indoor humidity controlled and lowering the moisture gradient across assemblies.
The sprayman guide discusses how spray foam affects indoor air and moisture behavior in tiny homes—handy when weighing foam against cavity-fill options (https://sprayman.co/blogs/insulation/tiny-house-insulation-guide?srsltid=AfmBOoqxK362u_9522woozSqX6Lp_4emNhREG8RRa7Vawmatns9TPlo6).
Cost, Weight and Buildability: Choosing for a Budget Tiny House
Budget decisions often determine the path. Consider material cost, installed cost, and weight—especially for trailer tiny homes where payload is finite.
Material Cost Per R-value and Installed Cost Comparisons
Approximate installed cost per square foot (varies by region and installer):
- Fiberglass batts: $0.50–$1.00/sqft (installed in cavity)
- Mineral wool: $0.75–$1.50/sqft
- Cellulose (blown in): $1.00–$1.75/sqft
- Open-cell spray foam: $1.25–$2.00/sqft
- Closed-cell spray foam: $2.50–$4.50/sqft
- Polyiso board (installed as CI): $1.50–$3.00/sqft (depends on thickness and fastening)
If budget is tight, cavity batts plus 1" polyiso exterior can often hit a middle ground: improved effective R with modest cost. For cost reduction and greener choices, see how to choose budget-friendly green materials and the tiny house build-on-a-budget case study [/blog/tiny-house-build-400-sq-ft-on-budget].
Weight and Trailer Payload Considerations for Mobile Tiny Homes
- Insulation weight matters for trailer homes. Example: a 20' tiny house with 400 sqft of wall + roof area filled with cellulose (~2.5 lb/ft3 packed) may add several hundred pounds; closed-cell foam can be heavier per cubic foot but reduces thickness.
- Estimate loads early. Heavy floor assemblies or thick under-slab insulation can push payload limits; use lightweight rigid foam (EPS or polyiso) to save weight and thickness.
DIY Skill Level, Tools and Safety When Installing
- Fiberglass and mineral wool are well within beginner DIY ranges; they require basic hand tools, knives and PPE (gloves, goggles, respirator).
- Cellulose needs a blower and experience dense-packing to avoid settling.
- Spray foam application generally requires either professional installers or rented equipment plus training; off-gassing during application mandates full respiratory protection and vacating occupied spaces until cure.
If an assembly requires professional spray foam, budget for a licensed installer. For electrical routing and off-grid electricals integration, coordinate with the tiny house electricals guide to plan service chases that avoid compressing insulation.
Comparison: Quick Specs Table for Top Insulation Options
| Product | R-value per inch | Typical installed cost ($/sqft) | Moisture tolerance | DIY difficulty | Ideal use | Embodied carbon note |
|---|---|---|---|---|---|---|
| Fiberglass batts | 2.9–3.8 | $0.50–$1.00 | Low | Low | Wall/roof cavity | Moderate |
| Mineral wool (rockwool) | 3.0–3.3 | $0.75–$1.50 | Medium-high | Low | Wall/roof cavity, fire zones | Lower than XPS |
| Cellulose (blown/dense-pack) | 3.2–3.8 | $1.00–$1.75 | Medium | Medium | Retrofit and cavity fill | Low (recycled content) |
| Closed-cell spray foam | 6–7 | $2.50–$4.50 | High | High | Rim-joist, limited-thickness walls | Higher embodied carbon |
| Open-cell spray foam | 3.6–3.8 | $1.25–$2.00 | Medium | High | Interior cavities for air sealing | Lower than closed-cell |
| Polyiso rigid board | 5.6–6.5 | $1.50–$3.00 | Medium | Medium | Continuous exterior, roof overlay | Moderate |
| XPS/EPS rigid board | 3.6–5 | $1.25–$2.50 | Medium | Medium | Underfloor, exterior CI (XPS) | XPS higher carbon; EPS lower |
Callouts:
- Best for mobile, thin-wall tiny houses: closed-cell spray foam or polyiso CI combined with cavity batts.
- Best low-cost, low-skill build: fiberglass batts in framed cavity with careful air-sealing.
- Best off-grid low-embodied-carbon: cellulose or natural fibers where availability permits.
(See the rockwool vs fiberglass comparison for more about performance and fire safety [/blog/rockwool-vs-fiberglass-which-insulation-best-you].)
How to Insulate Specific Tiny House Parts: Step-by-step Notes
Below are practical sequences for common tiny-house assemblies. Each is a condensed, actionable checklist.
Walls — Framing, Cavity Fill and Adding Continuous Foam
- Choose framing depth: 2x6 for R-19 cavities if space allows; otherwise 2x4 with exterior CI.
- Install sheathing and a water-resistive barrier. Tape sheathing seams or install a continuous WRB membrane.
- Add continuous exterior foam (polyiso 1–2 in) if using CI; tape joints and use furring strips for cladding attachment.
- Install cavity insulation (fiberglass/mineral wool/cellulose) ensuring no compression and full cavity fill.
- Create an interior air barrier: taped drywall, an air-sealing membrane, or sealed plywood. Seal around penetrations.
- Flash and seal windows per passive-house-style window sealing techniques [/blog/how-to-seal-windows-for-passive-house-standards].
- Tip: Use pre-cut insulation around window bucks and fill gaps with low-expansion foam in small amounts.
Roof — Vented vs Unvented Assemblies and Insulating Cathedral Roofs
- For vented attic: install ceiling insulation (batt or blown) to target R-values, maintain continuous ventilation channels above insulation to prevent condensation, and seal ceiling air barrier.
- For unvented cathedral or low-slope roofs: use continuous exterior foam aboveroof sheathing or use closed-cell spray foam to create a sealed, conditioned roof assembly. Check the attic R-value guide for layering and venting specifics.
- Tip: If using polyiso on the exterior, protect it from sun and install a ventilation gap between cladding and foam where appropriate.
Floor/underfloor — Insulating Over Trailers and on Piers
- Trailers: insulate between joists with closed-cell spray foam if clearance is minimal; otherwise use mineral wool or fiberglass with a sealed underbelly to maintain conditioned underside. Seal all underbody seams to prevent moisture ingress.
- Pier or elevated on blocks: install rigid foam under flooring sheathing or use a continuous insulated skirt to minimize uncontrolled airflow beneath the house.
- Tip: When wiring and plumbing pass through joists, use grommets and sealants to keep the air barrier continuous. For tips on routing near off-grid panels and batteries, reference the off-grid electricals guide [/blog/tiny-house-electrical-systems-off-grid-options].
Watch this step-by-step guide on choosing the best insulation for your home:
For local sourcing and lower embodied-carbon options, consult guidance on sourcing local materials for DIY homes.
The Bottom Line
For most budget-conscious tiny houses, prioritize airtightness and a well-installed cavity insulation (fiberglass or mineral wool) and add selective continuous exterior insulation (polyiso or thin rigid foam) where studs limit effective R. Use closed-cell spray foam selectively when thickness is extremely limited and budgets permit, while balancing VOC and moisture considerations.
What is the best single insulation for a trailer tiny house?
Closed-cell spray polyurethane foam often performs best as a single product for trailer tiny homes because it combines high R/inch (about R-6 to R-7), acts as an air and moisture barrier, and adheres to metal or wood substrates. However, it has higher upfront cost and VOC concerns during installation. If avoiding spray foam, a hybrid of cavity batts plus 1"–2" polyiso continuous exterior foam is a practical alternative that improves effective R and reduces thermal bridging.
How thick does insulation need to be in a tiny house?
Thickness depends on climate and material. Typical targets: walls R-13 to R-21 (2x4 to 2x6 framing), roofs R-30 to R-60, and floors R-13 to R-30. Where wall depth is limited, use higher-R-per-inch materials (closed-cell spray foam or polyiso CI) to reach those targets within a slim profile. Use the Department of Energy guidance as a baseline for climate-based R-values (https://www.energy.gov/energysaver/insulation).
Are spray foam VOCs a serious concern and what are safer options?
Yes, spray foams can emit VOCs and isocyanates during application and curing. Properly licensed installers, full-mask respirators for applicators during spray, and vacating occupied spaces until curing reduces risk. Safer options include low-VOC spray formulations, using closed-cell only in targeted areas, or choosing cavity-fill alternatives like cellulose or mineral wool and adding exterior polyiso for thin, high-R assemblies. See safer spray foam alternatives for more detail [/blog/safer-alternatives-spray-foam-insulation-performance].
How should I insulate under a tiny house on piers?
For piers, add rigid foam under the floor sheathing and seal the perimeter with an insulated skirt to reduce convective losses from underfloor airflow. If the crawlspace is conditioned, insulate and air-seal the foundation walls and band joist; if unconditioned, insulate the floor assembly to recommended R-values for your climate. Avoid leaving an open vented crawlspace beneath a tiny house without a sealed underbody.
Should I prioritize air sealing over adding more insulation?
Yes. Airtightness typically yields larger real-world energy savings than a small R-value increase. A well-sealed R-13 wall often outperforms a leaky R-19 wall because air leakage bypasses insulation. Focus on a continuous air barrier, sealed penetrations and proper window flashing before increasing insulation thickness. After sealing, consider CI to reduce thermal bridging for the next performance step.