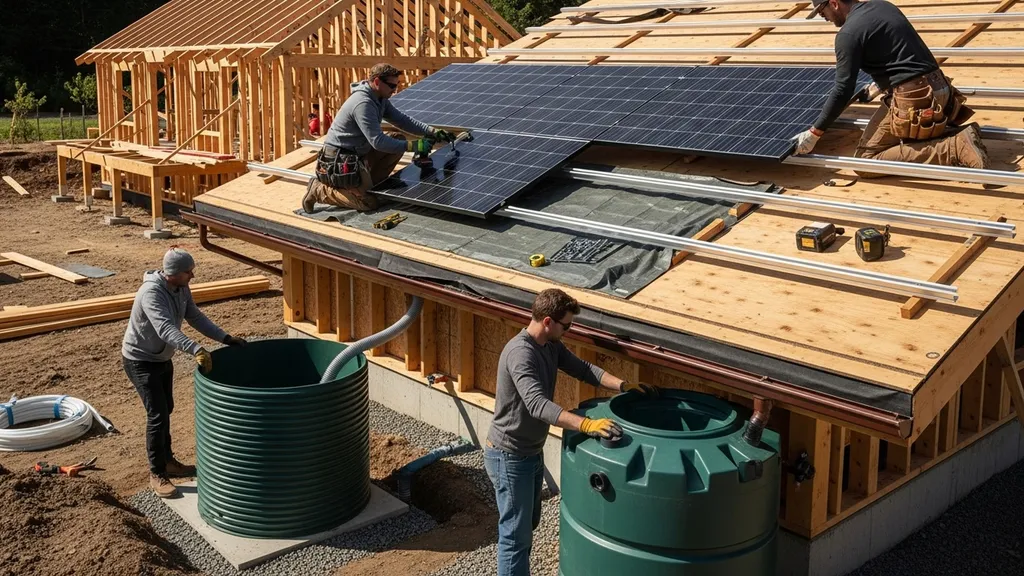
A practical start-to-finish guide for budget-conscious DIY builders on designing, permitting, and equipping an off-grid home with sustainable systems.
Building an Off-Grid Home: Start to Finish Guide
Planning, designing, and executing a building off-grid home project requires balancing site realities, realistic budgets, and system choices that match a household’s energy and water needs. This guide walks budget-conscious DIY builders through the full process — from site assessment and permits to passive design, solar and battery sizing, rainwater and sanitation planning, and a realistic DIY timeline — so readers can make decisions that reduce costs and environmental impact.
TL;DR:
- Confirm site access, sun exposure and water source early; expect permit lead times of 2–12 weeks and budget a 10–20% contingency.
- Proper passive design can cut energy demand by 30–60%, shrinking PV and battery sizes; target high R-values, airtightness, and south-facing glazing in cold climates.
- Size PV and batteries from an appliance-level load calculation; aim for 2–5 days autonomy and use LiFePO4 batteries for lower lifecycle cost if budget allows.
Related guides: Ultimate guide to emergency off grid cooking, Designing off grid solar system guide, The Ultimate Guide to Sustainable Building Materials and Products for Home Builders and DIYers, and The Complete Guide to Water-Efficient Plumbing and Moisture Control: Design, Off-Grid and Smart Water Systems, Composting Toilets, and Crawl Space Solutions.
Introduction: Why build an off-grid home and who this guide is for
Building off-grid homes appeals to people seeking independence, lower lifecycle costs, or a smaller environmental footprint. Worldwide off-grid renewable deployments have grown rapidly; the International Renewable Energy Agency’s recent report details the expansion of off-grid solar and related technologies from 2015–2024 and offers context for scale and cost trends (IRENA off-grid renewable energy statistics 2025). Typical DIY projects range from tiny homes (under 400 sq ft) to modest self-builds (~2,000 sq ft). Budgets vary: low-budget tiny homes often start under $30k (owner-labor heavy), mid-range self-builds commonly run $120k–$300k, and higher-spec off-grid homes can exceed $400k when high-end finishes and larger systems are included. Permit lead times are commonly 2–12 weeks depending on jurisdiction, and a contingency of 10–20% of hard costs is recommended.
Who This Guide Is Aimed at
- Budget-conscious DIY homebuilders, first-time self-builders, and homesteaders planning an off-grid or hybrid off-grid home.
- Small contractors and tradespeople wanting practical system-sizing and material recommendations.
- Readers seeking to apply passive-house ideas without the full Passive House certification overhead.
How to Use This Start-to-finish Guide
- Read sequentially for a full project roadmap, or jump to specific sections (power, water, materials) as needed.
- Use the checklists and sample budgets to create a phased plan: core shell first, systems later if financing requires it.
Quick-start Checklist (key Planning Points)
- Site access: Confirm year-round vehicle access and winter maintenance needs.
- Solar budget range: Estimate $1,000–$2,500 per kW installed for basic off-grid arrays (panels, racking, charge controllers) before batteries.
- Water source check: Identify rainfall, watershed, or well prospects and test soil percolation.
- Sanitation option: Decide between septic, composting toilet, or micro-treatment early.
- Initial permit check: Contact county building department for building, electrical, well and septic rules.
- Rough construction timeline: Expect 3–12 months to get to weather-tight depending on scope and crew.
- Contingency fund: Set aside 10–20% for unforeseen site work, system upgrades, or permit delays.
Planning & permitting: Site selection, zoning and realistic budgets
Site Assessment Checklist
- Slope and drainage: Map contours and choose a build pad away from concentrated runoff.
- Access and road permits: Check driveway setback, culvert requirements, and county road permits.
- Grid distance: Measure distance to nearest utility pole and get a quote for grid connection vs off-grid investment.
- Sun exposure: Analyze solar access with topographic maps or smartphone sun-path apps.
- Soil percolation test: Arrange perc tests for septic or evaluate suitability for composting toilets if allowed.
- Setbacks and easements: Check title and county plat for utility easements, setback requirements and firebreak rules.
- Vegetation and fire risk: Note defensible space needs and local fire code requirements.
Understanding Local Zoning, Permits and Inspections
Permits commonly required include building, electrical, plumbing (or well permit), septic or alternative sanitation permits, and driveway/culvert permits. Start with the county building department and request a checklist for alternative systems (e.g., composting toilets). Research and case studies such as Cal Poly’s off-grid living review offer useful cost and permitting context for rural builds (Living off the grid with renewable energy — cal poly pdf). Allow 2–12 weeks for permit approvals; complex systems or variance requests can take longer.
Budgeting, Financing and Phasing the Project
A practical budget breakout by percentage (ballpark):
- Land and site prep: 10–15%
- Foundation and structure: 20–30%
- Envelope (insulation, windows, doors): 15–25%
- MEP systems (solar, water, sanitation): 15–25%
- Finishes and fixtures: 10–20%
- Contingency: 10–20%
Phasing ideas to spread costs:
- Phase 1: Site prep and shell to weather-tight.
- Phase 2: Envelope upgrades and rough MEPs.
- Phase 3: Solar, batteries, and water systems commissioned.
- Phase 4: Interior finishes.
For early site work and layout guidance, see the site prep checklist. Research such as the Cal Poly case study and DOE guidance can inform financing and lifecycle cost estimates.
Design principles for off-grid living: passive strategies and efficient envelopes
Passive-house Principles Adapted to Off-grid
Passive design reduces the size and cost of mechanical systems. Research and practical builds show passive measures can reduce heating/cooling energy demand by 30–60% compared with code-minimum homes (see OSTI case study of an off-grid house using <1,000 kWh/year; Home alone — living off the grid | OSTI.GOV). Core elements to prioritize:
- High insulation: Target wall and roof R-values appropriate to climate (see regional IECC guidance).
- Airtightness: Strive for low air changes per hour; the Passive House standard targets 0.6 ACH50, but budget builds can aim for lower but realistic numbers.
- Controlled ventilation: Heat recovery ventilators (HRVs) or energy recovery ventilators (ERVs) keep fresh air while limiting heat loss.
Orientation, Glazing and Shading Choices
- Orientation rule of thumb: In the northern hemisphere, maximize south-facing glazing for winter solar gain while minimizing east/west glazing to reduce overheating.
- Window-to-wall ratio tradeoff: Higher window area increases passive gains but raises cost and potential heat loss; aim for 10–25% window-to-floor area for balanced budgets.
- Shading: Use overhangs sized for summer sun angles or simple exterior shades to prevent overheating.
Refer to practical strategies in the window orientation basics article for site-specific design. For airtightness detailing, consult the airtightness checklist.
Insulation, Airtightness and Thermal Mass
- Insulation: Recommended ballparks — cold climates: walls R-20–R-40, roofs R-40–R-60; mild climates: R-13–R-25 walls. Use continuous exterior insulation to avoid thermal bridging where budget allows.
- Thermal mass: Incorporate mass (concrete floor, masonry) on rooms with the most solar gain to smooth temperature swings.
- Airtight details: Seal framing penetrations, use taped sheathing or dedicated air barrier membranes, and test with a blower door before finishing.
Energy modeling and simple estimators (NREL tools, PHPP-lite options, or the site's own calculators) help quantify the expected reduction in energy demand; lower demand can shrink PV and battery capacity by 30–60%.
Power systems start-to-finish: sizing solar, batteries, inverters and wiring
Load Calculation and Creating an Energy Budget
Start with an appliance-level inventory: list every load, its power draw (watts), and estimated hours/day. Convert to daily kWh by multiplying watts by hours and dividing by 1,000. Example: a modest three-bedroom off-grid home might average 10–25 kWh/day depending on heating method and habits. Use the site's off-grid energy sizer to translate loads into PV and battery needs.
Solar Array and Charge Controller Sizing
- kWh/day to kW PV: Divide daily kWh by expected kWh/kW/day for the site (rough ranges: 2–6 kWh per kW per day depending on latitude and cloudiness). For example, a 15 kWh/day household in a location averaging 4 kWh/kW/day needs ~3.75 kW of PV.
- Panel count: If using 350 W panels, 3.75 kW ≈ 11 panels.
- Charge controllers: Use MPPT controllers sized for array voltage and current; multiple MPPTs can optimize arrays with shading or different orientations.
- Expect losses: Factor in 20–30% system losses (inverter, wiring, temperature). That means oversize the array slightly relative to pure kWh arithmetic.
This DIY video shows you the hands-on process:
Battery Chemistry Comparison and Storage Sizing
Aim for 2–5 days of autonomy depending on reliability needs and local climate. Sample calculation: For 15 kWh/day and 3 days autonomy → 45 kWh usable storage. If using 80% depth-of-discharge (DoD) LiFePO4, battery nominal capacity ≈ 56 kWh.
Battery comparison/specs table
| Chemistry | Round-trip efficiency | Cycle life (typ) | Recommended DoD | Cost per kWh (installed) | Maintenance |
|---|---|---|---|---|---|
| LiFePO4 | 90–95% | 3,000–7,000 cycles | 80% | $400–$800 | Low |
| AGM (VRLA) | 75–85% | 300–700 cycles | 50% | $200–$400 | Moderate |
| Flooded lead-acid | 70–80% | 400–1,200 cycles | 50% | $150–$300 | High (watering) |
Sources: industry battery datasheets and comparative lifecycle analyses. LiFePO4 typically has higher upfront cost but lower lifecycle cost and better safety for enclosed installations. For safe housing, consult the DIY battery enclosure.
Inverter and Hybrid Options
- Inverter sizing: Size for continuous loads plus surge capacity for motor starts. For homes with a 3,000 W continuous load and frequent motor use, choose a 3,500–6,000 W inverter with surge capability twice the continuous rating.
- Hybrid inverters: Useful when integrating a generator or grid-tie capability; they can manage battery charging and export. Use hybrid systems when future grid connection or generator backup is planned. For wiring, see the hybrid wiring guide.
Wiring, Safety and Code Basics
- Electrical codes: Follow NEC articles for battery systems and local amendments; some jurisdictions require licensed electricians for final connections.
- Safety: Provide disconnects, overcurrent protection, grounding, and proper ventilation for lead-acid batteries. LiFePO4 still needs appropriate fusing and disconnects.
- Inspection: Schedule electrical inspections before covering work.
Also review research on household energy choices and social factors in off-grid adoption for planning user behavior and demand (Off-the-Grid in an On-Grid Nation — USF PDF).
Water and sanitation systems: rainwater, wells, filtration and composting toilets
Rainwater Harvesting: Catchment Sizing and Cistern Planning
Use the yield formula: roof area (sq ft) × rainfall (inches/year) × 0.623 (gallons per sq ft per inch) × runoff coefficient (0.75–0.95 for metal/clean roofs) = gallons/year. Example: 1,000 sq ft roof × 25 in/year × 0.623 × 0.85 ≈ 13,200 gallons/year. That supports nonpotable uses for a small household but may need supplemental sources for potable or dry seasons. Cistern sizing depends on household use and seasonality; for 2 people using 50 gallons/day (minimal indoor use) and a 180-day dry season, storage would need 9,000 gallons. For treatment, a typical potable treatment train is: first-flush diverter → sediment filter → carbon filter → UV disinfection or controlled chlorination. EPA guidance on rain barrels and management gives practical details for small systems (EPA rain barrels overview).
Well Systems and Treatment Options
Wells vary widely by geology. Typical considerations:
- Depth and yield: Obtain local well logs to estimate likely depth and expected gpm.
- Pump types: Submersible pumps are common for deeper wells and have better efficiency; jet pumps suit shallow wells.
- Power needs: A 1 hp submersible pump uses roughly 0.75–1.0 kW when running; factor into PV and battery sizing if off-grid pumping is required.
- Treatment: Test for bacterial contamination, nitrates, and heavy metals; add UV and sediment treatment as needed.
Graywater Reuse and Composting Toilet Integration
Graywater systems can supply irrigation or toilet flushing (where allowed). Composting toilets reduce or eliminate septic needs; they require correct design, maintenance and often local approval. Permits for composting toilets vary—some counties accept approved units, others require engineered systems. For practical integration of graywater and composting toilets, see the graywater integration tips and the composting toilet guide.
Costs and maintenance cycles
- Cisterns: $1–$3 per gallon for larger buried tanks; aboveground polyethylene tanks are cheaper per gallon but may be less durable.
- Wells: Drilling ranges from $5–$15 per foot depending on geology and region.
- Composting toilets: $500–$5,000 depending on model and installation complexity; maintenance includes periodic solids removal and monitoring moisture and aeration.
Materials, construction methods and the DIY build timeline
Foundations and Low-cost Options
- Pier foundations: Lower concrete use, good for sloped sites; cost-effective for small to medium builds.
- Rubble trench: Traditional option with good drainage and reduced concrete; suited to DIY with proper compaction and frost-protection details.
- Insulated slab-on-grade: Offers thermal mass and low maintenance; requires edge insulation in cold climates.
Wall Systems, Insulation Choices and Advanced Framing
- Stick-frame: Familiar, flexible, and usually most DIY-friendly.
- SIPs (structural insulated panels): Fast enclosure, high thermal performance; higher upfront material cost but reduced labor.
- Strawbale: Excellent insulation, high embodied-carbon sequestration potential; heavier labor and detailing for moisture control.
- Earthbag: Low-cost, durable in some climates; requires significant labor and specialized detailing.
Insulation quick comparisons (summary):
- Polyiso: High R per inch, good in warm climates or as continuous exterior insulation.
- Cellulose: Lower cost, good for retrofit and irregular cavities; needs careful moisture control.
- Spray foam: Excellent air sealing and R-value; higher cost and potential VOC considerations.
Roofing, Air Barriers and Critical Detailing
- Roof choices: Metal roofs work well for rainwater harvesting and shed snow; asphalt shingles are cheaper but less durable.
- Air barrier strategy: Choose a primary air barrier (taped sheathing, self-adhered membranes, or interior membrane) and detail penetrations carefully. Use the airtightness checklist for guidance.
- Flashing and drainage: Prioritize roof-to-wall flashing, foundation drainage, and continuous gutters that feed first-flush rainwater diverters.
Tools, Schedule and When to Hire Specialists
- Tools: Basic framing tools, wet saw for masonry, scaffolding, and a competent set of power tools will cover most DIY tasks.
- Timeline example (modest shell build): Site prep (2–6 weeks), foundation (1–4 weeks), framing and roof (4–12 weeks), envelope and windows (2–8 weeks) to weather-tight. MEP rough-in and systems installation (4–12 weeks), finishes (4–16 weeks).
- When to hire specialists: Electrical final connections and inspections, well drillers, septic designers or composting toilet approval experts, and HVAC/ventilation balancing are commonly outsourced. See the DIY vs hiring comparison for trade-off analysis.
Cost-saving and waste reduction tips
- Order materials in bulk to reduce per-unit cost and delivery fees.
- Use reclaimed or salvaged windows where appropriate, but verify thermal performance.
- Plan cuts and layouts to reduce framing waste and optimize insulation usage.
The Bottom Line
This guide turns a complex project into an eight-step roadmap: site assessment, conceptual design and phasing, permits, shell and envelope, MEP rough-in, systems commissioning, finishing, and inspections. First three actions: confirm zoning/permits, perform an energy budget, and get a preliminary solar sizing estimate. For anyone building off-grid home, emphasizing passive design, realistic budgeting, and staged implementation reduces risk and long-term costs.
Frequently Asked Questions
How much does it cost to build an off-grid home?
Costs vary widely by size, region, and system choices. Ballpark ranges: low-budget tiny homes can start under $30,000 with heavy owner labor; modest self-builds typically range $120,000–$300,000; high-spec off-grid homes with larger PV and battery banks often exceed $400,000. Major cost drivers are foundation/site prep, the building envelope, and energy/water systems. Budget 10–20% contingency for unexpected site or permitting costs.
How do I size a solar and battery system for my needs?
Begin with an appliance-level load calculation: list appliances, watts, and hours per day to get daily kWh. Divide that by expected solar yield (kWh produced per kW of PV per day at your site) to estimate installed PV kW. For batteries, select desired days of autonomy (2–5 days common) and account for battery DoD and inverter round-trip losses. Use tools like the off-grid energy sizer and PV performance tools such as NREL’s PVWatts to refine numbers.
Do composting toilets require permits?
Permitting varies by jurisdiction. Some counties accept certified composting toilet models as an alternative to septic; others require engineered septic systems or prohibit composting toilets in certain zones. Contact the local building and health departments early and consult the composting toilet guide for installation and maintenance standards that can aid approval.
How much rainwater storage will my household need?
Use the rainfall yield formula (roof area × rainfall × 0.623 × runoff coefficient) to estimate annual collection. For minimal indoor use, two people might use 50–100 gallons/day; a 180-day dry season would need 9,000–18,000 gallons of storage for full independence. Many builds use a mix of modest cisterns plus supplementary well or hauled water to reduce upfront tank cost.
Can I legally go off-grid where I live?
Legal feasibility depends on local codes. Key obstacles include minimum plumbing connections, septic code requirements, and electrical regulations. Research county zoning and building codes early; many rural areas allow off-grid systems with approved plans, while some jurisdictions require grid connection. Early consultation with the permitting office and using tried-and-tested system designs eases approval.