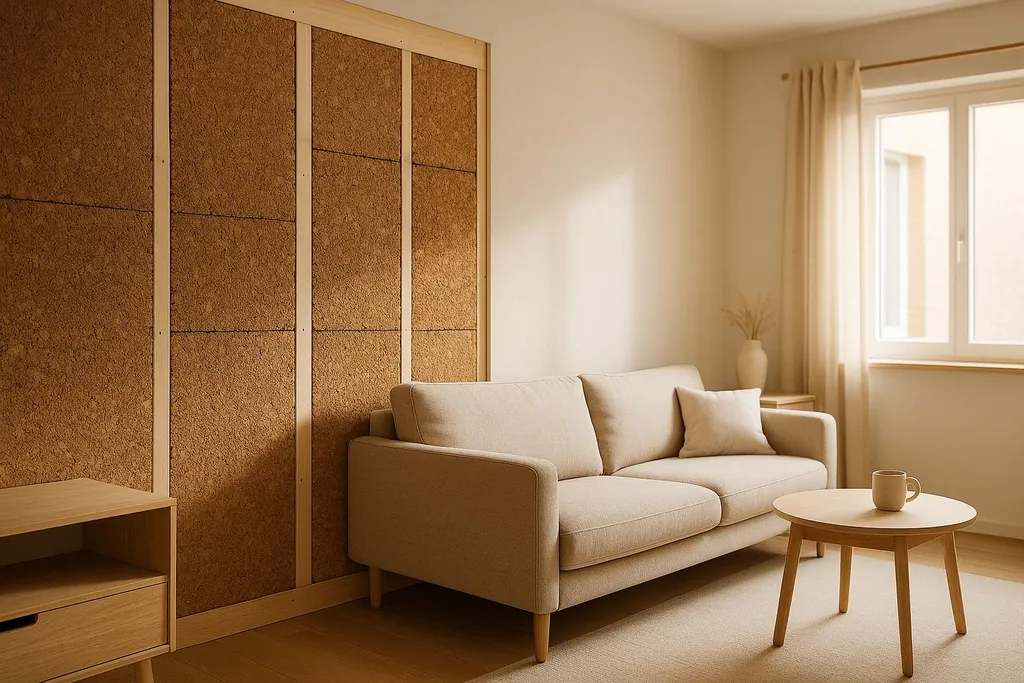
Learn how to effectively use cork for DIY home insulation, its benefits, installation tips, and eco-friendly advantages.
How to Use Cork for DIY Home Insulation
Cork is an eco-friendly, renewable material that's perfect for DIY home insulation. It's durable, water-resistant, and provides excellent thermal and acoustic insulation. Here's why it stands out and how you can use it:
- Why Choose Cork?
- Renewable: Harvested every 9 years without harming trees.
- High Performance: R-value of 3.6–4.0 per inch, comparable to fiberglass.
- Soundproofing: Absorbs up to 70% of sound waves.
- Durable: Resistant to water, mold, and mildew.
- Where to Use It:
- Walls: Great for soundproofing and thermal insulation.
- Floors: Moisture-resistant and comfortable for basements or overlays.
- Ceilings: Lightweight, fire-resistant, and easy to install.
- Cost: Prices range from $7.62 to $63.50 per square foot, depending on thickness and quality.
- Installation Tips:
- Prep surfaces: Clean and smooth them for better adhesion.
- Use proper tools: Adhesives, cutting tools, and primers ensure success.
- Seal gaps: Prevent air leaks for maximum insulation efficiency.
Cork insulation not only improves energy efficiency - cutting energy bills by up to 30% - but also contributes to a greener planet. Its durability and recyclability make it a smart, sustainable choice for your home.
How to Apply Cork Board Insulation
Preparing for Cork Insulation Installation
Getting ready for cork insulation installation is just as important as the material itself. Success depends on careful preparation, including using the right tools, taking accurate measurements, and ensuring surfaces are clean and ready to go.
Tools and Materials You'll Need
The tools and materials you choose can make all the difference in your cork insulation project. Start by gathering essential tools like a plastic smoothing tool, seam roller, utility knife, and measuring tape [\[5\]](https://romandecoratingproducts.com/blogs/how-to/install-cork-wallcoverings).
For cutting cork boards, a fine-toothed hand saw works well for smaller projects, while a crosscut saw is better suited for larger jobs [\[3\]](https://www.buildwithrise.com/stories/cork-insulation) [\[6\]](https://www.buildinggreen.com/news-article/installing-cork-insulation). A doctor blade is also helpful for making precise cuts [\[4\]](https://spfsolutions.ca/2025/01/31/cork-insulation-guide).
Adhesive plays a critical role in the installation process. ROMAN's PRO-880 Ultra Clear adhesive is a professional-grade option that ensures a strong, lasting bond [\[5\]](https://romandecoratingproducts.com/blogs/how-to/install-cork-wallcoverings). Pair this with a primer like ROMAN's PRO-999 Rx-35, which creates a smooth, sealed base to improve adhesion [\[5\]](https://romandecoratingproducts.com/blogs/how-to/install-cork-wallcoverings).
Cork insulation is available in three main forms: boards, rolls, and granules [\[4\]](https://spfsolutions.ca/2025/01/31/cork-insulation-guide). Rigid boards come in thicknesses ranging from 1 inch to 12 inches, offering flexibility for different insulation needs [\[3\]](https://www.buildwithrise.com/stories/cork-insulation). Depending on your project, you may also need additional materials like drywall and paint for walls or underlayment for floors [\[4\]](https://spfsolutions.ca/2025/01/31/cork-insulation-guide).
Measuring and Planning Your Project
Accurate measurements are the foundation of a successful installation. Start by calculating the total square footage of the area you're insulating.
For walls, measure the entire surface but subtract the dimensions of windows, doors, and other openings. For floors, include alcoves or irregular shapes in your measurements. When measuring ceilings, account for beams or fixtures that might require special cuts.
Before you begin cutting, plan the layout of your insulation. Shiplap edges, for example, help prevent gaps that could compromise the insulation's effectiveness [\[7\]](https://www.greenbuildingadvisor.com/article/installing-cork-insulation). If you're using shiplap joints, start at the base of the wall and work upward - this method helps keep moisture out [\[3\]](https://www.buildwithrise.com/stories/cork-insulation).
Create a cutting list based on your measurements to minimize waste and ensure you have all the pieces you need. Don't forget to factor in sealing gaps after installation, as this step improves insulation performance by reducing air leakage [\[4\]](https://spfsolutions.ca/2025/01/31/cork-insulation-guide).
Once your planning is complete, it's time to prepare the surfaces.
Preparing Your Surfaces
Proper surface preparation is key to ensuring that your cork insulation adheres well [\[11\]](https://www.rmax.com/blog/insulation-best-practices). The surface you attach the cork to needs to be clean, smooth, and free of any imperfections.
Start by thoroughly cleaning the area. Use mechanical methods and a suitable solvent like isopropyl alcohol or acetone to remove dust, debris, and loose particles. Repair any cracks or holes to create an even surface [\[8\]](https://www.mantoncork.com/how-to-install-a-cork-wall) [\[10\]](https://retail.usa.sika.com/es/node/305) [\[4\]](https://spfsolutions.ca/2025/01/31/cork-insulation-guide).
For porous surfaces such as drywall or concrete, clean them mechanically to expose a solid base [\[10\]](https://retail.usa.sika.com/es/node/305). For nonporous surfaces like metal or sealed concrete, lightly abrade the surface to improve adhesion, then clean it with a solvent-dampened cloth followed by a dry rag [\[10\]](https://retail.usa.sika.com/es/node/305). Be sure the cleaning agent has fully evaporated before continuing [\[10\]](https://retail.usa.sika.com/es/node/305).
After cleaning, vacuum the area to remove any remaining particles - this step is essential, as even tiny debris can interfere with adhesion [\[10\]](https://retail.usa.sika.com/es/node/305). If you're using water-based adhesives, make sure the surface can absorb moisture [\[10\]](https://retail.usa.sika.com/es/node/305).
For cork rolls or sheets, flatten them before installation by unrolling them and placing weights on top [\[8\]](https://www.mantoncork.com/how-to-install-a-cork-wall). This prevents curling and ensures better contact with the prepared surface. Finally, seal any gaps where air could pass between the inside and outside of your home [\[9\]](https://insulationinstitute.org/im-a-building-or-facility-professional/residential/installation-guidance-2/installation-preparation-2). A proper air barrier system should be in place before adding insulation [\[9\]](https://insulationinstitute.org/im-a-building-or-facility-professional/residential/installation-guidance-2/installation-preparation-2).
How to Install Cork Insulation: Step-by-Step Guide
With your surfaces prepped and materials ready, it's time to dive into installing cork insulation. While the specifics might vary depending on the area you're working on, the basics - cutting accurately, securing firmly, and sealing properly - stay consistent.
Installing Cork on Walls (Interior and Exterior)
Interior Walls: Start by ensuring the walls are smooth and free of imperfections. Apply adhesive evenly across the surface and position the cork tiles according to your layout. Use a level to keep the first row straight. For areas around outlets, carefully cut the tiles with a sharp utility knife. Press each tile firmly into place, trim any excess, and clean off any adhesive residue [\[12\]](https://twigandthistle.com/create-decorate/diy-crafts/diy-cork-wall-installation-guide-for-beginners).
Exterior Walls: The process differs slightly here, as the cork is applied over the wall sheathing. Align cork boards with horizontal seams, and for thicker applications, use shiplap joints starting from the bottom to help shed water [\[3\]](https://www.buildwithrise.com/stories/cork-insulation). Secure the boards by attaching 1" x 3" wood furring strips vertically over them, ensuring the screws penetrate the sheathing (if it's 5/8 inch thick) or the framing (for 1/2 inch sheathing) [\[3\]](https://www.buildwithrise.com/stories/cork-insulation). Check local building codes to ensure you meet the required R-value. Seal all edges to block air leaks, and finish by attaching siding or roofing to the furring strips or directly to the sheathing [\[3\]](https://www.buildwithrise.com/stories/cork-insulation)[\[4\]](https://spfsolutions.ca/2025/01/31/cork-insulation-guide).
Next, let's look at installing cork on floors.
Installing Cork on Floors
Plan for Expansion: Cork flooring needs to adjust to its environment. Let it acclimate for 72 hours to avoid gaps or buckling. Lay the planks parallel to the longest wall or the main light source [\[13\]](https://www.thisoldhouse.com/flooring/21016604/how-to-lay-a-cork-floor).
Underlayment: Install a cork or foam underlayment. This layer acts as a moisture barrier, reduces noise, and adds comfort - especially over concrete subfloors [\[13\]](https://www.thisoldhouse.com/flooring/21016604/how-to-lay-a-cork-floor)[\[15\]](https://woodwudy.com/pages/cork-installation). Trim door casings and jambs so the flooring can slide underneath easily. Maintain a 1/2-inch expansion gap around the room's edges and fixed fixtures. For floors longer than 25 feet, add extra expansion gaps to prevent issues [\[13\]](https://www.thisoldhouse.com/flooring/21016604/how-to-lay-a-cork-floor)[\[14\]](https://www.icorkfloor.com/how-to-install-cork-floor).
An expert from iCork Floor LLC emphasizes:
> "A floating floor is a floor that is not anchored to the subfloor – nor anchored underneath kitchen cabinets. It is a floor that requires expansion and contraction. It requires expansion gaps be ADHERED TO without fail – or your floor will surely fail!" [\[14\]](https://www.icorkfloor.com/how-to-install-cork-floor)
Installation Tips: Use leftover pieces longer than 10 inches to create a staggered pattern for added strength and a polished look [\[13\]](https://www.thisoldhouse.com/flooring/21016604/how-to-lay-a-cork-floor). Install cork floating floors last in kitchens, keeping them away from cabinetry. Avoid floating floors in bathrooms [\[14\]](https://www.icorkfloor.com/how-to-install-cork-floor). To protect the flooring from water damage, apply 1–2 coats of water-based polyurethane, such as Loba 2K Supra or Rigo Step [\[14\]](https://www.icorkfloor.com/how-to-install-cork-floor).
Now, let's move on to ceilings.
Installing Cork on Ceilings
Installing cork on ceilings can be tricky since gravity isn't on your side. Begin by ensuring the ceiling is smooth and free of paint. If it's painted, apply a latex primer first [\[16\]](https://www.icorkfloor.com/cork-ceiling-tiles-glue-down-cork-tiles). Use Wakol D3540 Cork Adhesive to attach the tiles, keeping in mind that water-based adhesives work only on plywood substrates - not on OSB or particle board [\[16\]](https://www.icorkfloor.com/cork-ceiling-tiles-glue-down-cork-tiles). Apply adhesive to the back of each tile and press them firmly onto the ceiling.
For Better Insulation: Opt for thicker tiles (6mm or 8mm) to improve both thermal and acoustic performance [\[16\]](https://www.icorkfloor.com/cork-ceiling-tiles-glue-down-cork-tiles). On concrete ceilings, drill anchor holes using a concrete bit and secure the tiles with anchors (like tapcons) alongside adhesive or mortar [\[16\]](https://www.icorkfloor.com/cork-ceiling-tiles-glue-down-cork-tiles). If you prefer a less permanent option, attach cork tiles to a plywood panel first, then mount the panel to the ceiling with screws. This makes future replacement easier [\[16\]](https://www.icorkfloor.com/cork-ceiling-tiles-glue-down-cork-tiles).
Final Steps: Seal all glue-down tiles to prevent shrinking or gaps. Typically, cork walls and ceilings require one coat of sealer, such as Loba 2K Supra AT, while floors need two coats [\[16\]](https://www.icorkfloor.com/cork-ceiling-tiles-glue-down-cork-tiles).
Cork is highly effective for thermal insulation (second only to felted wool) and acoustic insulation (just behind solid rubber), making it an excellent choice for controlling temperature and sound [\[16\]](https://www.icorkfloor.com/cork-ceiling-tiles-glue-down-cork-tiles).
Finishing and Maintaining Your Cork Insulation
Proper finishing and regular upkeep are key to keeping your cork insulation effective for years. While cork requires minimal maintenance, a few essential steps can help it perform at its best.
Sealing and Final Steps
Seal All Gaps and Edges: To ensure your cork insulation works efficiently, seal any gaps between boards or tiles. Even small leaks can reduce its insulating power. Use a high-quality sealant at the edges to block air leaks, and choose tape or caulk that's compatible with both the cork and the surface material [\[4\]](https://spfsolutions.ca/2025/01/31/cork-insulation-guide). For a smooth and secure finish, combine caulking with sealants, paying special attention to edges [\[1\]](https://www.buyinsulationonline.co.uk/blog/cork-insulation).
When applying the sealant, work carefully around each section, smoothing out excess with a spatula or your finger for a clean finish [\[1\]](https://www.buyinsulationonline.co.uk/blog/cork-insulation). This step is especially important for outdoor applications, where weatherproofing is critical.
Apply Protective Sealant: Adding a protective sealant boosts the cork's durability and resistance to moisture, particularly in humid environments [\[17\]](https://www.townandcountrycarpet.net/blog/articles/how-to-maintain-cork-flooring-in-maple-grove-mn-for-lasting-beauty). Once sealed, your cork insulation will be ready for long-term use with minimal upkeep.
Maintaining Cork Insulation Over Time
Once your cork insulation is sealed and finished, regular care will keep it performing well. Cork naturally resists cracking, discoloration, and fungal growth, making it a low-maintenance option [\[19\]](https://www.veramutltd.uk/post/corksol-spraycork-maintenance).
Routine Cleaning: Sweep or vacuum the surface regularly. For deeper cleaning, use a damp mop with a mild, pH-neutral cleaner [\[18\]](https://masterfulcarpetcleaning.com/cleaning-methods-cork-floors). Avoid harsh chemicals or soaking the cork, as excessive moisture can damage its natural structure.
Manage Indoor Humidity: Keep the humidity level in your home between 30% and 60%. This range prevents the cork from drying out or absorbing too much moisture [\[18\]](https://masterfulcarpetcleaning.com/cleaning-methods-cork-floors).
Quick Spill Cleanup: Clean up spills immediately to avoid moisture seeping into the cork. While cork is naturally water-resistant, standing water can still cause damage. For tough stains, try using a soft brush with diluted white vinegar or a baking soda paste [\[18\]](https://masterfulcarpetcleaning.com/cleaning-methods-cork-floors).
Protect High-Traffic Areas: To prevent dents and scratches, use furniture pads on cork flooring. Limit direct sunlight exposure to avoid fading [\[18\]](https://masterfulcarpetcleaning.com/cleaning-methods-cork-floors).
Regular Inspections and Repairs: Check your cork insulation periodically for signs of damage or gaps. Prompt repairs can save you time and money in the long run.
Re-coating for Longevity: If the surface starts to show wear, you can re-coat it without removing the insulation. This refreshes its appearance and extends its life [\[19\]](https://www.veramutltd.uk/post/corksol-spraycork-maintenance).
End-of-Life Options for Cork
One of cork's standout qualities is its eco-friendliness, even when its useful life ends. Cork is fully recyclable and biodegradable [\[23\]](https://www.bourrasse.com/en/recycling-cork), making it a sustainable insulation choice.
Recycling Programs: Look for companies that offer cork recycling services. For instance, EcoSupply recycles cork insulation and facade panels into granules, which can be used in light concrete, natural grass infill, or even as insulation again [\[21\]](https://www.ecosupplycenter.com/products/amorim-cork). You can send your used cork insulation back to EcoSupply for recycling [\[21\]](https://www.ecosupplycenter.com/products/amorim-cork).
Creative Repurposing: Before recycling, consider repurposing your cork. It can be transformed into products like coverings, sports surfaces, tennis balls, shoes, or even aircraft components [\[20\]](https://www.amorimtopseries.com/en/news/corks-sustainable-journey-to-its-end-of-life).
Composting: Pure cork, such as Amorim Cork Insulation, is 100% bio-based and biodegradable [\[21\]](https://www.ecosupplycenter.com/products/amorim-cork). It can be added to compost bins, where it will naturally break down. Just make sure the cork is free of adhesives or metal fasteners before composting [\[22\]](https://www.zerowaste.com/blog/zero-waste-materials-series-cork).
Preparing for Disposal: If recycling your cork, remove any metal components like staples or screws to make the material ready for processing [\[23\]](https://www.bourrasse.com/en/recycling-cork).
Cork insulation not only provides excellent thermal performance for your home but also supports environmental conservation throughout its lifecycle. From installation to disposal, it's a choice that aligns with sustainable living.
Conclusion: Building an Eco-Friendly Home with Cork Insulation
Cork insulation stands out as a smart, sustainable choice for anyone looking to create an eco-friendly home. It works effectively across walls, floors, and ceilings, offering impressive thermal and acoustic performance. With an R-value of 3.6–4.0 per inch [\[1\]](https://www.buyinsulationonline.co.uk/blog/cork-insulation), cork outperforms materials like fiberglass and cellulose, making it a top contender for energy-efficient insulation.
The benefits don't stop there. Cork insulation can cut wall heat loss by up to 90% [\[24\]](https://www.maninigroup.com/en/manini-world/blog/26-your-shield-against-the-cold-and-heat-discover-the-cork-insulation) and reduce energy bills by as much as 30% [\[4\]](https://spfsolutions.ca/2025/01/31/cork-insulation-guide). While the upfront cost may be higher, the long-term savings and performance make it a worthwhile investment. Plus, cork's durability - lasting up to 50 years [\[1\]](https://www.buyinsulationonline.co.uk/blog/cork-insulation) while maintaining its R-value [\[3\]](https://www.buildwithrise.com/stories/cork-insulation) - adds to its cost-effectiveness over time.
From an environmental standpoint, cork is hard to beat. Harvesting cork oak trees every nine years doesn't harm the trees [\[1\]](https://www.buyinsulationonline.co.uk/blog/cork-insulation)[\[2\]](https://www.corklink.com/index.php/7-reasons-why-cork-is-one-of-the-most-environmentally-friendly-products-on-the-planet), making it a renewable resource. These forests also act as carbon sinks, absorbing CO2 [\[3\]](https://www.buildwithrise.com/stories/cork-insulation), while protecting soil and supporting wildlife. And when cork reaches the end of its life, it's 100% biodegradable and recyclable [\[3\]](https://www.buildwithrise.com/stories/cork-insulation), ensuring a full lifecycle of sustainability.
On the practical side, cork offers more than just insulation. It's water-resistant, mold- and mildew-resistant [\[1\]](https://www.buyinsulationonline.co.uk/blog/cork-insulation), and provides excellent soundproofing. Free from added chemicals, cork doesn't off-gas and is both anti-fungal and anti-microbial [\[3\]](https://www.buildwithrise.com/stories/cork-insulation), creating a healthier indoor environment for your family.
Whether you're insulating walls, floors, or ceilings, cork delivers energy efficiency, durability, and eco-conscious benefits. It's an investment in a more comfortable home and a step toward a greener planet. With thoughtful planning and proper installation, cork insulation can transform your home into a space that's both energy-efficient and aligned with sustainable living practices.
FAQs
Is cork insulation more expensive than other materials, and is it a good investment for your home?
Cork insulation typically ranges from $2.50 to $6.50 per square foot, which is pricier than traditional options like fiberglass ($1.60 to $2.00 per square foot) or foam ($1.00 to $4.50 per square foot). Despite the higher initial cost, cork stands out for its impressive thermal performance, resistance to moisture, soundproofing abilities, and long-lasting durability.
One of cork's biggest advantages is its eco-friendly nature. As a renewable resource, it not only supports sustainable living but can also help reduce energy use over time - potentially lowering your utility bills. Many homeowners see cork insulation as an investment that pays off in the long run, offering both environmental benefits and energy efficiency.
What are the environmental benefits of using cork insulation in DIY projects?
Cork insulation stands out as an environmentally conscious option with plenty of perks for the planet. It comes from the bark of cork oak trees, which can regrow every nine years without causing any harm to the tree itself. This makes cork a renewable resource that promotes responsible forestry practices. Plus, cork oak trees naturally absorb large amounts of CO2, playing a key role in reducing greenhouse gases and addressing climate change.
What's more, producing cork insulation is a low-impact process. It involves minimal treatment and relies on natural binders instead of synthetic chemicals, making it a safe choice for DIY insulation projects. By opting for cork, you're not just enhancing your home's energy efficiency - you're also contributing to the preservation of ecosystems and lowering your environmental footprint.
What challenges might you face when installing cork insulation, and how can you address them for a successful DIY project?
Installing cork insulation in your home does come with a few hurdles, but they're nothing you can't handle with some preparation. The most common challenges include higher upfront costs compared to standard materials, the need for precise cutting, and managing moisture effectively.
To tackle these issues, start with accurate measurements and use sharp tools to cut the cork precisely, ensuring a snug fit. Before installation, make sure the surfaces are clean and completely dry to avoid moisture problems. Adding a [vapor barrier](/blog/vapor-barrier-installation-for-walls-step-by-step-guide) is a smart step to guard against dampness and mold. Also, keep the area well-ventilated during the process to help the insulation perform at its best and last longer. With a bit of planning and effort, cork insulation can become a long-lasting, environmentally friendly addition to your home.