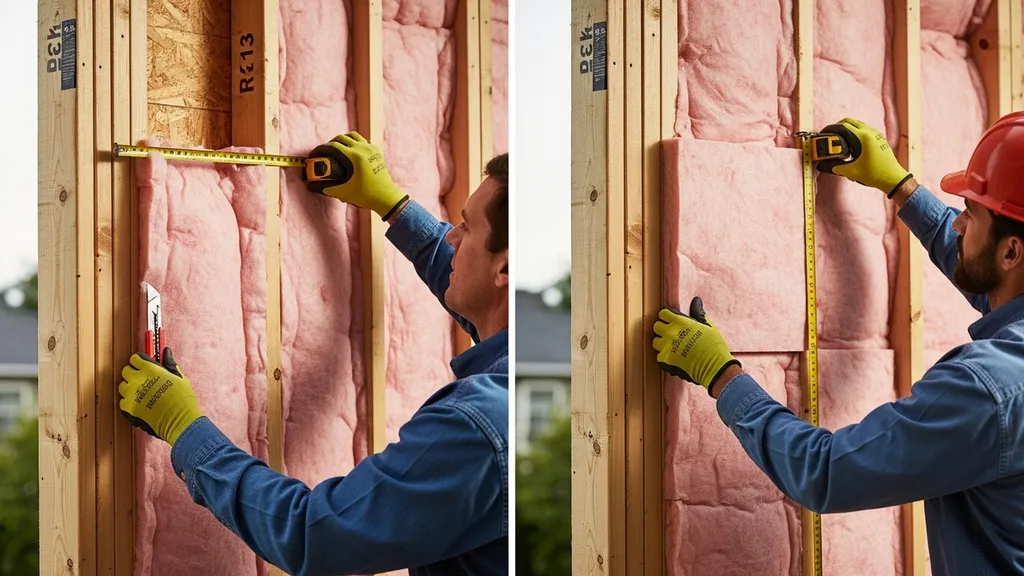
Compare R-13 and R-15 batt insulation, installation differences, cost, and which to choose for 2x4 walls, retrofits, and different climates.
R-13 vs R-15 Insulation: Which Do You Need?
Choosing between R-13 and R-15 insulation matters when your wall cavities are 3.5 inches deep (standard 2x4 framing). This article compares R-13 and R-15 batt insulation, shows how real-world installation affects thermal performance, and gives scenario-based recommendations for new builds, retrofits, tiny homes, and sheds. Read on to learn the practical trade-offs—cost, installation sensitivity, and when it makes sense to change materials or add continuous insulation—so you can decide the right upgrade for your project.
TL;DR:
- R-13 fits a 3.5" 2x4 cavity as the standard batt; R-15 is higher density or foil-backed to deliver ~R-15 in that same depth — expect ~10–20% better cavity R with R-15.
- Compression, gaps, and studs reduce effective performance; whole-wall R is often 10–25% lower than cavity R, so air sealing and continuous insulation matter as much as bumping R by two points.
- Pick R-13 for budget retrofits or mild climates; choose R-15 for new 2x4 walls in cooler zones or when you want extra margin without thicker walls.
| Product | Typical 2x4 cavity R | Common forms | Installation sensitivity | Best fit |
|---|---|---|---|---|
| R-13 | R‑13 (standard, 3.5") | Fiberglass batts, mineral wool, unfaced or kraft-faced | Low if cut to size; loses R when compressed | Budget new builds, mild climates, retrofits |
| R-15 | R‑15 (3.5" high-density or foil-backed) | High-density fiberglass/mineral wool, foil-faced batts | Medium — stiffer to fit; foil needs careful sealing | Cooler climates, energy-focused 2x4 walls, code margin |
Quick Answer (TL;DR) — R-13 vs R-15 Insulation: Which Do You Need?
One-paragraph Takeaway
For standard 2x4 framed walls, R-13 is the common, low-cost batt that fills the cavity and performs as rated when installed uncompressed and with minimal gaps. R-15 is produced either by increasing batt density or adding a foil/kraft facing and compressed manufacture; in practice it gives about 10–20% more thermal resistance in the same cavity. That extra R helps in mixed or cold climate zones and provides a buffer against installation losses, but it costs more and can be harder to fit around wiring and irregular cavities. For code guidance and recommended R-values by climate, see the Energy Star recommended home insulation R‑values.
|---|---|---|---|---|
R-13 Insulation: Overview and When to Choose It (R-13 vs R-15 Insulation: Which Do You Need?)
What R-13 Commonly is (materials and Typical Forms)
R-13 refers to a rated thermal resistance of about 13 for a 3.5-inch cavity — the standard depth of a 2x4 wall. Typical products labeled R-13 are:
- Fiberglass batts (loose fibers held in a binder) available unfaced, kraft-faced, or foil-faced.
- Mineral wool (Rockwool) batts with similar dimensions but higher density and better fire resistance.
- Dense-pack cellulose or blown-in cellulose can be used to reach roughly similar R per cavity when installed properly.
R-13 batts are widely stocked at big-box stores and lumberyards. They are easy to cut, and unfaced batts are common for retrofit fills when you plan to add an air barrier and vapor control separately.
Strengths of R-13
- Lowest material cost among batt options for 2x4 walls.
- Readily available in multiple facings and materials.
- Easier to compress slightly for retrofit insertion where cavities aren’t perfectly open.
- Good for interior partitions, sheds, garages, and mild climate exterior walls where wall depth limits upgrades.
Mentioning insulation basics helps; refer to our guide on understanding R-value basics for how ratings are measured and why cavity R differs from whole-wall R.
Weaknesses of R-13
- Lower R per inch for some fiberglass batts versus higher-density batts or closed-cell spray foam.
- Compression (squeezing a batt to fit) reduces effective R; a compressed R-13 batt can perform closer to R-10 or lower.
- Less margin against code minima in colder climate zones; if you’re in a zone that calls for higher wall R, R-13 leaves less room for air leakage or thermal bridging.
Best For: Use Cases and Examples
- Budget-conscious retrofit where cavity depth is fixed and adding external insulation isn’t feasible.
- Small-scale DIY structures like workshops, sheds, and standard tiny homes when climate is mild.
- Interior partition walls where fire and sound control are the priority rather than exterior thermal performance.
For readers choosing between mineral wool and fiberglass, see our rockwool vs fiberglass comparison to weigh fire resistance, moisture tolerance, and comfort during installation.
R-15 Insulation: Overview and When to Choose It (R-13 vs R-15 Insulation: Which Do You Need?)
What Makes R-15 Different (high-density Batts, Foil-faced Batts)
R-15 achieves higher labeled R in the same 3.5" cavity through two main methods:
- Increased batt density: manufacturers compress fibers so the batt has more mass per inch, improving thermal resistance.
- Foil- or kraft-faced manufacturing: some R-15 products are produced by compressing a slightly thicker roll and adding reflective foil facings that can improve performance if air gaps and reflective cavities are present.
Both approaches deliver a rated R-15 out of a 2x4 cavity without increasing wall thickness.
Strengths of R-15
- Higher rated thermal resistance for the same cavity depth — useful where wall thickness cannot be changed.
- Foil-faced varieties can double as a vapor retarder and sometimes reduce convective losses when sealed properly.
- Provides a buffer for installation mistakes: the extra R can offset small gaps or slight compression better than R-13.
Weaknesses of R-15
- Higher cost per batt compared with R-13, typically because of greater material use or facing.
- Denser batts can be stiffer and harder to fit around wiring, boxes, odd studs, or blocking; overcompressing negates the benefit.
- Foil facing requires careful sealing at seams and around penetrations to get vapor-control benefits; otherwise facing adds weight but little practical gain.
Best For: Use Cases and Examples
- New 2x4 framed homes in mixed or cold climate zones where code or performance goals push for more R without wider studs.
- Energy-conscious DIY builds that want improved performance without moving to 2x6 walls or exterior continuous insulation.
- Retrofits where adding exterior insulation is impractical and the owner wants the best cavity R available for the fixed depth.
Use the term "insulation for 2x4 walls" when comparing the two — R-15 is the higher-performing option for that common wall depth if you can install it correctly.
Performance, Installation, and Real-world Differences for R-13 vs R-15 (youtube Embed Here)
Before the video, readers will learn how compression, studs, and air leaks affect real-world performance.
This video compares the options to help you decide:
Thermal Performance vs Rated R-value (thermal Bridging and Whole-wall R)
Rated cavity R is a laboratory number. In a framed wall, studs, plates, and fasteners create thermal bridges that lower whole-wall R. A simple example:
- A 2x4 wall with R-13 batts may show a whole-wall R that is 10–20% lower once studs (usually 15–25% of the wall area) are accounted for.
- Moving to R-15 improves cavity R, but whole-wall percentage improvements are smaller because studs still conduct heat.
For calculations and guidance on climate-based minimums, industry resources such as the Department of Energy explain recommended insulation R-values and how to interpret them.
Installation Pitfalls That Erode R (compression, Gaps, Air Leaks)
Installation matters more than a small R jump. Common mistakes:
- Compression: Squeezing an R-13 batt into a 3.5" cavity reduces the trapped air and lowers R. The same is true if you try to force an R-15 into a cavity not sized for high-density batts.
- Gaps: Voids around electrical boxes, plumbing chases, and irregular framing cut into effective thermal resistance.
- Air leaks: Batt insulation does not stop air movement. Without a continuous air barrier, convective loops can bypass the insulation and cut performance dramatically.
See our guide on common air leakage points to identify places where batts are most often undermined.
Moisture, Vapor Control, and Facing Types
Facing choice affects moisture management:
- Unfaced batts leave vapor control to other layers (recommended in many mixed climates).
- Kraft-faced batts act as a vapor retarder when installed with the kraft toward the warm-in-winter side; however, improper placement can trap moisture.
- Foil-faced batts reflect radiant heat when installed with an air gap and can provide a vapor barrier when sealed.
For lower cavities like crawl spaces, moisture strategy matters more. Consult our piece on fix damp crawl space for related vapor-control practices. For roof assemblies with similar trade-offs, see cabin roof insulation methods. To better understand whole-wall performance and why cavity R isn't the whole story, read understand whole-wall performance.
Alternatives and Upgrades When R-13 or R-15 Won't Cut It (R-13 vs R-15 Insulation: Which Do You Need?)
If wall depth, climate, or energy goals demand more than R-15, these options outperform batts for whole-wall performance.
Continuous Exterior Insulation (foam or Mineral Wool Board)
Adding continuous insulation outside the sheathing—polyiso, XPS, EPS, or rigid mineral wool—reduces thermal bridging by covering studs. Benefits:
- Raises whole-wall R far more effectively than increasing cavity R alone.
- Allows thinner framing to meet higher effective R targets.
- Polyiso offers high R per inch; mineral wool provides fire and moisture resistance with lower embodied issues.
See our installation steps in exterior insulation on walls and the complete exterior foam guide for material pros and cons.
Spray Foam and Dense-pack Cellulose Options
- Closed-cell spray foam delivers high R per inch plus air sealing; best for tight budgets that can cover the install cost. It also adds some moisture control but has higher embodied carbon and needs professional equipment for large jobs.
- Dense-pack cellulose or mineral-wool dense pack fills cavities with fewer voids and is a lower-toxicity alternative to spray foam. It performs well in retrofit dense-pack applications where walls are blown from the exterior or through netting.
For detailed trade-offs on cavity-fill alternatives see our spray foam vs cellulose guide and "safer alternatives" coverage in safer spray foam alternatives.
Hybrid Approaches and Cost-effective Upgrades
A common DIY-friendly upgrade: install R-13 or R-15 in the cavity and add 1"–2" of exterior polyiso to cut thermal bridging. For roof-to-wall continuity, techniques from install exterior foam roof translate to wall edge details. Hybrids let you balance embodied carbon, cost, and whole-wall performance.
Which Should You Choose? Scenario-based Recommendations (R-13 vs R-15 Insulation: Which Do You Need?)
New 2x4 Framed Home by Climate Zone (mild, Mixed, Cold)
- Mild climates: R-13 is usually acceptable when paired with good air sealing and a continuous air barrier. Focus on sealing rather than squeezing more cavity R.
- Mixed climates: Consider R-15 plus careful air-sealing. If budget allows, prioritize a small layer of exterior insulation for whole-wall gains.
- Cold climates: Prefer R-15 or move to 2x6 framing with higher cavity R, or add continuous exterior insulation. Code may require higher wall R depending on your zone.
Refer to our attic insulation sizing to plan insulation holistically—walls are just one part of the envelope.
Retrofit of Existing 2x4 Walls
- If removing siding or re-sheathing is not desired, R-13 may be the realistic choice. Dense-pack cellulose blown into closed cavities is a strong retrofit approach when performed correctly.
- If you can open walls or add exterior foam, choose continuous insulation or upgrade to higher-performing cavity fill.
Budget DIY Builds, Sheds, and Tiny Homes
- Use R-13 for exterior walls in mild climates and for sheds or garages. For tiny homes with limited wall area, consider R-15 if you want slightly better performance without thicker walls. For shed-specific guidance, see best insulation for sheds and our how to build a shed guide.
When to Increase Wall Thickness or Use Continuous Exterior Insulation
- If your energy goal is net-zero, or your climate requires wall R beyond what a 2x4 can reasonably deliver, either adopt 2x6 framing or add continuous exterior insulation. Continuous insulation typically gives bigger real-world gains than small increases in cavity R.
Cost, Availability, and DIY Installation Tips for R-13 vs R-15 (R-13 vs R-15 Insulation: Which Do You Need?)
Price Factors and How to Shop (density, Facing, Brand)
Price drivers:
- Material density: R-15 high-density batts use more glass or rockwool and cost more.
- Facing: Kraft or foil adds cost, and foil-faced products are often specialty items.
- Shipping and local supply: Bulk availability at local suppliers reduces cost; specialty batts may require ordering.
For advice on sourcing materials locally, see sourcing local materials.
Tools and Steps for a Clean DIY Batt Install
Checklist for batt installs:
- Measure cavity depth and buy the correct thickness; buy 5–10% extra for cuts.
- Cut batts to fit around wiring and boxes; avoid compressing the product.
- Fill behind wiring chases and around windows with small pieces; pack loosely so the batt regains shape.
- Install an air barrier (sheathing + taped seams or interior air barrier) and handle vapor control per climate zone.
- Seal around electrical boxes with gaskets or foam to reduce air leakage.
Practical tip: If a batt feels too stiff to insert without compressing, get a product sized for that cavity or switch to an unfaced batt plus separate vapor/air control layers.
When to Call a Pro
- Large spray-foam projects should be done by licensed contractors.
- If your home has moisture issues, or you plan to change vapor control strategy, consult a building-science-aware pro.
- For complicated continuous insulation detailing (flashing, window returns), professional help reduces rework risk.
The Bottom Line
R-13 works for many standard 2x4 projects and is the budget-friendly choice; R-15 gives measurable cavity gains and is a better fit for colder zones or energy-focused builds. For most DIYers, choose R-13 for mild climates or retrofits and R-15 for new 2x4 construction in mixed or cold climates — and always prioritize proper installation and air sealing when comparing r13 vs r15 insulation.
Frequently Asked Questions
Can you compress R-15 into a 2x4 cavity?
Physically squeezing an R-15 batt into a shallower cavity is possible, but compressing decreases the trapped air and lowers the effective R-value. If a batt must be forced into the cavity, it often performs closer to a lower-rated product. The right approach is to choose batts sized for the cavity or use an alternate strategy like unfaced batts plus exterior insulation.
Is R-15 worth the extra cost?
Whether R-15 is worth the cost depends on climate and goals. In mixed or cold climates, the marginal gain helps meet code targets and reduces heating loads. For mild climates or non-conditioned spaces, R-13 plus good air sealing often gives a better cost-to-performance ratio. Consider whole-wall performance and air sealing when making the decision.
Does facing (foil/kraft) change the R-value?
Facing does not change the labeled cavity R in standardized tests, but foil facing can provide a radiant-reflective benefit when installed with an air gap and can act as a vapor retarder when sealed. Kraft facing is a thin paper vapor retarder and affects moisture control. Install facing appropriately for your climate or choose unfaced batts and manage vapor control with separate layers.
Will switching to R-15 reduce energy bills noticeably?
Switching from R-13 to R-15 in the same wall depth reduces heat loss some, but savings depend on climate, whole-wall thermal bridging, and air leakage. In colder climates the savings are larger; in mild climates they may be small. Often, sealing air leaks and adding continuous exterior insulation yields larger bill reductions than a two-point bump in cavity R.
How do building codes view R-13 vs R-15 for 2x4 walls?
Code requirements vary by jurisdiction and climate zone. Many residential codes reference the IECC or local amendments and list minimum wall R-values by zone. Check your local code office or consult national guidance such as the Energy Star recommended home insulation R‑values to determine whether R-13 is sufficient or if R-15 or additional continuous insulation is required.