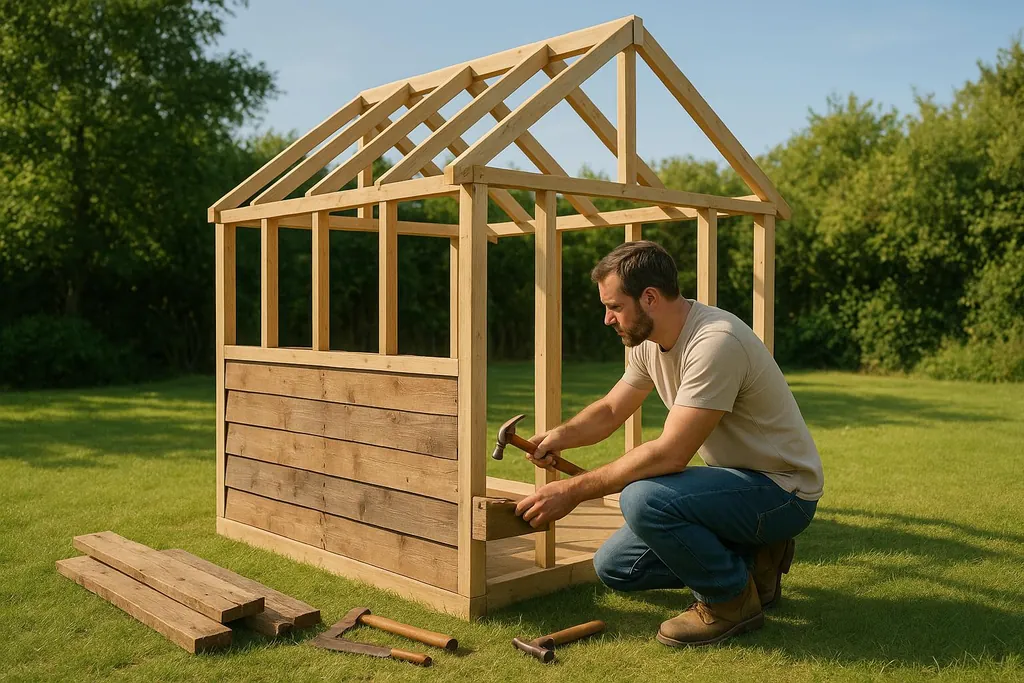
Learn how to build your own shed with eco-friendly materials while saving money and customizing it to fit your needs.
How to Build a Shed
Building a shed yourself can save you money, give you complete control over its design, and even allow you to use eco-friendly materials. This guide covers everything you need to know - from tools and materials to site preparation and construction steps. Here's the quick breakdown:
If the shed will be a workshop, studio, or conditioned storage space, estimate material quantities first with the Shed Insulation Calculator.
Key Takeaways:
- Save Money: DIY avoids labor costs and lets you shop smart for materials.
- Customize: Design your shed to fit your specific needs - add shelves, windows, or even a loft.
- Eco-Friendly Options: Use reclaimed wood, recycled steel, or sustainable materials.
- Step-by-Step Process: Start with planning, site prep, permits, and then build the floor, walls, and roof.
- Maintenance Matters: Regular upkeep ensures your shed lasts for years.
Tools You’ll Need:
- Measuring tools (tape measure, level, square)
- Cutting tools (circular saw, hand saw)
- Fastening tools (hammer, nails, or impact driver with screws)
- Safety gear (goggles, gloves, ear protection)
Materials to Consider:
- Reclaimed wood for character and sustainability
- Recycled steel for durability
- Pressure-treated lumber for pest resistance
- Insulation options like sheep’s wool or rigid foam
Construction Highlights:
- Prepare the site: Pick a dry, elevated location and ensure proper drainage.
- Build the foundation: Use gravel, concrete blocks, or compacted stone.
- Frame and assemble: Construct the floor, walls, and roof step by step.
- Add finishing touches: Weatherproof with stains or sealants and organize the interior with shelves or pegboards.
DIY shed building combines practicality with creativity, giving you a functional space tailored to your needs. Plus, making smart material choices can reduce waste and lower your project’s impact.
99 - DIY Shed - Complete Instructions - Best Tutorial There Is!
Tools and Materials You'll Need
Starting your shed-building project with the right tools and materials can save you time, effort, and frustration. Here’s a breakdown of what you’ll need to get started.
Basic Tools for Shed Construction
To build a shed effectively, you’ll need tools for measuring, cutting, fastening, and ensuring everything is level and aligned. Here’s what to have on hand:
- Measuring and Layout Tools: A tape measure, pencil, level, and square are must-haves for accurate measurements and alignment.
- Cutting Tools: A hand saw works for smaller tasks, but for thicker or more frequent cuts, a circular or miter saw is far more efficient. Many lumber suppliers also offer pre-cut pieces if you want to save time.
- Fastening Tools: You can choose between a hammer and nails or an impact driver with screws. While hammers and nails are budget-friendly, screws driven by an impact driver provide a stronger hold.
- Drill: Essential for pre-drilling holes and driving screws, ensuring your frame and walls are securely fastened.
Don’t forget safety gear - gloves, safety goggles, and hearing protection are non-negotiable when handling power tools. These items keep you safe and make working more comfortable.
> "Having the right tools can make shed construction smoother, faster, and more precise." - Eagle Ridge Barn Builders
If you find yourself missing a tool, you can purchase or rent it as needed. Once your tools are ready, consider the materials you’ll use - especially if you’re looking to make eco-conscious choices.
Eco-Friendly Material Options
Building a shed with sustainable materials doesn’t mean sacrificing durability or quality. In fact, many environmentally friendly options are just as reliable as traditional materials, with the added benefit of reducing waste and your carbon footprint.
- Reclaimed Wood: This wood, salvaged from old barns or buildings, offers a rustic look and proven stability. Its seasoning over decades makes it less prone to warping. Check salvage yards, specialty dealers, or online marketplaces for reclaimed lumber.
- Recycled Steel: Perfect for framing or roofing, recycled steel is highly durable and resistant to pests, rot, and fire. Plus, it’s endlessly recyclable without losing strength.
- Recycled Concrete Blocks or Composite Lumber: These materials are excellent for foundations and structural elements. Composite lumber, made from recycled plastics and wood fibers, resists moisture, insects, and decay with minimal maintenance.
- Pressure-Treated Lumber: Sourced from sustainably managed forests, this wood is treated to resist rot and pests. Look for Forest Stewardship Council (FSC) certification to ensure responsible sourcing.
- Natural Materials: Options like cob (a mix of clay, sand, and straw) or straw bales offer excellent insulation and are ideal for dry climates. These materials are renewable and provide unique thermal properties.
- Bamboo Plywood and Lumber: Bamboo grows quickly and offers strength comparable to hardwoods. Availability and pricing can vary depending on your location.
Planning and Site Preparation
Getting the planning and groundwork right is crucial for a successful shed-building project. Choosing the best location, preparing the site properly, and handling permits early on can save you from unnecessary stress and expenses down the line.
Picking the Right Location
Where you place your shed matters - a lot. The spot you choose affects how long it lasts, how much upkeep it needs, and how useful it will be. Look for a location with good drainage, plenty of sunlight, and protection from excessive water accumulation. An elevated area works best to avoid issues with standing water and material wear.
Make sure the shed is easy to access and complies with local zoning setback rules. If you’re thinking about adding utilities like electricity or plumbing later, factor that into your decision now. Planning for these details early can help you avoid costly changes in the future.
Wind patterns are another important consideration. If you live in an area prone to high winds or storms, align the shed so its longest wall faces the prevailing wind. This positioning can reduce wind pressure and boost stability.
Once you’ve settled on the perfect spot, the next step is creating a solid foundation.
Preparing the Ground
A sturdy foundation is the backbone of a durable shed. Start by clearing the area of any vegetation, rocks, or debris. Mark the shed’s footprint using spray paint or stakes and string, leaving extra space around the perimeter to make working easier.
The depth of excavation depends on the type of foundation you’re using and your local frost depth. After clearing and digging, create a level base with suitable fill materials. Compacted gravel is a popular choice because it offers excellent drainage and stability. Angular crushed stone works particularly well, as it compacts tightly for a firm base.
For those looking to save money or reduce waste, recycled materials can be a great option. Recycled concrete blocks, for example, can serve as foundation piers and are often more affordable than new materials. Permeable gravel foundations are another eco-friendly choice, as they allow rainwater to filter into the ground naturally instead of causing runoff.
Don’t forget about moisture control. Placing a vapor barrier - such as heavy-duty plastic sheeting or a recycled rubber membrane - between the foundation and the shed floor can help protect the structure from long-term moisture damage.
Finally, ensure the ground around the foundation slopes away from the shed. Proper grading helps direct water away, preventing pooling near the structure.
Before moving forward, double-check that you’ve met all local regulations and obtained the necessary permits.
Permits and Zoning Rules
Before you start digging, it’s essential to tackle permits and zoning requirements. Check with your local authorities to understand the rules for shed size, timelines, and fees.
Many areas have setback and height restrictions that dictate how far your shed must be from property lines, other buildings, or even how tall it can be. Confirm these details early to make sure your shed design complies with local codes.
Begin the permit application process well in advance of your planned start date. You’ll typically need to submit a site plan showing where the shed will sit in relation to your property lines and existing structures. Basic construction drawings, including dimensions and materials, are also usually required.
If you’re part of a homeowners association, review their guidelines as well. They may have specific rules about materials, colors, or design aesthetics that could affect your project timeline.
Lastly, don’t forget to call 811 before you dig. This ensures all underground utilities are marked, helping you avoid costly and dangerous mistakes.
Step-by-Step Construction Process
Here's how to construct a sturdy and energy-efficient shed, step by step.
Building the Frame, Walls, Roof, and Floor
Start by assembling the floor frame, which serves as the foundation of your shed. Use 2×8 or 2×10 lumber for the floor joists, spacing them 16 inches apart. Secure rim joists around the perimeter with 3-inch deck screws or galvanized nails. To ensure everything is square, measure diagonally across the frame - both diagonal measurements should match.
Once the frame is square and level, attach three-quarter-inch plywood or OSB sheathing. Leave a 1/8-inch gap between sheets to allow for expansion, and secure the sheathing with 2-inch screws spaced every 8 inches along the edges and 12 inches in the middle.
For the walls, assemble each one flat on the ground before raising it into place. Standard wall framing uses 2×4 studs spaced 16 inches apart, but 2×6 studs can provide extra room for insulation. Cut the top and bottom plates to the wall's length and mark stud locations on both plates simultaneously for accuracy.
When framing openings for doors and windows, use king studs on each side and add jack studs to support the header. For a 4-foot opening, a double 2×6 header is sufficient, but larger openings may require engineered lumber. Raise each wall one at a time, using temporary braces to keep them plumb, and ensure everything is square and vertically aligned.
For the roof, a gable-style design is the easiest for DIY builders. Cut rafters using a speed square to maintain consistent angles; a 4/12 or 6/12 pitch works well for most sheds. Create a template from one rafter and use it to trace the others for uniformity.
Start by installing the ridge board, supporting it temporarily with posts. Attach rafters in pairs, working from the ends toward the center. Secure each rafter to the top plate with hurricane ties for added stability in high-wind areas.
Add roof sheathing - 1/2-inch plywood or OSB - perpendicular to the rafters, leaving small gaps for expansion. Install a drip edge along the eaves before applying your roofing material. Metal roofing offers durability and reflects heat, while asphalt shingles are more affordable upfront but may require replacement sooner.
Once the main structure is complete, you can incorporate reclaimed materials and focus on energy efficiency.
Working with Recycled and Reclaimed Materials
Using reclaimed materials not only cuts costs but also supports sustainable building practices. Reclaimed lumber, often sourced from old-growth trees, tends to have tighter grain patterns and higher quality.
You can find reclaimed materials at architectural salvage yards. Bring a tape measure and calculator to ensure the pieces will fit your project. For roofing, consider reclaimed metal sheets from barn demolitions or commercial renovations. Inspect them carefully for holes, rust, or damage around fastener points.
Old pallets can provide free or inexpensive lumber, but their quality varies. Look for heat-treated pallets marked "HT", which are safe to use. Avoid pallets marked "MB" (methyl bromide), as they’ve been chemically treated. Reclaimed pallet wood works well for interior framing or non-structural components.
Reclaimed materials often come in nonstandard dimensions, so have a reciprocating saw handy for trimming. Use a metal detector to locate hidden nails or screws that could damage your tools.
You can also save on insulation by sourcing recycled fiberglass batts from construction sites. As long as the batts are dry and uncontaminated, they perform just as well as new materials. Once you’ve incorporated these materials, move on to insulation and ventilation to improve your shed’s energy efficiency.
Adding Insulation and Ventilation
Proper insulation and ventilation are key to making your shed both durable and energy-efficient. Choose insulation that offers good thermal performance while meeting your environmental goals.
Sheep’s wool insulation is a great option. It regulates humidity naturally and is installed like traditional batts - fitting snugly between studs without compression. For 2×4 walls, R-13 insulation is appropriate, while 2×6 walls can accommodate R-19 or R-21 insulation.
Rigid foam insulation is another option, offering high thermal performance in a thin profile. Polyiso boards have the highest R-value per inch, while XPS foam resists moisture well. Attach rigid foam with construction adhesive and seal the joints with spray foam or tape.
Ventilation is just as important, as it prevents moisture buildup that can lead to mold or structural issues. A combination of ridge vents and soffit vents creates natural airflow. Ensure the soffit ventilation area matches the square footage of the ridge vent.
If your shed doesn’t have soffits, gable vents are an effective alternative. Install them near the peak of each gable end, and use insect screening to keep pests out. For sheds used as heated workshops, exhaust fans help remove moisture and fumes. A standard bathroom exhaust fan is sufficient for most small spaces - wire it to a timer switch for convenience.
Finally, install a vapor barrier on the warm side of the insulation (typically the interior wall in U.S. climates). Use 6-mil plastic sheeting or kraft-faced insulation, sealing all seams with construction tape.
> "Having the right tools can make shed construction smoother, faster, and more precise." - Eagle Ridge Barn Builders
Eco-Friendly Material Comparison
Choosing the right material for your shed is about more than just aesthetics - your decision directly affects its durability, maintenance needs, and environmental impact. This comparison breaks down the pros and cons of popular eco-friendly materials to help you make an informed choice.
Wood remains a favorite for many shed builders, especially when sourced responsibly. Cedar and redwood, for instance, naturally resist insects and decay without needing heavy chemical treatments. Pressure-treated pine is a budget-friendly option, though its chemical preservation raises environmental concerns. For a sustainable touch, reclaimed wood gives old materials a second life and adds character to your structure.
Metal sheds, crafted from galvanized steel or aluminum, are built to withstand tough weather. Steel offers excellent durability when coated properly, while aluminum resists rust but is more prone to denting. However, metal’s tendency to conduct heat and cold means insulation is key if you want a comfortable interior.
Resin and composite materials, made by blending recycled plastics with wood fibers, are gaining traction for their resistance to moisture, pests, and UV damage - all without requiring chemical treatments. While the initial cost can be higher, these materials demand very little upkeep over time, making them a low-maintenance option.
Natural alternatives like bamboo, hemp boards, and straw bales are ideal for those seeking materials with minimal environmental impact. Bamboo’s fast growth and renewability make it a standout choice, while hemp boards provide excellent insulation. Keep in mind, though, that these materials may require specialized installation techniques, which could add to labor costs.
Here’s a quick look at how these materials stack up:
| Material Type | Durability | Maintenance | Environmental Impact | Cost | Insulation Potential |
|---|---|---|---|---|---|
| Cedar Wood | Good | Low | Moderate | Moderate | Basic |
| Pressure-Treated Pine | Fair | Medium | Higher (due to chemicals) | Lower | Basic |
| Reclaimed Wood | High | Low to Medium | Very Low (sustainable reuse) | Variable | Basic |
| Galvanized Steel | High | Low | Moderate | Moderate | Minimal |
| Aluminum | Moderate | Very Low | Moderate | Moderately High | Minimal |
| Resin/Composite | Moderate | Very Low | Low to Moderate | Moderate to High | Moderate |
| Bamboo Panels | Good | Medium | Very Low | Moderate | Slightly Improved |
| Hemp Boards | High | Low | Very Low | Higher | Excellent |
While the chart provides a general overview, don’t forget to factor in additional costs like fasteners, sealers, specialized tools, or even a concrete foundation - especially for metal sheds. These expenses can add up quickly.
Your local climate and skill level should also guide your decision. For example, rot-resistant woods are ideal for humid regions, while temperature-tolerant materials suit desert environments. Coastal areas, on the other hand, demand materials that can withstand salt exposure. If you’re a DIY enthusiast, wood may be the easiest to work with, whereas metal and natural materials often require more precision and expertise.
Finishing Touches and Maintenance
Your shed is almost ready to serve its purpose, but the final steps are where you ensure it stands the test of time. By focusing on weatherproofing, regular upkeep, and smart interior organization, you’ll protect your investment and create a functional, durable space.
Weatherproofing and Final Finishes
Shielding your shed from the elements starts with selecting the right sealers and finishes. For wood sheds, oil-based stains like tung oil or linseed oil are excellent choices. They penetrate deep into the wood, offering moisture resistance while enhancing the wood’s natural beauty.
If you prefer painted finishes, consider natural options like milk paint or clay-based paint. These allow the wood to breathe and reduce harmful volatile organic compounds, though they may cost a bit more. Another great option is beeswax-based sealers, which provide water-repellent protection for wood in areas with moderate moisture exposure. Apply these with a natural bristle brush for the best results.
For metal sheds, start with a rust-inhibiting primer - zinc-rich formulas work particularly well. Follow this with acrylic latex paint for metal, which adds another layer of protection and extends the shed’s lifespan.
Don’t forget about ventilation. Proper airflow is crucial to prevent moisture buildup, which can lead to mold and rot. An exhaust fan can help reduce condensation, especially in humid climates.
Once the finishes are applied, it’s time to focus on keeping your shed in great shape with material-specific maintenance.
Maintenance by Material Type
Every shed material has its own maintenance needs. A little care tailored to the specific material can go a long way in keeping your shed in top condition.
For wood sheds, check regularly for insect damage, rot, or loose fasteners, especially near the foundation where moisture issues often begin. Reapply stains or sealants every few years - or sooner if you notice wear. A yearly inspection and touch-up routine will help extend the shed’s life significantly.
Metal sheds require less frequent attention, but rust can be a concern. Inspect fasteners, seams, and any areas where paint may have chipped. Clean the exterior with a mild detergent and promptly repaint any damaged spots to stop rust from spreading. Also, watch for galvanic corrosion where different metals come into contact.
Composite and resin sheds are low-maintenance but still benefit from occasional cleaning. Use a pressure washer on a low setting to remove dirt, algae, and mildew.
For sheds made from natural materials like bamboo, more frequent care may be needed. Inspect joints and connections, as bamboo tends to shift more than traditional lumber. Treat it with natural preservatives like neem oil or borax solutions to guard against moisture and insects. Though this requires extra effort, the aesthetic appeal and environmental benefits often make it worthwhile.
A seasonal maintenance schedule can simplify everything: inspect for damage after winter, clean in summer, prepare for harsh weather in fall, and check for structural integrity during winter.
With the exterior and structure in check, it’s time to turn your attention to the interior.
Interior Storage Solutions
A well-organized shed is not only more functional but also easier to maintain. Start by incorporating eco-friendly storage solutions that maximize space.
Reclaimed wood shelving is a durable and stylish option. It adds character to your shed while making use of upcycled materials. Pallets can also be repurposed into custom storage solutions.
For a more adaptable setup, modular systems made from recycled plastic lumber are a smart choice. While these may cost more upfront, they’re resistant to moisture and pests, making them a durable long-term option.
Metal pegboard systems, crafted from recycled steel, are perfect for keeping tools visible and within reach. Mount these panels with a small gap behind them to allow airflow and prevent moisture buildup.
For seasonal or lightweight items, ceiling-mounted storage is a great solution. Overhead racks keep bins and boxes off the floor, freeing up valuable space. Just make sure they’re positioned high enough to maintain clear headroom.
Smaller items like screws, nails, and hardware can be neatly organized in repurposed containers such as old wooden crates or metal toolboxes. Label these clearly with weatherproof markers or laminated tags to make finding what you need quick and easy.
Good lighting is essential for safety and usability. Solar-powered LED lights are an energy-efficient option that eliminates the need for complex wiring. Battery-operated motion-sensor lights are another convenient choice, providing illumination exactly when you need it.
Lastly, plan your shed’s layout to ensure clear pathways. A spacious main aisle and secondary paths between storage areas make it easy to access items while keeping the space safe and organized.
Conclusion
Building your own shed not only saves you money but also helps reduce your environmental impact and sharpens your skills. It's a chance to create a sturdy, functional structure that will serve you well for years to come.
The environmental advantages are compelling. In OECD countries, construction activities account for 25-40% of total energy use and contribute 30-40% of global greenhouse gas emissions . By opting for eco-friendly materials like recycled steel, reclaimed wood, or carbon-negative options such as LP SmartSide siding, you’re taking a meaningful step toward lowering your carbon footprint while crafting something practical.
While green building might cost around 2% more initially, it delivers significant savings - up to 14%-19% - on lifetime operating costs . Add in the money saved by doing the work yourself and the durability of high-quality materials, and your shed becomes a smart, long-term investment.
This shift toward sustainable construction reflects a larger movement. The rising demand for eco-conscious storage solutions mirrors growing awareness of environmental responsibility . Whether you're drawn to the idea of minimalist living through the shed lifestyle trend or simply need dependable storage, you're contributing to a community that values resourceful and budget-friendly alternatives to traditional builds .
To make the most of your project, choose durable, sustainable materials and commit to regular maintenance. Plan thoroughly, ensure a strong foundation, and focus on critical details like weatherproofing and ventilation. With careful preparation, your DIY shed will stand the test of time.
FAQs
What are the benefits of using eco-friendly materials to build a shed compared to traditional materials?
Using eco-friendly materials to construct a shed comes with some great benefits. Materials like reclaimed wood, recycled plastic, and bamboo not only help cut down on waste but also reduce the use of natural resources. Plus, many of these materials are either biodegradable or recyclable, making them a smart pick for the long haul.
Beyond being kinder to the planet, these materials can also improve the shed’s durability and energy performance. Take reclaimed wood, for example - it’s often more resistant to weather than untreated lumber. Similarly, recycled plastics can match the strength of traditional materials like metal. Opting for sustainable materials means creating a shed that’s practical and better aligned with environmental responsibility.
How can I choose the best spot and foundation for my shed based on my local climate and soil type?
To find the best spot for your shed, choose a location with firm, well-drained soil. Steer clear of low-lying areas where water might pool or frost heave could occur. The type of foundation you choose should suit your local climate and soil conditions:
- Clay soils or cold climates: Use gravel or crushed stone foundations to minimize frost damage.
- Mild climates: A concrete slab offers a sturdy and long-lasting base.
- Rainy areas: Opt for an elevated foundation, like piers or a gravel base, to improve drainage.
- Cold regions: Install frost-proof foundations that go below the frost line to prevent shifting.
Choosing the right foundation for your environment helps keep your shed stable and functional for the long haul.
What regular maintenance does my shed need to stay in good condition, and how often should I do it?
To keep your shed in top condition, there are a few essential maintenance tasks you should prioritize:
- Seal and treat wooden surfaces once a year to shield them from weather-related wear and tear.
- Inspect the roof every 6 to 12 months for any signs of leaks or loose shingles that could lead to damage.
- Check and seal doors and windows regularly to block drafts, keep moisture out, and deter pests.
- Clear debris and trim nearby vegetation twice a year to reduce the risk of pests and prevent moisture from accumulating around the shed.
Sticking to these simple steps will help your shed stay sturdy and functional for the long haul.