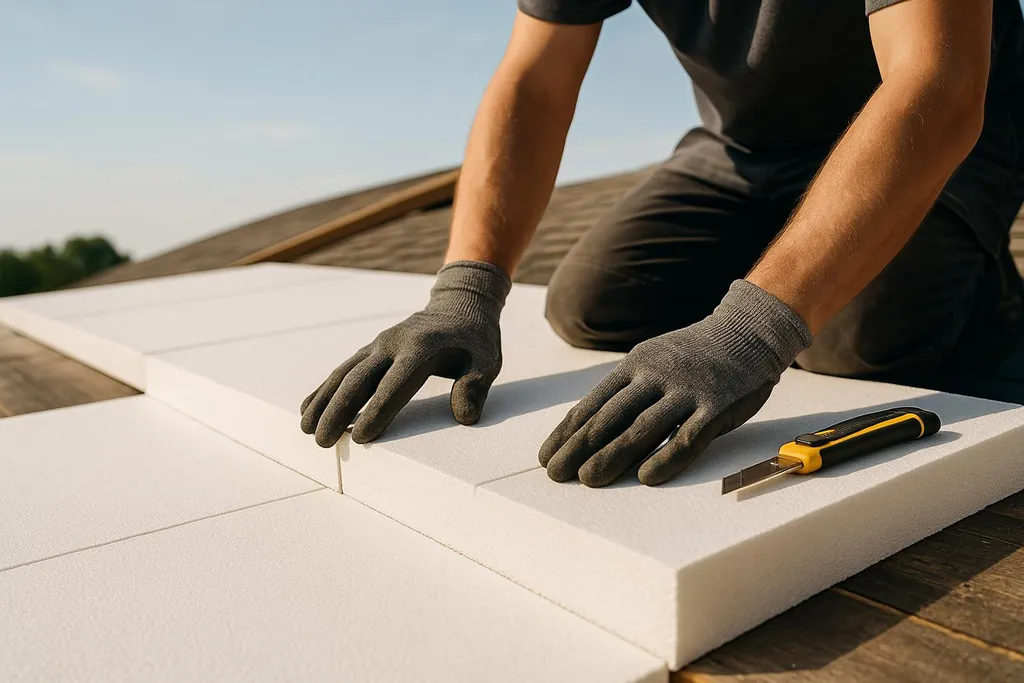
Learn how to properly install exterior foam roof insulation for improved energy efficiency and reduced moisture issues, ensuring long-lasting performance.
How to Install Exterior Foam Roof Insulation the Right Way
Proper exterior foam roof insulation improves energy efficiency, reduces drafts, and extends your roof's lifespan. It provides a continuous thermal barrier, prevents condensation, and cuts down on energy costs. Here's a quick guide to getting it done right:
Key Steps:
- Preparation: Remove old materials and ensure a clean, dry surface.
- Tools & Materials: Use rigid foam insulation (XPS, EPS, or Polyiso), foil tape, sealants, and appropriate fasteners.
- Installation: Layer foam boards, offset seams, and seal gaps for airtight insulation.
- Moisture Control: Add air and water barriers, seal penetrations, and ensure proper ventilation.
Benefits:
- Lower energy bills
- Consistent indoor temperatures
- Reduced risk of mold and structural damage
Follow these steps to ensure your roof insulation delivers lasting performance and protection.
Exterior Insulation For Roofs (3 DIFFERENT WAYS!)
Tools and Materials You Need for Installation
Before starting, gather everything you'll need to make the installation process smoother. Installing exterior foam roof insulation requires specific tools and materials to ensure a high-quality, long-lasting result.
Tools You’ll Need
Start with the basics: cutting, measuring, and installation tools. A sharp utility knife with spare blades is essential for clean, precise cuts. A straight edge or level will help guide your cuts and ensure neat, square edges.
For accurate measurements and layout, grab a 25-foot measuring tape, chalk line, and pencil. A cordless drill with various bits and a screwdriver set will also be necessary for securing materials.
Safety is just as important as precision. Wear safety glasses, gloves, a dust mask, and knee pads when cutting or handling insulation. If you’ll be working at height, use a ladder or scaffolding system that’s rated for your weight and ensure it’s set up securely.
Choosing the Right Insulation and Fasteners
Once your tools are ready, focus on selecting the correct insulation and fasteners. Rigid foam insulation comes in three main types:
- Extruded polystyrene (XPS): Known for excellent moisture resistance, offering a consistent R-value of about 5 per inch.
- Expanded polystyrene (EPS): A more budget-friendly option with an R-value of around 4 per inch.
- Polyisocyanurate (polyiso): Provides the highest R-value, approximately 6 per inch, but its performance may drop in colder temperatures.
If moisture control is a priority, consider foil-faced polyiso boards. According to Peter Engle:
> "The taped foil-faced polyiso can act as your WRB, vapor, and air barrier."
Foam board thickness typically ranges from 1 to 4 inches. When choosing fasteners, ensure they’re long enough to penetrate at least 1 inch into the structural decking below. Fasteners with large plastic washers are ideal for evenly distributing the load and preventing the foam from pulling through.
Moisture Control and Sealing Materials
Proper sealing is critical for maximizing insulation performance. For foil-faced polyiso boards, foil tape is the go-to material for sealing seams. Building expert Bill Wichers suggests:
> "You'd be fine using the foil-faced polyiso as your air barrier, and also your WRB -- just be careful not to damage the exterior side foil facer. I would use foil tape to tape the seams since it sticks well, and it gives a clean finished appearance..."
For non-foil-faced insulation, high-quality housewrap tape works well for sealing seams. Be sure to pick a tape designed for exterior use, capable of withstanding temperature changes.
To seal the perimeter where the foam meets the framing, apply polyurethane sealant. As Wichers explains:
> "Just the perimeter of the wall. The goal is to make sure air can't find a sneaky way to leak through. If you tape the seams between sheets, and caulk the sheet/framing interface around the perimeter of the wall, you've made a pretty airtight assembly."
Additionally, use polypropylene roof underlayment over the foam and any new decking as a waterproof layer. For areas with penetrations like vents or pipes, apply specialized roof sealant or roofing-grade mastic to create a durable, flexible seal. If you’re layering foam boards, stagger the seams to block continuous air or moisture pathways .
With your tools and materials organized, you’re ready to move on to the installation process.
Step-by-Step Installation Process
With your tools and materials ready, it's time to dive into the installation process. This method ensures proper thermal performance and durability over time.
Preparing the Roof Surface
Start by removing any old roofing materials and underlayment to expose the roof sheathing. Before moving forward, make sure the sheathing is dry, with moisture levels between 12% and 15% . Installing insulation on a damp surface can trap moisture, leading to structural issues.
If there are hazardous materials like lead, asbestos, or animal droppings in the attic or roof area, these must be addressed and removed safely before proceeding.
Next, apply a continuous air control membrane over the roof sheathing to prevent moisture-laden air from seeping through insulation joints. Here are your options for air control membranes:
- Non-adhered roof underlayment: Install this with taped seams and ensure airtight, properly overlapped connections.
- Self-adhered air and water control membrane: This provides better performance but requires careful handling, especially on steep slopes.
- Fully-adhered, self-sealing ice and water control membrane: Offers maximum protection when installed in a shingle-style pattern.
For wood panel sheathing like plywood or OSB, you can tape all panel joints using acrylic or butyl adhesive flashing tape to establish the air control layer. Don’t forget to seal around penetrations, and if the membrane also acts as a water barrier, make sure to integrate proper flashing at these points.
Finally, mark the locations of roof framing on the applied air control membrane. This step is crucial for accurately attaching the roofing substrate or purlins later, especially in structures with irregular framing.
Installing Foam Insulation Layers
Now, install the rigid foam insulation boards in multiple layers. Offset the joints both vertically and horizontally between layers to minimize thermal bridging and convective looping. Cut each foam panel to fit snugly - gaps can weaken thermal performance.
Apply construction or foam board adhesive to the back of each panel, press it into place, and allow it to set. Use temporary bracing or fasteners to hold the panels in position until the adhesive cures.
After each layer is installed, inspect the seams between panels. Fill any gaps - especially at edges and corners - with spray foam or high-quality caulk to maintain a continuous thermal barrier. Cover all joints with foil tape or specialized seam tape to create an airtight seal. Make sure the tape and sealants are compatible with your insulation materials. As you add layers, transfer the roof framing markings to ensure proper placement of the roofing substrate or purlins later on.
Once all insulation layers are in place and sealed, you’re ready to move on to securing the furring strips and roof decking.
Attaching Furring Strips and Roof Decking
With the insulation complete, the next step is to install the structural components.
For unvented systems, fasten the cladding (such as plywood or OSB) directly over the insulation using long, exterior-grade screws. For vented systems, attach vertical purlins to the framing, leaving a 2-inch ventilation gap before securing the cladding to the purlins. Vented systems are often necessary in areas with ground snow loads exceeding 50 pounds per square foot to prevent ice damming.
If the roof design includes hips, valleys, or other features that disrupt direct soffit-to-ridge ventilation, create gaps along the purlins to allow cross-ventilation. Align these gaps with the nailing pattern of the cladding to maintain structural strength. Typically, OSB or plywood serves as the decking material when asphalt shingles are used as the final roof covering.
Once the roof cladding is in place, you can move on to installing the roofing underlayment, flashing, and the final roof covering, following standard best practices. The key is ensuring that all fasteners securely engage the structural framing, using the framing markings as a guide for precise placement.
Moisture Control and Sealing Techniques
Once the insulation layers are in place, the next critical step is managing moisture with proper sealing. This process is key to protecting your roof system from issues like condensation, mold, mildew, and structural rot. Beyond safeguarding the structure, effective sealing also enhances thermal efficiency and supports eco-friendly building practices.
Building a Continuous Air and Water Barrier
A continuous air barrier is essential for keeping moisture at bay. By sealing gaps, cracks, and joints, you can prevent air leaks, temperature swings, and the moisture buildup that leads to problems like condensation and rot. For added protection, install a continuous air control membrane beneath the insulating sheathing. This layer stops humid air from seeping through insulation panel joints. Be equally thorough when sealing around roof penetrations and intersections to maintain this barrier.
Sealing Around Penetrations and Intersections
Pay close attention to sealing areas like pipe openings, vents, and roof-to-wall connections. Properly sealing these penetrations ensures moisture stays out, protecting your roof system from long-term damage.
Eco-Friendly Building Considerations
Building with eco-consciousness involves more than just selecting sustainable materials - it also means reducing waste during the construction process. When it comes to exterior foam roof insulation, minimizing material waste is a crucial step. By focusing on precision and efficiency, you not only lessen the environmental impact but also keep project costs under control. Here are some effective ways to reduce waste while supporting environmentally friendly construction.
Reducing Waste During Installation
- Accurate Measurement: Measure roof dimensions carefully to ensure you purchase only the amount of insulation you need, avoiding unnecessary waste .
- Efficient Application Techniques: Begin at the roof's highest point and work your way down in a steady manner. Gradual layering ensures even coverage and reduces excess material use .
- Precise Cutting: Use a sharp utility knife and make clear, accurate markings to minimize off-cuts and maximize material usage .
- Strategic Gap Filling: For larger gaps, apply expanding spray foam to seal voids. This approach helps make the most of leftover materials .
Conclusion: Key Points for Installing Exterior Foam Roof Insulation
To wrap things up, let’s highlight the essentials for a successful exterior foam roof insulation project.
First and foremost, preparation is everything. A well-prepped roof surface sets the stage for insulation that will last for decades. This means cleaning the surface thoroughly and ensuring it’s dry and ready for layering.
Using the _right tools and materials_ is equally important. High-quality fasteners, foam boards with the appropriate R-value, and compatible moisture barriers all play a critical role in boosting energy efficiency and maintaining the roof’s durability. Taking a methodical approach to layering the insulation on a clean surface helps avoid costly mistakes and ensures the roof can handle temperature changes and harsh weather conditions.
Moisture control is another key factor. Continuous barriers and sealed penetrations are non-negotiable to keep water out and preserve the insulation’s thermal performance. Even tiny gaps can undermine the entire system, so attention to detail here is crucial.
Efficient installation techniques not only improve energy savings but also minimize waste. Precise measurements and careful application reduce material waste, which is good for the environment and keeps project costs in check.
When done correctly, exterior foam roof insulation delivers tangible benefits like lower energy bills, improved indoor comfort, and increased home value. By sticking to these principles, you’ll end up with a roof that’s not only energy-efficient but also built to last.
FAQs
What are the differences between XPS, EPS, and Polyiso foam insulation, and how do I choose the best option for my roof?
When it comes to foam insulation, there are three key players: XPS (Extruded Polystyrene), EPS (Expanded Polystyrene), and Polyiso (Polyisocyanurate). Each type has its own strengths, making them suited for different needs.
- Polyiso stands out with the highest R-value per inch, making it perfect for situations where space is limited but maximum insulation is essential.
- XPS strikes a good balance between performance and cost, offering decent [moisture resistance](/blog/cost-strength-moisture-resistance-plywood-vs-osb-showdown) alongside solid insulation capabilities.
- EPS is the most cost-effective option, though it has a slightly lower R-value and provides less protection against moisture.
Choosing the right insulation depends on factors like your climate, budget, and specific project requirements. For colder regions, Polyiso's superior R-value can help cut heating costs. If moisture is a concern, XPS might be the better fit. On the other hand, EPS is an affordable choice for projects with basic insulation needs.
What’s the best way to install exterior foam insulation to prevent moisture and condensation problems?
To keep moisture and condensation at bay, consider using rigid foam insulation boards arranged in multiple layers. Offset the joints both vertically and horizontally between the layers to form a snug seal. This overlap minimizes gaps where moisture might sneak in.
On top of that, make sure all seams are securely taped or sealed with a weather-resistant material. Pay extra attention to areas like vents, chimneys, or any other transitions to ensure the moisture barrier remains uninterrupted. These precautions not only safeguard your roof but also enhance its energy efficiency.
How can I minimize waste and make the installation of exterior foam roof insulation more eco-friendly?
When installing foam boards, using several thinner layers and staggering the joints between them is a smart way to cut down on waste. This method not only enhances insulation but also reduces the amount of material that goes unused.
Be precise when measuring and cutting the boards to minimize scraps. Leftover pieces don’t have to go to waste either - they can often be repurposed to fill small gaps or for future projects. Opt for high-quality, long-lasting materials to extend their usability and limit the need for replacements, making the entire process more efficient and environmentally friendly.