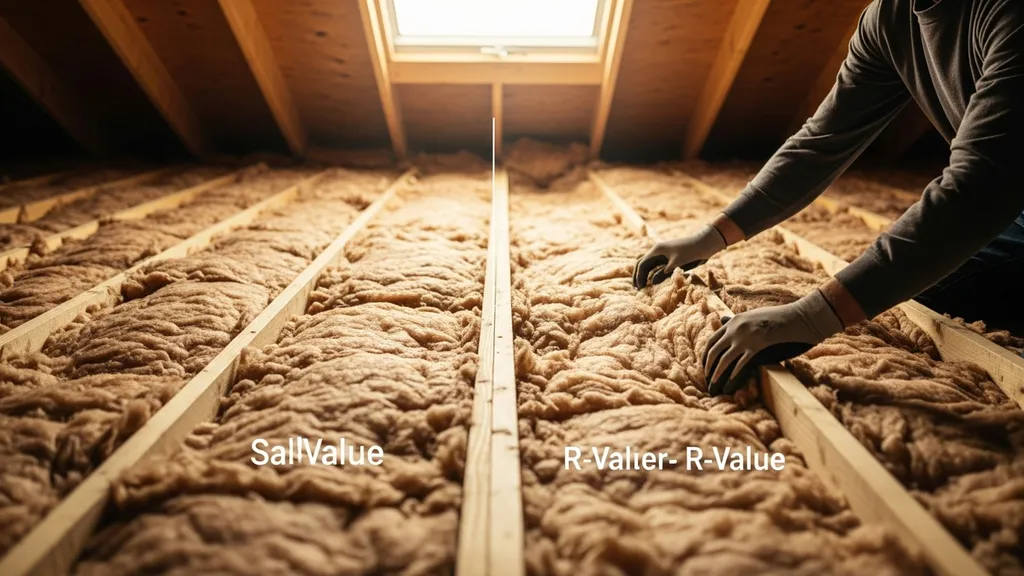
Compare R-23 and R-30 insulation — materials, thickness, costs, and which is best for attics, walls, and retrofits on a DIY budget.
R-23 vs R-30 Insulation: Which Do You Need?
Choosing between R-23 and R-30 insulation matters because that small change in R-value can affect winter heat loss, summer comfort, and whether your assembly meets local code or energy-goal targets. This article compares R-23 and R-30 across common materials, shows how much extra thickness each requires, and gives practical recommendations for DIYers deciding for attics, walls, or retrofits. The primary question — "r23 vs r30 insulation" — will be answered with clear scenarios, material trade-offs, and site-ready checklists.
TL;DR:
- R-23 is often enough for 2x6 wall cavities and some knee walls; R-30 is the common minimum for attic floors in colder zones and requires roughly 25–30% more thickness.
- Choose R-23 (or equivalent assembly) when cavity depth is limited or when you add exterior continuous insulation; choose R-30 for attic floors or when reaching code minimums in colder climates.
- Prioritize air sealing and correct moisture control first — improving airtightness often delivers bigger real-world gains than a small R increase.
Quick TL;DR and Comparison Table — R-23 vs R-30
TL;DR Summary
R-23 and R-30 differ mainly in thickness, typical use, and how they interact with air sealing. R-23 fits comfortably into many 2x6 cavities with medium-density materials; R-30 normally requires deeper cavities or layered insulation. For attics, R-30 is a common target; for exterior-wall assemblies, R-23 can be acceptable if thermal bridging is addressed or if continuous exterior insulation is used.
Side-by-side Comparison Table: Performance, Typical Materials, Approximate Thickness, Common Uses, Estimated Cost Range
| Feature | R-23 | R-30 |
|---|---|---|
| Typical materials | Fiberglass batts (2x6), dense-pack cellulose, partial spray foam | Deep fiberglass batts, blown-in cellulose, layered rigid foam + batt |
| Approx R/inch ranges (typical) | Fiberglass 2.2–2.7, cellulose ~3.0–3.8, open-cell foam ~3.5 | Same materials; need greater thickness (see next column) |
| Approx installed thickness (fiberglass) | ~8–10 in (approx) | ~10–13 in (approx) |
| Approx installed thickness (cellulose/blown) | ~7–8 in (dense-pack) | ~9–12 in (loose-fill) |
| Common uses | 2x6 wall cavities, shallow attics, rim joists | Attic floors, deep wall cavities (2x8/2x10), retrofits with headroom |
| DIY difficulty | Low–medium | Medium–high (more material, possible pro help) |
| Cost/DIY difficulty indicator | Low/Medium | Medium/High |
| Notes | Check product R/inch on datasheets; climate zone and air sealing change effective performance | Consider continuous exterior insulation if interior depth is limited; factor in moisture strategy |
(Thickness estimates are approximate. Verify R/inch on manufacturer data sheets and check local code and climate guidance such as the Insulation Institute's fiberglass guidance.)
What R-23 Means and Where You'll See It Used
Definition and How R-values Stack Up
R-value is a measure of thermal resistance; higher R means more resistance to heat flow. R-23 is a mid-range value you’ll commonly see where 2x6 stud cavities exist or in assemblies mixing foam and batt. In simple terms, moving from R-23 to R-30 increases resistance by about 30% (30/23 ≈ 1.3), but the real-world impact depends on air leaks, thermal bridges, and assembly details.
Common Materials Used to Reach R-23
- Fiberglass batts sized for 2x6 studs often rate in the R-21 to R-23 range depending on product; achieving R-23 with fiberglass typically requires full-depth batts.
- Dense-pack cellulose in a 2x6 cavity can reach R-23 because cellulose has a higher R/inch than fiberglass in many installations.
- Hybrid systems (partial spray foam at the wall interior or rim joist plus batt) can reach R-23 while adding some air-sealing benefit.
Industry guidance explains R-value concepts and recommended values for climates; see the Energy Star recommended R-values page for background on targets by climate zone. For a current U.S. code-oriented reference, the Department of Energy also summarizes 2021 IECC insulation R-value requirements by climate zone; local code and the complete adopted standard still control.
Typical Locations (walls, Rim Joists, Shallow Attics)
- Walls: R-23 is a realistic target for 2x6 framed walls without exterior continuous insulation.
- Rim joists and knee walls: R-23-equivalent assemblies are often used where space is limited but added foam or spray foam is applied to control air leakage.
- Shallow attics/cathedral ceilings: In assemblies where full depth isn’t available, R-23-level performance is sometimes the practical ceiling unless you add exterior insulation or a truss/furring strategy.
For readers comparing smaller steps in R-value, our R-15 vs R-23 guide explains when R-23 is the practical choice versus lower cavity targets. Also check framing basics to understand how 2x6, 2x8, and larger cavities change achievable R.
What R-30 Means and Where It’s Commonly Used
Why R-30 is a Common Target for Attic Floors
R-30 is a widely recommended minimum for attic floors in moderate-to-cold climates because attics are major heat-loss pathways. In many climate zones local code and energy programs call for R-30 to R-49 in attics; achieving R-30 helps reduce heating load and can improve year-round comfort. For a quick rule of thumb, blown fiberglass or cellulose in attics reaches R-30 in roughly 10–13 inches depending on product and density.
Materials and Approaches That Achieve R-30
- Deep fiberglass batts and rolls sized for attic joists are a common DIY solution to reach R-30.
- Blown-in cellulose is efficient for attics; around 10–13 inches of cellulose typically gives R-30 but settling and installation density matter.
- Layered strategies — such as adding a rigid foam layer over the ceiling (continuous insulation) then thinner batts — can reach R-30-equivalent while keeping headroom.
Our attic insulation guide covers installation approaches, recommended depths, and how R-30 fits into broader attic performance. For context on larger jumps, see the R-15 vs R-30 comparison.
When a Full-depth Cavity is Required vs Adding Exterior Insulation
If you have full attic joist depth or deep rafter bays (2x10/2x12), you can reach R-30 within the cavity. But when headroom is limited, continuous exterior insulation or layering rigid foam under roof sheathing avoids needing deep interior depth. Exterior insulation also reduces thermal bridging and can simplify moisture control in roof assemblies.
The How much attic insulation do i need? r-value guide (2026) is a useful secondary reference for attic depth ranges and attic R-targets by climate zone.
Material-by-material Comparison: How R-23 and R-30 Look Across Fiberglass, Cellulose, and Foam
Fiberglass Batts and Rolls: Thickness Needs and Practical DIY Notes
- Typical R-per-inch: about 2.2–2.7 for common fiberglass batts (product dependent).
- To hit R-23: expect roughly 8–10 inches of fiberglass (approximate).
- To hit R-30: expect roughly 10–13 inches.
- DIY notes: fiberglass is low-cost and widely available; cut-to-fit batts work in joists and walls. Installation quality matters: compression, gaps, and bypasses dramatically lower effective R. Use proper protective gear and the right tools from our installation tools guide.
Blown-in Cellulose: Loft, Settling, and How It Affects Target R
- Typical R-per-inch: roughly 3.0–3.8 when installed at recommended densities.
- To hit R-23: around 6–8 inches in a dense-pack scenario for wall cavities, or 7–8 in shallow attic bays depending on density.
- To hit R-30: roughly 9–12 inches in attic loose-fill installations; dense-pack applications require special equipment.
- Practical note: cellulose settles over time; installers often add extra depth to maintain long-term R. Dense-pack in walls resists settling but requires pro-grade equipment or rental.
Spray Foam (open and Closed Cell): Effective R Per Inch and Air-sealing Benefits
- Open-cell spray foam: about R-3.5 to R-3.7 per inch; closed-cell: about R-6 to R-7 per inch (product dependent).
- To reach R-23: closed-cell needs roughly 3–4 inches; open-cell needs about 6–7 inches.
- To reach R-30: closed-cell about 5–6 inches; open-cell about 8–9 inches.
- Trade-offs: spray foam adds insulation and air sealing in one step, often allowing thinner assemblies. But closed-cell foam has higher embodied carbon and cost; open-cell is vapor-permeable and less of a moisture trap but needs an interior vapor retarder in cold climates.
For carbon and performance trade-offs between spray foam and cellulose see our spray foam vs cellulose comparison.
Hybrid Approaches: Layered Batts + Exterior Rigid Foam or Dense-pack Plus Cavity Foam
Layering a continuous rigid foam outside the sheathing (or using a Larsen truss) lets you reach R-30 equivalent while keeping interior cavity shallower. A common retrofit uses R-13 batt inside plus 1–2 inches of polyiso or extruded polystyrene outside to get near R-30 whole-assembly performance with reduced thermal bridging.
For recommended attic materials and how to choose between them, consult our best attic insulation article.
Comparing Thickness, Cost, Thermal Performance, and Moisture Risk (youtube Embed Here)
How Thickness Scales with R-value for Common Materials
Thickness scales roughly linearly with R/inch for a material. Example approximations:
- Fiberglass: R-2.5/in → R-23 ≈ 9.2 in, R-30 ≈ 12 in.
- Cellulose: R-3.4/in → R-23 ≈ 6.8 in, R-30 ≈ 8.8 in.
- Open-cell foam: R-3.6/in → R-23 ≈ 6.4 in, R-30 ≈ 8.3 in.
- Closed-cell foam: R-6.5/in → R-23 ≈ 3.5 in, R-30 ≈ 4.6 in.
These are approximations; verify product R/inch on manufacturer data sheets before ordering.
Rough Installed Cost Comparison and DIY Labor Considerations
- Relative cost bands: fiberglass (low), cellulose (low–medium), open-cell spray (medium), closed-cell spray (high), rigid continuous foam (medium–high).
- DIY trade-offs: fiberglass and loose-fill cellulose are accessible DIY projects with modest tool rental costs; spray foam typically requires a contractor or rental equipment and training. Exterior continuous insulation and furring systems add material and labor but can be staged.
Remember to account for hidden costs such as waste disposal, rental equipment, and potential remedial work. See our 10 hidden costs in DIY eco home building for details.
Moisture and Condensation Risk When Increasing Cavity Depth
Thicker insulation on its own doesn't prevent condensation. Cold-side condensation can occur when warm, moist interior air meets cold sheathing. Strategies:
- Control air leakage with an air barrier before adding insulation; use the air sealing checklist.
- In roof assemblies, consider exterior insulation to move the dew point outward and protect sheathing; see exterior roof insulation.
- Use a vapor strategy appropriate to climate zone and assembly. If unsure, consult local code and IECC guidance.
Air-sealing Interaction: Why Air Leaks Can Make Extra R Less Effective
Air leakage bypasses insulation and reduces measured performance. A modest improvement in airtightness (measured with a blower door) often yields bigger heating/cooling savings than increasing R-value from R-23 to R-30. Use blower-door testing to quantify leakage before major insulation upgrades—our blower door testing guide explains how to interpret results.
What to watch: major gaps, rim-joist leaks, and penetrations around chimneys or recessed lights. Fix these first; then add insulation to the target R.
Watch this step-by-step guide on installing ceiling insulation in a basement or crawlspace & why you should. r30, r21, r19, r13.:
Other Ways to Reach R-30 Performance Without Adding Extreme Cavity Depth
Continuous Exterior Insulation (rigid Foam or Mineral Wool) Plus Thinner Cavity Insulation
Adding continuous insulation outside the sheathing reduces thermal bridging and lets you keep interior cavity shallower. Typical approach: R-13 or R-15 batt in cavity plus 1–2 inches of polyiso or mineral wool sheathing to meet or approach R-30 whole-assembly performance. Our complete exterior foam guide explains installation sequencing and flashing details.
Larsen Truss and Furring Systems to Increase Effective Cavity Depth
Larsen trusses or exterior furring create a new deep cavity outside the original wall to accept thick insulation without modifying interior finishes. This method keeps interior work minimal and simplifies adding insulation on retrofits. See the Larsen truss comparison for pros and cons.
Reflective/vented Assemblies and When They Help
Reflective foils and vented roof cavities can reduce radiant gains and help in hot climates. They are not substitutes for R-value in cold climates but can complement other strategies when used correctly.
When to Choose Dense-pack or Spray-foam Strategies
Choose dense-pack cellulose for retrofits where you want low-cost, higher R/inch, and reduced settling risk. Choose spray foam when air sealing, structural adhesion, or limited cavity depth is critical. Both methods have cost and environmental trade-offs; factor in long-term goals for airtightness and moisture control. For high-performance passive-house level examples, review our exterior roof insulation piece.
Which Should You Choose? Scenario-based Recommendations
Scenario a — Cold Climate New Build on a Budget
Recommendation: Aim for R-30 in attic floors; for walls, use R-23 in 2x6 cavities plus 1–2 inches of continuous exterior foam to reduce thermal bridging. Use dense-pack cellulose or a hybrid of thin closed-cell spray at rim joists plus batts for walls. Prioritize airtightness early and plan exterior foam detailing to protect sheathing.
Scenario B — Mild Climate Retrofit with Limited Headroom
Recommendation: Use continuous exterior insulation (1–2 in polyiso or mineral wool) plus R-13 batts to approach R-30 whole-assembly performance without losing interior headroom. If exterior work isn’t possible, choose dense-pack cellulose in wall cavities and use spray foam at critical junctions to control air leakage.
Scenario C — Tight Budget, DIY Attic Upgrade Only
Recommendation: Focus on air sealing first (attic hatch, recessed lights, rim joist). Then add blown-in cellulose or fiberglass to reach at least R-30 on the attic floor. Blown-in cellulose is often the best DIY trade-off for attic upgrades because it fills gaps and has higher R/inch than loose fiberglass. See the attic insulation guide for step-by-step depth guidance.
Quick decision checklist: climate zone, cavity depth, air-sealing condition, budget, long-term goals
- Climate zone: Colder zones favor R-30 (attics) and higher wall targets.
- Cavity depth: Measure stud/rafter depth before ordering; consult framing basics.
- Air sealing: Do a blower-door test or follow the air sealing checklist.
- Budget: Fiberglass and cellulose are lowest-cost; spray foam and exterior insulation cost more but offer combined benefits.
- Long-term goals: If planning a high-performance house, favor exterior continuous insulation or thicker cavities to reduce thermal bridging.
For small outbuildings or sheds where headroom is tight, our shed insulation options shows how to prioritize materials.
The Bottom Line
Choose R-23 for constrained cavities, walls, or where you apply continuous exterior insulation; choose R-30 for attic floors and when code or climate calls for deeper insulation. In many cases, fixing air leaks and selecting the right assembly (e.g., exterior foam plus thinner cavity insulation) gives equal or better real-world performance than simply adding more batt depth.
Frequently Asked Questions
Is R-30 always better than R-23?
Not always. R-30 offers higher thermal resistance, which helps in cold climates and attic floors, but the marginal benefit depends on air sealing, thermal bridging, and moisture control. If air leaks are large or the assembly has continuous bridging, the effective improvement from R-23 to R-30 will be smaller.
Consider whole-assembly performance: adding exterior insulation or improving airtightness can deliver larger gains than a small R increase. Use blower-door testing to prioritize work.
How much thicker are R-30 batts than R-23?
Approximate examples: with typical fiberglass batts (~R-2.5 per inch), R-23 needs about 9 inches while R-30 needs about 12 inches. For cellulose (~R-3.4 per inch), R-23 could be about 7 inches and R-30 about 9 inches. These are estimates; verify R/inch on manufacturer data sheets and account for installation method.
Also factor in settling for loose-fill products — installers often add depth to compensate for future settling.
Can I mix materials to reach R-30?
Yes. Layered assemblies are common: a continuous rigid foam outside plus interior batt, or a thin spray-foam air barrier combined with batt or dense-pack cellulose for the remaining R. Mixing lets you control air leakage and reduce depth while hitting whole-assembly targets.
Make sure to follow proper sequencing and flashing details when adding exterior foam, and check local code for fire and ventilation requirements.
Does air sealing matter more than R-value?
Often, yes. Reducing air leaks is one of the most cost-effective ways to improve comfort and lower energy use. A modest reduction in air change rate can cut heating load substantially; this can outpace the benefit of increasing R from 23 to 30 in a leaky house.
Do a blower-door test or follow an air-sealing checklist, then add insulation to the target R for best results. See our air sealing checklist and blower door testing guides for practical next steps.
Will adding more insulation cause moisture problems?
It can, if moisture control and vapor management are not considered. Thick insulation can change where the dew point falls in a wall or roof assembly. In cold climates, adding continuous exterior insulation can move the dew point outward and protect sheathing; in mixed climates be careful with impermeable layers like closed-cell foam against wet assemblies.
Follow climate-based vapor control guidance and consider consulting a local building official or experienced contractor for complex roof or wall retrofits.