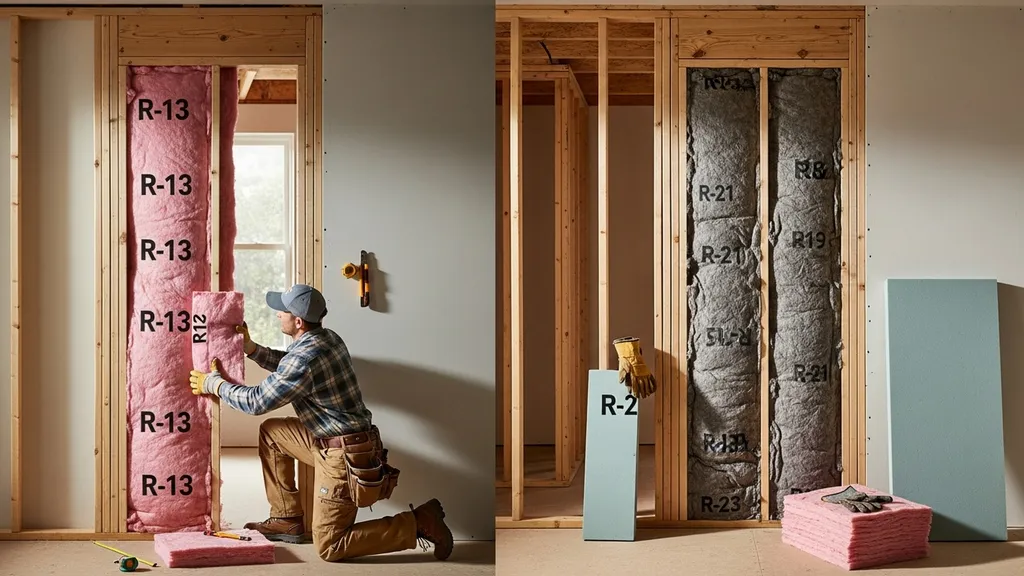
Compare R-13 and R-21 insulation: performance, costs, installation, and which one fits 2x4 or 2x6 walls and different climates.
R-13 vs R-21 Insulation: Which Do You Need?
Deciding between R-13 vs R-21 insulation is a common early choice for budget-conscious DIY homebuilders: it directly affects wall thickness, thermal performance, and whether you reframe or add exterior foam. This article compares R-13 and R-21 for typical materials (fiberglass, cellulose, mineral wool, spray foam), explains how cavity depth (2x4 vs 2x6) changes options, and gives scenario-based recommendations so you can pick the right approach for retrofit, new builds, sheds, or tiny homes.
TL;DR:
- Pick R-13 for quick retrofit in existing 2x4 framing: fits 3.5" cavities, lower material cost, and faster DIY install.
- Pick R-21 for new 2x6 walls or colder climates: fits 5.5" cavities and typically reduces heating demand more than R-13.
- Consider cavity insulation + continuous exterior insulation if you want whole-wall R-value without thicker framing; use the insulation savings calculator to compare payback.
R-13 vs R-21 Insulation: Quick Overview and TL;DR
What This Comparison Covers
This comparison focuses on thermal performance, typical cavity thickness, common materials, ease of DIY installation, and use cases for both R-13 and R-21. It highlights R-value per inch ranges for common materials and explains how adding continuous exterior insulation changes the whole-wall performance. If you’re weighing a retrofit of a 2x4 house versus building new with 2x6 studs, this guide helps you balance cost, labor, and year-round comfort.
For climate-based recommendations, consult regional guidance such as the Energy Star recommended insulation R–values table which shows where higher wall R-values tend to be cost-effective.
TL;DR Recommendation (one-sentence Takeaway)
For retrofit on existing 2x4 walls and tight budgets choose R-13 (or dense-pack cellulose in the cavity plus air sealing); for new 2x6 framing or long heating seasons pick R-21 (or R-13 cavity with exterior continuous insulation) to lower heating loads and improve comfort.
R-13 vs R-21 Insulation: Side-by-side Comparison Table
| Property | R-13 | R-21 |
|---|---|---|
| Typical labeled R-value | R-13 | R-21 |
| Typical cavity thickness | 3.5" (2x4) | 5.5" (2x6) |
| Common materials | Fiberglass batt, cellulose (blown or dense-pack), mineral wool | Denser fiberglass batts, mineral wool, dense-pack cellulose, spray foam |
| Typical R/inch (fiberglass) | ~3.2–3.8 /in | Same per inch; more inches total |
| Typical R/inch (cellulose) | ~3.2–3.8 /in | ~3.2–3.8 /in |
| Typical R/inch (mineral wool) | ~3.0–3.3 /in | ~3.0–3.3 /in |
| Foam board R/inch | N/A in cavity; polyiso ~6+/in, XPS ~5/in, EPS ~3.8–4.2/in | Same if used exterior |
| Installation ease for DIY | Easier — batts fit 2x4 bays; blown-in also straightforward | Moderately harder — heavier batts, dense-pack requires equipment |
| Relative material cost | Lower | Moderate to higher |
| Typical use cases | Retrofit 2x4 homes, interior partitions, sheds | New 2x6 walls, cold climates, higher-performance homes |
Data notes: R/inch varies by product and density; labeled R-values depend on manufacturer testing. The Insulation Institute guide to fiberglass products explains testing variance and product selection. Use the insulation savings calculator to estimate energy and payback for choosing thicker cavity insulation vs adding exterior foam.
R-13 vs R-21 Insulation: R-13 Explained — What It Is, Strengths, Weaknesses, Best For
Overview of R-13 (materials and Typical Installations)
R-13 typically corresponds to insulating materials sized for a 3.5" cavity — the nominal depth of 2x4 studs. Common choices include fiberglass batts designed for 2x4 bays, loose-fill cellulose installed as blown-in or dense-pack, and mineral wool batts sized for the same cavity. R-13 is widely available and offered in faced and unfaced varieties. In retrofit jobs, installers often add R-13 batts behind finished walls or dense-pack cellulose into existing cavities via small holes.
Strengths: Cost, Fits 2x4, Retrofit-friendly
- Lower material outlay per bay compared with deeper batts; easier to carry and cut for DIYers.
- Batts sized for 2x4 are simple to install for a homeowner: measure, cut, friction-fit or staple faces, and seal gaps with caulk or foam at penetrations.
- In retrofit settings where reframing is impractical, R-13 plus careful air sealing provides a substantial comfort and efficiency upgrade.
Weaknesses: Lower Thermal Resistance in Cold Climates
R-13 offers modest wall-level insulation compared with thicker assemblies. In cold climate zones, R-13 cavity-only walls will leave higher heating loads unless paired with continuous exterior insulation or exceptional air sealing. Thermal bridging through studs also reduces effective whole-wall R-value; the sheathing and siding contribution matters.
Best For: Retrofits, Interior Walls, Mild Climates
R-13 is a sensible choice for:
- Existing 2x4 framed homes where reframing isn’t planned.
- Interior partitions or lightly conditioned sheds where wall thickness is constrained.
- Mild climates with short heating seasons where ceiling/attic insulation is a higher priority.
For more on attic and whole-house priorities, see the attic insulation guide. Mobile homes and small outbuildings often use R-13; see our mobile home insulation solutions and shed insulation options for product choices and installation tips.
R-13 vs R-21 Insulation: R-21 Explained — What It Is, Strengths, Weaknesses, Best For
Overview of R-21 (materials and Typical Installations)
R-21 corresponds to thicker batts sized for ~5.5" cavities in 2x6 framing or to higher-density manufactured batts that deliver the labeled R in fewer inches. Materials include denser fiberglass, mineral wool, dense-pack cellulose, and spray polyurethane foam that fills the cavity. R-21 is commonly used in new construction where 2x6 framing is specified or where whole-wall performance is prioritized.
Strengths: Higher Thermal Resistance for Same Wall Area, Better for Cold Climates
- Greater cavity depth yields higher R-value per wall assembly, reducing conductive heat loss.
- When combined with careful air sealing, R-21 significantly lowers heating requirements in zones with long cold seasons.
- Works well with passive-house minded assemblies when paired with details that reduce thermal bridging.
Research shows that increasing cavity R-value tends to yield larger savings where heating loads dominate; however, whole-wall performance also depends on framing fraction and exterior insulation.
Weaknesses: Needs Deeper Framing or Denser Batts, Slightly Higher Cost and Weight
- R-21 requires 2x6 studs or higher-density manufactured batts that can be heavier and harder to cut.
- Retrofits into 2x4 walls to achieve R-21 are labor-intensive (reframe, sister studs, or use exterior continuous insulation).
- Denser materials can be more expensive; installer experience matters for avoiding compression or gaps that reduce labeled R.
The Wikipedia entry on R-value (insulation))) offers background on what the R-value number measures and why higher R is helpful, but remember whole-wall R depends on framing and air sealing.
Best For: New 2x6 Framed Walls, Colder Climates, Higher-performance Builds
Choose R-21 when:
- Building new with 2x6 framing and you want simpler cavity-only performance.
- You’re in a colder climate or expect long heating seasons.
- You plan to pair cavity R-21 with tight air barriers and attention to thermal-bridge reduction.
If you want equivalent whole-wall R without 2x6 framing, consider R-13 cavity insulation plus continuous exterior insulation; see the "Installation costs" section below and the link to spray foam vs cellulose for material trade-offs.
R-13 vs R-21 Insulation: Installation Costs, Materials, and Common DIY Approaches
DIY-friendly Installs for R-13 and R-21
- R-13 batts: Friction-fit or staple-faced batts are the most DIY-friendly. Tools needed: utility knife, tape measure, staple gun, caulk/low-expansion foam for gaps, and safety gear (dust mask, gloves).
- R-21 batts: Larger and heavier; cutting and fitting needs a sharper blade and sometimes a second pair of hands. Dense-pack cellulose in 2x6 walls requires rental blowers and injector equipment.
- Spray foam: Open-cell or closed-cell spray foam provides high effective R and air sealing in a single pass but usually requires a pro for quality and safety; small canister kits exist for tiny areas.
When to Choose Denser Batts vs Foam vs Blown-in
- Choose denser batts or R-21 batts in new 2x6 walls where framing allows full thickness and you want a straightforward install.
- Choose dense-pack cellulose if retrofitting existing framed walls through small holes — it seals voids well and resists settling when installed correctly.
- Choose spray foam for hard-to-seal assemblies, rim joists, or where you want combined insulation and air barrier; keep code and fire-blocking requirements in mind.
How Framing Choice (2x4 vs 2x6) Changes Cost and Labor
- Adding 2x6 framing instead of 2x4 increases lumber and labor cost but simplifies achieving R-21 cavity R-value. It also deepens window jambs and trim; plan for different window rough openings and sill heights.
- Alternative: Keep 2x4 studs and add continuous exterior foam board (polyiso, XPS, or EPS) on the outside to reach the same whole-wall R without thicker studs. Compare foam board options in our polyiso vs EPS vs XPS guide.
- For small structures, use the shed insulation calculator to test thickness vs R-value tradeoffs before buying materials.
Installation difficulty and tools required (summary):
- R-13 batts: Low difficulty, basic hand tools.
- R-21 batts: Moderate difficulty, heavier handling, precision cutting.
- Dense-pack cellulose: Moderate difficulty, blower rental, skill to avoid settling.
- Spray foam: High difficulty for DIY; pros recommended for large areas.
Plan vapor control and air sealing at the same time as insulation. Check local code for minimum R-values and fire-blocking requirements before starting work.
This video compares the options to help you decide:
R-13 vs R-21 Insulation: Air Sealing, Moisture, and Code Considerations
Why Air Sealing Matters as Much as R-value
Air leakage can account for more heat loss than a modest increase in cavity R-value. Sealing gaps at top plates, around windows, at electrical penetrations, and at sill plates often delivers immediate comfort and energy benefits that rival moving from R-13 to R-21. For step-by-step methods, see our how to air seal guide and the list of common trouble spots in air leakage points.
Moisture Risk and Vapor Control Strategies for 2x4 vs 2x6 Walls
- Vapor control strategy depends on climate: in cold climates, a Class I vapor barrier (polyethylene) or impermeable interior finish can trap moisture if not paired with drying paths. In mixed and warm climates, semi-permeable or no interior vapour barrier is common.
- Thicker walls (2x6 with R-21) provide more thermal buffer and reduce the chance of interior-side condensation, but assembly still needs proper flashing, breathable sheathing, and a water-resistive barrier.
- When adding continuous exterior foam, choose sheathing, cladding, and exterior coatings that maintain moisture balance — see our eco-friendly exterior coatings guide for products that support drying to the outside.
Code, Climate Zone, and IECC Guidance (how to Verify for Your Project)
Minimum wall R-values vary by climate zone and local adoption of the International Energy Conservation Code (IECC). Do not assume a single answer for every county. Confirm requirements with your local building department and consult the IECC tables where applicable. For educational background on insulation benefits and proper installation, the Department of Energy's "Insulation" page provides an overview of strategies and paybacks: Department of Energy insulation guide.
R-13 vs R-21 Insulation: Which Should You Choose? Scenario-based Recommendations
Budget Retrofit in an Existing 2x4 House
- Start with air sealing: top plates, rim joists, window and door perimeters, and control of ducts. Air sealing often yields the biggest comfort gains per dollar.
- Add R-13 batts or dense-pack cellulose into 2x4 cavities. Dense-pack reduces settling and improves sound control.
- If the budget allows, add 1–2 inches of exterior rigid foam (polyiso or EPS) to improve whole-wall R without changing framing.
Recommendation: air seal first, then R-13 or dense-pack cellulose. Use the insulation savings calculator to estimate savings from adding exterior foam vs thicker cavity insulation.
New Build on a Tight Budget Aiming for Comfort
- Consider the cost of 2x6 studs versus the incremental material cost of exterior foam. Often, 2x6 plus R-21 delivers simple cavity performance with standard interior finishes.
- If window jamb depth or wall thickness is constrained, a 2x4 frame with continuous exterior polyiso may be cheaper overall to reach the target whole-wall R.
Decision flow:
- Check framing choice (2x4 or 2x6).
- Check climate zone and target whole-wall R.
- Compare incremental cost of 2x6 + R-21 vs 2x4 + exterior foam + R-13 using the insulation savings calculator.
For whole-house sequencing, pair wall choices with attic upgrades — see our best insulation for attic guide.
Cold Climate or Long Heating Season
- Prioritize cavity depth or continuous insulation to reduce annual heating loads. R-21 in a well-sealed 2x6 wall is a straightforward choice.
- Tight air barriers, insulated cantilevers, and reduced thermal bridging (e.g., insulated headers, advanced framing) amplify the benefits of higher R.
If passive-house levels are the goal, R-21 alone may not be enough; combine it with airtight construction and careful thermal-bridge details.
Tiny Homes, Sheds, and Mobile Homes
- For small structures with 2x4 framing, R-13 is common and practical. For tiny homes where interior space is precious, consider high-R foam or spray foam to shrink thickness while retaining R.
- Mobile homes often use R-13; see our mobile home insulation solutions for tailored approaches.
For small structures, test options with the shed insulation calculator before purchasing materials. If building a small cabin, our how to build a small cabin resource shows how insulation choice affects framing and finish details. For full self-build planning, consult the self-build guide.
The Bottom Line
R-13 fits 2x4 cavities and is best for retrofits and tight budgets; R-21 fits 2x6 cavities and is a better default for new builds in cold climates or for higher-performance homes. Match your choice to framing, climate zone, and whether you will add continuous exterior insulation for superior whole-wall performance.
Frequently Asked Questions
Can I use R-21 in a 2x4 wall?
Practically, labeled R-21 requires roughly 5.5" of material and will not fit a standard 3.5" 2x4 cavity without compression, which reduces effective R. Options to achieve higher whole-wall R without 2x6 framing include adding continuous exterior foam board or applying spray foam that increases R per inch. Each approach has trade-offs for cost, drying potential, and finishing details.
Is it better to add continuous foam or increase cavity R-value?
It depends on goals and constraints. Continuous exterior insulation reduces thermal bridging and raises whole-wall R more efficiently than simply increasing cavity R in many cases. If you cannot reframe to 2x6, exterior foam plus R-13 cavity insulation is often the best route. Use the insulation savings calculator to compare payback for your climate and heating fuel.
How much energy will switching from R-13 to R-21 save?
Savings vary widely by climate, framing fraction, airtightness, and heating fuel. In a cold climate with high heating loads, moving from R-13 to R-21 in exterior walls may reduce annual heating energy by a measurable percentage, but the exact number depends on whole-house factors. For a precise estimate, model the change with an energy calculator or consult a local energy advisor and use our insulation savings calculator.
Will changing insulation affect my wall thickness and trim?
Yes. Upgrading to R-21 typically means deeper studs (2x6) and thicker walls, which change window jamb depths, trim details, and interior millwork. Adding exterior insulation increases wall thickness outward, which impacts flashing and siding transitions. Plan trim and window details in advance to avoid late-stage adjustments.
Are there fire or health concerns with certain insulation types?
Different insulation materials have distinct fire performance and indoor air considerations. Mineral wool and dense cellulose offer good fire resistance and are often preferred where fire performance matters. Some spray foams require thermal barriers and professional installation to control off-gassing. Always review product datasheets and local code, and consult manufacturers for installation and safety guidance.