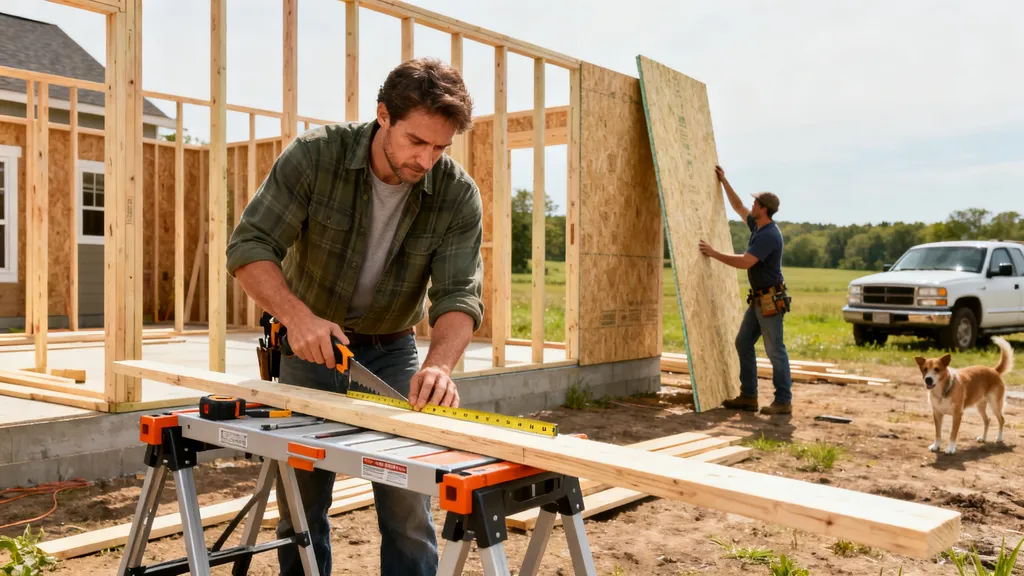
Practical, step-by-step carpentry fundamentals for owner-builders: tools, framing, openings, finish work, safety, and budget-friendly material choices.
Basic Carpentry for Owner-Builders
Basic carpentry skills are the foundation of most successful self-build projects. This guide on basic carpentry explains what owner-builders can reasonably tackle, the minimum tools to get started, framing workflows, roof and floor basics, openings and finish carpentry, material choices that save money and carbon, and safety and permit considerations you should not skip. Readers will learn practical step-by-step methods, sample fastener patterns, buy-vs-rent guidance for tools, and links to hands-on practice projects so owner-builder carpentry work stays efficient and code-friendly.
TL;DR:
- Learn three priority skills (accurate layout, measuring to the 1/16", and safe wall-raising) that reduce rework by 50–70% on small framing jobs.
- Start with a compact tool kit (25' tape, speed square, circular saw, cordless drill); rent table saws, compressors, and roof nailers to save $200–$800 per project.
- Practice on a small project like a deck or greenhouse before framing a home; follow permit rules and consult an engineer for long spans or complex roofs.
Getting Started: What Basic Carpentry Means for Owner-builders
Owner-builder carpentry covers the practical, learnable tasks of a self-builder: laying out and assembling stick-framed walls, building simple roof systems for small structures, installing subfloor and basic finishes, and managing openings for windows and doors. For budget-conscious owner-builders, realistic early goals include framing exterior walls for a shed or tiny house, building a deck, and completing finish trim work on interiors.
Training time varies by task: framing a single small exterior wall (layout, cutting, assembly) can be learned in a weekend workshop plus practice; building consistent speed and accuracy usually takes several repeat projects. Workshops and how-to courses show that short, focused practice improves speed and reduces waste. For a broader project roadmap that places carpentry tasks in the full self-build sequence, see the self-build roadmap. For beginners, start with manageable projects that use the same core skills—measuring, nailing, squaring—before moving to structural framing on a primary residence.
Industry resources note carpentry requires basic math and spatial reasoning; the Bureau of Labor Statistics highlights the trade’s skill set for estimation and layout tasks. For owner-builders, prioritize learning layout and squaring, safe tool handling, and reading basic plans. Those three skills translate across framing basics and finish carpentry tips, and will make subsequent stages—insulation, air barrier, and finishes—smoother.
Essential Tools and Workshop Setup for Owner-builders
A compact, prioritized tool kit lets owner-builders do most carpentry without overspending. Focus on accuracy and mobility: you’ll use the same few hand tools and a handful of power tools for framing, openings, and trim.
Hand Tools Checklist (2–4 Must-haves)
- 25' tape measure (steel, fractional markings to 1/16")
- Speed square and framing square
- 16 oz claw hammer and framing hammer (one or the other for starters)
- 4' level and torpedo level
Power Tools to Prioritize (buy vs Rent)
- Cordless drill + impact driver: buy (daily utility, battery platform value)
- Circular saw: buy (versatile for rip and crosscuts with a straight-edge guide)
- Miter saw: buy if doing lots of trim; rent for occasional use
- Table saw: rent or use a shop — buys make sense only for frequent ripping
- Reciprocating saw: buy for demo and rough cuts
- Pneumatic nail gun + compressor: rent for large framing or roof sheathing jobs; buy for repeated deck/trim work
The U.S. Bureau of Labor Statistics provides context on carpentry tasks and typical equipment use; see a summary of skill requirements at the BLS carpenter overview. That resource helps estimate which tools are core to most carpentry jobs.
Safe, Compact Workshop Setup for Small Sites
- Set up a portable workbench and sawhorses to stage wall plates and studs.
- Keep a small cutoff station for blade changes and mitering.
- Use a tarp or temporary canopy to protect materials.
- Designate separate zones for cutting, assembly, and storage to reduce trip hazards.
Tool Care and Basic Maintenance
- Clean sawdust from vents and lubricate moving parts every 10–20 hours.
- Store batteries at 40–60% charge in a cool, dry place to extend life.
- Sharpen or replace blades when cuts burn or tear out.
For a straightforward practice project that reinforces these tools and workflows, try building a simple deck or a small greenhouse from our small framing projects guide before committing to house-scale framing.
Basic Framing: Measuring, Cutting, and Assembling Walls
Framing basics begin with layout, stud placement, and consistent nailing patterns. Framing work demands accurate measurements, repeated checks for plumb and square, and safe lifting procedures during wall raising.
Layout, Squaring, and Setting Wall Plates
- Transfer plan dimensions to the sole and top plates with a marking sequence: plate length, stud marks at either end, then mark spacing from one side to avoid cumulative error.
- Standard stud spacing is 16" o.c. or 24" o.c.; mark stud locations using a speed square and a framing square. Use a chalk line for long runs.
- To square a plate assembly, measure diagonals (the 3-4-5 triangle method works for shorter lengths) and adjust until diagonals are equal.
Compare 16" vs 24" on-center:
- 16" o.c.: Better for heavier loads and most wall sheathing/finish installs; insulation fits standard batts; slightly more lumber cost.
- 24" o.c.: Saves ~12–15% on studs and reduces material cost; may require thicker sheathing or blocking for finish attachments; less optimal for batt insulation in some climates.
Cutting Studs, Headers, and Creating Stud Bays
- Cut common studs to finished height minus top and bottom plate thickness.
- For openings, use jack studs and cripple studs; nail patterns: two 3" box nails or two 8d nails per stud-to-plate connection as a starter pattern (confirm with local code).
- Header sizing varies by span and load; typical single-story spans up to 3–4 ft can use a doubled 2x10 header with plywood spacer in many cases, but spans beyond common limits require engineered sizing—always confirm with local code or a structural engineer.
Assembling and Raising a Wall Safely
- Layout studs on the plates on a flat surface and toe-nail or use a pneumatic framing nailer to fasten.
- Sheathe the wall as needed before raising (for short walls) or after for larger walls.
- Use at least two helpers, temporary bracing, and a defined lift plan. Brace walls immediately to prevent tipping.
A step-by-step visual walkthrough helps: watch this beginner-friendly framing tutorial to see layout, stud spacing, cutting, and wall-raising sequencing. For deeper procedural variations and advanced techniques, consult the wall-framing step-by-step and our tiny house construction tips.
Roof and Floor Basics for Small Self-builds
Small-structure roof framing and floor framing follow consistent rules: control loads, follow rise/run math, and fasten subfloors to reduce movement.
Simple Roof Framing Concepts
- The common rafter layout uses rise and run: rise (vertical) divided by run (horizontal) sets the slope. Use a framing square to lay out the birdsmouth cut that seats the rafter on the wall plate.
- Ridge boards must be plumb and continuous for common rafters; hips and valleys introduce complex cuts and typically benefit from extra practice or manufactured trusses.
- Compare stick-framed roofs and prefabricated trusses: stick framing gives site flexibility and lower transport cost on small builds; trusses speed up installation and can span larger distances without interior load-bearing walls but require delivery and crane access for some builds.
Floor Joists, Subfloor Installation, and Squeak Prevention
- Choose joist spacing and depth per recommended span tables (span tables depend on species and grade). For short spans found in tiny buildings, 2x8 or 2x10 joists spaced at 16" or 12" o.c. are common.
- Use blocking or bridging every 8'–12' for stiffness on longer joists.
- Subfloor fastening patterns: stagger adhesive beads with screws/nails at 6" o.c. at panel edges and 12" o.c. in the field (manufacturer recommendations vary). Glue plus screw patterns greatly reduce squeaks.
- Thermal detail: connect floor framing strategy to foundation thermal breaks—see the insulated slab edge guidance in our insulated slab edge article.
Seek engineered designs for long spans, unusual loads (heavy equipment, rooftop decks), or when roof geometry is complex. For small sheds and simple gable roofs, the roof framing steps article provides a stepwise pattern for birdsmouth layout and rafter cutting.
For broader learning resources, practical guides like World of Woodcraft provide self-directed learning pathways and recommend progressive practice on simple roof projects.
Openings and Finish Carpentry: Windows, Doors, and Trim
Openings and finish carpentry are where accuracy shows. Proper rough openings, flashing, and trim details influence weather tightness, energy performance, and final appearance.
Rough Openings, Flashing, and Basic Waterproofing
- Size rough openings by adding shim space: commonly 1/4"–3/8" clearance per side, and 1/2"–3/4" at the head for window settlement and shimming (manufacturer specs control final numbers).
- Sequence for flashing: apply sill pan or sill flashing first, install window on shims, then apply flashing tape to jambs and head, and finish with a head flashing that diverts water away.
- Follow established air and moisture control sequences to reduce risk—see the carpentries pre/post survey research for evidence that hands-on training improves installation quality and reduces later callbacks.
Installing Windows and Doors: Shimming and Squaring
- Set window plumb with shims at the jamb near the hinge/lock locations; temporarily fasten, then check for square using diagonal measurements.
- Adjust shims to correct racking, then fasten per manufacturer recommended screw patterns.
- For doors, ensure the frame is plumb; set hinge heights and check swing clearance before applying final trim and weatherstripping—refer to our door weatherstripping tips for energy-focused finishing.
Trim Basics: Casing, Baseboard, and Simple Stair Trim
- Use returns or rosettes at casing ends for easier inside corner transitions, or cope inside corners where paint gaps are likely.
- Baseboard: install after floors are complete; scribe to uneven floors for a tight fit.
- Stair trim: prioritize consistent nosing and riser alignment; use a jig to mark stringer trim lines.
When measuring for finishes, use the phrase "measure twice, cut once" literally—tight fits reduce caulk reliance and improve perceived quality. For window performance specifics, consult the window u-factor guide to align installation choices with thermal goals.
Materials, Sustainability, and Cost-saving Choices
Material selection affects cost, build speed, and embodied carbon. Owner-builders can reduce waste and choose sustainable alternatives without compromising structure or code compliance.
Choosing Lumber and Sustainable Alternatives
- Select kiln-dried lumber for interior framing when possible; wet lumber shrinks and causes nail pops.
- Grade choices: #2 is common for framing; select clear or better for exposed finish members.
- Species: southern pine and Douglas fir are common; choose locally available species to reduce transport impacts.
- Panel optimization: lay out cuts on sheet goods before cutting to minimize waste; use 4x8 sheet dimensions to reduce offcuts.
Using Reclaimed or Engineered Products (sips, Recycled Aggregate)
- SIPs: Structural insulated panels provide high thermal performance and reduce field framing labor. They save time on framing and insulation installation but require accurate openings and delivery logistics. See our SIPs overview for details.
- OSB vs plywood subfloor: Plywood resists moisture better but costs more; OSB is cheaper and improved OSB products have better moisture performance than older generations. Use tongue-and-groove panels and follow recommended fastening schedules.
- Reclaimed lumber: Works well for trim, flooring, and non-critical uses; avoid reclaimed for primary structural members unless graded by a professional.
Short materials comparison table:
| Material | Cost | Thermal/Structural Pros | Waste & Use Case |
|---|---|---|---|
| Dimensional lumber (2x4/2x6) | Low–Medium | Proven structural use, easy to work | Moderate waste if not optimized; good for stick framing |
| OSB subfloor | Low | Economical, uniform | More prone to moisture; use with proper fastening patterns |
| Plywood subfloor | Medium–High | Better moisture resistance, stable | Less waste from delamination; better for wet climates |
| SIPs | High upfront | Excellent thermal, fast assembly | Low on-site waste; needs panel planning and openings layout |
For airtightness and durable wall assemblies, pair material choices with proper membranes and seals—our airtight membrane installation article covers techniques that reduce heat loss and moisture risk. For vapor control sequencing, see the vapor barrier guide. When choosing materials on a budget, review our budget green materials guide for trade-offs between cost and sustainability.
Guidance on recycled aggregate concrete for foundation tie-ins and where reclaimed materials make sense is available in our related content; avoid reclaimed structural members unless they are inspected and graded.
Common Mistakes, Safety, Permits, and Code Basics
Owner-builders often run into recurring issues that are avoidable with checklists, safety habits, and adherence to permit requirements.
Top Carpentry Mistakes Owner-builders Make
- Out-of-square layouts due to cumulative measurement errors; use fixed reference lines and measure from a single face consistently.
- Incorrect fastener patterns and underfastened subfloors causing squeaks; follow manufacturer fastening schedules.
- Improper flashing or skipped sequencing around windows and doors leading to leaks.
- Relying on ungraded reclaimed lumber for structural use.
Basic Site and Tool Safety Practices
- PPE: eye protection, hearing protection when using power tools, dust masks when cutting treated lumber.
- Ladder safety: maintain three points of contact; avoid overreaching.
- Nail gun safety: treat like a loaded firearm—disable when moving, keep safety engaged, and use sequential triggers if possible.
- Fall prevention: for roofs and raised framing, use edge protection or fall-arrest systems per basic OSHA guidance.
Understanding Permits and Inspections
- Permit rules vary by jurisdiction. Our permit requirements by state helps owner-builders find local rules and owner-builder registration processes.
- Recognize when to consult a structural engineer: long clear spans, heavy roof loads (e.g., snow country), unique seismic or wind requirements, or when local code expressly requires engineered plans.
- Inspections typically include footing/foundation, framing, insulation, and final. Schedule inspections early to avoid rework.
Avoid the temptation to shortcut flashing, fastening patterns, or inspections—these cuts cost more later. OSHA and local building departments provide authoritative safety practices; using them reduces injury and improves long-term performance.
Key Checklist, Tools Comparison Table, and Quick Reference
A compact on-the-day framing checklist and a buy-vs-rent tool comparison help plan costs and logistics.
Day-of framing checklist:
- Layout plans: Full-size prints or clear layout notes
- Marking tools: Tape, panels of chalk line, carpenter pencils
- Fasteners: 8d and 16d nails, recommended screws, construction adhesive
- Blocking material: 2x blocking stock for bridging and cripple studs
- Helpers: Minimum two people for wall raises; more for long walls or roofs
- Safety: Gloves, eye and ear protection, fall protection if needed
- Extras: Shims, wedges, pry bar, spare blades
Tools buy vs rent comparison:
| Tool | Typical buy cost (low/med/high) | Typical rental/day cost | Recommend |
|---|---|---|---|
| Circular saw | $60 / $120 / $300 | $20/day | Buy |
| Miter saw | $150 / $300 / $700 | $35/day | Buy if trimming a house, rent for once-off |
| Table saw | $300 / $600 / $1,200 | $60/day | Rent |
| Nail gun (framing) + compressor | $150 / $350 / $800 | $50/day | Rent for a weekend, buy for repeated use |
| Cordless drill/impact | $80 / $200 / $450 | $15/day | Buy |
| Reciprocating saw | $50 / $120 / $300 | $20/day | Buy |
Troubleshooting list for common finish issues:
- Gaps at trim: Use backbeads of caulk, then a small paint touch-up; for large gaps, re-scribe or replace the molding.
- Squeaky floors: Add adhesive and screws from below or screw through the subfloor into joists at closer spacing.
- Racked door: Remove and re-shim hinge side; check jamb for twist and plane.
For practice projects that mirror these tool choices, see building a simple deck and the greenhouse guide at small framing projects.
The Bottom Line
Basic carpentry gives owner-builders the control to save material and labor costs while achieving durable results. Prioritize a small set of reliable tools, master layout and squaring, and practice on non-critical projects before tackling primary structures. When jobs involve long spans, heavy loads, or complex roofs, bring in an engineer and follow permit rules.
Frequently Asked Questions
Do I need a pro to frame my first wall?
Owner-builders can frame a first wall with practice, basic tools, and a helper. Start by laying out and assembling a single small wall on the ground, check squareness carefully, and use temporary bracing when raising the wall. For load-bearing walls in a primary dwelling, or when spans exceed common limits, a professional or engineer review is recommended.
What basic tools should I buy first?
Buy the tools that get used every day: a 25' tape measure, speed square, circular saw, cordless drill/impact driver, and a 4' level. Rent or borrow larger, less-frequent tools such as a table saw, compressor, and roof nailer. This buy-vs-rent approach saves several hundred dollars on most owner-builder projects while keeping the essential items on hand.
How do I learn to square and level walls reliably?
Use consistent layout methods: measure from the same reference face, use a chalk line for long runs, and check diagonal measurements for squareness. The 3-4-5 triangle rule is a reliable quick check for shorter walls. Practice on a mock-up wall or a shed wall before tackling primary structures, and verify with a level and plumb line at multiple points during assembly.
Can I use reclaimed lumber for structural framing?
Reclaimed lumber can be a good choice for non-structural uses like trim, flooring, or decorative beams. For primary structural framing, reclaimed wood should be graded by a qualified professional and inspected for hidden damage, rot, nails, or structural compromise. In many cases, modern graded lumber or engineered products are safer and more predictable for load-bearing uses.
How do I know when to get engineered plans?
Seek engineered plans for long clear spans, unusual roof geometries (complex hips, valleys, or heavy snow loads), significant cantilevers, or whenever local code or the building department requires it. If the project includes multi-story framing with large openings, or if initial span tables suggest members beyond typical domestic limits, an engineer should size members and design connections.