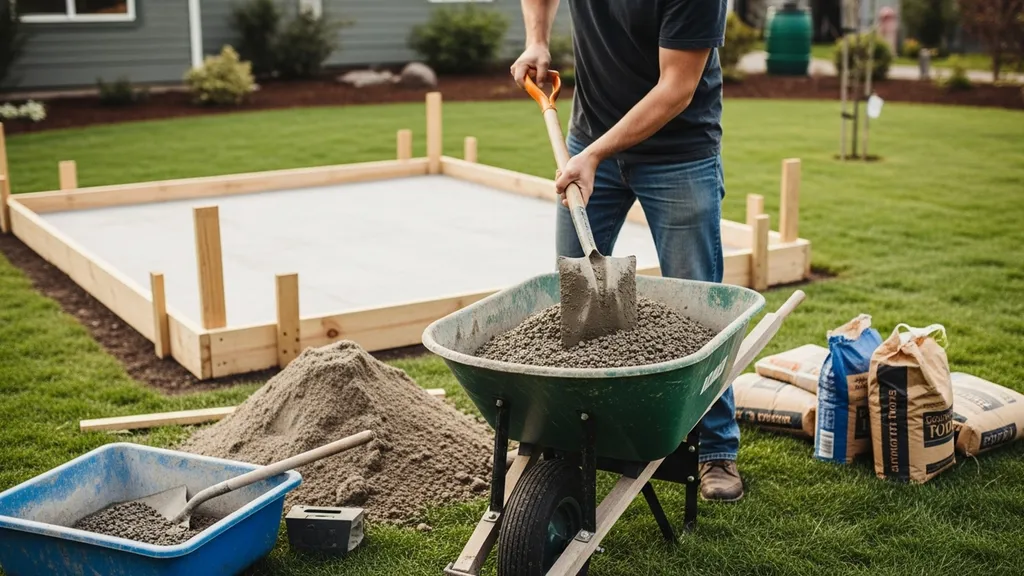
Practical, step-by-step guidance for DIY concrete: mix design, pouring techniques, finishing methods and sustainable tips for budget-conscious builders.
Concrete Work DIY: Mixing Pouring Finishing
Concrete work is one of the most practical skills a budget-conscious DIY homebuilder can add to their toolkit. This guide on DIY concrete covers mixing, pouring and finishing for small slabs, footings and simple walls — so readers can size mixes, plan a pour, pick the right tools, and avoid the most common mistakes. It explains how to calculate volumes, choose between hand-mixing, a portable mixer or ready-mix, and how to finish and cure concrete for long-term durability.
TL;DR:
- For a typical small slab (8x10x0.5 ft = 40 ft³) expect ~1.48 yd³ of concrete — equals roughly 112 60-lb bags or one small ready-mix truck; plan delivery and crew accordingly.
- Use a 3,500 psi mix for driveways and exterior slabs, 2,500–3,000 psi for walkways and shed slabs; avoid extra water — use plasticizers if needed.
- Prioritize consolidation and 7-day moist curing (28 days for full strength) — poor curing causes most early failures like scaling and low strength.
Why DIY Concrete Matters for Budget-friendly, Eco-conscious Builders
Small pours are common on self-build sites: shed slabs, tiny-house footings, and garden walls. Typical DIY slab sizes range from about 6x8 ft for compact tool sheds up to 12x12 ft for small workshops. A 6x8x0.5 ft slab is 24 ft³ (~0.89 yd³); a 12x12x0.5 ft slab is 72 ft³ (~2.67 yd³). Those volumes are small enough to mix on-site with a wheelbarrow or portable mixer, which saves on delivery minimums and truck access fees.
DIY concrete saves labor costs but demands careful planning. Local building departments often require permits and inspections when footings are deeper than typical frost-depth thresholds, for structural foundations, or for slabs that support buildings. Contact the local building department and call utility locate before digging. For large structural pours, complex reinforcement, or code-required inspections, hiring a concrete contractor is safer and sometimes required.
Research and vendor guides show nominal mix ratios for many DIY uses; these inform cost and performance decisions. For small, uncovered slabs that won’t carry vehicles, a 2,500–3,000 psi mix is usually sufficient. For driveways or structural footings, step up to 3,500–4,000 psi and consult code on reinforcement and frost protection. For help weighing labor savings versus risk, see the cost and labor discussion in renting vs hiring labor.
Planning a Concrete Project: Measurements, Mix Quantities and Permits
Accurate volume calculation avoids waste and last-minute orders. Formulae:
- Slab Volume (ft³) = Length (ft) × Width (ft) × Thickness (ft).
- Footing Volume (ft³) = Length (ft) × Width (ft) × Depth (ft) for continuous footings; for isolated pads use area × thickness.
- Convert cubic feet to cubic yards: yd³ = ft³ ÷ 27.
Example: an 8x10 ft slab, 6 in (0.5 ft) thick → 8 × 10 × 0.5 = 40 ft³ → 40 ÷ 27 = 1.48 yd³.
Bag conversions (typical yields):
- One 60-lb bag yields ~0.45 ft³.
- One 80-lb bag yields ~0.60 ft³.
Using 60-lb bags, the 40 ft³ slab needs ~89 bags (40 ÷ 0.45 ≈ 89). Note: bags are often sold as ready-mix blends (portland cement + aggregates).
Scheduling matters. Concrete placement should avoid forecast rain, heavy freezing temperatures, or extreme heat. Allow window buffers:
- Delivery or mixing window: morning or late afternoon to reduce rapid setting in heat.
- Crew: For 1–3 yd³, two to three people can place and finish in a few hours; larger pours need more hands.
- Curing: Plan for at least 7 days of protected curing; block site access during that time.
Permits and site prep checklist:
- Check local code for frost-depth and footing size; obtain required permits.
- Provide compaction and a well-graded base (4–6 in of compacted gravel is common).
- Lay a vapor barrier for slab-on-grade when moisture control matters — see shed vapor barrier guidance.
- Mark and sleeve any embedded conduit or plumbing; see the water-efficient plumbing layout for coordination.
- Use the basics in how to calculate materials for measuring tools and conversions.
- For permit examples, consult a regional overview like permits overview.
Tools, Forms and Reinforcement: What a Diyer Really Needs
A compact, well-chosen toolkit speeds the job and raises finish quality.
Essential tools:
- Wheelbarrow, shovel, mixing hoe, and mixing trough or portable mixer.
- Screed (2x4 or aluminum straightedge), bull float (aluminum), magnesium trowel, edging tool, jointer, and steel trowel.
- Concrete vibrator or tamping rod; for small DIY pours, a handheld vibrator rental or a tamping bar will help consolidate.
- Safety gear: gloves, eye protection, N95 mask for dry mixing, knee pads, rubber boots.
Formwork materials:
- 2x6 or 2x8 lumber for perimeter forms, braced every 2–3 ft.
- Plywood or OSB can be used as facing; see oriented strand board uses.
- Form release oil prevents sticking; use screws or stakes that allow easy removal.
Reinforcement choices:
- Welded wire mesh: quick to place and effective for controlling cracking in slabs without heavy loads.
- Rebar (typical #3 or #4): required for many footings and structural slabs; tie intersections with wire.
- Synthetic fibers: polypropylene fibers reduce plastic shrinkage cracking and can reduce labor by replacing secondary mesh in some non-structural slabs.
Comparison table: Hand-mix vs Portable Mixer vs Ready-Mix
| Option | Typical Batch Size | Labor | Cost per yd³ (approx) | Quality control |
|---|---|---|---|---|
| Hand-mix (wheelbarrow) | 0.1–0.3 yd³ | High manual effort | $120–$200 (bags) | Variable, operator dependent |
| Portable mixer (rented) | 0.25–0.75 yd³ | Moderate, 2 people | $100–$150 + bags | Good with consistent batching |
| Ready-mix truck | 1–10+ yd³ | Low on-site mixing | $110–$160 delivered | High consistency, timed delivery |
Notes: Costs vary regionally and with aggregate pricing. For small volumes under 1 yd³, hand-mixing or portable mixers usually cost less in hard cash but more in labor. For 2+ yd³, ready-mix often becomes competitive.
For budget-conscious formwork and insulation-compatible options, see budget-friendly material choices.
Mixing Concrete: Ratios, Methods and Quality Control
This section includes a practical video walkthrough to visualize batches, mixing technique and on-site checks.
For a visual demonstration, check out this video on pouring a huge concrete slab using bagged concrete:
Common nominal mix ratios and target strengths:
- 1:2:3 (cement : sand : aggregate) is a widely cited nominal mix for many DIY uses; vendors often recommend bagged blends for convenience. See a complete guide at slabcalc's guide to DIY concrete.
- Target compressive strength guidance:
- 2,500–3,000 psi for walkways and small shed slabs.
- 3,500 psi for driveways and residential garages.
- 4,000+ psi for heavier structural needs.
- Water-cement ratio controls strength. Aim for the lowest workable ratio. Excess water reduces long-term strength and increases shrinkage cracks.
Mixing methods:
- Hand mixing: Combine dry ingredients first, then add measured water. Use a plastic container or wheelbarrow and fold materials until uniform.
- Portable mixer: Add measured water and a portion of aggregate, then add cement and remaining aggregate; mix 2–4 minutes per batch.
- Ready-mix: Confirm slump, admixtures (air entrainment for freeze-thaw regions), and delivery time with the plant.
Quality control and on-site checks:
- Slump: For slabs, typical slump is 3–4 in. Use a slump cone if available; for small DIY projects, a feel test works — mix should be workable but not soupy.
- Remixing: If a batch is too wet, add measured dry mix to rebalance; never add extra water to adjust set time.
- Temperature adjustments: Hot weather accelerates set — use chilled water or retarding admixtures. In cold weather, use warm water and avoid placing concrete below about 40°F without special measures (accelerators, insulating blankets).
- Testing: For critical work, arrange 7- and 28-day cylinder tests through a local lab. For most small DIY projects, consistent batching and curing are sufficient.
For deeper statistical methods in mix design, see the component analysis work on mix optimization at the National Institutes of Health archive: component analysis as a tool for concrete mix design. For practical DIY tips on prepping the surface and vapor barriers, consult a vendor guide at DIY concrete projects: tips and tricks for success.
Pouring and Placing: Techniques for Slabs, Footings and Walls
Efficient sequencing reduces rework and cold joints. Place concrete as close to final location as possible — use wheelbarrows, chutes, or pumps to avoid long carries. Avoid drop heights above 3–4 ft; if drop is unavoidable, use a chute and tamp as you place.
Leveling and screeding:
- Start at one end and strike off with a straightedge (screed) using a sawing motion to remove excess.
- Use the bull float immediately after screeding to level and bring fines to the surface; do not finish until bleed water has evaporated sufficiently.
Compaction and consolidation:
- Use a vibrator or tamping rod to consolidate, especially around reinforcement or in narrow forms. For small slabs, manual tamping and dragging a heavy rake can be effective.
- Avoid over-vibration; excessive consolidation can segregate aggregates.
Control and expansion joints:
- Control joint spacing rule of thumb: 24–36 times slab thickness in inches. For a 4 in slab, joints every 8–12 ft are common; adjust for load and subgrade.
- Saw-cut timing: For 4 in slab, saw joints within 6–18 hours depending on set rate and weather; early-entry joint tools can be used for faster timing.
- Use expansion joints where slab meets fixed structures or where differential movement is expected.
Wall and column placement:
- Brace forms to resist lateral fluid pressure. Small forms may need 1–2 ft spacing for strong lateral support.
- Pour in lifts for tall walls; consolidate each lift.
For a pros-and-cons view of mixing options relevant to pour planning, see a ready-mix vs DIY comparison at ready mix vs DIY concrete which is the better choice.
Finishing Concrete: Troweling, Textures and Curing
Timing is everything for finishing. After screeding and initial floating, wait until bleed water recedes and the surface resists fingerprinting. That window varies with mix and weather.
Finishing sequence (typical for slabs):
- Screed to level.
- Bull float to flatten high spots.
- Edge and jointer to form control edges and joints.
- Intermediate float to refine surface.
- Steel trowel for a smooth finish, or broom for textured, slip-resistant surface.
Popular DIY Finishes:
- Broom finish: Drag a broom across the float-finished surface to create texture. Good for exterior slabs and non-slip areas.
- Exposed aggregate: Apply a surface retarder after finishing, then wash the surface 24–48 hours later to expose coarse aggregate. Requires careful timing.
- Stamped concrete basics: Simple stamps can be used on small slabs, but risk uneven patterns and poor adhesion for DIYers; renting professional-grade stamps and practice on a scrap slab is recommended.
Curing — the single most underappreciated step:
- Moist curing: Keep the surface wet with continuous misting or wet burlap for at least 7 days. This helps achieve design strength.
- Curing compounds: Apply a proprietary curing compound immediately after finishing if wet curing isn't feasible.
- Plastic sheeting: Covering with polyethylene helps retain moisture but does not allow water addition; it’s best combined with an initial wetting before covering.
- Minimum durations: 3–7 days for general durability; 7 days is standard for many mixes. Full strength is commonly measured at 28 days.
Climate adjustments:
- Hot, dry conditions need more aggressive moisture control (frequent wetting or curing compounds); use retarders or chilled water to slow set.
- Cold conditions require insulated blankets or heated enclosures if temperatures drop below about 40°F during the 48–72 hour set window.
Troubleshooting Common DIY Concrete Problems
Cracking patterns and fixes:
- Plastic shrinkage cracks: Appear within hours; cause — too much surface evaporation (wind, heat). Fix by improving curing, using windbreaks, and adding fibers to mixes.
- Drying shrinkage (hairline) cracks: Often from high water-cement ratio. Use control joints and fibers to limit width.
- Structural cracks: Wide, vertical or stepping cracks in footings usually indicate load or subgrade problems. Consult a structural engineer for repair (epoxy stitching, underpinning).
Surface Defects:
- Scaling: Delamination of the surface due to freeze-thaw and poor air entrainment. Repair with overlays and ensure proper air-entrainment in future mixes.
- Dusting: Fine powder on the surface from weak surface mortar — often from over-finishing or too much water. Remove weak material and seal or overlay.
- Blisters/bugholes: Small voids from air trapped at the surface after finishing too early. Minimize by delaying final trowel until bleed water is gone.
If a pour is too soupy:
- Do not add strength by adding cement; instead, add measured dry mix to rebalance or stop the pour and let the next pour use new mix.
- Excess water reduces strength and increases shrinkage — remedial fixes (polishing, overlays) are aesthetic only, not structural.
If a batch is too stiff:
- Add small, measured amounts of water and remix; if stiffness persists, use a plasticizer instead of free water, or discard and remanufacture for critical pours.
For moisture-driven concrete issues in enclosed spaces or crawl spaces, see guidance on remediation at crawl space moisture repairs and short-term moisture control options at DIY moisture absorber comparison.
Sustainable and Cost-saving Tips for DIY Concrete Work
Reduce embodied carbon and waste while keeping costs in check.
Supplementary cementitious materials (SCMs):
- Replace part of portland cement with fly ash, slag, or calcined clay to reduce carbon intensity. Typical replacements range from 15–30% for fly ash or slag in non-critical mixes; local codes and performance requirements vary, so check compatibility.
- SCMs may slow early strength gain; plan curing and setting times accordingly.
Recycled aggregates and local sourcing:
- Use crushed concrete or recycled aggregates for subbase or non-exposed fills. For guidance on trade-offs and techniques, see the recycled aggregate concrete guide.
- Prioritize locally available sand and gravel to reduce haul emissions and cost. See general sourcing strategies in the guide to sustainable materials.
Minimizing Waste:
- Batch planning: Calculate volumes carefully and add 5–10% for waste and spillage on small jobs.
- Washout best practices: Build a dedicated washout pit or container; disposing of wash water and slurry to municipal systems can be illegal.
- Reuse forms and bracing where possible; clean and store lumber properly.
Alternatives and trade-offs:
- Low-carbon mixes can be marginally more expensive in materials but reduce lifetime emissions; for small DIY projects, lightweight or alternative wall systems like hempcrete vs ICF comparison may suit some builders better depending on insulation and moisture goals.
The Bottom Line
DIY concrete is practical for small slabs and footings when planners calculate volumes, choose a suitable mix and method, and prioritize consolidation and moist curing. Start with a modest project, follow permit rules, and use the right tools to get durable results with lower cost and environmental impact.
Action checklist for a first small slab (8x10x0.5 ft):
- Materials: ~1.5 yd³ of concrete (or ~112 60-lb bags), 4–6 in compacted gravel base, vapor barrier if needed.
- Tools: wheelbarrow or rented mixer, screed, bull float, edging tool, trowel, safety gear.
- Steps: Excavate and compact base → set forms and reinforcement → mix/place/consolidate → screed and float → edge/joint → finish (broom or trowel) → cure moist for 7 days.
Frequently Asked Questions
How much concrete do I need for a 10x10 slab?
Calculate volume: 10 ft × 10 ft × thickness (ft). For a 4-inch thick slab (0.33 ft): 10 × 10 × 0.33 = 33 ft³. Convert to cubic yards: 33 ÷ 27 ≈ 1.22 yd³. If using 60-lb bags (~0.45 ft³ per bag), you need about 74 bags (33 ÷ 0.45 ≈ 74). Add 5–10% for waste and minor over-excavation.
Can I mix concrete in a wheelbarrow for a shed foundation?
Yes. For small volumes (under ~1 yd³) a wheelbarrow or mixing trough is common. Mix dry first, then add measured water; avoid overwatering. For larger slabs or when consistent slump is critical, rent a portable mixer or order ready-mix. Hand mixing is labor-intensive but economical for single small pads.
How long before I can walk or drive on new concrete?
Typical timelines: light foot traffic after 24–48 hours, light vehicle traffic after about 7 days if the mix is 3,500 psi and cured properly. Full design strength is generally reached at 28 days. Actual timelines depend on mix design, temperature, and curing method; in cold weather, strength gain is slower.
Is fiber reinforcement enough instead of rebar?
Synthetic fibers reduce plastic shrinkage cracking and can replace secondary mesh in many non-structural slabs. However, for structural footings, heavily loaded slabs, and where code requires continuous reinforcement, rebar or welded wire mesh remains necessary. Evaluate loads and code requirements before substituting fibers for rebar.
What is the best way to cure concrete in hot weather?
In hot, dry conditions, keep the surface moist using frequent misting or wet burlap and protect from direct sun with shade cloth. Use curing compounds if continuous wet curing isn’t practical. Consider retarding admixtures or chilled mixing water to slow setting. Keep wind and direct sun off the slab during the first 48–72 hours to minimize plastic shrinkage.