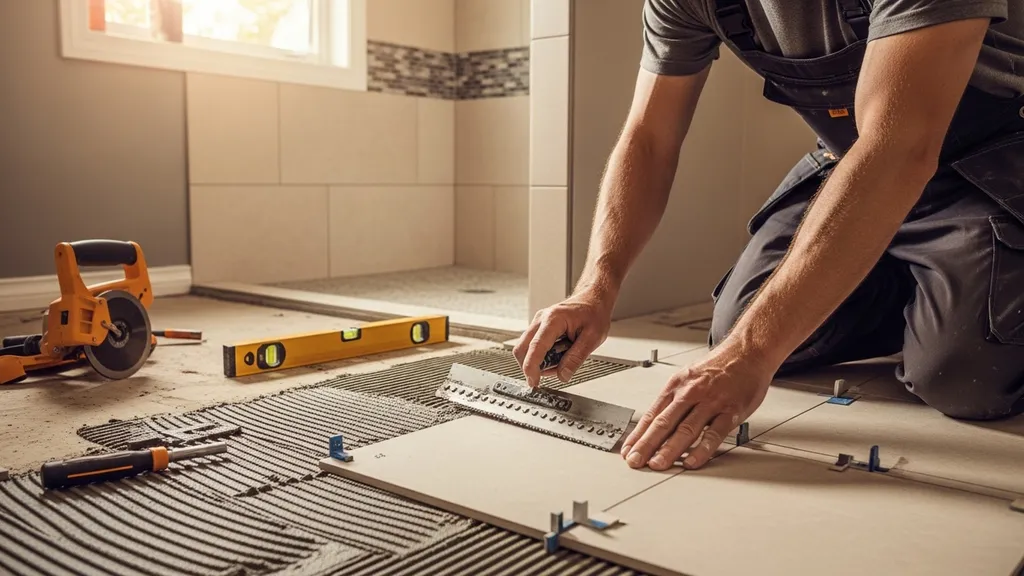
Step-by-step guide to installing tile on floors and in showers — materials, waterproofing, tools, common mistakes, and cost-saving tips for DIYers.
Tile Installation: Floors and Showers DIY
Installing tile on floors and in showers is a high-value DIY project: it improves durability, increases resale appeal, and lets a careful homeowner control material choices and waste. This guide covers practical, hands-on steps for a successful DIY tile install — from selecting tile and waterproofing a shower pan to setting, grouting, and avoiding common failures — and it uses plain language so a budget-conscious self-builder can plan confidently. Expect to learn which materials fit floors versus wet walls, how to prepare substrates and drains, when to use thinset or mastic, and which mistakes cost the most time and money.
TL;DR:
- Allow a 10–15% tile overage for cuts and breakage, and plan 2–5 days of active work for a small bathroom install (plus curing time).
- For shower floors, build or use a pre-sloped waterproof shower pan with 1/4" per foot slope and a bonded waterproof membrane for reliable protection.
- Rent a wet saw for large or porcelain tiles, buy quality notched trowels and a grout float, and prioritize proper substrate prep over fancy tile choices.
Why DIY Tile Installation for Floors and Showers?
DIY tile is a logical pick for budget-conscious self-builders tackling small bathroom remodels, tiny-house wet rooms, or a single-room floor replacement. Tile's durable surface and low maintenance make it attractive, and the labor portion of a tile job is often the biggest single cost — doing that work yourself can cut overall project cost if the right skills, time, and tools are available. That said, tile in wet areas requires attention to plumbing, waterproofing, and substrate stiffness; skip the steps and failures are expensive.
When DIY Makes Sense
- Small, simple floor plans with square or rectangular rooms reduce layout complexity and cut-down waste.
- Projects where the subfloor and plumbing are already in good condition — no major structural repairs or re-routing of drains.
- Builders willing to learn a handful of techniques: accurate layout, mortar bed or membrane installation, proper trowel selection, and grouting.
Skill Level, Time, and Cost Trade-offs
- Tile flooring DIY and shower tile installation both require steady, detail-oriented work; floors are more forgiving if you avoid waterproofing mistakes, while showers demand strict waterproofing.
- For cost planning, obtain local labor and material quotes to compare against your DIY budget; Porcelain tile installation guidelines and industry standards can help estimate time and tolerance expectations.
- Safety and permits: altering drains or plumbing may require permits or inspections — check local requirements before starting, and ensure good ventilation during and after work (see guidance on bathroom ventilation).
Choosing Tiles and Materials: Floors vs Showers
Tile choice affects durability, installation method, and maintenance. Use tile designed for the intended surface: floor-rated tiles for walking surfaces, wall-only tiles for vertical applications. Porcelain is the default for wet floors because of low water absorption; natural stone needs sealing. Smaller mosaics are common on shower floors because grout lines add traction and they conform to slope more easily.
Tile types and best uses (ceramic, porcelain, natural stone, mosaics)
- Ceramic: Lower cost, good for walls and low-traffic floors; higher water absorption than porcelain.
- Porcelain: Denser, low water absorption; suitable for floors, showers, and exterior walkways if rated.
- Natural stone (granite, marble, slate): Attractive but porous; requires sealing and careful substrate prep.
- Mosaics: Small format (typically 2" or smaller) that perform well on shower floors because they accommodate slope and require smaller cuts around the drain.
Size, Format, and Slip-resistance Considerations
- Larger-format tiles (12" x 24" and up) need flatter substrates and sometimes back-buttering to achieve full mortar coverage.
- For wet surfaces, look for high COF (coefficient of friction) ratings. For shower floors, 1"–2" mosaics or textured small-format tiles improve grip and make the 1/4" per foot slope easier.
- PEI rating: this indicates surface wear resistance for glazed tiles — PEI 3 is common for residential floors, PEI 4–5 for high-traffic areas. PEI doesn't apply to all tile types (e.g., most porcelain manufacturers will list it).
Grout, Sealers, and Trims
- Sanded grout for joints 1/8" and wider; unsanded for very narrow joints and some wall tiles.
- Epoxy grout resists stains and water penetration and is worth the extra cost in showers and high-stain kitchens.
- Natural stone requires a penetrating sealer; re-seal frequency depends on porosity — often every 1–2 years.
Comparison/specs table: ceramic vs porcelain vs natural stone
| Property | Ceramic | Porcelain | Natural stone |
|---|---|---|---|
| Typical cost (material only) | Low–mid | Mid | Mid–High |
| Water absorption | Higher | Very low | Variable (porous) |
| PEI (typical) | 1–4 | 3–5 | N/A (varies) |
| Recommended grout | Unsanded for walls, sanded for wide joints | Sanded or epoxy | Sanded + sealer |
| Typical use | Wall, low-traffic floors | Floors, showers, exterior | Feature walls, floors with sealing |
Industry standards and specifications are evolving; consult the updated ANSI A108/A118/A136.1 guidance for installation requirements and test criteria — see the overview of the ANSI A108/A118/A136.1:2024 standard for installation changes to consider.
Sustainable options and suppliers
- Look for reclaimed tile at local salvage yards, or choose porcelain and ceramic with recycled content. Shop local tile yards, big-box retailers, and online wholesalers to compare prices and remnants — practical savings come from using offcuts or choosing standard sizes that minimize waste. For sourcing tips see sourcing local materials.
- Use low-VOC adhesives and grout where available for better indoor air quality.
Preparing the Substrate: Floors and Shower-specific Requirements
The substrate must be sound, flat, and stiff enough for tile. For floors, that usually means a plywood subfloor with a rigid underlayment or a concrete slab prepared to the tile manufacturer's flatness tolerances. For showers, substrate prep includes a pre-sloped base, waterproofing layers, and correct drain placement.
Subfloor Repairs, Leveling, and Underlayments
- For wood subfloors, ensure deflection limits suitable for tile — industry guidance often references L/360 for tile (i.e., maximum deflection of span/360 under load), but verify current local codes and standards before beginning.
- Common underlayments: cement backer board screwed and sealed, fiber-cement boards, or uncoupling membranes like Schluter Ditra to reduce cracking from movement. On plywood, install a minimum of 1/2" cement backer board over 5/8" subfloor in many assemblies; follow manufacturer instructions.
- For concrete slabs, repair spalls, remove contaminants, and grind high spots to meet the flatness tolerance (surface variation guidance is available from manufacturers and technical sources such as Porcelain tile installation guidelines).
Shower Waterproofing Methods: Preformed Pans, Mortar Beds, Membranes
- Preformed foam/ABS pans: fast and consistent slope, ease of installation, good for DIY curbed showers.
- Mortar (mud) bed with waterproof membrane (e.g., PVC liner): traditional method that allows custom slope; requires skill to create a pre-slope and final finish.
- Bonded waterproof membranes (liquid-applied or sheet membranes): applied over a solid substrate and tiled over directly. For wet areas, the practice is to use a waterproof pan or a fully bonded membrane on the floor with waterproofing extending up walls to at least 2" above the flood level of the drain.
- For drain slope, industry guidance recommends a minimum slope of 1/4" per foot to drain, with some codes allowing up to 1/2" per foot. See the Ceramic Tile Foundation's guidance on required slopes and wet-area protection: What do you need to install tile in wet areas?.
Drain Placement and Slope Details
- Place the drain centered or where the final layout minimizes tiny cuts, keeping accessibility and plumbing trap placement in mind. Early coordination with rough plumbing is critical; review shower drain basics for tolerances and assembly tips.
- Build your slope to drain at 1/4" per foot. Use a screed or straightedge and a level to verify slope before setting tile. For mortar beds, ensure a consistent pre-slope under the waterproof liner and a uniform finish layer.
Practical cross-links
- If you need to form a mud bed or work with concrete slabs, consult the guide on mixing and finishing concrete. For airtightness and moisture control in high-performance builds, coordinate with your sealing for airtightness practices.
Setting Tiles: Layout, Adhesives, and Installation Techniques
A good layout and the right adhesive choices make the difference between a satisfying job and endless callbacks. Take time to dry-lay tiles, snap chalk lines, and plan transitions before mixing mortar.
Dry Layout and Chalk Lines
- Start from a visual focal point: the shower drain, the center of a room, or a doorway threshold. Do a "dry layout" using tiles to determine where cuts will fall; aim to avoid 1–2" edge tiles where possible.
- Use chalk lines to establish perpendicular grid lines and a tile starting point. For bathrooms, work from the center line toward walls, keeping cut tiles at the room perimeter.
Thinset, Mortar Mixes, and Trowel Selection
- Thinset mortar (polymer-modified cementitious mortar) is the standard for floor and shower tile installations. Use a medium-bed or large-and-heavy tile mortar for large-format tiles to prevent sag and ensure full contact.
- Thinset vs mastic: mastic is an organic adhesive suited for dry walls and some wall tiles but is not recommended for shower floors or areas with prolonged water exposure. For wet areas and floors, choose a polymer-modified thinset or a specified mortar rated for wet areas.
- Trowel selection example guidance (consult manufacturer for exact choices):
- Tile ≤ 8" x 8": 1/4" x 1/4" square-notched trowel.
- Tiles 8"–15": 1/4" x 3/8" V-notched or 1/4" x 1/2" square-notched.
- Large-format tiles: 1/2" x 1/2" square-notched or larger and back-butter tile to ensure full contact.
- Full mortar contact is the goal — avoid voids below the tile which cause hollow sound and risk breakage. Use a notched trowel to create ridges and then comb thinset toward the tile placement.
Tile Cutting, Notching, and Back-buttering
- A wet saw is the most versatile cutter for porcelain and large-format tiles. For small ceramic tiles, a manual cutter or snap cutter may suffice.
- Back-buttering: apply a thin layer of thinset on the back of large tiles in addition to thinset on the substrate to ensure full bedding and prevent lippage, especially on floors.
- Wear a properly rated N95 or P100 respirator when dry-cutting or grinding tiles to limit silica dust exposure; consult OSHA and public health guidance on silica safety.
Watch this step-by-step guide on installing cement board and waterproofing for tile shower walls - complete step-by-step guide:
Safety notes and product choices
- Follow manufacturer coverage rates and open time for mortars and adhesives; environmental conditions (temperature and humidity) affect cure and working time.
- Brands to consider (examples): MAPEI and Laticrete make a wide range of thinsets and mortars; Schluter Ditra is a popular uncoupling membrane. Always follow the product data sheet for mixing ratios and pot life.
- For detailed technical flatness and variation criteria for substrates, consult manufacturer technical documents such as the porcelain installation guidelines cited earlier.
Grouting, Sealing, and Finishing for Wet and High-traffic Areas
After tile has been set and mortar has cured, grout fills the joints and completes the visual and functional finish. Choose grout type to match joint width, water exposure, and cleaning expectations.
Sanded vs Unsanded vs Epoxy Grout
| Grout type | Joint width | Water resistance | Stain resistance | Typical use |
|---|---|---|---|---|
| Unsanded | <1/8" | Moderate | Moderate | Wall tiles, narrow joints |
| Sanded | ≥1/8" | Moderate | Moderate | Floors, wide bathroom joints |
| Epoxy | Any | High | High | Showers, commercial kitchens, heavy stain areas |
- Epoxy grout is highly water-resistant and stain-resistant; it's harder to tool and more expensive but reduces long-term maintenance in showers and wet kitchens. Consider epoxy (e.g., Laticrete SpectraLOCK) where durability and stain resistance matter.
- Sanded grout is economical and strong for floor joints. Unsanded grout avoids scratching delicate tiles and suits narrow joints.
Sealing Natural Stone and Grout Lines
- Natural stone should be sealed with a penetrating sealer per the manufacturer's guidance; re-seal based on porosity—many homeowners schedule resealing every 1–2 years.
- Cementitious grout should be sealed if the area is subject to stains or high moisture. Epoxy grouts typically do not require sealing.
Cleaning Haze, Curing Times, and Final Inspections
- Remove grout haze with a clean sponge and multiple rinses; use grout haze remover only if manufacturer recommends it for your grout type.
- Typical cure times: grout often reaches initial set in 24 hours but full chemical cure varies; for showers, wait at least 48–72 hours before sustained wet use, and always confirm with product data sheets for exact cure times.
- Final inspection: check joints, look for hollow-sounding tiles (tap test), verify drain performance, and ensure all edge transitions and thresholds are secure.
For practical tips and a contractor-style checklist on grout application and cleanup, see DIY tile installation: tips for professional results.
Common Mistakes, Troubleshooting, and Repairs
Avoiding the most common missteps reduces rework, and when problems appear, targeted repairs can restore performance without a total redo.
Top mistakes and how to prevent them
- Inconsistent mortar coverage: Prevent by back-buttering large tiles and using the correct trowel.
- Inadequate slope in showers: Verify 1/4" per foot during pan construction; insufficient slope leads to pooling and mold.
- Wrong grout choice in wet areas (using mastic or cementitious grout alone in heavy wet traffic): Use polymer-modified thinset and consider epoxy grout for showers or high-stain kitchens.
- Poor substrate prep or excessive deflection: Confirm substrate stiffness (L/360 guidance) and flatness tolerances from tile manufacturers and standards.
- Skipping movement joints: Use expansion joints per manufacturer and TCNA guidelines to avoid random cracking.
Troubleshooting quick fixes
- Hollow-sounding tile: Remove grout around the tile and carefully pry tile up; re-clean substrate, apply fresh mortar, and re-bed.
- Cracked grout: Rake out damaged grout with a grout saw and re-grout. Wide cracks may indicate movement—install movement joints.
- Waterproof failures: Small leaks may be patched if accessible membrane edges can be reached; major membrane failure often requires removing tile back to the liner or replacing a section of the pan.
- Mold and moisture control: Improve ventilation and inspect the source. For ongoing moisture issues under floors, consult crawl space moisture fixes and consider temporary moisture absorber options while repairs proceed.
Long-term maintenance and diagnostics
- Use a tapping test to find hollow spots; IR cameras and moisture meters can identify wet areas behind tiles but may require professional interpretation.
- For exterior or envelope-related moisture causing interior tile issues, review rain-screen practices; see rain screen assembly for broader moisture management.
Tools, Material Checklist, and Cost-saving Tips
A clear checklist prevents costly trips to the store mid-job and helps decide which tools to rent or buy.
Essential Tools (buy vs Rent) and Alternatives
- Buy: notched trowels (1/4", 1/2"), grout float, rubber mallet, tile spacers, grade level, mixing paddle, grout sponge, tape measure, straight edge, knee pads.
- Rent: wet saw (for porcelain and large format cuts), tile nippers for curved cuts, mortar mixer (if doing lots of mortar).
- Alternatives: manual tile cutter for small ceramic tiles, diamond hole saw bits for plumbing penetrations.
Material Quantities, Waste Factor, and Ordering Tips
- Order tile with a 10–15% overage for straight patterns; use 15% or more for diagonal layouts or heavy-cutting situations. For mosaics, account for extra mosaic sheets to cover pattern matching around drains.
- Use manufacturer coverage rates for thinset and follow product data sheets for bag yields. Always round up to ensure continuity if a batch run is needed.
Cost-saving strategies
- Buy remnants or discontinued tile lines for accent walls or trim.
- Shop local tile yards and salvage stores for discounted porcelain or reclaimed tile.
- Reuse sound existing tiles where matches are possible, or choose standard-format tiles that reduce cutting waste.
- Consider sustainable substrate options such as recycled aggregate concrete for mortar beds or leveling.
When to Call a Professional
- Curbless curbless showers with barrier-free drains and structural substrate repair.
- Structural subfloor replacement or complex plumbing reroutes.
- Persistent leak tracing where damage may be hidden within the assembly.
Cross-links for related decisions
- If adding radiant floors under tile, check insulation guidance such as mineral wool insulation and insulation R-value choices.
- For ADUs and projects subject to specific rules, consult ADU code guidance and verify local permits before altering plumbing.
The Bottom Line: is Tiling Your Own Floors and Showers the Right Project?
DIY tile is a rewarding project for budget-minded self-builders when the scope is controlled and the builder commits to correct substrate prep, reliable waterproofing, and appropriate adhesive and grout choices. For small bathrooms and straightforward floor jobs, DIY tile can reduce labor costs and deliver a high-quality finish. For complex waterproofing, curbless showers, or structural repairs, budget for a contractor.
Key must-dos: confirm a solid substrate, install a proper waterproof shower pan or bonded membrane, and use the right thinset and grout for wet areas. For all installations, follow product data sheets and local code guidance.
Frequently Asked Questions
How long does a typical bathroom tile install take?
A small bathroom (3' x 6' shower plus floor) usually requires 2–5 days of active labor for tile setting — this covers layout, thinset application, tile setting, and grout tooling. Allow additional cure time: thinset and grout often need 24–72 hours to reach safe handling strength, and showers commonly require 48–72 hours before regular wet use. Larger rooms, custom patterns, or complex cuts add days; always check product data sheets for specific cure times.
Can I use the same thinset for floor tiles and shower walls?
Use a polymer-modified thinset rated for both floor and wet-area use when possible. Standard thinset works for many floors and walls, but for showers and wet floors choose a mortar specified for wet-area exposure; avoid organic mastics in shower floors. Check manufacturer recommendations for large-format tiles or heated floors — some products call for medium-bed or large-and-heavy mortars for full support.
What causes grout to crack and how can I prevent it?
Grout cracks usually result from movement in the substrate, inadequate mortar coverage under tiles, or missing movement joints. Prevent cracking by ensuring substrate stiffness, achieving full mortar contact, installing movement (expansion) joints where required, and using the correct grout type for joint width. For showers and high-movement areas, consider flexible or epoxy grout and follow TCNA/ANSI joint placement guidelines.
How do I make a curbless shower drain properly?
Curbless showers require precise slope and waterproofing to protect adjoining areas. Options include linear drains with a single plane slope or point drains with a well-executed mud bed and waterproof liner. The substrate must have consistent slope to the drain (minimum 1/4" per foot is typical), a continuous waterproof membrane, and appropriate transition details at thresholds. For accessibility and code compliance, consult local regulations and consider professional help for curbless installations.
Is a wet saw always necessary for tile cuts?
A wet saw is strongly recommended for cutting porcelain and large-format tiles because it produces clean, accurate cuts and reduces breakage. For small ceramic tiles, manual cutters or score-and-snap tools can suffice. Renting a wet saw for a weekend is often the most cost-effective choice for DIYers who don’t foresee frequent tile projects.