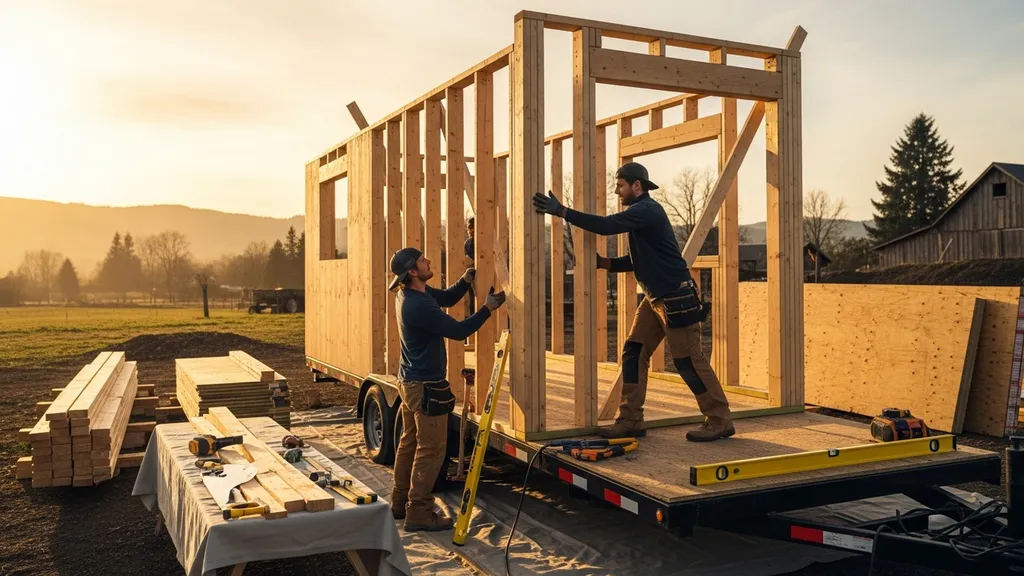
Step-by-step, budget-minded guide to planning, designing and building a tiny house — foundations, framing, insulation, off-grid systems and material choices.
Tiny House Construction: Complete Building Guide
Tiny house construction is the process of planning, designing and building a compact dwelling (typically 100–400 sq ft) with choices that affect mobility, code classification, energy use and cost. This guide shows budget-minded DIY builders how to pick a legal path (trailer vs foundation), choose foundations and framing systems, meet insulation and airtightness goals, and size simple off-grid energy and water systems. Readers will find practical timelines, material comparisons, and links to authoritative standards and building guides to help move a tiny build from plan to occupancy.
TL;DR:
- Decide legal status first: under 400 sq ft often fits IRC Appendix AQ or IRC ADU rules, contact your building department before buying a trailer or land.
- Prioritize envelope: invest in continuous insulation and airtight detailing to halve heating loads; aim for R-values aligned with your climate band.
- Size systems to measured loads: 1–3 kW PV plus 5–15 kWh battery suits most off-grid tiny homes with conservative use; scale up only if heavy loads (AC, electric cooktop) are expected.
Introduction: What 'tiny House Construction' Means for DIY Builders
Tiny house construction covers builds from road-legal trailer homes (on-axle) to small permanent dwellings on shallow foundations. Typical tiny footprints range from roughly 100 to 400 square feet. There are two main regulatory paths: 1) build on a registered trailer and treat the unit as an RV or park model, or 2) build on a permanent foundation and follow local residential building codes; each path changes permit needs, insurance and resale options. DIY timelines vary: a focused DIYer can complete a shell in 3–6 months; a full fit-out often takes 6–12 months depending on subcontracting and weather.
Quick Checklist to Get Started:
- Site: confirm access, setbacks and utility access.
- Plan: sketch a floor plan and circulation with rough dimensions.
- Permits: call your local building department to confirm classification.
- Budget: set a contingency of 10–20%.
- Utilities: decide grid-tied or off-grid for power, water and waste.
For a compliance-focused reference on planning and permitting, see the ICC's construction guide for tiny houses, which covers design, permitting and inspection considerations: The tiny house building it right - icc store.
Planning, Codes and Permits for Tiny House Construction
Understanding local zoning and code classification is the first practical step. Some jurisdictions allow tiny dwellings as accessory dwelling units (ADUs) or through IRC Appendix AQ (tiny houses on foundations up to 400 sq ft). Other jurisdictions treat trailer builds as recreational vehicles and restrict long-term occupancy. Industry groups summarize common standards; see the Tiny Home Industry Association for an overview of building standards used by manufacturers and builders: building standards overview.
Common permit categories and rules of thumb:
- Structural approvals: footings/slab or trailer attachment points and lateral bracing.
- Electrical permits: service connection, breaker sizing and bonded grounding.
- Plumbing permits: water supply, drainage, and venting; septic connections if on-site sewage is needed.
- Mechanical permits: fuel-burning appliances, ventilation and HVAC.
Practical steps:
- Contact the local building department with a sketch and ask which code applies.
- If planning Passive House or net-zero goals, discuss them early — tighter envelopes and mechanical ventilation often change mechanical design and inspection points.
- Watch for barriers: driveway access, septic rules, and flood plain restrictions.
For design-and-code context and a compact reference on practical tiny-house planning, see this assembly of design and construction guidance: Tiny house design & construction guide.
Insurance and resale:
- Trailer-based tiny homes usually need RV or specialty homeowner coverage; permanent foundation builds are easier to insure as dwellings.
- Consider resale markets: permanent structures tend to retain broader buyer pools.
Site Selection and Foundation Options for Tiny House Construction
Site matters. Key criteria include road access for delivery, slope and drainage, and soil type for shallow foundations or piers. For trailer builds, verify driveway width and turning radius. If planning utilities, confirm nearest electrical, water and septic connections.
Foundation and support options:
- Trailer on-axle: Mobility is the main benefit; planning must match trailer tongue and GVWR limits. Typical road-legal width is 8.5 ft; verify local axle, tongue weight and braking requirements before building.
- Pier and beam (concrete piers or helical piles): Common for small footprints, lower material cost and reduced excavation. Typical pier spacing for tiny homes is 4–6 ft under major load-bearing points; alternatives include adjustable steel piers with concrete pads.
- Shallow slab: Works well in stable, non-frost-susceptible soils and where mobility is not required. Slabs avoid trailer thermal bridging but require more site prep.
- Shallow footings with grade beams: For colder climates with frost, footings need depth below frost line; where frost depth is large, piers or helical piles reduce excavation cost.
Pros/cons matrix (short):
| Foundation type | Mobility | Cost | Code complexity | Thermal bridging |
|---|---|---|---|---|
| Trailer on axle | High | Low–Med | Variable | High at floor |
| Pier & beam | Low | Low | Low–Med | Medium |
| Slab | None | Med–High | Med | Low if insulated |
Flood, frost and soil:
- If in a floodplain, anchor and elevate the structure; local flood regulations apply.
- For frost: follow local frost-depth guidance; where frost is shallow, shallow footings or slab-on-grade with perimeter insulation work.
- If soil is uncertain, order a basic geotechnical or at least a borings test for load-bearing and frost-susceptible soils; state agencies often publish regional frost-depth maps. For low-impact options like helical piles and shallow piers, consult the foundation reference in the site's guide to sustainable foundations: foundations options guide.
Design and Layout: Tiny House Floor Plans and Space-saving Strategies
Footprint and circulation set liveability. Road-legal trailer builds commonly use 8.5 ft widths and length limited by trailer GVWR. Foundation builds can go wider—typically 10–12 ft—which eases circulation and allows full-height cabinets.
Footprint and circulation rules:
- Keep main circulation corridors at least 24–30 in wide; 30 in is more comfortable.
- For lofts, plan 36–44 in headroom at the kneewalls and a minimum 30–36 in at the loft center for usable sleeping space.
- Kitchen run lengths: a compact galley of 6–8 ft with stacked appliances fits well; L-shaped kitchens require 6–9 ft of wall length to be practical.
Multi-use furniture and storage:
- Prioritize built-in storage under stairs, in toe-kicks and under benches.
- Fold-down tables and Murphy beds free daytime floor area.
- Use lofts for sleeping and ground-level for living and wet core (bath/kitchen) to locate plumbing in a single compact zone—this saves plumbing runs and eases insulation.
Accessibility and Future-proofing:
- Consider avoiding steep loft ladders if long-term accessibility is required; a compact stair with storage is heavier but more practical.
- Anticipate panels for solar, routing for future battery expansion and service access for repairs.
For layout inspiration grounded in high-efficiency design, consult the set of compact passive-inspired layouts here: passive house floor plans. Also consult building standards and small-dwelling guidance from state housing departments when confirming livability and egress needs: INFORMATION bulletin 2016-01 tiny homes.
Sample micro-plan checklist:
- Entry with storage — 2 ft.
- Kitchen wet core adjacent to bathroom for shared plumbing.
- Living area with convertible furniture.
- Sleeping loft above wet core.
- Mechanical/utility cabinet accessible from inside.
Structural Systems & Material Choices: Framing, Sips and Alternatives
Framing choice affects thermal performance, cost, and speed. Common options: platform/stick framing, structural insulated panels (SIPs), light-gauge steel and timber frame. Recycled and reclaimed materials can reduce embodied carbon but may introduce variability.
Key comparisons:
| System | Typical wall R-value | Assembly thickness | DIY friendliness | Cost |
|---|---|---|---|---|
| Stick framing + CI | R-13–R-23 + CI | 6–10 in | High | Low–Med |
| SIPs (core foam) | R-20–R-40 | 6–8 in | Medium | Med–High |
| Light steel framing | R-13–R-26 + CI | 6–10 in | Medium | Med |
| Timber frame / Reclaimed | Varies | Varies | Low–Med | Varies |
Platform/stick framing:
- Familiar to most DIY builders; allows easier on-site adjustments.
- To limit thermal bridging, add continuous insulation (1–2 in polyiso or 1.5–2 in mineral wool board) outside the sheathing.
- Stick framing with advanced framing details (24 in o.c. studs, insulated headers) reduces lumber use.
SIPs:
- Offer fast enclosure and very good airtightness when panels are sealed correctly.
- Panels integrate insulation and structure, reducing on-site labor time but requiring accurate planning and often a crane or mechanical help for large panels.
- For a deep energy envelope and tightness, see the site’s detailed SIPs primer: SIPs guide.
Alternatives and recycled options:
- Light steel is noncombustible and dimensionally stable but transfers thermal bridging; pair with exterior continuous insulation.
- Recycled aggregate concrete can reduce embodied carbon for small footings and slabs; see technical guidance at recycled aggregate concrete guide.
When to choose which:
- Choose SIPs when airtightness and speed matter and the builder is comfortable with precise shop drawings.
- Pick stick framing for maximum flexibility, incremental DIY work and easier modifications.
- Consider mixed systems (stick walls, SIP roof panels) to balance cost and performance.
Insulation, Air-sealing and Passive Principles for Tiny House Construction
Tiny houses gain a lot by prioritizing a tight, well-insulated envelope—the ratio of envelope area to volume is higher than in larger homes, so insulation and sealing pay off quickly.
Recommended R-value targets by climate band (generalized):
| Climate band | Wall R-value (min) | Roof/ceiling R-value |
|---|---|---|
| Cold (IECC zones 6–8) | R-20 cavity + R-10 CI | R-40–R-60 |
| Mixed (IECC zones 4–5) | R-13–R-20 cavity + R-5–R-10 CI | R-30–R-50 |
| Warm (IECC zones 1–3) | R-13 cavity + R-3–R-5 CI | R-19–R-30 |
Insulation options and notes:
- Closed-cell spray foam: high R-per-inch and acts as a vapor retarder; useful in small cavities and for air sealing, but it’s more expensive and has higher embodied emissions.
- Mineral wool: noncombustible, good acoustic and moisture performance; pairs well with exterior CI.
- Cellulose: good for retrofit and dense-pack walls, lower embodied impact.
- Exterior continuous insulation: reduces thermal bridging and works well with stick or light steel framing; see step-by-step installation best practices at exterior insulation methods.
Air-sealing and common leakage points:
- Major tiny-house leakage areas are floor-to-trailer connections, skirting seams, window and door perimeters, mechanical penetrations and vents.
- Use gaskets at floor-to-trailer interfaces, high-quality window flashing and continuous sheathing taping systems (e.g., ZIP sheathing with seam tape). The project-level guidance on common misses helps highlight specific details: common leakage points.
- For DIY sealing techniques and materials, consult the air-sealing how-to: air-sealing DIY guide.
Ventilation choices:
- Mechanical ventilation is essential in tight tiny houses to control moisture and indoor air quality.
- Heat-recovery ventilators (HRVs) or energy-recovery ventilators (ERVs) are efficient but add cost and require space for ducting and maintenance.
- Exhaust-only ventilation is simpler and lower cost but will increase heat loss in cold climates; choose HRV/ERV for cold climates and for passive-house-inspired designs. For adapting passive principles at small scale, see: how to apply passive principles.
Off-grid Systems: Power, Water and Waste for Tiny House Construction
Off-grid tiny houses are common. Sizing should be load-driven: list major appliances and estimate daily kWh usage.
Solar and battery basics:
- Typical tiny-house base loads include LED lighting (1–3 kWh/day), mini-fridge (1–3 kWh/day), water pump (0.5–2 kWh/day), fans and occasional electronics. With conservative use, many tiny homes fit within 1–3 kW PV arrays and 5–20 kWh of battery capacity.
- Use the site's detailed sizing reference for larger systems and scenarios when AC or electric cooktops are used: 10 kW tiny-house solar sizing.
- Wiring and safety: follow proper grounding, inverter installation and disconnects. For hybrid solar/battery wiring techniques and safety, consult the wiring walkthrough: hybrid wiring walkthrough.
- If remote and windy, consider a small wind turbine as a supplement; see the hybrid overview here: wind-solar hybrid overview.
Water Systems:
- Rainwater collection is common: roof catchment area, first-flush diverter, storage tank (500–2,000+ gallons depending on occupancy and rainfall), and basic filtration/UV treatment for potable use. Sizing and treatment basics are covered in the site's water collection guide: water collection guide.
- Backup: plan for hauled water or grid tie if reliable supply is uncertain.
Waste Systems:
- Composting toilets reduce water use and septic demand; however, they face inspection and permitting differences by state. Check rules before committing: composting toilet rules.
- Graywater options: permitted in some jurisdictions as subsurface irrigation or evapotranspiration beds; confirm with local code.
Safety and permitting:
- Batteries require ventilation and fire-safe enclosures; propane appliances require combustion air, venting and certified installations. Size battery enclosures to allow airflow and keep electrical disconnects accessible.
Construction Timeline, Tools, Budgeting and Key Milestones
A practical DIY timeline broken into phases helps track progress. Sample 6–9 month schedule:
- Planning & permits: 4–8 weeks
- Foundation/trailer prep: 1–3 weeks
- Shell/framing and roof: 2–6 weeks
- Systems rough-in (electrical, plumbing): 2–6 weeks
- Insulation, air-sealing, windows: 1–3 weeks
- Interior finishes and installs: 4–12 weeks
- Inspections and commissioning: 1–4 weeks
For a visual demonstration, check out this video on framing a small house build (720 square feet):
Essential tools and when to subcontract:
- Essential: circular saw, cordless drills, framing nailer, levels, tape measure, scaffolding or platforms, basic plumbing and electrical hand tools.
- Hire professionals for: final electrical service connection, complex plumbing (septic connection), structural inspections, and any work that triggers local licensing requirements.
Budget breakdown (percent of total build cost, approximate):
- Shell, foundation/trailer: 25–35%
- Systems (electrical, plumbing, off-grid): 20–30%
- Insulation, windows, airtightness: 15–25%
- Interior finishes and fixtures: 15–25%
- Permits, design and contingency: 5–10%
Common cost-savers:
- Buy used or surplus windows and appliances where they meet efficiency needs.
- Reclaim interior finishes like cabinets or shelving.
- Do staged work: complete shell and systems first, then finishes as budget allows.
Key points checklist:
- Verify trailer GVWR and tongue weight if mobile.
- Sketch plumbing runs to keep wet core compact.
- Plan ventilation and service access early.
- Invest in quality, insulated windows for long-term comfort.
- Test off-grid system sizing with a real usage log or conservative estimates.
- Allow at least 10% contingency and account for permitting time.
For a practical budget-focused small build example, see the site's case study on a compact project: 400 sq ft budget build.
Materials Comparison Table and Recommended Specs for Tiny House Construction
Choosing where to spend affects performance and lifetime costs. The table below summarizes common wall assemblies, roof options and foundations.
| Assembly | Typical R-value | Thickness | DIY-friendliness | Cost |
|---|---|---|---|---|
| Stick framing + 1.5" CI | R-20 (wall) | 8–10 in | High | Low–Med |
| SIPs (2.5" EPS core) | R-20–R-30 | 6–8 in | Medium | Med–High |
| Advanced timber + CI | R-20+ | Varies | Low–Med | Med |
| Metal roof (insulated panels) | R-6–R-16 | 2–6 in | High | Med |
| Shallow pier foundation | N/A | N/A | High | Low |
| Insulated slab with perimeter CI | N/A | 6–8 in slab | Medium | Med–High |
Recommended minimum specs:
- Windows: double-glazed low-E for moderate climates; triple-glazed for cold climates. Choose U-values under 0.30 BTU/(hr·ft²·°F) for cold zones where practical.
- Airtightness: aim for under 3 ACH50 for comfortable performance; under 1.5 ACH50 for Passive House–level projects.
- Roof: use continuous ventilation path with at least R-30 in cold climates or R-19 with reflective roofing in hot climates.
Where to save vs invest:
- Invest: insulation (continuous exterior insulation), quality windows, airtightness detailing, mechanical ventilation.
- Save: interior surface materials, decorative trims, some appliances where efficient alternatives exist.
For product-level guidance on sustainable components, consult the site's sustainable materials overview: sustainable materials guide. For exterior continuous insulation details, see exterior insulation methods. For SIP performance and installation, see the SIPs guide.
The Bottom Line: Making Tiny House Construction Work for Your Goals
Tiny house construction can meet mobility, budget and sustainability goals when the legal path and site are chosen first, the structural system matches builder skills, and insulation/airtightness are prioritized. Start by confirming whether the build will be classified as an RV or dwelling, lock down site and permit requirements, then select framing and off-grid systems sized to measured loads for reliable performance.
Three next steps:
- Contact the local building department and ask about tiny house classification.
- Sketch a compact floor plan and locate the wet core to reduce plumbing runs.
- Run a simple off-grid load estimate and compare to a 1–3 kW PV baseline.
Frequently Asked Questions
How big can a tiny house be and still be road-legal?
Road-legal width in most jurisdictions is 8.5 feet without special permits; length and height limits vary by state and trailer ratings. Many tiny builders keep the living area under 400 sq ft to align with the International Residential Code's tiny-house provisions (IRC Appendix AQ) when building on a foundation.
Should I build on a trailer or a permanent foundation?
Choose a trailer if you need mobility or want to reduce initial site work; trailers generally cost less upfront but create thermal-bridge challenges at the floor and can complicate long-term insurance. For permanence, a pier, shallow footing or slab reduces mobility but simplifies permitting, financing and resale.
What insulation is best for a tiny house?
There is no single best option; closed-cell spray foam offers high R-per-inch and air sealing but has higher embodied emissions and cost. A balanced choice is cavity insulation plus exterior continuous insulation to reduce thermal bridging—see the site's guide on exterior insulation for details: exterior insulation methods.
How do I size solar for a tiny house?
Estimate daily kWh by listing appliances and run-times, then size PV to meet that load given local sun hours. Many tiny homes fit into 1–3 kW PV arrays with battery storage of 5–20 kWh; for higher loads or backup needs consult the detailed sizing guide: 10 kW tiny-house solar sizing.
Do I need a permit to park a tiny house on my land?
It depends on local zoning and whether the unit is classified as an RV or a dwelling. Some jurisdictions allow temporary parking but not permanent occupancy; others permit ADUs or tiny dwellings on foundations. Contact your local building department before siting the unit to confirm rules and avoid costly retrofit or removal.