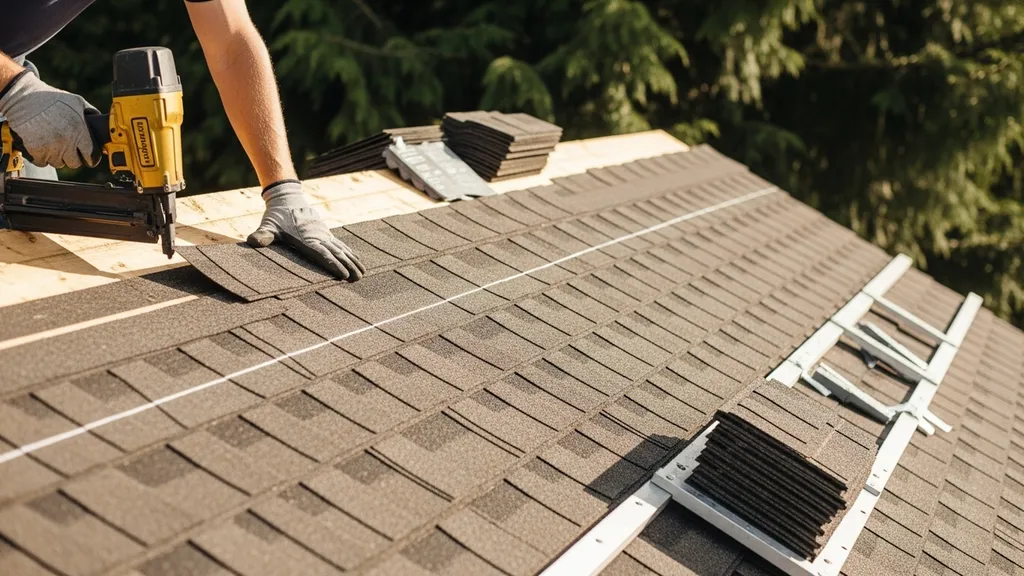
A practical, step-by-step DIY roofing guide for budget-conscious builders — planning, tear-off, underlayment, flashing, finishes, and common troubleshooting.
Roofing Installation DIY: Step-by-Step
A practical, step-by-step DIY roofing guide lets budget-conscious builders complete a reroof or new roof while avoiding common mistakes that cause leaks and early failures. This article covers planning and permits, safe tear-off and deck inspection, underlayment, flashing and ventilation, roofing finishes (shingles, metal, tile), finish work, and troubleshooting. Readers will learn how to calculate materials for a 1,200 sq ft gable roof, when to replace sheathing, how to size ventilation, and what repairs will void manufacturer warranties.
TL;DR:
- Plan and permit: calculate roofing squares from plan area and pitch (a 1,200 sq ft simple gable ≈ 12 roofing squares at 0/12 pitch; adjust for pitch), and check local permit triggers before starting.
- Underlayment and flashing: use synthetic underlayment for longer life, install ice & water shield at eaves and penetrations in cold climates, and follow manufacturer nailing/overlap guidance.
- Finish and maintenance: asphalt shingles are DIY-friendly; metal and tile need more skill or a pro. Do an attic and exterior inspection annually and after storms.
Step 1: Prepare, Permits, Safety and What You Need
Permits and Local Code Checklist
Start by contacting your local building department to confirm permit thresholds. Typical triggers that require a permit include full reroofing in some jurisdictions, structural change, or replacement of more than one roofing layer. For process details and paperwork examples, consult a local permit processing guide such as the Ventura County building permit guide: building and safety permit processing guide. For workplace safety expectations and employer obligations, refer to state DOSH/OSHA guidance like this overview: permit requirements and enforcement guidance.
Permits affect inspections, fire-rating requirements, and whether you can overlay versus tear off. Manufacturer instructions and your local code (often based on the IECC and local amendments) govern nailing schedules, flashing details, and ventilation minimums.
Essential Safety Gear and Fall Protection
OSHA fall-protection rules apply to most residential roof work. Use system-level fall protection where possible: guardrails, safety harness with anchorage rated to 5,000 lb, or controlled access zones. Minimum personal protective equipment includes a hard hat, non-slip footwear, eye protection, and gloves. Rent or buy rooftop anchors and a harness rated for construction. For ladder setup, follow the 4:1 rule (one foot out for every four feet up).
Decide whether to hire a trained crew for steep roofs (steeper than 7:12) or high elevations. Even experienced DIYers often rent roof jacks (toe boards) and scaffolding for safer access.
Materials List and Estimating Roof Squares
Example: a 1,200 sq ft simple gable roof (plan view) has two rectangles totaling 1,200 sq ft of plan area. Roofing "squares" = total roof area ÷ 100. With no hip/ridge complexity and 0/12 pitch, that equals 12 squares. Adjust for pitch: multiply plan area by roof pitch factor (for 6:12 pitch multiply by ~1.077). Factor 5–10% for waste (shingles), and 10–15% more for hip and ridge cuts.
Common materials and typical quantities for a 12-square asphalt shingle roof:
- Starter strip: 1 bundle per 4–6 squares (follow shingle maker guidance)
- Shingles: 3 bundles per square (architectural) → ~36 bundles
- Underlayment: synthetic rolls often cover 10–20 squares each; calculate by square
- Ice & water shield: 1–2 rolls for eaves and valleys depending on length
- Ridge vent and ridge caps: length equals ridge measurement
- Flashing (step, counter, chimney): 10–20 linear feet per penetration area
- Nails: box of 3,000–5,000 roofing nails (check manufacturer for length)
Compare renting vs buying tools: a gas or cordless shingle nailer (Bostitch, Paslode) speeds installation but can be rented for 1–3 days. Roof brackets, scaffolding, and a power shingle cutter are commonly rented. See the insulation tools list for overlapping tool recommendations and rental vs purchase decisions. Budget for disposal fees and potential decking repairs—our 10 hidden costs in DIY eco home building covers common surprises. For region-specific price differences, consult our regional cost differences.
Tools Checklist (hand and Power Tools)
- Roofing nailer (pneumatic or cordless), 1/2-in to 1-in roofing nails, or manufacturer-specified fasteners
- Framing hammer, pry bar, roofing shovel or tear-off tool
- Circular saw with metal-cutting blade for decking repairs
- Chalk line, tape measure, utility knife, snips (for metal)
- Ladder stabilizer, roof jacks, scaffolding (rent for safety)
- Magnet nail sweep and leaf blower for cleanup
- Personal fall-arrest system (harness, lanyard, anchors)
- Tarps, tar paper, caulk gun, lead or aluminum flashing
Step 2: Inspect Structure and Remove Old Roofing Safely
How to Do a Visual and Hands-on Deck Inspection
Inspect from the attic and from the roof surface. In the attic, look for:
- Water stains and active leaks
- Soft spots or sagging between rafters
- Mold, rot, or insect damage on rafter-ends
- Evidence of fastener corrosion
From the roof, probe suspect areas with a screwdriver. Replace sheathing when you find soft spots or if more than half of adjacent panels are compromised. Typical sheathing thicknesses: 7/16-in OSB or 1/2-in plywood is common for 16-in o.c. rafter spacing; for 24-in o.c., 5/8-in or greater is recommended. Follow local code for nailing schedules (often 8d nails at 6 in along edges, 12 in in the field, or manufacturer-prescribed screw patterns).
If replacing panels, size and fasten per the framing spec: nail every 6–8 in on edges and 12 in in the field for plywood; consider ring-shank nails or structural screws for greater pullout resistance. See our guides on wall sheathing and framing basics for related framing details. If modifying roof geometry or adding dormers, review advanced framing techniques and the Larsen truss guide for cold-climate assemblies.
Safe Tear-off: Single vs Multi-layer and Disposal Options
Decide early whether to overlay (install new roofing over existing) or perform full tear-off. Overlay pros: faster, cheaper disposal. Cons: reduced ventilation access, extra weight on structure, potential hidden deck damage, and many manufacturers void warranties for overlays. Code in many jurisdictions limits overlays to one existing layer.
For multi-layer roofs, full tear-off is often the safe choice. Use tarps to catch debris and route shingles to dumpsters. Recycling options exist—some facilities accept asphalt shingles for use as aggregate or in paving; consult the recycling materials checklist for local options. Be mindful of load: a full layer of shingles and underlayment adds roughly 2–4 lbs/ft²; during construction, avoid stacking materials on the roof or loading a single area.
Replacing Damaged Sheathing and Securing Rafters
Remove damaged sheathing back to the nearest full rafter or truss. Install new panels with staggered joints like the existing layout. Use adhesive rated for roof sheathing plus mechanical fasteners to reduce squeaks. After replacing decking, check for rafter or truss damage—split members, loose hurricane clips, or compromised connections require repair per manufacturer and code; see framing basics.
If in doubt about structural repairs or if more than a few panels are damaged, consult a structural engineer or hire a contractor. This prevents short-term savings from becoming long-term failures.
Step 3: Install Underlayment, Ice & Water Shield, Flashing and Roof Ventilation
Choosing Underlayment: Felt vs Synthetic (performance and Cost)
Underlayment protects the deck until primary roofing is installed and acts as secondary weather protection. Traditional #30 felt costs less upfront but absorbs moisture, can tear, and has shorter life expectancy. Synthetic underlayment (brands include GAF Deck-Armor, CertainTeed RoofRunner) offers higher tear strength, lighter weight, and better UV exposure tolerance; it typically costs 2–4× more per roll but often extends roof warranty eligibility.
Install underlayment with recommended overlaps: 2–4 inches side lap and 4–6 inches end lap, or follow the manufacturer's instructions. Use cap or roofing nails as specified; placement matters for shingle nail guns to avoid over-driving through the underlayment. For guidance on how continuous exterior insulation changes flashing and ventilation, see the exterior foam insulation guide.
Many manufacturers require specific underlayments for warranty purposes—read the product installation guide. Also consult general how-to references like the Black & Decker/DIY roofing PDFs for step-by-step patterns: Comprehensive DIY roofing guide pdf.
Where and How to Apply Ice & Water Shield
Ice & water shield (self-adhering membrane) is critical in cold climates and where ice damming is a risk. Typical placement:
- Eaves: extend 24–36 inches upslope from eave line
- Valleys: full valley coverage where applicable
- Around chimneys and skylights: extend at least 6 inches over edges and integrate with step flashing
For low-slope roofs (below manufacturer minimums), continuous membrane installation patterns differ—follow the manufacturer’s published details.
Step Flashing, Valley Flashing and Chimney Prep
Step flashing is used where the roof meets vertical walls. Flashing must be installed in shingle courses: a 3–4 in step flashing piece at each shingle course, lapped so water sheds over the flashing and into the field. Integrate wall flashing with housewrap and wall vapor control; see the vapor barrier steps for tying roof and wall details.
Valleys are either woven, closed-cut, or use metal flashing. For long-lasting performance, use metal valley flashing and correct underlayment beneath. Chimney flashing requires a cricket or saddle on the high side and counter-flashing embedded into the chimney when possible.
Planning and Installing Ventilation: Soffit, Ridge, and Intake
Proper ventilation balances intake (soffit) and exhaust (ridge or roof vents). Calculate total net free vent area (NFVA): common rule is 1/300 of attic area (1 sq ft of vent per 300 sq ft attic) if balanced intake/exhaust; where a vapor retarder or baffle is used, follow manufacturer and code guidance. Passive-house builders will balance airtightness goals with required ventilation—refer to blower-door testing guidance in our blower door testing article for how attic details influence whole-house airtightness.
Install baffles at eaves to keep insulation from blocking intake vents. Ensure ridge vents run the full ridge length for consistent airflow. Avoid installing powered vents that create negative pressure issues if your home relies on balanced mechanical ventilation.
Before installing flashing and vents, check manufacturer nailing patterns and fastener corrosion resistance—use galvanized or stainless steel where needed.
Watch this step-by-step guide on installing underlayment:
Step 4: Install Roofing Finish — Shingles, Metal, and Tile Options
Asphalt Shingles: Starter Strip, Nailing Pattern, and Ridge Caps
Asphalt architectural shingles are the most common DIY finish. Start with a starter strip along eaves and rakes to ensure proper sealing and wind resistance. Use a chalk line to align the first course. Nailing pattern and nail type matter: use galvanized or stainless roofing nails, shank length sufficient to penetrate sheathing by at least 3/4 inch or per manufacturer. Typical pattern: four nails per shingle for standard exposure; high-wind rated shingles may require six or more nails per shingle. Do not overdrive nails; they should be flush.
Install pipe boots and flash around penetrations with step flashing and sealers compatible with the shingle and flashing materials. Use ridge cap shingles or pre-formed ridge caps and secure according to instructions.
Wind-rating: check product rating (e.g., ASTM D3161) and follow nailing pattern and starter strip guidance to meet a 110 mph or higher rating if needed in high-wind zones.
Metal Roofing Basics and Fastener Patterns
Metal roofing (standing seam, corrugated, or screw-down panels) requires different underlayment and flashing details. Standing seam panels often use concealed fasteners and require precise clip spacing; screw-down profiles need neoprene-washered screws placed at recommended intervals (usually every 12–18 inches along seams and per manufacturer). Use a breathable synthetic underlayment and be mindful of thermal movement—fasteners must allow for expansion on some profiles.
Cut metal with appropriate snips; avoid grinding in place to reduce heat on finish. Metal is durable and long-lived but may be more costly and needs accurate substrate and clip spacing; consider hiring a pro for complex rooflines.
Clay/tile Considerations and When to Hire Pros
Clay and concrete tiles are heavy—often 8–10+ lbs/ft²—so confirm structural capacity before selecting. Underlayment, batten systems, and flashing differ from shingle roofs and require mortar or mechanical fastening in some systems. For step-by-step tile installation, see the clay tile guide. Hire a licensed roofer for tile on anything other than a small project, or if structural reinforcement is required.
Choosing a Finish for Climate and Budget (comparison)
Quick comparison (consider site and budget):
| Finish | Typical DIY difficulty | Lifespan | Approx cost per sq (materials) |
|---|---|---|---|
| Asphalt architectural shingles | Low to medium | 20–30 years | $80–$150 |
| Metal (screw-down) | Medium | 30–60 years | $150–$300 |
| Standing seam metal | High | 40–70 years | $250–$500 |
| Clay/concrete tile | High (pro recommended) | 50–100 years | $300–$700 |
For sustainable choices, consult the sustainable materials guide. If reusing demolition aggregate after tear-off, see the recycled concrete guide for ideas on repurposing shingles and rubble for paths or base materials.
Always follow specific manufacturer nailing and underlayment instructions to avoid voiding warranties.
Step 5: Finish Work, Inspection, Cleanup and Maintenance Checklist
Final Inspection Checklist (what to Check Before Signing Off)
Complete a thorough walk-around and attic check:
- Flashing: step and counter flashings are integrated and sealed.
- Ridge vent: continuous and secured along full ridge.
- Shingle alignment: even courses, no exposed nails.
- Nail set: nails are flush, not overdriven or underdriven.
- Valleys and penetrations: flashing watertight and sealed.
- Gutters: secure and clear of debris.
A quick attic inspection with a flashlight can reveal missed nail holes, light leaks (indicating a gap), or signs of moisture migration.
Clean-up, Fastener Sweep and Waste Disposal Tips
Sweep the yard with a roof magnet after shingle installation—nail cleanup prevents injuries and vehicle damage. Use tarps during tear-off to reduce debris on landscaping. For disposal, rent a roll-off dumpster sized for your project. Recycle where possible; find local options via the recycling materials checklist. Consider reclaiming usable underlayment or metal flashings, and reuse concrete or aggregate per the recycled concrete guide.
Seasonal Maintenance Checklist and Expected Lifespans
Maintenance schedule:
- Annually: inspect shingles, flashing, gutters; sweep off debris; check attic for leaks.
- After severe storms: look for missing shingles, dented metal, lifted flashing; document for insurance.
Signs of failure: curling shingles, bald spots with granule loss, multiple leaks, sagging deck. Typical lifespans: architectural shingles 20–30 years, metal 30–70 years, tile up to 100 years.
For small homes and cabins, follow post-install guidance found in our cabin roof insulation tips when completing attic insulation or adding interior vapor control.
Common Mistakes and Troubleshooting (leaks, Wind Damage, Nail Pops)
Diagnosing Common Leak Sources and Quick Fixes
Common DIY errors:
- Improper flashing at walls, valleys, or chimneys—diagnose by tracing stains in the attic and performing a water test with a hose to isolate source.
- Wrong nail length or pattern—nail pops and blown shingles result from insufficient penetration or incorrect fastener type.
- Insufficient underlayment overlap or improperly installed ice & water shield—this leads to underlayment blow-off and leaks.
Diagnostics: inspect attic after simulating rain (hose test from low to high on suspect sections), look for daylight through the roof deck, or use thermal imaging to map moisture. Quick fixes: re-seal flashing terminations, replace localized decking, and patch underlayment and shingles. For complex water paths, consult a roofer.
What to Do After High Winds or Storm Damage
Document damage with photos for insurance. Replace missing shingles or panels promptly. For wind events, inspect all edges and valleys for lifted material and check ridge caps. If more than 20% of roof covering is damaged or deck is exposed, full replacement may be necessary.
When Patching is Acceptable vs When to Reroof
Patch when:
- Damage is isolated to a small area (<10–15% of a roof plane) and decking is sound.
Reroof when:
- Large-scale granule loss, widespread curling, multiple active leaks, or deck rot exists.
If the roof is near the end of its expected life, a full reroof often offers better value than repeated patches. Industry advice and manufacturer warranty terms should guide the decision. For additional troubleshooting on ventilation-related condensation and airtightness issues, consult our blower door testing and vapor-barrier guidance in vapor barrier steps. For common DIY pitfalls and repairs, see this practical overview: The essential DIY roofing guide.
The Bottom Line
DIY roofing can save money if you plan carefully, follow manufacturer instructions, and respect safety and code requirements. Prioritize a full deck inspection, correct underlayment and flashing, and balanced ventilation; when in doubt on structural or heavy roofing types, hire a professional.
Frequently Asked Questions
How can I tell if a leak is from flashing or shingles?
Start with an attic inspection: trace water stains back to the highest point of discoloration. Leaks from flashing often show as localized stains near roof-to-wall junctions, chimneys, or vent pipes. Shingle leaks typically appear down-slope from damaged shingles and may show more diffuse staining. A controlled water test—spraying water in small areas while someone watches inside—helps isolate the source. Thermal imaging can also reveal moisture paths in decking and insulation.
Is it OK to overlay new shingles over old ones?
Overlaying is allowed in some jurisdictions for a single existing layer but carries trade-offs: you won't inspect the deck, weight increases, and many manufacturers limit or void warranties on overlays. If the existing roof has multiple layers, shows deck problems, or the home will be in a high-wind area, a full tear-off is the safer choice. Check local code and the shingle manufacturer's installation guide before deciding.
What is the minimum roof pitch for asphalt shingles?
Most architectural asphalt shingles require a minimum slope of 2:12, though some require 3:12. Low-slope roofs below manufacturer minima often need special underlayment or a different roofing system. Always verify the specific shingle product's installation instructions and local code before installing on low-slope areas.
How soon should I replace shingles after storm damage?
Replace or repair wind- or hail-damaged shingles as soon as practical, ideally within days to weeks—document damage for insurance claims quickly. Small isolated areas can often be patched; extensive loss of granules, multiple missing shingles, or blow-off indicates the need for larger repairs or a full reroof, especially if the shingles are mid- to late-life.