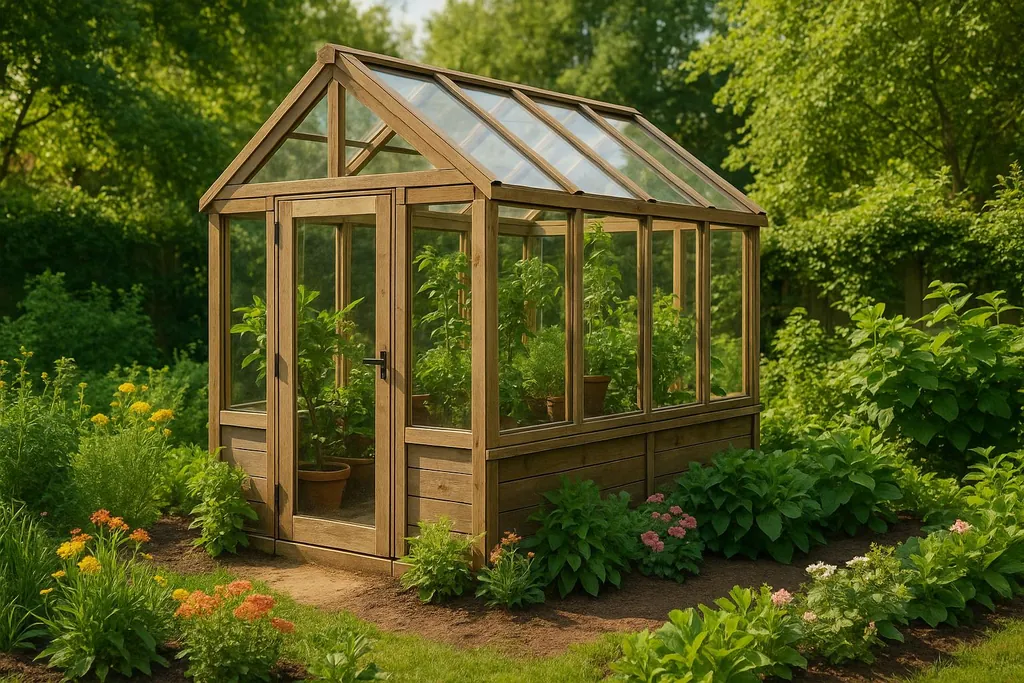
Learn how to build your own greenhouse using eco-friendly materials and efficient construction methods for year-round gardening success.
How to Build a Greenhouse
Building your own greenhouse offers year-round gardening opportunities and helps you grow plants in a controlled environment. This guide breaks down the process into simple steps, from choosing the right location to using eco-friendly materials and tools. Here's a quick overview:
- Location Matters: Pick a south-facing spot with at least six hours of sunlight daily.
- Eco-Friendly Materials: Use reclaimed wood for the frame and polycarbonate panels or recycled glass for glazing.
- Tools You'll Need: Basic hand tools (hammer, tape measure) and power tools (circular saw, drill).
- Construction Steps:
- Prepare a level, well-drained foundation.
- Build a sturdy frame with diagonal braces and metal brackets.
- Install glazing and doors with proper seals for insulation.
- Energy Efficiency Tips: Add vents for airflow and use grow lights during shorter days.
How I Built A Custom DIY Polycarbonate Greenhouse | What You Need To Know!
Planning and Selecting Your Greenhouse Location
When designing a greenhouse, picking the right location is crucial to ensure it thrives throughout the year. A well-chosen site can harness sunlight effectively, promoting plant growth and energy efficiency.
Choosing the Best Site for Maximum Sunlight
Sunlight is the lifeblood of any greenhouse. To keep your plants healthy, make sure the structure gets at least six hours of sunlight daily during winter . Remember, the sun’s position changes with the seasons - what seems unobstructed in summer might cast shadows in winter.
For the best results, aim for a south-facing spot. Position the greenhouse’s longest side to face south, which helps capture the most sunlight. Alternatively, an east-west orientation can provide a good balance of morning and afternoon light.
To avoid surprises, conduct a shade analysis over several months. Track the sun’s path using tools like a sun path chart and a compass (adjusted for magnetic declination). You can also use a smartphone level or clinometer to measure the height of nearby trees or buildings, helping you identify potential shadow zones that could block essential light.
Choosing Eco-Friendly Materials and Tools
Starting with eco-friendly materials and efficient tools is key to building a sustainable greenhouse.
Framing and Glazing Materials
Using reclaimed wood for the frame not only reduces waste but also adds a rustic charm to your greenhouse. You can source reclaimed wood from places like old barns, salvaged lumber yards, or even repurposed deck boards. If you're looking for durability without the need for chemical treatments, cedar is a great option because it naturally resists rot and pests. For those working with tighter budgets, pressure-treated lumber is another choice, especially since modern treatments use safer chemicals compared to older methods.
When it comes to glazing, polycarbonate panels strike a good balance. They’re durable, insulate well, and let in plenty of natural light. If you prefer a more classic look, recycled glass can be a beautiful option, though it’s more fragile and requires careful handling during installation. For a more affordable alternative, corrugated plastic panels work well, although they may not last as long or provide as much insulation as the other options.
Tools Required for Greenhouse Construction
Having the right tools makes the construction process smoother. Basic hand tools like a tape measure, level, and hammer are essential for accuracy. Power tools such as a circular saw, drill, and reciprocating saw can save time and effort when cutting or modifying materials. A finishing nailer is also handy for attaching trim and securing glazing, ensuring cleaner and more precise joints.
Don’t forget safety gear! Always wear safety glasses, gloves, and ear protection while working. Building your greenhouse from scratch, rather than buying a pre-made kit, gives you full control over material choices and allows for greater use of recycled or reclaimed components.
Each material and tool choice comes with its own set of advantages. By considering factors like durability, cost, and environmental impact, you can create the ideal setup for your greenhouse project. Once you've gathered your eco-friendly materials and tools, you're ready to move on to the step-by-step construction process.
Step-by-Step Greenhouse Construction Guide
With your eco-friendly materials and tools ready, it's time to bring your greenhouse to life. Follow these steps to ensure a sturdy and reliable structure.
Preparing the Foundation
A solid foundation is key to keeping your greenhouse stable and protected from water damage or pests . Start by clearing away any debris, rocks, or vegetation from the site. Use a long level and measuring tape to make sure the base is completely flat and square - this ensures that the frame, panels, and doors will align properly . If your site has a slope, you may need to grade the area to create a flat surface.
Good drainage is just as important. Water pooling around the base can weaken the foundation over time. Check how water naturally flows in the area and make adjustments to direct it away from the greenhouse .
When choosing foundation materials, you have a few options depending on your budget and climate. Pressure-treated lumber, concrete blocks, and gravel are common choices, each offering different benefits in terms of stability, durability, and drainage.
Once your foundation is level and well-drained, you’re ready to move on to constructing the frame.
Building the Frame
Lay out all the frame pieces first and double-check your measurements before making any cuts. If you're working with wood, pre-drilling joints can help prevent splitting.
Start with the base frame, ensuring the corners form perfect 90° angles. A helpful trick is the 3-4-5 triangle method: measure 3 feet along one side, 4 feet along the adjacent side, and adjust until the diagonal between them measures 5 feet.
To strengthen the structure, add diagonal braces at key corners and use metal brackets on critical joints. As you build upward, regularly check that everything stays level and square. Small misalignments at the base can lead to bigger issues higher up. Pay extra attention to the roof frame, as it needs to support the weight of the glazing materials. Ensure the spacing is suitable for the type of panels you plan to use.
Once the frame is stable and secure, you can move on to glazing and door installation.
Installing Glazing and Doors
For glazing, polycarbonate panels are a popular choice. Use screws with rubber washers - often included with the panels - to ensure a weather-resistant seal. Pre-drill holes slightly larger than the screws to allow for thermal expansion, which helps prevent cracking.
If you’re using glass, handle it carefully. Use glazing compounds or rubber gaskets to create a tight, weatherproof seal. Install glass panels from the bottom up, so each panel rests securely on the one below it.
After the glazing is in place, hang the door. Make sure the door frame is plumb and level for a proper fit. Add weatherstripping around the door and any windows to minimize air leaks, which can affect the greenhouse's internal temperature.
Finally, include roof and side vents for natural airflow. For added convenience, consider installing automatic vent openers to regulate ventilation without manual effort.
Maximizing Energy Efficiency and Functionality
After constructing your greenhouse, the next step is to focus on its interior layout and growing practices. These elements play a big role in boosting productivity and energy efficiency, making it possible to cultivate plants throughout the year.
Interior Layout for Space Optimization
The way you organize the interior of your greenhouse can make a huge difference. A thoughtful layout improves airflow, ensures even light distribution, and makes daily tasks easier to manage. In fact, smart design choices can increase the usable growing area by up to 60% and cut your maintenance time in half . Start by identifying your goals - whether you’re growing vegetables, ornamental plants, or planning seasonal versus year-round use. These goals will help you decide on the layout and any accessories you might need .
Year-Round Growing Strategies
Creating an efficient layout is just the beginning. To keep your greenhouse productive all year, you’ll need to adjust your growing strategies with the seasons. Crop rotation, for example, can improve yields by around 10% . Providing adequate light is another must - leafy greens and herbs generally need 12 to 14 hours of light daily to thrive . During months with shorter days, using supplemental grow lights can ensure your plants get the light they need to flourish .
Conclusion: Key Steps for Building a Greenhouse
Building your own greenhouse is more than just a project - it's a chance to develop practical skills while reaping the rewards of year-round gardening. To get it right, you'll need to focus on planning, choosing the right materials, careful construction, and energy-efficient design.
Planning is the foundation of success. Choosing the right location is crucial for ensuring your greenhouse performs well throughout the seasons. A well-thought-out plan sets the stage for long-term functionality and efficiency.
Selecting materials wisely can help you balance eco-friendly choices with budget considerations. Opting for sustainable materials not only aligns with environmentally responsible practices but also influences the overall energy efficiency and cost-effectiveness of your greenhouse.
The construction phase demands patience and precision, especially when laying the foundation and installing glazing. A solid, level foundation with proper drainage and tightly sealed glazing ensures structural stability and maintains the controlled environment inside. Paying close attention to these details can save you from expensive fixes down the road.
Once the structure is complete, energy efficiency and functionality take your greenhouse to the next level. Smart interior layouts can maximize your growing space, while features like rainwater collection systems and thermal mass storage help reduce operating costs. These additions make sustainable, year-round gardening a reality.
FAQs
What are some sustainable alternatives to polycarbonate panels for greenhouse glazing?
If you're searching for greener alternatives to polycarbonate panels, there are a few solid choices worth exploring. Tempered glass stands out as a tough, fully recyclable option that offers great light transmission and is crafted from natural materials. Another option is reclaimed glass, which is often salvaged from construction sites or recycling centers. This choice not only cuts down on waste but also retains its strength and durability. For a more cost-effective route, consider modern recyclable plastics - these are designed with energy efficiency and environmental responsibility in mind. With these options, you can create a greenhouse that aligns with your budget, suits your climate, and supports eco-friendly practices.
What’s the best way to ensure proper drainage and a stable foundation for my greenhouse in a rainy climate?
To keep your greenhouse sturdy and well-drained in a rainy climate, start by laying down a gravel base with geotextile fabric underneath. This setup prevents water from pooling and helps maintain a stable foundation. Steer clear of untreated wooden foundations since they can break down in wet conditions. Instead, go for concrete slabs or pressure-treated lumber placed on compacted, well-drained soil.
Another key step is grading the ground around your greenhouse. Ensure the surrounding area slopes gently away from the structure to guide water away. Surrounding the base with permeable materials like gravel or sand can further improve drainage and help minimize water-related issues. These precautions will ensure your greenhouse stays solid and functional, even during heavy rainfall.
What are the best ways to keep a greenhouse energy-efficient during winter in the U.S.?
To keep your greenhouse cozy and energy-efficient during the winter months, start by focusing on insulation. Using materials like double-layered polyethylene film or foam insulation can go a long way in reducing [heat loss](/glossary/heat-loss). Don’t forget to seal up any gaps, cracks, or broken panels to block out drafts and keep the warmth inside.
For heating, opt for energy-efficient solutions. Properly sized heaters and heat-retention curtains can help you maintain a steady temperature without driving up energy bills. You can also take advantage of passive solar design by installing south-facing windows or panels to capture sunlight and naturally warm your greenhouse during the day.
These practical steps not only create a stable environment for your plants but also help cut down on energy consumption and costs throughout the chilly season.