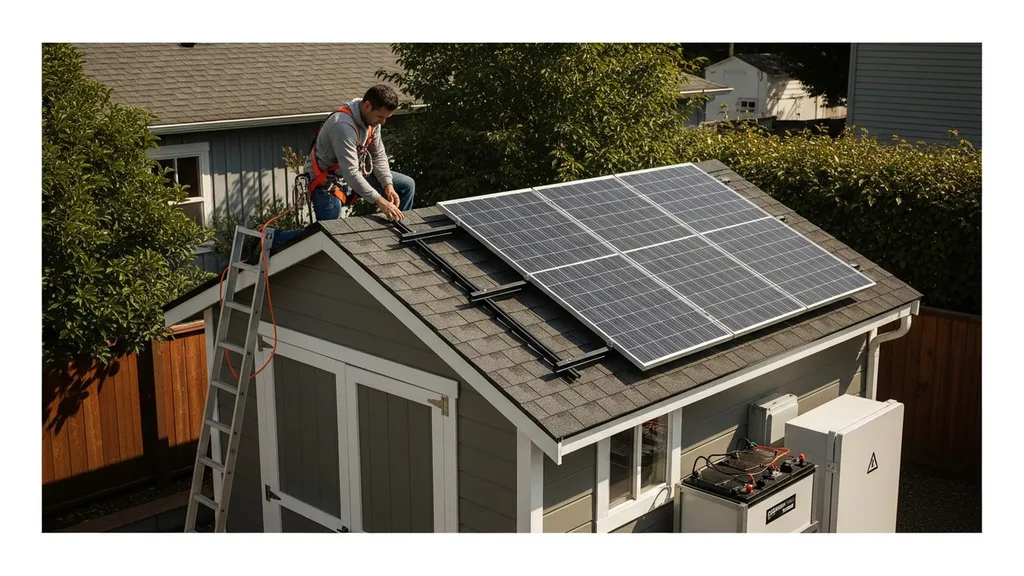
Step-by-step guide to planning, sizing, and installing a shed solar system for reliable off-grid power — components, costs, and upkeep.
Shed Solar System: Off-Grid Power Setup
A shed solar system gives a small building dependable off-grid power without running a utility line or relying on a noisy generator. This guide explains how to plan, size, and install a shed solar system so DIYers can run lights, tools, or tiny-home loads reliably while keeping costs down. Read on to learn real component choices, worked sizing examples, mounting and wiring basics, sample builds with parts lists, and routine maintenance tips.
TL;DR:
- A basic shed solar system (150 W panel + 100 Ah battery) can run LED lighting and phone charging for 1–2 people, costing roughly $500–$1,200 in parts.
- For a workshop or tiny-living shed, size for 1–4 kWh/day: expect 1–3 panels of 300 W and a 200–600 Ah battery (12–48 V), accounting for 15–25% system losses.
- Start by listing appliances and hours, use local peak-sun-hours for panel sizing, pick MPPT controllers for efficiency, and prefer LiFePO4 batteries for long-term value if budget allows.
Quick Takeaways and Why Install a Shed Solar System
Top Reasons to Add Solar Power to a Shed
- Reduce operating cost: Solar eliminates fuel and line-extension fees for off-grid setups.
- Avoid grid work: Useful where grid extension costs exceed the system price or isn’t possible.
- Quiet, low-maintenance backup: Replaces a generator for light-to-medium loads.
- Enable tiny-living or workshop use: Power tools, a mini-fridge, lighting, and chargers.
- Improve utility resilience: Keeps critical tools and lights running during outages.
Research shows small-scale solar installations are growing rapidly; industry reports highlight rising adoption for accessory structures and remote buildings (SEIA solar market insight Q3 2025). For sheds used as conditioned space, pairing insulation and ventilation reduces required system size—see the guide to shed insulation options and the HRV systems guide for ventilation that lowers heating loads.
At-a-glance Checklist: What a Small Shed System Can Run
- Light-use (200–400 Wh/day): LED lights, phone/tablet charging, small tools intermittently.
- Workshop (1–3 kWh/day): Frequent use of power tools, drill press, laptop, fridge duty cycle.
- Tiny-living (3–8 kWh/day): Refrigerator, lights, a few small appliances, limited heating or cold-climate loads require much more capacity.
Typical runtimes (rough examples): a 150 W panel + 100 Ah 12 V battery (1.2 kWh nominal, ~600 Wh usable at 50% DOD lead-acid) can run four 10 W LED fixtures for ~30 hours, or a circular saw (1200 W) for short bursts with adequate inverter surge margin. Consider local constraints: available roof area, peak-sun-hours, and shading. Passive design choices also reduce electrical demand—see passive design tips.
How to Size a Shed Solar System: Loads, Panels, and Batteries
Step 1 — List Appliances and Watts
Create an itemized list: device name, continuous wattage (W), and daily hours. Use labels like W, Wh, kWh, Ah. Example list:
- LED lights: 20 W total × 4 hours = 80 Wh/day
- Mini-fridge: 60 W average × 12 hours (duty cycle) = 720 Wh/day
- Circular saw: 1,200 W × 0.25 hours = 300 Wh/day
- Phone charger + misc: 50 W × 2 hours = 100 Wh/day
Total = 1,200 Wh/day (1.2 kWh/day)
For accuracy, install an energy monitor or measure loads with a clamp meter; see the energy monitor calibration guide.
Step 2 — Convert to Daily Kwh and Account for Solar Hours
Take total daily Wh and divide by expected peak-sun-hours (PSH) to get required panel wattage. Use a PSH range: 3.5–5.0 as common in many U.S. locations. Calculation example:
- Daily load: 1.2 kWh (1,200 Wh)
- System losses and safety margin: add 20% → 1,200 × 1.20 = 1,440 Wh
- If PSH = 4.0: Required panel watts = 1,440 Wh ÷ 4 h = 360 W of panels
Round up to nearest common module sizes: 2 × 200 W panels or 1 × 400 W panel.
Step 3 — Battery Capacity and Autonomy Math
Decide how many days of autonomy (days without sun) you want. For one-day autonomy:
- Usable battery = daily Wh × autonomy
- For lead-acid, use 50% depth-of-discharge (DOD) typical; LiFePO4 use 80–90% usable.
Example for 1-day autonomy and 1,440 Wh/day:
- Lead-acid required capacity (Wh) = 1,440 ÷ 0.5 = 2,880 Wh → at 12 V that’s 240 Ah (2,880 ÷ 12)
- LiFePO4 required capacity = 1,440 ÷ 0.8 = 1,800 Wh → at 12 V that’s 150 Ah
Charge controller headroom: select a controller that can handle the panel open-circuit voltage (Voc) and current with 25% headroom. MPPT controllers are more efficient and allow higher array volts.
Sample target systems by daily load:
- Light-use: 200–400 Wh/day — 100–300 W panels, 100–200 Ah battery (12 V)
- Workshop: 1–3 kWh/day — 400–1,000 W panels, 200–600 Ah battery (24–48 V often better)
- Tiny-living: 3–8 kWh/day — 1,000–2,500 W panels, 400–1,000+ Ah battery (48 V recommended)
Note: 12 V systems work for very small setups, but 24 V or 48 V reduce current, smaller cable sizes, and better efficiency for medium or larger loads.
Core Components of a Shed Solar System (panels, Controllers, Inverters, Batteries) — Comparison Table Included
Solar Panels: Types and Sizing
- Monocrystalline: Highest efficiency and best for limited roof area.
- Polycrystalline: Lower cost, slightly lower efficiency.
- Thin-film (CIGS, CdTe): Lower efficiency, flexible options for odd shapes, performance better in high heat.
Panels for sheds commonly range from 100 W to 400 W each. For budget module choices see our budget solar panel options.
Charge Controllers: MPPT vs PWM
- MPPT (Maximum Power Point Tracking): Higher efficiency, allows higher array voltage, better in cold or variable sun. Preferred for most shed systems.
- PWM (Pulse Width Modulation): Cheaper, works for small matched 12 V arrays, not recommended when you can use MPPT.
Include the term solar charge controller when shopping.
Inverters: Pure Sine vs Modified and Sizing Rules
- Pure sine wave: Clean power for electronics and motors; recommended for most tools and appliances.
- Modified sine: Cheaper, may cause noise or issues with sensitive electronics.
Rule of thumb: inverter continuous rating should be at least 1.25× expected continuous load; for motors and saws allow surge capacity of 1.5–3× the running wattage.
Batteries: Lead-acid vs Lifepo4 Pros and Cons
- Flooded lead-acid / AGM / Gel: Lower upfront cost, shorter cycle life, heavier, require maintenance (flooded). Usable capacity ~40–50%.
- LiFePO4 (lithium iron phosphate): Higher upfront cost, much longer cycle life (2,000–5,000 cycles typical), lighter, higher usable capacity (80–90%), faster charging.
LiFePO4 often pays back over years for frequent cycling. See external forecasts that show growing small-scale solar adoption (EIA small-scale solar outlook).
| Component | Common options | Pros | Cons | Typical cost (parts) | Expected lifespan |
|---|---|---|---|---|---|
| Solar panel | Monocrystalline, polycrystalline, thin-film | High efficiency (mono), lower cost (poly) | Thin-film lower efficiency | $80–$300 per panel | 15–30 years |
| Charge controller | MPPT, PWM | MPPT higher efficiency, better with cold | PWM cheaper but less efficient | $80–$350 | 5–15 years |
| Inverter | Pure sine, modified | Pure sine works with electronics & motors | Modified may cause issues | $150–$1,200 | 5–15 years |
| Battery | Flooded, AGM, Gel, LiFePO4 | LiFePO4 long cycles, lightweight | LiFePO4 higher cost | $150–$2,000+ | 3–15 years (lead), 10+ years (LiFePO4) |
| Mounting & racking | Rail-based, rail-less | Rail-based adjustable tilt | Rail-less cheaper but less flexible | $50–$300 | 10–25 years |
For additional off-grid concepts see the solar off-grid topics hub.
Mounting, Wiring, and Code Basics for a Shed Solar System
Roof Mounting vs Ground-mount Options
Choose roof-mount if the shed roof is structurally sound and has good sun exposure. For poor roof orientation or shading, consider ground-mounts with adjustable tilt. Racking styles: rail-based for better wind load performance; rail-less for cost savings. Check roof framing—reinforce rafters if needed; our framing basics and advanced wall framing guides help when modifying structure. For a dedicated battery or generator pad, consult the slab-on-grade foundation.
Tilt choices: fixed tilt optimized for year-round production uses latitude minus ~10 degrees; summer-optimized tilts increase summer output.
Basic Wiring Layout and Conduit Best Practices
A typical DC wiring flow: panels → combiner (if multiple strings) → charge controller → battery bank → inverter → AC loads. Use proper fusing between panels and charge controller and battery to prevent backflow and short-circuits. For long DC runs, calculate voltage drop and step up array voltage (higher system voltage) to reduce cable size.
Conduit and cable glands should be weatherproof. Seal roof penetrations with flashing and appropriate sealant. For panel cooling and spacing, see cost-effective ventilation and spacing methods in our cooling solutions for panels article.
Weatherproofing, Flashing, and Structural Checks
Inspect roof sheathing, rafter spacing, and wind load rating before mounting. Use manufacturer racking instructions for torque specs and wind standoff distances. For electrical safety, follow the National Electrical Code (NEC) and local permitting; AC connections or permanent building circuits often require a licensed electrician.
Off-grid Configurations for a Shed Solar System and Hybrid Backup Options
Dc-coupled vs Ac-coupled Configurations
- DC-coupled: Panels feed a charge controller directly into batteries; inverter draws from batteries. More efficient for charging and common in pure off-grid systems.
- AC-coupled: Panels feed a grid-tied inverter with battery-based inverter/charger on AC side. Easier to expand with grid-tied components; may have efficiency penalties.
For a deeper technical comparison see the AC and DC coupling guide.
Adding Generator or Grid Backup
Small gasoline or propane generators integrate through an inverter/charger or transfer switch to provide charging during prolonged low-sun periods. A generator sized for battery charging (1.5–2 kW minimum) is a practical backup. For low-budget redundancy, a portable inverter-generator combined with a manual transfer switch is an affordable option.
When to Add a Transfer Switch and Automatic Backup
Automatic transfer switches (ATS) are recommended when you need seamless handoff between generator/grid and the shed system. All-in-one off-grid inverters with integrated chargers simplify control and often include automatic transfer functions—useful when you want hands-off backup and generator integration. For alternative generation in very remote sites, consider hybridizing with micro-hydro where available; read how micro hydro powers a cabin for an example.
Referencing an installation guide can clarify configuration choices; an online step-by-step resource lays out common hybrid patterns (Solar power for your shed: the ultimate guide).
Sample Shed Solar System Builds, Budgeting, and Parts Checklist
Below are three sample builds with approximate parts and cost ranges (parts-only). Use the solar cost calculators to refine these to local sun hours and pricing.
Sample Build a — Basic Lighting and Tools (light-use)
- Panels: 1 × 150–200 W monocrystalline panel
- Charge controller: 20 A MPPT
- Battery: 100 Ah 12 V lead-acid (or 100 Ah LiFePO4 for higher upfront)
- Inverter: 600 W pure sine
- Mounting: simple rail kit, wiring, fuses
Parts-only cost: $450–$900 Parts+installation (if hiring): $800–$1,500
This setup supports LED lights, phone charging, small drill, and occasional 500–800 W tools for short bursts.
Sample Build B — Workshop Setup (medium-use)
- Panels: 2–4 × 300 W panels (600–1,200 W total)
- Charge controller: 40–60 A MPPT (24–48 V system recommended)
- Battery: 200–400 Ah at 24 V (LiFePO4 or AGM bank)
- Inverter: 2,000–3,000 W pure sine with surge capacity
- Mounting: rail-based racking, combiner box, conduit
Parts-only cost: $2,500–$6,000 Parts+installation: $4,000–$9,000
Sized for frequent use of power tools, a small fridge, and multiple worksite outlets.
Sample Build C — Tiny-living Off-grid (higher-use)
- Panels: 4–8 × 300–400 W panels (1.2–3.2 kW)
- Charge controller/inverter: hybrid inverter/charger 3–5 kW (48 V)
- Battery: 400–1,000 Ah LiFePO4 at 48 V
- Mounting: elevated tilt frames or ground-mounts
Parts-only cost: $8,000–$25,000 Parts+installation: $12,000–$35,000
Supports refrigeration, lighting, some cooking appliances, and limited heating when paired with efficient insulation and heat sources.
Parts Checklist and Tools for DIY Installation
- Parts: Solar panels, MPPT charge controller, inverter, battery bank, racking, breakers/fuses, combiner, wiring, conduit, junction boxes, safety disconnects.
- Tools: Multimeter, clamp meter, crimpers, torque wrench, cordless drill, ladder, safety harness.
- Safety gear: Gloves, eye protection, rubber-soled shoes, insulated tools.
For a visual demonstration, check out this video on step by step budget solar install with eco-worthy!:
.Scale these samples using local PSH: if your area averages 3.5 PSH instead of 4.0, increase panel wattage about 15% to maintain output. For part selection, consider reputable brands such as Victron (inverters/chargers), Morningstar (controllers), and Jinko or Q CELLS for modules—compare specs and warranties before buying.
Maintaining and Troubleshooting a Shed Solar System — Safety First
Routine Maintenance Checklist
- Clean panels every 6–12 months or after heavy dust/pollen events.
- Check terminal torque on battery and combiner lugs quarterly.
- Inspect wiring and conduit for UV damage and pests annually.
- Log battery state-of-charge and inverter error codes monthly; consult the inverter maintenance checklist for detailed steps.
Common Problems and DIY Fixes
- No charging: Check PV open-circuit voltage with a multimeter, inspect fuse or breaker, verify charge controller display. If panels read voltage but controller shows no input, check Voc for shading or wiring faults.
- Inverter trips: Verify continuous load vs inverter rating; look for motor or compressor starting current spikes. Try soft-start or use a larger inverter.
- Battery not accepting charge: Test for sulfation (lead-acid) or cell imbalance (LiFePO4). For lead-acid, equalization (if supported) can help; for lithium, check BMS error codes.
For in-depth battery diagnosis see the solar battery troubleshooting article.
Battery Safety and Disposal Basics
Batteries contain hazardous materials. Flooded lead-acid requires vented enclosures; LiFePO4 cells are more stable but still require proper BMS protection and ventilation. Recycle or return batteries through certified drop-off programs or manufacturers. If a battery shows swelling, leakage, or excessive heat, stop using it and consult a licensed professional.
If uncertain about any AC wiring or main service connections, hire a licensed electrician. Follow lockout/tagout practices before working on battery or DC circuits.
The Bottom Line: is a Shed Solar System Right for Your Off-grid Needs?
A shed solar system is a cost-effective way to power lighting, tools, and tiny-living loads without running a utility line. Start with a clear load list, use local peak-sun-hours to size panels, and choose batteries and controllers that match expected cycling. For most DIYers, a small MPPT-based system with a modest LiFePO4 battery gives the best long-term value; for tight budgets, stick to conservative loads and upgrade components over time.
Frequently Asked Questions
How much roof space do I need for a shed solar system?
Roughly 1 panel of 300 W needs about 1.7–2.0 m² (18–22 ft²). For a 1 kW array you’ll need ~6–8 m² (65–85 ft²) of clear, unshaded roof. Exact space varies by panel wattage and tilt—measure the usable roof area and account for service access and mounting clearances.
Can I run a small fridge and tools from a shed solar setup?
Yes. A mini-fridge (60–100 W average) plus intermittent tool use typically fits a 400–1,000 Wh/day system with a 600–1,200 W inverter and a 200–400 Ah battery bank, depending on duty cycles. Size the inverter for motor surge and allow battery headroom for starting currents.
Is LiFePO4 worth the extra upfront cost for a shed battery?
Often yes for frequent cycling: LiFePO4 offers 2,000–5,000 cycles and 80–90% usable capacity, reducing replacement frequency and wiring needs. If usage is infrequent or budget is tight, AGM or flooded lead-acid can work short-term but expect shorter life and more maintenance.
Do I need a permit to install solar on a shed?
Permitting rules vary by jurisdiction. Many areas require electrical permits for permanent AC connections and may require structural review for roof-mounted panels. Check local code and contact your building department; a licensed electrician can also advise on permit needs.
How long do shed solar systems last with regular maintenance?
Panels typically last 15–30 years, inverters and controllers 5–15 years, and batteries 3–15+ years depending on chemistry. With regular maintenance—cleaning panels, checking connections, and monitoring battery health—a system can perform reliably for a decade or more before component replacement is needed.