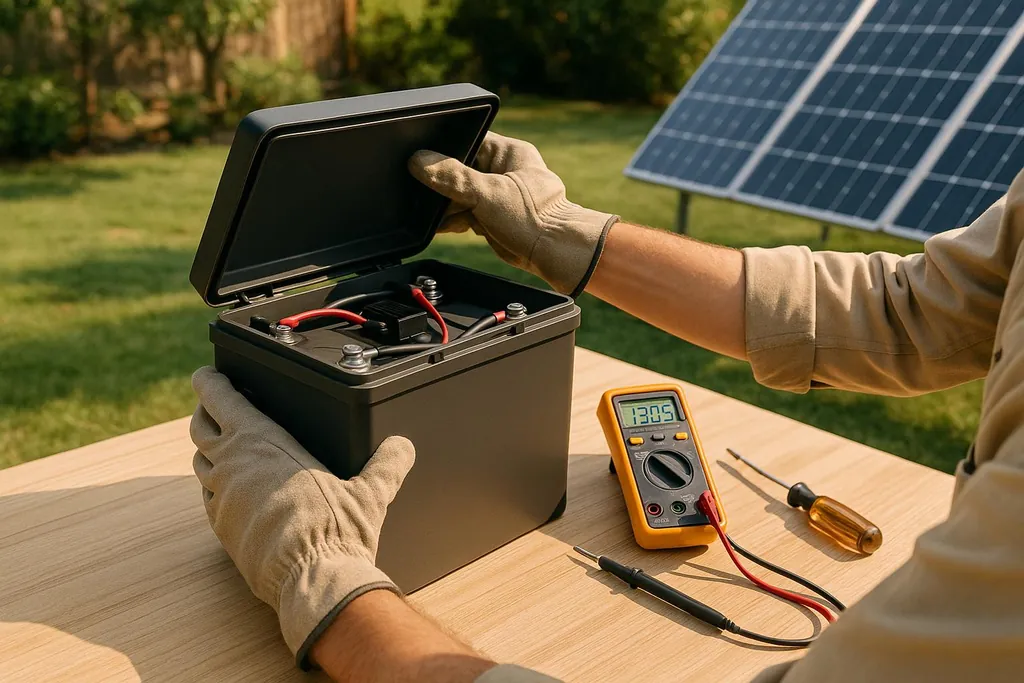
Learn how to troubleshoot and maintain your solar batteries effectively to enhance their performance and lifespan.
DIY Troubleshooting for Solar Batteries
Solar batteries power your home when the sun isn’t shining, but they need regular care to work well. If you’re dealing with problems like low performance, charging issues, or overheating, you can fix many of these yourself. Here’s what you need to know:
- Safety First: Always turn off power, wear protective gear, and check for harmful gases before starting.
- Common Problems:
- Overcharging: Causes swelling, heat, or leaks.
- Undercharging: Leads to low performance and shorter runtime.
- Sulfation (for lead-acid batteries): Reduces capacity and slows charging.
- Voltage Imbalance: Uneven performance in battery banks.
- Tools You’ll Need: Multimeter, thermal camera, insulated tools, and cleaning supplies.
- Maintenance Tips: Regularly check connections, keep batteries ventilated, and monitor charge levels.
If issues persist after basic fixes, call a professional. A little DIY effort can save you thousands in labor costs and extend your battery’s lifespan by up to 5 years. Ready to protect your investment? Let’s dive in.
Why solar battery is not charging
Safety Guidelines and Required Tools
Before diving into troubleshooting solar battery issues, it's crucial to acknowledge the risks involved with high-voltage systems. Protecting yourself and your equipment should always come first. Interestingly, battery storage incidents dropped by 97% between 2018 and 2023, a testament to the importance of following safety protocols .
Safety Precautions
Start by turning off the main disconnect switch. Use a voltage tester to confirm there’s no electrical charge present . Even when a system appears off, solar batteries can retain a dangerous charge, making this step non-negotiable.
Make sure you're dressed for safety. Wear chemical-resistant gloves, safety glasses, flame-resistant clothing, and non-conductive boots . Remove all metal jewelry or anything else that could conduct electricity before you begin working .
Work in a well-ventilated area. Batteries, especially damaged or overheating ones, can release harmful gases. If you're in a tight space, consider using vent fans to maintain airflow . Keep baking soda and water nearby to neutralize any acid leaks .
Lithium-ion batteries require extra care. Avoid dropping, puncturing, or crushing them, and keep them far from heat sources. Always read the manufacturer's handling instructions before working with these batteries .
If you notice a burning smell, smoke, or a battery casing that feels hot, stop immediately .
Once you've taken these precautions, gather the tools you'll need for troubleshooting.
Required Tools for Troubleshooting
A digital multimeter is essential for measuring voltage, current, and resistance, helping you assess battery health and system performance . Clamp meters allow you to measure electrical current without making direct contact with wires .
Thermal imaging tools, like a thermal camera or infrared thermometer, are invaluable for spotting hot spots that could signal failing connections or overheating components. These tools often catch problems before visible damage occurs .
You'll also need insulated screwdrivers, wire strippers, a wire brush, and a battery terminal puller for inspecting and cleaning components safely .
Keep your system's documentation close by. Manuals specific to your battery model and system components are crucial for accurate troubleshooting, as many steps vary depending on the equipment .
If these tools and steps don’t resolve the issue, it might be time to bring in an expert.
When to Call a Professional
Certain situations demand professional help. If you see battery deformities, leaks, or scorch marks, stop immediately and contact a licensed technician .
Recurring fault codes, frequent tripping of circuit breakers or RCDs, or a system that fails to deliver backup power during outages are signs of deeper issues that require expert diagnosis . Persistent poor performance after basic troubleshooting is another red flag .
Check your warranty terms before attempting DIY repairs, as some actions might void your coverage . If your system is still under warranty, professional service could be covered at no extra cost .
Finally, modern battery management systems often incorporate advanced technologies that can be tricky to navigate without specialized knowledge. Hiring a professional ensures that repairs are done safely and correctly, minimizing electrical risks .
How to Identify Common Solar Battery Problems
Spotting issues early is essential for maintaining solar batteries and avoiding expensive repairs or failures. Solar batteries often show warning signs that, if addressed promptly, can save you time and money.
Overcharging and Undercharging
Overcharging can be identified by swollen battery cases, excessive heat, fluid leaks, or a sulfur-like smell . Keep an eye on the temperature, as solar batteries function best between 77°F and 86°F (25°C to 30°C). If temperatures exceed 104°F (40°C), overcharging may be occurring . A temperature increase of 18°F (10°C) can cut a battery's lifespan in half . For lead-acid batteries, overcharging often happens when charging exceeds 2.40 to 2.45 volts per cell. For a 12-volt battery, the ideal range is around 13.5 to 14.5 volts .
On the other hand, undercharging is trickier to detect but just as damaging. Warning signs include consistently low voltage readings and shorter runtime during power outages. If your system struggles during cloudy days or evenings when it used to perform well, undercharging might be the culprit. Use a multimeter to monitor voltage levels and check your charge controller settings. Additionally, keep an eye out for sulfur odors and reduced system performance, which could signal capacity loss or voltage imbalances .
Capacity Loss and Voltage Imbalance
Capacity loss becomes evident when batteries fail to hold a charge, leading to unexpected outages or slower charging . Most batteries start to fail when their capacity drops to 70–80% of their original level .
> "Solar battery losing power due to age, improper charging, extreme temperatures, excessive loads, or sulfation. Most problems show clear warning signs if you know where to look." - GYCX Solar Smart Energy Solutions
Daily monitoring of inverter or battery data is crucial. A temperature increase of 15°C can significantly reduce a battery's lifespan .
Voltage imbalance occurs in systems with multiple batteries when individual units discharge at uneven rates. This can lead to inconsistent performance, unexpected shutdowns, or some batteries running hotter than others . Causes often include differences in battery age, variations in cell parameters, or loose connections.
| Problem Patterns | Voltage Behavior | Likely Cause |
|---|---|---|
| Big immediate drop | Weak battery | Battery degradation |
| Slow steady fall | Parasitic drain | System drain |
| Won't rise when charging | Bad cell | Cell degradation |
Regularly check individual battery voltages and secure all connections to prevent imbalances. Factors like sulfation and overheating can also disrupt battery performance.
Sulfation and Overheating
Sulfation affects lead-acid batteries when lead sulfate crystals accumulate on the plates. This buildup reduces performance, slows charging, and lowers electrolyte levels in flooded batteries. You might also notice a swollen or distorted case and increased internal resistance .
> "Sulfated batteries resist normal recharge service and usually lose capacity over time." - Crown Battery
To avoid sulfation, ensure lead-acid batteries stay fully charged. Batteries left in a discharged state are more prone to this issue . Regular voltage testing with a multimeter can help catch sulfation early.
Overheating presents as swelling, reduced capacity, or fluid leakage near the terminals . In severe cases, you might notice acid or hydrogen gas emissions .
During your routine maintenance, visually inspect for cracks, bulges, discoloration, and leaks . Load testing can also help identify capacity issues before they disrupt your system . Proper ventilation and insulation are key to managing battery temperatures, especially in hot environments or enclosed spaces . Cleaning terminals regularly can further prevent overheating caused by corrosion or poor connections.
Step-by-Step Troubleshooting Instructions
Once you've pinpointed potential issues with your solar battery system, it's time to dive into troubleshooting. Follow these steps to systematically inspect your batteries and address common problems safely and effectively.
Check for Physical Damage
Start with a close visual and physical inspection of your solar battery. Look for any noticeable damage, such as cracks, bulging, or ruptures in the casing - these could signal internal problems caused by overheating or overcharging. Check for discoloration or leaks, especially acid leaks, which can compromise the battery's functionality. Don’t forget to examine the terminals and connections for signs of corrosion, rust, or any residue that might indicate electrolytic discharge.
Test Voltage and Charge Level
After ensuring there’s no physical damage, move on to testing the battery's electrical performance. Use a multimeter to measure the voltage and charge level. Before testing, make sure all electrical components are powered off, and disconnect the battery from any load. For lead-acid batteries, let the battery rest for 4 to 24 hours to get an accurate reading.
Set your multimeter to the correct voltage range, then connect the red probe to the positive terminal and the black probe to the negative terminal. Use the table below as a reference for voltage readings based on the battery type:
| State of Charge | Sealed/Flooded Lead Acid Battery Voltage | Gel Battery Voltage | AGM Battery Voltage |
|---|---|---|---|
| 100% | 12.70+ | 12.85+ | 12.80+ |
| 75% | 12.40 | 12.65 | 12.60 |
| 50% | 12.20 | 12.35 | 12.30 |
| 25% | 12.00 | 12.00 | 12.00 |
| 0% | 11.80 | 11.80 | 11.80 |
For a fully charged 12-volt battery, you should see a reading between 12.6 and 12.8 volts. If the reading is below 12.2 volts, the battery might be undercharged, and anything below 12 volts indicates a severely discharged battery that needs immediate attention. Keep in mind that temperature can influence these readings, so factor that in during your assessment.
Clean Connections and Test Components
Once you've tested the voltage, it’s time to clean and secure the connections. This step ensures your system operates at peak performance. Always work in a well-ventilated area to prevent the buildup of potentially explosive gases, and wear protective gear like gloves and goggles.
Use a wire brush or terminal cleaner to remove any corrosion from the terminals. For tougher buildup, a mixture of baking soda and water or mild soap and water can help. Just make sure all components are completely dry before reconnecting them. To protect against future corrosion, apply a protective spray or high-temperature grease to the terminals.
Next, test the other components of your system. Use your multimeter to check the voltage, current, and resistance across the charge controller, wiring, and any fuses or breakers. Tighten all connections to ensure proper electrical contact.
By regularly cleaning and testing your system, you can prevent many common issues and extend the lifespan of your solar batteries. If you encounter more complex problems, don’t hesitate to reach out to a professional for help.
For additional tips and detailed guides on sustainable home energy solutions, visit [DIY Eco Homes](/).
Preventive Maintenance for Solar Batteries
Taking care of your solar batteries is essential to keep them running smoothly, avoid expensive repairs, and extend their lifespan. A little effort in regular maintenance can go a long way toward ensuring your system stays reliable for years to come.
Create Regular Inspection Schedules
A consistent inspection routine is your best defense against battery issues. Here's how to stay on top of it:
- Monthly checks: Look for corrosion, swelling, or loose connections. Dust off any buildup to ensure proper ventilation .
- Quarterly checks: Measure electrolyte levels and voltage to confirm your battery is performing as it should .
- Seasonal checks: Adjust your approach based on the time of year. In spring and fall, inspect capacity and tweak settings for changing sunlight. During summer, focus on ventilation and cooling, while in winter, protect batteries from freezing temperatures and monitor their charging .
To stay organized, use a seasonal checklist and set calendar reminders. Keep a digital copy of your manufacturer's manual handy, and maintain a simple log of your maintenance activities. This not only helps with troubleshooting but can also protect your warranty coverage .
Proper Installation and Setup
Good maintenance starts with proper installation. Setting up your batteries correctly can prevent many common problems down the line. Start by conducting a site evaluation to pick the right location. Choose a spot that's safe, easy to access, well-ventilated, and away from flammable materials. Make sure the floor or platform can handle the battery's weight .
Follow the manufacturer's instructions carefully and comply with local electrical codes. Proper grounding is a must to avoid electrical hazards, and fire safety measures should be in place as outlined in the manual .
Another critical step is configuring your charge controller. Different battery types, like lithium-ion and lead-acid, require specific settings. Adjust these based on your battery type and local climate conditions to ensure optimal performance .
Document the installation process for future reference and warranty purposes. Scheduling annual check-ups is also a good idea, especially during the first year when issues are more likely to arise .
Track Battery Performance Records
Keeping tabs on your battery's performance can help you catch problems early. Focus on monitoring metrics like state of charge (SOC), depth of discharge (DOD), input/output power levels, and temperature. Maintaining the SOC between 50% and 90% can significantly extend your battery's life .
Temperature is another key factor. Aim to keep it within the optimal range of 50°F–77°F. Adjust ventilation or insulation as needed to maintain this range .
Invest in a monitoring system that provides real-time data and sends alerts for changes in charge level, temperature, or voltage. This is especially important if you're using an off-grid setup that relies entirely on battery power. Follow the manufacturer's guidelines for connecting and reviewing your monitoring system .
For even more detailed insights, consider using a Battery Management System (BMS). A BMS can monitor each cell in your battery pack, protecting against overcharging or deep discharging. Over time, this data will help you understand your usage patterns and system efficiency .
Finally, keep a log of voltage readings, temperature changes, and maintenance activities. This record will be invaluable for troubleshooting or making warranty claims. With most solar batteries lasting 5 to 15 years, tracking this information can help you get the most out of your investment .
Quick Reference: Troubleshooting Comparison Table
If your solar battery starts acting up, this table can help you pinpoint the issue and decide your next steps. Keep it handy for quick troubleshooting.
| Problem | Symptoms | Common Causes | DIY Fixes | When to Call a Professional |
|---|---|---|---|---|
| Battery Not Holding Charge | Drains quickly, frequent power outages | Worn-out cells, sulfation in lead-acid batteries, nearing end of life | Check and clean connections, clean terminals with a baking soda solution, test with a multimeter | If cleaning and testing don’t resolve the issue |
| Overcharging | Voltage exceeds safe limits (above 14.8V for a 12V system), battery gets hot or swells | Faulty charge controller, misconfigured BMS, damaged voltage regulator | Check charge controller settings, ensure the battery has good ventilation, test voltage with a multimeter | If overcharging continues or if the battery shows swelling or visible damage |
| Undercharging | Battery never fully charges, voltage stays low | Low solar panel output, shading, faulty charge controller | Clean solar panels, check for shading, inspect wiring, and test the charge controller | If the battery still undercharges after these steps |
| Overheating | Temperature above 77°F, reduced performance, unusual smells | Poor ventilation, high ambient temperatures, overcharging | Improve ventilation, move the battery to a cooler area, check charging rates | If the battery exceeds 100°F, or if there’s swelling or chemical odors |
| Voltage Imbalance | Uneven voltage readings across batteries | Aging batteries, loose connections, mismatched battery types | Tighten connections, clean terminals, and test individual batteries | If voltage differences remain significant |
| Sulfation (Lead-Acid) | White buildup on terminals, reduced capacity, slow charging | Prolonged discharge or undercharging | Clean terminals, perform an equalization charge (if recommended), maintain proper charge levels | If sulfation is extensive or capacity drops by more than 20% |
| Physical Damage | Cracks, bulging, leaks, or corrosion on terminals | Old age, extreme temperatures, physical impact, overcharging | Clean minor corrosion, tighten loose connections, secure the battery | If there are cracks, bulging, or electrolyte leaks |
| Inconsistent Performance | Unpredictable charging, intermittent power, varying output | Loose connections, aging parts, unstable temperatures | Check all connections, monitor temperatures, ensure proper system grounding | If issues persist after basic troubleshooting |
This table is a quick summary of the most common solar battery problems and solutions. Start with simple fixes like inspecting connections and cleaning terminals. Keep an eye on battery temperatures - ideally between 50°F and 77°F - to extend their lifespan. Remember, for every 18°F rise above optimal conditions, battery life can drop significantly .
If you notice strong smells, visible damage, or temperatures over 100°F, stop troubleshooting and call a professional immediately. These situations require expert attention and specialized tools to fix safely.
Use this guide as part of your regular maintenance routine to keep your solar system running smoothly.
Conclusion and Key Takeaways
After diving into the diagnostic tips and preventive measures covered earlier, here’s your action plan for keeping your solar battery system in top shape. With home solar batteries costing between $10,000 and $15,000, learning some basic maintenance can protect your investment and help you save on labor costs .
Safety first - always. Solar batteries are always live, meaning they can’t be turned off, so taking proper precautions is non-negotiable . Keep sparks, flames, and any flammable materials far away from your battery system.
Regular upkeep is your best defense against expensive repairs. A well-maintained system should last at least five years before needing replacement , and simple care can extend its life even further. For instance, cleaning terminals every few months, checking voltage weekly, and keeping the temperature between 50°F and 77°F can have a big impact. On the flip side, excessive heat can significantly shorten a battery's lifespan .
The troubleshooting table provided earlier serves as a practical guide to address common problems before they escalate. Start with straightforward checks like inspecting connections and cleaning terminals. Most battery issues stem from things like loose connections, temperature extremes, or charging imbalances - problems that are entirely manageable with the right tools and know-how.
Taking a DIY approach to troubleshooting doesn’t just save money - it also ensures your solar system runs efficiently. Spotting and fixing inefficiencies early can prevent performance dips and help you make the most of your energy use . This is especially handy during peak rate periods when relying on your battery instead of the grid can cut down your electricity costs.
That said, know when to step back and call in the pros. While basic maintenance and fixes are doable for most homeowners, more complex issues - like electrical malfunctions, physical damage, or anything involving safety risks - are best left to professionals. The money you save by handling routine tasks yourself can go toward expert help when it’s truly necessary.
FAQs
How can I tell if my solar battery is overcharging or undercharging?
If your solar battery is overcharging, you might see signs like swelling, excessive heat, unusual gassing, or even a noticeably shorter lifespan. Overcharging isn’t just harmful - it can lead to permanent damage and reduce how well your battery performs.
On the flip side, undercharging brings its own set of problems. You may notice the battery charges slowly, struggles to hold a charge, or experiences frequent deep discharges. These issues can take a toll on the battery's performance over time. Tackling these problems early can go a long way in preserving your battery's health and ensuring it lasts longer.
What’s the best way to safely clean and maintain my solar battery connections to avoid common problems?
To keep your solar battery connections in good shape, start by turning off the entire system to eliminate any risk of electrical shock. Mix distilled water and baking soda to create a cleaning solution, then use a terminal cleaning brush to gently scrub away dirt and corrosion from the battery terminals. After cleaning, rinse the terminals with clean water and dry them completely. For added protection against corrosion, apply a thin coat of anti-corrosion spray or high-temperature grease to the connections.
Always double-check that the system is powered down before starting any maintenance. If you're uncertain about any step, refer to your battery's user manual or reach out to a professional for help.
When should I call a professional instead of trying to fix solar battery issues myself?
If your solar battery keeps running into issues - like failing to hold a charge, experiencing frequent power outages, showing error messages, or displaying physical damage (like swelling) - it’s time to call in a professional. Trying to fix these problems on your own can sometimes make things worse, so getting expert help is crucial to avoid further damage.
It’s also smart to book yearly inspections with a qualified technician. Regular check-ups can help ensure your solar system is running smoothly and catch any small problems before they turn into major headaches.