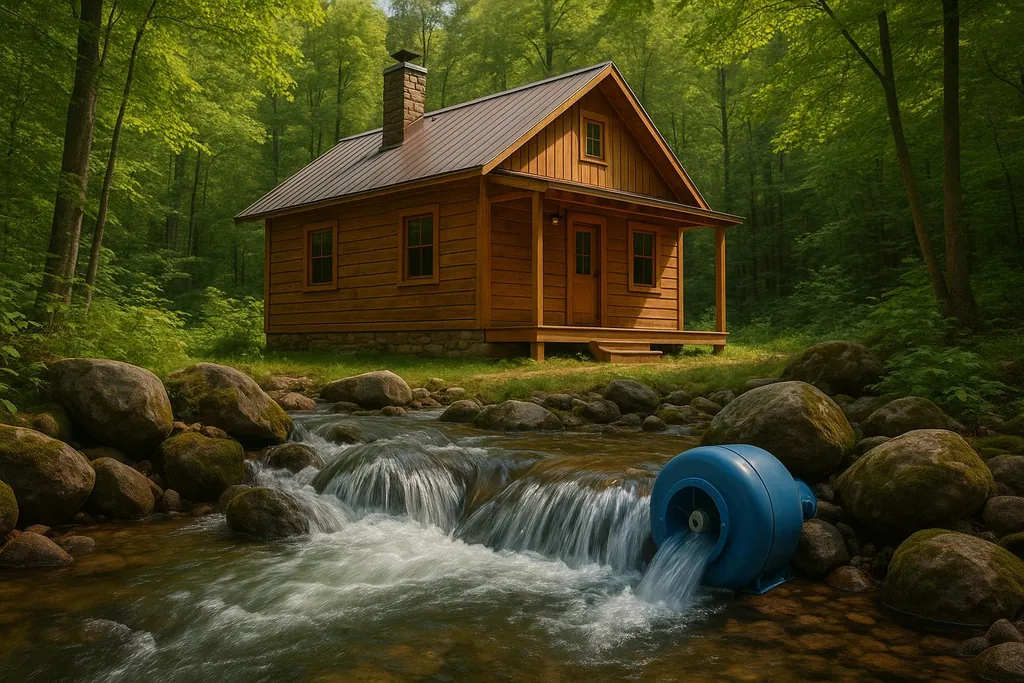
Explore how micro-hydro systems provide a reliable, eco-friendly power solution for remote cabins, ensuring year-round energy independence.
How Micro-Hydro Powers a Remote Cabin
Looking to power your off-grid cabin? Micro-hydro systems might be your best option. These systems generate electricity by using the natural flow of water, offering a reliable, low-maintenance, and eco-friendly energy source. Here's what you need to know:
- What It Is: Micro-hydro systems are small-scale hydroelectric setups (up to 100 kW) that use streams or small waterfalls without large dams.
- Why It Works Well: Unlike solar or wind, micro-hydro provides consistent power (up to 90% efficiency) year-round, even in winter.
- Costs: Installation ranges between $1,000 and $20,000, with systems lasting 50+ years.
- Key Steps: Assess water flow and head, secure permits, and carefully plan your system's components like the turbine, penstock, and generator.
- Maintenance: Minimal upkeep is needed - clean debris, check bearings, and monitor voltage stability.
Micro-hydro systems are ideal for remote cabins, offering continuous power and long-term savings. Keep reading for step-by-step guidance on setup, maintenance, and solving common challenges.
AMAZING 500w Micro Hydro Power
Planning and Checking Your Site
Before diving into construction or buying equipment, it's crucial to ensure your site can support a micro-hydro system. This involves assessing the water resource and understanding the rules and permits that apply. A solid plan tailored to your specific site will set you up for success.
Measuring Water Flow and Head
The power potential of your site depends on two main factors: water flow and head. Flow measures how much water moves through the site over time, typically in gallons per minute (GPM) or cubic feet per second (CFS). Head refers to the vertical distance the water falls, measured in feet.
Measuring Water Flow
Because stream levels fluctuate throughout the year, you'll need to measure flow during different seasons to get an accurate picture. A few methods can help:
- Container Fill Method: Redirect water into a container of known volume and time how long it takes to fill.
- Float Method: For larger streams, measure water depth and flow speed at a specific point to estimate flow.
- Weir Method: Build a temporary dam with a measured opening. Then, use flow tables to determine flow based on the water depth behind the dam. This method works well for small to medium streams.
For reference, 1 cubic foot equals 7.481 gallons, and 1 cubic meter equals 35.31 cubic feet.
Calculating Head
Head is measured in two ways: gross head and net head. Gross head is the total vertical drop from the water intake to the turbine, while net head accounts for losses from friction and turbulence in the pipes. You can measure head using surveying tools or a pressure gauge. If using a pressure gauge, remember that 1 psi equals roughly 2.31 feet of vertical head.
Understanding Permits and Regulations
Permits are essential to protect water resources and ensure your project complies with environmental and safety standards. Securing them early can save you time and money.
Key Areas to Address
Several regulatory aspects often apply to micro-hydro systems:
- Water Rights: States manage these rights, and you might need a separate permit to generate power even if you already have water rights for other uses, like irrigation.
- Dam Safety: If your system includes water impoundment structures, dam safety regulations will apply.
- Environmental Rules: State and federal regulations, including reviews for historical or archeological impacts, may influence your project.
- State and Local Permits: Requirements for land use and construction permits vary widely depending on your location.
Where to Start
Reach out to your county engineer for guidance on local permits and processes. Your state energy office can offer advice on renewable energy projects, while federal agencies like the Federal Energy Regulatory Commission (FERC) and the U.S. Army Corps of Engineers can help with national requirements. Additionally, local experts familiar with micro-hydro systems can provide valuable insights to navigate the permitting process.
Choosing the Best Location for System Parts
Once you've assessed your site and sorted out regulatory requirements, the next step is to determine where to place the system's components. Proper placement ensures efficiency and minimizes environmental impact. Key components include the intake, penstock, and turbine.
Intake Placement
Your intake should mimic the stream's natural flow to reduce environmental disruption. Horizontal intakes are often preferred due to simpler construction and maintenance. Here are three common intake types:
- Submerged Intakes: These are less prone to freezing and clogging but can be more challenging to install and repair.
- Exposed Intakes: Easier to maintain but more vulnerable to freezing and may require frequent cleaning.
- Collecting Intakes: Ideal for waterfalls, these designs can be self-cleaning and require minimal maintenance if properly set up.
Penstock Routing
The penstock connects the intake to the turbine and plays a vital role in system efficiency. To reduce head loss, aim for a flow speed below 10 feet per second and keep head loss within 10–15% of the gross head. High-density polyethylene (HDPE) is a popular choice for penstocks because it's durable, cost-effective, and easy to install, even on uneven terrain.
Turbine and Powerhouse Location
Position your turbine based on site-specific factors like head, flow, and available space. Ensure easy access for maintenance, protection from weather, and proximity to your cabin's electrical setup. Be mindful of in-stream flow requirements to maintain the stream's natural ecosystem.
Balancing technical needs with practical considerations - like accessibility and environmental care - is crucial. Walk your site multiple times to evaluate how seasonal changes might impact performance and access to each component.
Building and Installing the Micro-Hydro System
Once you've completed your site assessment and secured the necessary permits, it's time to bring your micro-hydro system to life. This stage focuses on selecting the right components, installing them properly, and taking measures to ensure the system runs smoothly for years to come - especially in remote, off-grid locations.
Main Components and How They Work
A micro-hydro system is a combination of several interconnected parts, all working together to transform the energy of flowing water into electricity. Understanding how each component functions is key to a successful installation.
Water Management Components
The first step in protecting your system is the trash rack, which filters out debris before water enters the intake. Position it upstream for maximum efficiency. Next, the weir - a small dam - diverts water into the system while allowing the stream to continue flowing naturally. The forebay, located downstream of the weir, acts as a settling basin, letting sediment sink before the water moves into the penstock.
Power Generation Equipment
The penstock is a pressurized pipe that carries water from the intake to the turbine. Its job is to maintain water pressure while minimizing energy losses. Inside the powerhouse, you'll find the turbine, generator (or alternator), regulator, and wiring. This structure not only protects these components but also facilitates maintenance. The turbine converts the energy of moving water into mechanical energy, which the generator then transforms into electricity. To ensure everything works efficiently, the turbine and generator must be properly matched in terms of horsepower and rotation speed. Many manufacturers offer these as pre-matched sets.
Electrical Components
Inverters play a critical role in converting DC power into AC, while the control system keeps voltage levels stable. The tailrace returns water to the stream, and transmission lines deliver electricity to your cabin.
Step-by-Step Installation Process
Installing a micro-hydro system is a step-by-step process that begins at the intake and progresses downstream to the powerhouse. Each stage builds on the last, so precision and secure connections are essential.
Intake Construction
Start by installing the trash rack, ensuring it's anchored to withstand strong water flows. Build the weir to divert just the right amount of water without disrupting the natural stream flow. Downstream, construct the forebay, ensuring it's large enough to allow sediment to settle. Add a cleanout valve for easy sediment removal during maintenance.
Penstock Installation
Lay the penstock along the planned route, selecting a pipe that meets your durability needs. Secure the pipe carefully, especially at bends where water pressure can strain joints. Check for leaks and reinforce all connections.
Turbine and Generator Setup
Place the turbine inside the powerhouse, following the manufacturer's guidelines. Align the penstock connection with the turbine inlet to reduce turbulence and pressure loss. Securely mount the generator, ensuring it aligns precisely with the turbine to prevent vibration, noise, or early wear. Install the electrical control panel in a dry area within the powerhouse and connect all recommended safety features.
Electrical Connections
Follow local electrical codes and manufacturer instructions when wiring the system. Proper grounding is essential to avoid shocks or equipment damage. If you're using energy storage, connect the inverter and battery bank, making sure the wiring can handle the current loads without excessive voltage drops. Use a multimeter to verify all connections before powering up the system.
Safety and Weather Protection Tips
Once your system is installed, keeping it safe and operational requires ongoing monitoring and protection against environmental stresses.
Monitoring and Safety Systems
Install temperature sensors on turbine and generator bearings to catch potential issues early. Regularly check oil levels in lubricated components like governor tanks. To protect against flooding, consider adding systems that automatically close intake gates during high water events. Surge tank level monitoring can help manage pressure spikes that might otherwise damage the penstock or turbine.
Environmental Protection
Keep an eye on ambient temperatures, especially near bus bars and high-voltage equipment, as heat combined with high voltage can pose fire risks. Proper ventilation and temperature monitoring can help mitigate these dangers. Install water-level and flood alarms to warn of conditions that may require shutting down the system. Maintain stable electrical loads during operation to prevent sudden voltage spikes that could harm your equipment.
Weather and Debris Management
Design your intake to handle seasonal debris loads with minimal manual cleaning. Protect electrical components with weatherproof enclosures and ensure ventilation to prevent condensation. Regular inspections are crucial - check intake screens and electrical connections for wear or corrosion to catch potential problems early.
At DIY Eco Homes, we offer detailed guides and cost breakdowns to help you navigate the complexities of micro-hydro installations. From choosing components to planning for long-term upkeep, our resources aim to make building a reliable off-grid power system easier.
Solving Common Problems During Setup
Even the best-installed micro-hydro systems can encounter challenges that interrupt power generation. Knowing what to expect and preparing solutions in advance can help ensure your remote cabin stays powered year-round.
Dealing with Seasonal Water Changes
One of the biggest hurdles for micro-hydro systems is managing changes in water flow, especially in areas with distinct wet and dry seasons. Since these systems depend on consistent streamflow, even slight reductions in water can lead to noticeable power losses.
> "Climate change is exacerbating both water scarcity and water-related hazards (such as floods and droughts), as rising temperatures disrupt precipitation patterns and the entire water cycle." - United Nations
Practical Backup Options
To offset power losses during dry spells, consider integrating solar panels or a small wind turbine as supplemental energy sources.
Adjusting the Intake for Variable Flow
Raising your intake can help capture whatever water is available during dry periods while also minimizing sediment intake. Another option is building a small diversion pond upstream. This pond can act as a temporary reservoir, smoothing out daily flow fluctuations and providing additional water during brief low-flow periods.
Next, let's look at how to manage debris and sediment, which can also impact system efficiency.
Managing Debris and Sediment
Debris like leaves and branches, along with sediment, can clog your system and disrupt water flow. Effective management is critical to maintaining steady performance.
Keeping the Intake Clear
Install a trash rack at your intake to filter out larger debris while still allowing water to flow freely. During heavy storms or seasonal leaf fall, make it a habit to clean the trash rack regularly. Adding a bypass channel can also help by directing excess water and debris away from the intake during high-flow events.
Handling Sediment Build-Up
Design your forebay to allow sediment to settle naturally, and schedule cleanings during periods of low energy demand to minimize disruptions.
With water flow and debris under control, the next challenge is maintaining electrical stability.
Controlling Voltage and Battery Storage
Fluctuating water flow can lead to voltage instability, which may damage sensitive electronics and shorten battery life.
Why Voltage Fluctuates
Voltage issues often arise when there's a mismatch between power output and demand. An Automatic Voltage Regulator (AVR) can help by automatically adjusting voltage levels to keep them stable. Be sure to choose an AVR that can handle your system's highest output levels.
Protecting Against Voltage Surges
Install surge protectors at key points in your system - like the main panel, battery bank, and before sensitive devices - to absorb spikes and shield your equipment from damage.
Optimizing Battery Performance
Use a digital monitoring system to track your battery bank and avoid deep discharges. Disconnect non-essential loads when voltage drops to conserve power, and incorporate temperature compensation into your charging setup to account for environmental changes.
At DIY Eco Homes, we provide step-by-step guides to help you troubleshoot these common issues. With the right strategies, your off-grid micro-hydro system can stay efficient and reliable, no matter the season.
Performance, Maintenance, and Lessons Learned
Once your micro-hydro system is up and running, real-world performance data can offer invaluable insights. Observing how the system performs daily, understanding its maintenance needs, and tackling common challenges can help future DIY enthusiasts make better decisions when embarking on their off-grid energy projects.
Actual Power Output and Usage
The power output of a micro-hydro system hinges on your site's unique conditions - specifically, the vertical drop and the water flow rate. Unlike solar or wind energy, micro-hydro systems have the advantage of providing continuous power generation around the clock, which is particularly useful during winter when energy demand tends to spike.
Real-World Performance Examples
Take the example of Scott and Tracey Gentleman, who installed a micro-hydro system on their property in 1999. With an 80-foot drop and a creek flowing at approximately 134 gallons per minute, they used a Harris 4-nozzle turbine connected to a 4-inch pipe running through a 1,100-foot penstock. This setup delivered a steady output of 725 watts, enough to power their remote homestead throughout the year.
Another case from British Columbia highlights how micro-hydro systems can scale. A small homestead used a Harris turbine paired with a Ford alternator to produce 50 kWh per month, while a larger First Nations community installation generated 7,200 kWh monthly with a continuous 10,000-watt output.
Typical Power Ranges and Applications
Most micro-hydro systems produce between 75 and 350 kilowatt hours (kWh) per month. This is typically enough to power a large home, a small resort, or even a hobby farm. For a remote cabin, this means you can reliably run essentials like LED lights, refrigerators, water pumps, and electronics - without the interruptions often seen with solar or wind systems. However, during summer, reduced water flow can lead to lower power output, so accurate flow assessments are critical for proper system sizing.
Regular Maintenance and Inspections
To keep your micro-hydro system running smoothly, regular maintenance of both mechanical and electrical components is essential. The frequency and type of upkeep depend on the system's size, but even smaller setups need consistent attention to avoid costly repairs.
Essential Monthly Tasks
- Clean the intake house and trash rack to remove mud, leaves, and debris that could block water flow.
- During stormy seasons or autumn, check these components weekly to prevent clogs.
Quarterly Tasks
- Apply waterproof grease to the unit frame three times a year.
Semi-Annual Maintenance
- Add waterproof grease to the upper bearing.
- Inspect turbine bearings, drive belts, and the generator for signs of wear or damage.
- If the generator gets wet during heavy weather, perform a dry treatment.
Professional Maintenance Schedule
Larger systems benefit from professional inspections to catch potential problems early. The number of visits required annually depends on the system size:
| System Size | Annual Professional Visits |
|---|---|
| 50 kW | 1 |
| 100 kW | 2 |
| 250 kW | 3 |
| 500 kW | 4 |
| 1 MW | 6 |
These visits typically include tasks like gearbox oil analysis, hydraulic system checks, and sensor calibrations. Even if you handle routine maintenance yourself, an annual professional inspection can ensure your system stays in top shape.
Key Tips for Future DIYers
Setting up a successful micro-hydro system requires careful planning, realistic goals, and a commitment to ongoing maintenance. Lessons from existing installations can help you avoid common pitfalls.
Review Your Site Assessment
> "Actively engaging in the siting and development of your hydropower system is critical... because micro-hydro development is very site-specific." – Leif Kindberg, NCAT Energy Specialist
A thorough site assessment is essential. Don't rely on a single measurement or visual estimate - install a temporary measuring system to monitor water flow over several months. This data will help you design a system that matches seasonal variations.
Plan for Your Actual Needs
Many first-time DIYers make the mistake of designing their system to produce the maximum possible power instead of focusing on what they actually need. Start by calculating your energy usage, then size your system accordingly to avoid unnecessary expenses.
Secure Permits and Build Relationships Early
As discussed in earlier sections, securing permits and approvals is just as important as system upkeep. Identify all required permits - such as water rights, environmental assessments, and building codes - early in the process. Talking to other micro-hydro system owners in your area can also provide insights into local challenges and requirements.
Budget Beyond Equipment
The cost of a micro-hydro system goes beyond just the turbine and generator. Factor in expenses for penstock piping, electrical components, installation labor, and ongoing maintenance. Many DIYers underestimate these additional costs, which can sometimes double the initial investment.
Design with Nature in Mind
Plan your system thoughtfully to avoid harming aquatic life and to integrate equipment into the surrounding environment. This not only ensures regulatory compliance but also helps maintain community support and long-term sustainability.
At DIY Eco Homes, we provide detailed cost breakdowns and step-by-step guides to help you design a system that fits your specific needs. Success in micro-hydro projects lies in careful preparation, realistic expectations, and consistent maintenance efforts.
Conclusion: Building an Off-Grid Energy System That Works
A micro-hydro system provides a dependable and efficient way to achieve energy independence. By converting the flow of water into electricity with up to 90% efficiency, micro-hydro far outperforms solar power (30–36% efficiency), wind power (25–45% efficiency), and even coal power (33–40% efficiency).
While setting up a micro-hydro system requires thoughtful planning - from site assessment to installation - the payoff is undeniable. Costs typically range from $1,000 to $20,000, depending on your location and system requirements. This investment ensures a steady power supply, especially crucial during winter when energy demands rise. Unlike solar panels and wind turbines, which depend heavily on weather conditions, micro-hydro systems run continuously, day and night.
With a lifespan of 50 years or more and minimal need for major upgrades, these systems are among the most cost-effective renewable energy options. Add in the elimination of monthly utility bills and low maintenance expenses, and the long-term savings are hard to ignore.
Environmental considerations are also a key strength of micro-hydro. These systems have a much smaller footprint compared to large hydropower dams and can operate with minimal disruption to the surrounding ecosystem. By designing your setup to divert only the necessary amount of water, you can produce clean energy while preserving the natural beauty and balance of your surroundings - a major advantage for those who value the serenity of remote living.
Of course, there are technical challenges to address. Seasonal changes in water flow, debris management, and maintaining consistent voltage require attention, but these tasks are manageable with proper preparation. Regular maintenance is straightforward and well within the abilities of most DIY enthusiasts who approach the project with care and organization.
For cabin owners and others living off-grid, micro-hydro power stands out as a decentralized, reliable, and low-maintenance energy solution. Its combination of efficiency, durability, and eco-friendliness makes it an excellent cornerstone for sustainable living.
At DIY Eco Homes, we know that creating a successful off-grid system takes more than technical know-how. It calls for practical advice, budget planning, and ongoing support. Whether you're just beginning to explore micro-hydro or ready to start building, now's the perfect time to tap into the power of water. Let us help you make it happen.
FAQs
What are the environmental effects of using a micro-hydro system at a remote cabin?
A well-thought-out micro-hydro system can blend into its surroundings with minimal disruption, but care must be taken to address a few crucial aspects. If not properly planned, these systems might change stream flow, impact water temperature, or block fish migration routes. To prevent such problems, it's essential to design intake and dam structures that respect and preserve the natural ecosystem.
When done right, micro-hydro systems offer a reliable energy source with minimal long-term environmental effects, making them an excellent option for off-grid living in remote locations.
How can I tell if my property is suitable for a micro-hydro power system, and what should I consider before starting?
To figure out if your property is a good fit for a micro-hydro power system, you'll need to evaluate a few key factors: water availability, flow rate, and head (the vertical drop of the water). These elements play a big role in determining how much power you can generate. Properties located in hilly or mountainous regions with a steady water source, like a stream or river, tend to work best.
You'll also need to think about other aspects, such as the impact on the environment, how easy it will be to access the site for installation and maintenance, and whether the system meets local regulations or requires permits. A detailed site assessment is essential to ensure the system runs efficiently and meets your needs. If you're feeling uncertain, consider reaching out to an expert or exploring DIY resources for eco-friendly projects to get a better sense of how to proceed.
What maintenance is needed to keep a micro-hydro system running efficiently over time?
Regular maintenance is the backbone of keeping your micro-hydro system running smoothly and dependably. Some of the key tasks include clearing the intake and trash rack to avoid blockages, inspecting and lubricating moving parts like bearings, and making sure the turbine runner moves without resistance. You'll also want to check for leaks, adjust and tension belts as needed, and clear out any silt or debris that might accumulate in the system.
Over time, more in-depth inspections become necessary. This includes looking for wear on critical components and addressing any alignment problems that could affect performance. After several decades of operation, a comprehensive overhaul might be required to ensure the system stays reliable for the long haul. Staying consistent with maintenance not only maximizes the system's lifespan but also keeps it generating power efficiently for your off-grid setup.