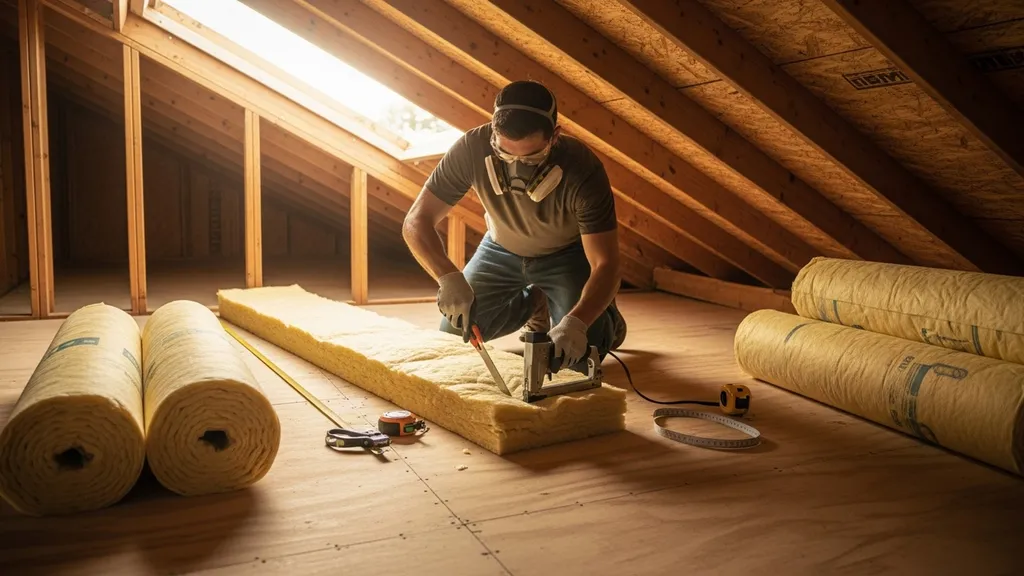
Practical guide to the insulation tools and equipment DIYers need — hand tools, power gear, PPE, buy vs rent, and a starter kit checklist.
Insulation Installation Tools and Equipment
Insulation tools matter as much as the material you choose. For a budget-conscious DIYer insulating an attic, wall, or tiny house, the right hand tools, power gear, and personal protective equipment (PPE) can cut hours off installation time, reduce waste, and keep the job safe. This guide spells out the practical toolkit for batt, loose-fill, spray foam, and rigid-board installations, explains what to buy vs rent, and gives two clear starter kits so you can get to work with confidence.
TL;DR:
- Choose one versatile hand tool and one respirator first — expect to spend $30–$120 for a quality respirator and $10–$25 for a utility knife.
- Rent bulky power gear for one-off attic jobs: blower machines typically rent for $50–$120/day; buy only if you’ll use it repeatedly.
- For spray foam, plan to hire a contractor for large volumes; DIY kits are suitable for small gaps and repairs only.
Overview: Insulation Installation Tools and Equipment
This guide covers the insulation tools DIYers need for common retrofit and new-build jobs: hand tools, power/specialty equipment, PPE, air-sealing tools, and a buy-vs-rent framework. It focuses on batt insulation, loose-fill (cellulose and fiberglass), spray polyurethane foam (SPF), and rigid board products. Research on material performance and field methods supports tool choices; for an industry-level primer on mechanical insulation methods see this introduction to mechanical insulation.
Who is this for? Homeowners insulating an attic, owners upgrading wall cavities, tiny-house builders, and small contractors who want practical, cost-aware tool guidance. Natural-building projects often use similar hand tools, so see the overlap with natural building tools when planning your shop inventory.
A few scope notes:
- This is a practical toolkit, not a full training manual for commercial insulators.
- Where safety or code compliance is at stake — for example, major spray-foam installs or complex ventilation changes — consider hiring a certified contractor.
- Typical DIY labor savings vary, but industry sources show homeowners can cut material and labor costs substantially by doing straightforward attic installs themselves; still, test your airtightness and verify R-value targets before finishing.
Quick Key Points Every DIY Installer Should Know
Top 8 Takeaways
- Buy these first: utility knife, tape measure, respirator (P100 recommended), and a heavy-duty staple gun.
- R-value targets: attics often need R-49 to R-60 in cold climates; walls typically aim for R-13 to R-21 depending on framing and climate — see our guide on attic insulation amounts.
- Blower rental vs purchase: rent for single projects ($50–$120/day). Buy a mid-range machine only if doing multiple houses per year.
- PPE matters: a correctly fitted P95/P100 respirator and eye protection significantly reduce inhalation and irritation risks.
- For small spray-foam gaps, DIY kits are OK; for whole-wall or whole-roof SPF, hire a pro.
- Air sealing yields outsized performance gains versus simply adding insulation. Learn sealing methods before insulating.
- Use insulation supports, proper stapling, and tight seams on rigid boards to avoid thermal bridging and sagging.
- Store foam-cutting blades and blower hoses in a dry place; moisture degrades equipment quickly.
When to Hire a Pro
Hire a contractor for large spray-foam work, complex ventilation or combustion appliance interactions, and when a blower-door test and thermal imaging are required. If your project targets passive-house-level airtightness, consult specialists and review cost impacts in our passive house costs piece.
For tape selection and manufacturer guidance about tape performance, industry resources such as the National Insulation Association provide practical notes on product selection in this tools and resources PDF.
Hand Tools Every Diyer Needs for Insulation Installation
Cutting and Fitting: Utility Knife, Straightedge, Insulation Saw
- Utility knife: A 3- to 5-blade retractable knife with snap-off blades is the workhorse for batts and foam board. Use a fresh, sharp blade for straight, safe cuts. Expect $10–$25 for a durable model.
- Straightedge / T-square: Aluminum drywall T-squares or a long straightedge keep cuts square on rigid foam. A 48" T-square is handy for standard boards.
- Insulation saw / bread knife: A serrated insulation saw or a coarse-toothed "bread knife" makes cutting fiberglass batts less dusty. For cork or dense boards, use a fine-toothed saw or panel saw.
These tools apply across most projects. Studies on handling and dust control recommend sharp blades and clean cuts to reduce airborne fibers; see related research on insulation material performance at the National Library of Medicine: Research on thermal insulation performance.
Fastening and Securing: Staple Gun, Insulation Supports, Adhesive
- Staple gun: Choose a heavy-duty manual or pneumatic stapler rated for 1/4" to 3/8" staples; stainless-steel staples resist corrosion in humid attics. A manual heavy-duty stapler is fine for batt vapor retarder flanges.
- Insulation supports (rods): For attic floor joists use metal insulation supports (commonly called "tiger teeth" or rod supports) to hold batts above ceilings where needed.
- Adhesive / construction glue: Use a solvent-free construction adhesive for securing rigid foam to framing where mechanical fasteners are limited.
Measuring, Marking, and Small Helpers: Tape Measure, Marker, Respirator Fit-check
- Tape measure: A 25-foot tape with a stiff blade helps measure roof runs and sheet lengths.
- Permanent marker and chalk line: For marking cut lines on foam boards and batts.
- Respirator fit-check tools: After selecting a respirator, perform a user seal check each time; simple fit-check instructions should be part of every install routine.
For a broader inventory of workshop gear that overlaps with framing and finish work, check the shop tools list. Many framing tools used in shed projects are the same ones used for insulation; see shed framing tools for crossover examples. When the job moves from insulation to finish, related tools are covered in our drywall alternatives guide.
Watch this step-by-step guide on installing blown-in or loose fill insulation:
The linked video shows how to hold a utility knife safely, staple batt flanges, and measure and cut foam board — useful for visual learners.
Power and Specialty Equipment: What to Buy, When to Rent
Major power tools speed large installs but have higher capital and storage costs. Below is a compact comparison table for common power gear.
| Equipment | Typical spec | Typical rental or purchase cost | When to rent vs buy |
|---|---|---|---|
| Blown-in insulation machine (cellulose/fiberglass) | 400–1,200 CFM; hose 2–3" | Rent $50–$120/day; buy $1,200–$3,000 | Rent for single attic; buy if doing multiple homes/year |
| DIY spray foam kit | Two-component kits, small volume | $150–$500 per kit (single-use) | Use kits for small gaps/repairs; hire pro for whole-wall |
| Professional spray foam rig | 300–1,000 psi pumps, heated hoses | Contractor-only; capital $30k+ | Not for typical DIY purchase |
| Electric insulation cutter / heated knife | 100–300W, replaceable blades | $60–$400 | Buy for frequent rigid-foam work; rent rarely needed |
| Portable generator (off-grid use) | 2,000–5,500 W | $500–$2,000 | Buy if off-grid or frequent jobsite use; rent for short jobs |
The above table helps decide buy vs rent. For blower machines, rental shops and insulation contractors often include hoses and chute adapters. If your project will require more than two full-house installs in a year, buying a machine may pay off. For deeper reading on spray-foam vs blown cellulose performance and environmental trade-offs, see our comparison of spray foam vs cellulose.
Technical papers on test efficiency and equipment performance offer deeper context for heavy equipment; see the IEEE conference discussion on testing efficiency here: Document.
Practical notes:
- If renting a blower, ask the shop about hose length, nozzle types, and whether a trained operator is available for the first run.
- For ballast and electrical loads, a small generator like a 3,000–4,000 W model usually handles electric cutters and compressors; a Honda EU2200i-style inverter generator is a common recommendation for noise- and fuel-efficiency on site.
- Storage and maintenance: clean out hoses after cellulose jobs to avoid mold; keep foam nozzles sealed.
Choosing Tools for Different Insulation Types
Batts and Rolls — Best Tools and Common Pitfalls
Tools: utility knife, straightedge, staple gun, insulation supports, measuring tape. Tips: Cut batts slightly wide for friction fit in stud bays to avoid gaps. Avoid compressing batts; compression reduces R-value. Use insulation supports in floor joists and staple flanges on vapor retarder facings. For natural materials like sheep's wool or cork, cutting can be slower — see natural vs synthetic for material-specific handling and using cork insulation for cutting tips.
Loose-fill (cellulose, Fiberglass) — Blower Equipment and Setup
Tools: blower machine, hoses with cuffs, chute adapters, PPE (full-face or goggles and P100 respirator), tarps. Setup: Build a fill platform, secure hoses, and measure depth with depth gauges. Use the correct nozzle for density and target settlement factor. For attic fills, protect light fixtures and venting and follow local codes on clearance from heat-producing fixtures. For standard guidance on safe mechanical insulation applications, consult the Department of Labor overview of the profession: Construction and extraction.
Tiny-house projects typically need shorter hose runs and smaller blower volumes; consult tiny house insulation for material choices and tool-sizing differences.
Rigid Foam Boards and Taped Seams — Cutting and Fastening Tools
Tools: electric foam cutters, oscillating multi-tools with fine blades, long straightedges, adhesive, cap nails or screws with washers, seam tape. Notes: Heated knives produce clean edges for thick polyiso; electric hot-wire cutters are faster but require steady hands. Use compatible tapes (butyl or acrylic foam tapes) for airtight seams. Rigid foam fasteners and plastic washers work well for vertical applications and masonry ties; when building on insulated concrete forms, see ICF-specific guidance in our ICF foundations article.
Spray Foam — PPE, Mixing, and Application Notes
Tools: for DIY, small two-component kits with foam gun; for pros, high-pressure rigs with heated hoses and proportioners. PPE: full-face or goggles, P100 respirator for overspray, coveralls, and ventilation. Caveat: Large-volume spray foam installs interact with ventilation and combustion appliances; building science experts often recommend hiring trained installers for full-wall or roof projects. For product-level comparison and environmental topics, review our spray foam vs cellulose analysis.
Personal Protective Equipment, Safety, and Ventilation During Insulation Work
Respirators and Filter Types (P95/P100) and Fit Testing
- P95 vs P100: P95 filters at least 95% of particulates and resists oil; P100 filters at least 99.97%. For fibrous insulation (fiberglass, mineral wool) and cellulose dust, P100 cartridges or N95 respirators are common; for spray foam work choose full-face respirators with appropriate organic vapor cartridges plus particulate filters. Follow NIOSH guidance for respirator selection and use.
- Fit testing: Perform a user seal check for each use. For professional settings, quantitative fit testing is recommended; for DIY, follow the manufacturer's fit-check steps each time.
Protective Clothing, Eye Protection, and Gloves
- Coveralls: Disposable Tyvek or reusable work coveralls protect skin from fibers and chemical contact. For spray foam, full chemical-resistant suits are recommended.
- Gloves and eye protection: Nitrile gloves for handling adhesives, durable work gloves for cutting tasks, and safety glasses that seal against dust.
Worksite Ventilation, Containment and Dust Control
- Dust control: Use tarps and negative-pressure ventilation where dust is likely. Portable fans and window exhaust can help but don’t rely on them alone for spray foam fumes.
- Airtight builds: If aiming for high airtightness, ensure ventilation plans (ERV/HRV) match planned changes; our complete guide to passive house airtightness links airtightness strategies with mechanical ventilation sizing.
For field-level best practices about mechanical insulation and ventilation during work, see the University of Illinois field applications note: Uploads.
Air-sealing and Prep Tools That Improve Insulation Performance
Caulk Guns, Tapes, and Sealants for Gaps and Service Penetrations
- Caulk guns: A smooth-action ratcheting caulk gun and a high-quality acrylic-latex or polyurethane sealant for gaps around rough openings.
- Butyl and acrylic tapes: Use butyl tape for low-surface-energy materials and acrylic tape for general-purpose seam sealing. The National Insulation Association's tape guidance is helpful when choosing tape properties: Sites.
Backer Rod, Gaskets, and Foam Sealants — When to Use Each
- Backer rod: Use for wide joints to control sealant depth and avoid three-sided adhesion.
- Aerosol foam and canned spray foam: Best for small penetrations and odd-shaped gaps; larger voids require gun-applied foam or cellulose fill.
Blower-door Testing and Infrared/thermal Cameras (overview)
- Blower-door: A blower-door test quantifies whole-house leakage (ACH50) and guides targeted sealing. Blower-door kits rent from test labs or HVAC shops; consider hiring a certified tester if airtightness matters.
- Thermal imaging: Infrared cameras quickly locate gaps, voids, and insulation misses. Handheld cameras (Flir, Seek) are available for purchase or rental; some energy auditors include thermal scans in inspection services.
For a focused primer on air-sealing materials and techniques, see our air-sealing guide.
Maintenance, Storage, and a Recommended DIY Insulation Kit
Tool Care: Blades, Batteries, and Filters
- Blades: Keep spare blades for utility knives and cutters. Dull blades tear materials and increase dust.
- Batteries: Rotate batteries and store them partially charged in cool, dry places. Label chargers and batteries for each tool family.
- Respirator filters: Replace particulate cartridges per manufacturer guidance or when breathing resistance increases. Store sealed extra cartridges in airtight containers.
Compact Starter Kit for First-time Installers
- Utility knife with spare blades
- 25' tape measure
- Heavy-duty staple gun and 1,000 staples
- P100 half-mask respirator with two cartridge sets
- 48" straightedge or T-square
- Insulation supports (box of 25)
- Permanent marker and chalk line
Approximate cost: $150–$350 depending on brand choices and respirator selection. This list emphasizes buy-first items; rent larger gear as needed.
Upgraded Kit for Frequent Diyers and Small Contractors
- Electric heated foam cutter or hot-wire cutter
- Mid-range blower machine (or two if buying)
- Oscillating multi-tool with blade set
- Pneumatic staple gun and compressor
- Blower-door kit or access to a certified tester
- Thermal camera (entry-level)
Approximate cost: $1,500–$6,000 depending on equipment quality. Rent spray-foam rigs; buy cutters and staple compressors if used often.
Storage tips: keep blower hoses off the floor and coiled on racks; seal foam cutter blades and store in dry containers; keep respirators in zipped bags away from solvents. Protect equipment from rodents in outbuildings by using sealed bins and elevated shelving.
The Bottom Line
Match your tool purchases to the project scale: buy inexpensive hand tools and a quality respirator first, rent heavy equipment like blowers for one-off attic jobs, and plan to hire professionals for large spray-foam installs. Start with a utility knife and a P100 respirator, make a parts list by insulation type, and rent or book specialist services for blower-door testing if airtightness is a priority. For details on attic R-values and material choices, return to our attic insulation amounts and consider trade-offs in our spray foam comparison article.
Frequently Asked Questions
Do I need a respirator for insulation work?
Yes. For handling fibrous materials like fiberglass and mineral wool, at minimum use an N95 or P100-rated respirator to cut particulate exposure. For cellulose dust, a P100 offers higher filtration efficiency. For spray polyurethane foam, use a full-face respirator with organic vapor cartridges and particulate filters because of fumes and thermal isocyanates.
Always perform a user seal check before starting work. If chemical exposure or long-duration dust work is expected, consider professional fit testing or hiring a certified contractor.
When should I rent a blower machine instead of buying?
Rent a blower for single attic fills or occasional home projects; typical rental rates are roughly $50–$120 per day depending on location and model. Buy a machine only if you plan to do multiple full-house installs each year, need immediate access often, or run a small insulation business.
When renting, confirm hose length, nozzle types, and whether the shop provides an operator or instruction for first-time users.
Can a DIYer spray foam safely?
DIY spray-foam kits are suitable for small gap-filling and patch repairs. However, whole-wall or whole-roof SPF applications require experience and attention to substrate moisture, thickness control, and ventilation; those projects are best handled by trained contractors. Overspray, improper mixing, and poor ventilation can cause health and performance problems.
For any spray-foam work, use full PPE, ventilate the work area, and follow manufacturer instructions precisely.
What is the best first tool to buy for insulation?
The best single purchase is a sharp utility knife plus spare blades. It’s inexpensive, useful across batt and rigid-foam work, and reduces waste. Pair that with a quality P100 respirator as the next purchase to protect your lungs while cutting and installing materials.
How should I store tools between seasons?
Store tools in a clean, dry location off the floor. Coil hoses and keep them in sealed bins or on racks to prevent kinks and rodent damage. Keep blades and cutting tools in labeled cases; seal respirators in plastic bags with desiccant packs and rotate cartridges per manufacturer guidance.
For large power equipment, follow the owner's manual for winterization: drain fluids if required, disconnect batteries, and ensure hoses are dry to prevent mold.