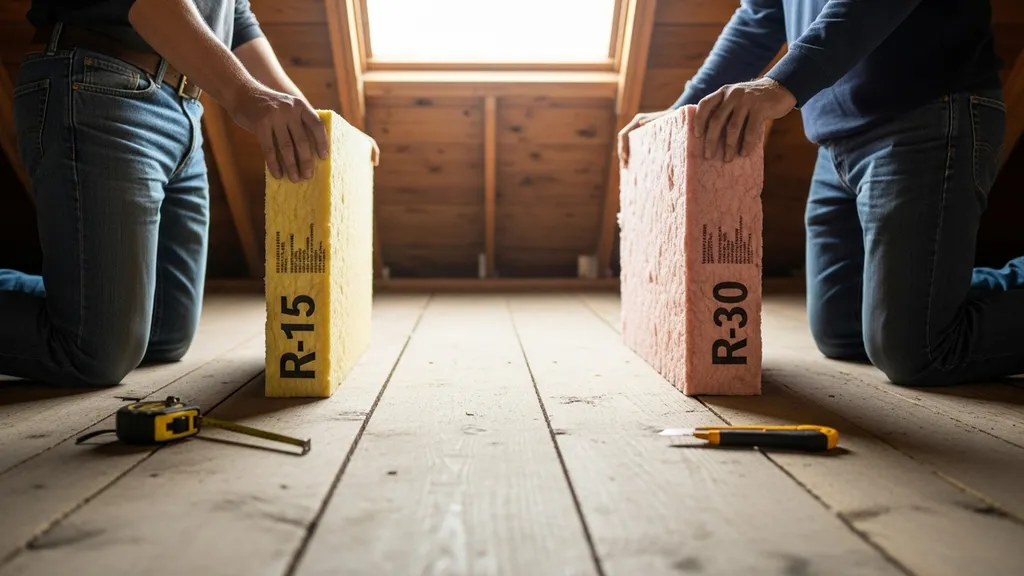
Compare R-15 and R-30 insulation: where each makes sense, material options, installation trade-offs, and scenario-based recommendations for DIY builders.
R-15 vs R-30 Insulation: Which Do You Need?
Choosing between R-15 vs R-30 insulation affects comfort, energy use, and how much you spend on heating and cooling over the life of a home. This guide explains what those R-values mean in real assemblies, which materials and installation methods deliver each target, and practical recommendations for common DIY projects so you can make the right choice for walls, attics, floors, and tiny-house builds. The comparison covers performance, trade-offs, airtightness importance, and example scenarios for both retrofit and new construction.
TL;DR:
- R-15 fits 2x4 cavities (interior walls, some rim joists); use it for thin assemblies, mild climates, or when adding exterior continuous insulation.
- R-30 is a common attic target and is better for cold-climate attics, floors over unheated spaces, and homes where reducing heating load matters most.
- Focus first on air sealing and correct installation; increasing R has diminishing returns unless the assembly is tight and details are addressed.
Quick Comparison: R-15 vs R-30 Insulation (TL;DR)
A quick, at-a-glance comparison of performance and common uses. Values and thicknesses are typical; actual R per inch varies by product.
| Attribute | R-15 | R-30 |
|---|---|---|
| Typical location | 2x4 wall cavities, some rim joists | Attic floor, deep cavities, multi-layer walls |
| Typical cavity thickness | 3.5 in (2x4) | 9–12 in (attic, 2x8/stacked layers) |
| Common materials | Fiberglass batt, thin rigid foam, dense-pack cellulose | Rolled batt, blown-in cellulose, layered rigid foam, spray foam |
| Relative material/installation effort | Lower | Higher |
| Air-sealing importance | High — performance falls with gaps | Important but more forgiving due to higher mass |
| Best climates | Mild, mixed climates or with CI | Cold climates, heating-dominated homes |
For detailed attic targets and how deep R-30 looks in real life, see the attic R-values guide.
According to Energy Star's recommendations, insulation levels vary by climate and by location in the home, so use these rows as practical starting points rather than rigid rules: Recommended home insulation R–values - Energy Star.
One-sentence Recommendation for Common DIY Projects
Choose R-15 for 2x4 wall cavities, interior partitions, and constrained retrofits where exterior continuous insulation is planned; choose R-30 for attic floors, ceilings over unheated spaces, and cold-climate retrofits that need more thermal buffer.
R-15: When R-15 Insulation is the Right Choice
What R-15 Typically Means in Real-world Assemblies
R-15 is the nominal resistance commonly achieved by standard fiberglass batts in a 2x4 stud cavity (3.5 inches of depth). It also describes a whole-wall scenario when thin rigid foam or a modest layer of insulation is installed. Industry literature shows R-30 batts are 8–10 inches thick; by contrast R-15 batts are much thinner and intended for the narrower 2x4 cavity (see the Insulation Institute product guide for typical batt thicknesses). A guide to selecting fiber glass insulation products for new ...
Strengths of Choosing R-15
- Easier to retrofit 2x4 walls without reframing.
- Lower material and labor complexity for DIYers: batts are familiar, lightweight, and quick to install.
- Works well where continuous exterior insulation (CI) can supplement wall R-value; thin CI lets whole-wall R rise without changing cavity depth.
- Good fit for tiny houses, interior partitions, and mild climates where heating loads are modest.
Weaknesses and Common Pitfalls
- In cold climates, R-15 provides limited winter performance; heat loss through studs (thermal bridging) and air leaks can make R-15 feel inadequate.
- Fiberglass batts lose effective R if compressed, poorly cut around wiring, or if gaps exist at edges and plates. Compression reduces the trapping of still air that gives insulation its value.
- R-15 placed alone without attention to airtightness often underperforms compared with slightly higher R combined with good air control.
Best For: Typical Use Cases
- Tiny houses with 2x4 walls where weight and thickness are constrained — see the tiny house insulation guide for strategies.
- Interior non-load-bearing partitions where insulation is for sound and modest thermal separation.
- Budget retrofits in mild climates where adding wall CI later is planned.
- DIY builders using advanced framing techniques (24-inch on-center, fewer studs) can make R-15 more effective; see advanced framing for how framing affects cavity width and thermal performance.
R-30: When R-30 Insulation is the Right Choice
What R-30 Typically Means in Attics and Walls
R-30 is a common target for attic floors in many regions. It can be achieved with deep rolled batts, blown-in cellulose at specified depths, or layered products. In walls, R-30 requires thicker cavities (2x8 or deepened assemblies) or a combination of cavity insulation plus continuous exterior foam. The Department of Energy provides a clear primer on R-value definitions and how to compare materials: Insulation | Department of Energy.
Strengths of Choosing R-30
- Significantly reduces conductive heat loss compared with R-15; this is valuable in heating-dominated climates where attic losses dominate bills.
- Offers more tolerance for some installation imperfections since the thicker assembly reduces the proportionate effect of small gaps.
- Enables smaller, more efficient HVAC sizing in new builds when combined with airtightness and ventilation planning.
Weaknesses and Installation Considerations
- Requires thicker assemblies: most 2x4 walls cannot reach R-30 without exterior insulation or special wall systems.
- Higher material and labor effort for attics (e.g., bringing in blown-in cellulose, moving wiring and fixtures, air-sealing before insulating).
- Spray foam choices: closed-cell spray foam can deliver high R per inch but adds cost and needs cautious moisture and fire planning.
Best For: Use Cases Where R-30 Shines
- Cold-climate attics, floors over unheated garages or basements, and new constructions aiming for long-term energy savings.
- Retrofit attics where adding depth of insulation is feasible without reworking rafters or ventilation.
- Homes where reducing peak heating load is a priority and the owner plans complementary measures like improved airtightness.
If considering whether to stop at R-30 or go higher, compare R-30 to R-38 options in our related comparison: R-30 vs R-38.
Materials and Methods That Deliver R-15 and R-30
Common Materials: Fiberglass Batts, Cellulose, Spray Foam, Rigid Foam
- Fiberglass batts: Widely available, low cost, typical R per inch around 2.5–3.0 for standard batts. In 2x4 cavities, batts are the usual R-15 solution.
- Blown-in cellulose: R per inch ~3.2–3.7; good at filling odd cavities and achieving R-30 in attics at prescribed depths.
- Spray foam: Open-cell ~R-3.5 per inch, closed-cell ~R-6–6.5 per inch. Closed-cell is high-R but more expensive and acts as a vapor retarder.
- Rigid foam boards (polyiso, XPS): Polyiso ~R-6 per inch (declines in very cold temps), XPS ~R-5 per inch. Useful for continuous exterior insulation.
A buyer guide that compares materials and R-per-inch benchmarks is useful for DIY selection: Insulation buyer guide 2026 : best options and r-value chart.
How Thickness and Density Map to R-values
- 2x4 fiberglass batt (3.5 in) ≈ R-13 to R-15 depending on product and manufacturing.
- 2x6 cavity (5.5 in) with fiberglass ≈ R-19 to R-21; dense-pack cellulose will raise that slightly.
- Attic blown-in cellulose requires roughly 9–10 inches to meet R-30 depending on settled density.
Layering Strategies: Combining Cavity and Continuous Insulation
Layering cavity insulation with exterior continuous insulation reduces thermal bridging across studs and raises whole-wall R without widening studs. Continuous exterior foam of R-5 to R-10 combined with R-15 cavity insulation produces a higher whole-wall R that often beats a thicker but bridged cavity-only wall. For construction methods that increase cavity depth and simplify insulation placement, see the Larsen truss walls discussion and the exterior foam guide.
Installation Tips to Reach Rated R in Real Installations
- Seal gaps: Air-sealing at plates, penetrations, and top plates is essential. Even high nominal R loses value when air moves through or around the insulation; consult the complete guide to passive house airtightness for techniques.
- Avoid compression: Cut and fit batts so they fill cavities without compressing. Compression can reduce rated performance by 10–30%.
- Address thermal bridging: Use continuous exterior insulation or increase stud spacing via advanced framing to reduce heat transfer through studs.
- Meet code and safety requirements: Ensure proper clearance from recessed lights and chimneys, maintain proper ventilation in attics, and follow local fire and moisture rules.
- Watch R-per-inch trade-offs: Closed-cell spray foam offers more R per inch but comes at higher cost and may create vapor control layers that require careful detailing. For a material-by-material comparison, review spray foam vs cellulose.
Watch this step-by-step guide on choosing the best insulation for your home:
Where in a Home R-15 vs R-30 Insulation Matters Most
Attics and Roof Assemblies
Attics are where R-30 commonly appears as a minimum target in many regions because the attic/ceiling plane controls the bulk of heat loss. For attics, insulation type choices include rolled batts, blown-in cellulose, or spray foam at the roofline. For detailed attic recommendations and regional targets, see the attic R-values guide. Pay attention to ventilation; adding insulation often requires checking soffit and ridge vents and ensuring baffles keep airflow clear.
Exterior Walls (2x4 vs 2x6 and Advanced Wall Systems)
2x4 framed walls mostly fit R-15; 2x6 cavities get closer to R-20–R-23 with batt insulation. To reach R-30 in a wall, either widen the cavity (2x8, Larsen truss, or double-stud) or add exterior continuous insulation. Advanced wall systems like Larsen trusses or structural insulated panels eliminate some thermal bridging and allow thicker insulation. When wall thickness is limited, consider SIPs or exterior foam to raise whole-wall R efficiently.
Floors, Crawl Spaces, and Rim Joists
Floors over unheated spaces and rim joists are places where R-30 may be useful — for example, a floor assembly over an unheated garage benefits from higher R to reduce cold floors. For small buildings like sheds or cabins, follow the insulate a shed floor guide for practical tips. Rim joists often need targeted spray foam or layered rigid foam + spray/seal to reach effective R and avoid condensation issues.
Tiny Homes, Sheds, and Non-standard Enclosures
Tiny houses and mobile shelters often have thin walls; R-15 is therefore a common practical target. But designers can achieve higher whole-wall performance by adding thin exterior foam or using SIPs. For tiny-house owners, balance weight, space, and thermal needs. See the best insulation for tiny house article for tailored strategies.
Cost, Installation & Payback for R-15 vs R-30 Insulation
Relative Material and Labor Effort
R-15 installations typically require less material and less access work. R-30 installations often mean more material, deeper cavities, or machinery for blown-in products. Labor effort rises with complexity: air-sealing, moving fixtures, and ensuring ventilation are common add-ons that affect total project time.
How Airtightness and Other Measures Change Payback
Airtightness, ventilation strategy, and heating fuel affect returns. Tight assemblies paired with heat-pump upgrades and right-sized HVAC systems give faster payback from higher R. In leaky homes, the first investment should be air-sealing; adding R without controlling air paths reduces the effective benefit. The complete guide to passive house airtightness explains why detailing changes how much extra R you need. For wider budget context, see passive house costs.
When Paying for Extra R Makes Sense (and When It Doesn't)
- Make extra R a priority when the climate is heating-dominated, the attic/floor plane is a major loss path, or when you plan to downsize HVAC equipment.
- Skip aggressive R increases if the house is extremely leaky, if the marginal cost is high relative to other upgrades (like air sealing or a high-efficiency heat pump), or if adding R complicates moisture control.
- Use simple payback thinking: incremental R yields diminishing returns. Each extra R point saves energy, but the percent energy saved per R goes down as total R grows. So pair higher R with airtightness, ventilation, and correct HVAC sizing to get meaningful returns.
Seek local rebates and incentives — utilities and governments often offer attic insulation programs — and verify current availability through local resources.
Which Should You Choose? Practical Scenarios for R-15 vs R-30 Insulation
Decision Matrix: Quick Checklist to Pick R-15 or R-30
- Climate: Cold → favor R-30; Mild → R-15 may suffice.
- Cavity depth: 2x4 → R-15; 2x6/greater → R-30 or higher.
- Budget and access: Tight budget or thin walls → R-15; room to add depth or attic access → R-30.
- Airtightness: Leaky shell → prioritize sealing first; tight shell → invest in higher R.
- HVAC plan: Upsizing to a heat pump or resizing system → consider R-30 to reduce load.
Scenarios and Recommended Choices
- New 2x4 framed tiny house on a budget
- Recommendation: R-15 in walls, supplement with 1–2 inches of exterior rigid foam if possible.
- Trade-off: Keeps wall thickness and weight low while improving whole-wall R. Action: prioritize continuous air barrier and seal all penetrations. See SIPs guide if considering a higher-R thin-panel alternative.
- New 2x6 stick-framed home in a mixed climate
- Recommendation: Aim for cavity insulation near R-20 plus R-5–R-10 exterior foam for whole-wall performance; use R-30 in attic.
- Trade-off: Moderate extra cost for long-term savings. Action: size HVAC with efficient units; consult heat pump efficiency.
- Attic retrofit in a cold climate
- Recommendation: Prioritize air-sealing, then add blown-in cellulose to reach R-30 or higher if budget allows.
- Trade-off: Attic work is disruptive but offers high returns. Action: seal ceiling penetrations before insulating and confirm ventilation paths.
- Energy retrofit for an older home with mixed cavities
- Recommendation: Combine targeted rim-joist spray foam, cavity dense-pack cellulose where possible (R-15→denser R), and up to R-30 in attics.
- Trade-off: Older homes need careful moisture and ventilation planning. Action: follow strategies in the passive retrofit guide to sequence work and avoid unintended moisture issues.
When to Consider Alternatives
SIPs, exterior continuous foam, and hybrid approaches let DIYers reach higher whole-wall R without thick cavities. For example, SIPs provide high thermal performance with a narrow profile, while exterior foam plus cavity batt reduces thermal bridging. Review the SIPs guide and the exterior foam guide for options.
The Bottom Line
R-15 and R-30 serve different practical needs: R-15 for standard 2x4 cavities and constrained builds, R-30 for attics and places where thicker insulation reduces heating load significantly. The best choice depends on climate, cavity depth, airtightness, and project budget; always prioritize air sealing and correct installation before increasing nominal R.
Frequently Asked Questions
Is R-30 always better than R-15?
Not always. R-30 provides more thermal resistance but has higher material and installation costs and requires deeper assemblies. In mild climates or in thin-wall assemblies where exterior continuous insulation is planned, R-15 plus CI may be a smarter, lower-cost route. The value of extra R also depends on airtightness and HVAC strategy; without good air control, higher R delivers less real-world benefit.
Can I stack insulation to go from R-15 to R-30?
Yes. Layering cavity insulation with rigid exterior foam or adding a second layer of batt or blown insulation in the attic can reach R-30. For walls, adding exterior continuous insulation avoids compressing cavity insulation and reduces thermal bridging. Always follow manufacturer guidance and maintain clearances for fire-rated fixtures and ventilation.
How does air leakage affect the value of higher R?
Air leakage can significantly reduce the effective benefit of nominal R. Warm air moving through cavities bypasses insulation and carries heat that R-rated materials don't stop. Sealing top plates, penetrations, and rim joists often yields greater energy savings than adding a few R-points. For airtightness techniques that complement insulation upgrades, see the passive house airtightness guide linked earlier.
Will adding R-30 in the attic reduce my heating bill enough to justify the work?
It depends on climate, current attic R, heating fuel, and house leakage. In cold climates or in homes with little attic insulation, adding R-30 or more typically pays back faster. In milder climates or on already well-insulated attics, incremental savings fall. Estimate savings by looking at current R, heating degree days for your location, and how much of the home's heat loss comes through the attic; local incentives can improve project economics.
Does compressing batts change the R-value?
Yes. Compressing batts reduces the trapped air that provides insulation, lowering effective R. A batt compressed into a narrower cavity than intended can lose 10–30% of its rated performance depending on the product. Cut batts to fit and avoid forcing them into cavities; where space is tight, consider higher-R-per-inch materials like rigid foam or closed-cell spray foam.