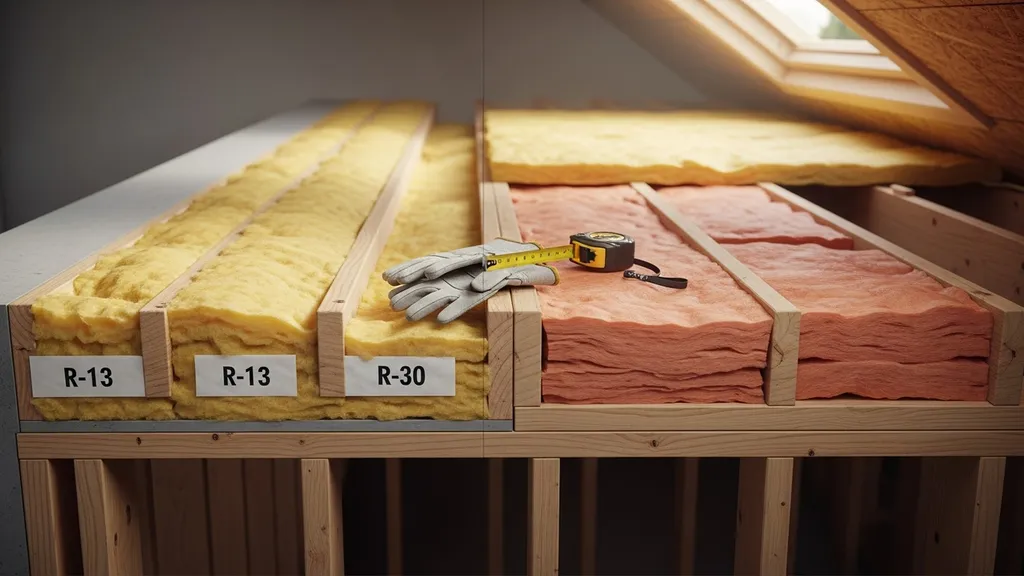
Compare R-13 and R-30 insulation performance, costs, and best uses for walls, attics, and DIY projects to pick the right R-value for your home.
R-13 vs R-30 Insulation: Which Do You Need?
Choosing between r13 vs r30 insulation affects comfort, energy bills, and project cost — especially for budget-conscious DIY builders finishing an attic or framing 2x4 exterior walls. This guide compares how R-13 and R-30 perform in walls, attics, and floors, shows typical thicknesses and cost ranges, and gives practical, scenario-based recommendations so a homeowner or DIYer can pick the right R-value for their build or retrofit. The comparison will highlight material choices (fiberglass, cellulose, spray foam, mineral wool), installation difficulty, and where extra air sealing or continuous insulation matters most.
TL;DR:
- R-13 is typically ~3.5" thick for fiberglass batts and is best for 2x4 wall cavities or shallow retrofit spaces; it costs less up front but needs good air sealing to work well.
- R-30 is roughly 9–10" for fiberglass batt or blown-in attic fill and delivers much larger heating/cooling savings in attics and ceilings; expect higher material and labor cost but shorter payback in cold/hot climates.
- For a budget DIYer: use R-13 in shallow walls, prioritize R-30 (or deeper) for attic insulation, and pair any choice with proper air sealing and thermal-bridge reduction for best results.
R-13 vs R-30 Insulation: Quick Overview and Why This Comparison Matters
TL;DR Verdict
R-13 and R-30 represent different points on the R-value scale and are commonly used in different assemblies. R-13 fits standard 2x4 wall cavities and offers the lowest upfront material cost; R-30 requires deeper cavities or attic depth and gives markedly better thermal resistance for ceilings and attics. Which is "right" depends on cavity depth, climate severity, and whether the build prioritizes upfront savings or ongoing operating cost reductions.
How to Use This Guide
This guide is laid out to help DIYers and small contractors make choices by assembly type (walls, attics, floors). Check local code for minimums in your jurisdiction and consult authoritative guidance for climate-specific recommendations; for a national summary of cost-effective insulation levels, see the Energy Star table on recommended home insulation R‑values.
Comparison Table: R-13 vs R-30 at a Glance
| Attribute | R-13 | R-30 |
|---|---|---|
| Typical thickness (fiberglass batt) | ~3.5" | ~9–10" |
| Common installation locations | 2x4 exterior walls, interior partitions, some rim joists | Attic flat ceilings, cathedral ceilings with deep rafters, 2x10 wall/ceiling cavities |
| Blown-in equivalent | n/a (usually not used in thin walls) | Cellulose or fiberglass loose-fill, ~8–10" |
| Spray foam equivalent (approx.) | 1.5–2" closed-cell | 5–6" closed-cell or 3–4" open-cell |
| Typical cost range (materials only) | $0.30–$0.75/ft² for batts (varies) | $1.50–$4.00/ft² for blown-in or thicker batts (varies) |
| DIY difficulty | Low | Moderate (attics easier than complex walls) |
| Moisture / air-sealing needs | High — gaps reduce performance | High — still needs air barrier and ventilation attention |
| Thermal bridging sensitivity | High in thin cavities | Still important; R-30 reduces but doesn't eliminate bridge effects |
| Common materials | Fiberglass batts, mineral wool | Fiberglass batts, cellulose, spray foam, mineral wool |
How to read the table: thicknesses are nominal for common materials; costs vary by brand, region, and whether labor is included. For national guidance on recommended attic and wall R-values and climate-specific advice, consult the Department of Energy's insulation overview and recommended assemblies.
See also our comparison of higher R-value tradeoffs in the R‑value tradeoffs piece for context on stepping beyond R-30.
R-13 Insulation: What It Is, Strengths, Weaknesses, and Best Uses
Overview: Materials and Typical Assemblies
R-13 most commonly appears as unfaced or kraft-faced fiberglass batts sized for a 2x4 stud cavity (nominal 3.5" thickness). Mineral wool batts and thin spray foam layers can also deliver equivalent R-values. In retrofit scenarios with shallow cavities, R-13 is frequently the default because it fits the space without changing framing.
Strengths (cost, Availability, Ease of DIY)
- Affordable materials: fiberglass batts at R-13 are widely available at big-box stores.
- Fast install: batts cut to fit studs are a quick DIY solution with minimal tooling.
- Good for shallow cavities: when wall depth is limited (tiny homes or 2x4 walls), R-13 is often the only full-cavity option without reframing.
Weaknesses (lower Thermal Resistance, More Sensitive to Gaps)
- Sensitive to compression and gaps: compressing batts or leaving voids can reduce effective R-value a lot.
- Less effective in cold climates alone: in regions with long heating seasons, R-13 walls benefit from added continuous insulation or thicker assemblies.
- Thermal bridging: studs can carry heat through the wall; R-13 in a 2x4 assembly leaves the stud bay fraction of the wall with lower overall effective R.
Best For: Specific Use-cases
- Exterior 2x4 walls in mild climates where code and budget align.
- Interior partition walls where high R-value isn't required.
- Budget retrofits where adding continuous exterior foam or thickening walls isn't practical.
To improve R-13 performance without changing cavity depth, pair it with careful air sealing—see the airtightness checklist for targeted sealing steps and blower-door priorities. For comparisons with intermediate R-values, consult the R‑13 vs R‑23 comparison.
R-30 Insulation: What It Is, Strengths, Weaknesses, and Best Uses
Overview: Materials and Typical Assemblies
R-30 is commonly achieved in attics using loose-fill cellulose or fiberglass (about 9–10" depth) or by installing multi-layer batts. In framed walls, R-30 requires deeper cavities (2x10 or 2x12) or assemblies that combine cavity insulation with continuous exterior insulation. Structural insulated panels (SIPs) and continuous foam strategies can deliver R-30+ in thinner profiles — see our SIPs overview for alternatives.
Strengths (higher R-value Per Assembly, Better for Attics)
- Strong return in ceilings/attics: increasing attic insulation from R-13 to R-30 typically yields noticeable energy savings because attic is a major heat transfer path.
- Better in extreme climates: R-30 reduces peak load in both heating and cooling seasons, shortening runtime for HVAC equipment.
- Flexible materials: loose-fill cellulose is effective in attics and around obstructions; spray foam versions can add air sealing and higher per-inch R.
Weaknesses (thickness, Cost, Installation Challenges)
- Space requirement: R-30 needs significant depth; not always feasible in low-profile cathedral ceilings.
- Higher upfront cost: materials, disposal of old insulation, and labor add up.
- Attic detailing: adding R-30 without addressing ventilation, soffit baffles, and eave bypasses can create moisture and airflow problems.
For practical attic installation tips and R-value guidance, see the attic insulation guide. If comparing spray foam to loose-fill for R-30 performance and cost, our spray foam vs cellulose guide outlines trade-offs in depth. For where to push beyond R-30, see the R-30 vs R-38 context in R‑30 vs R‑38 context.
How R-13 vs R-30 Perform in Common Locations: Walls, Attics, and Floors
2x4 Exterior Walls: R-13 Realities
In a 2x4 framed exterior wall, R-13 fills the cavity but the studs (about 25% of wall area on 16" OC framing) bridge heat through the assembly. The effective wall R-value is lower than the cavity R-value because of thermal bridging. To raise effective performance without full reframing, add continuous exterior foam (e.g., R-5 to R-10 polyiso or XPS) to reduce bridging; our exterior foam guide explains how CI changes effective R and detailing at windows and corners.
Attics and Ceilings: Where R-30 Shines
Attics typically deliver the biggest energy savings per inch of insulation added. Moving from R-13 to R-30 in an attic reduces conductive heat transfer and, when combined with air sealing at the ceiling plane, can cut heating and cooling loads significantly. Energy savings depend on climate — the Department of Energy's insulation guidance lists recommended attic R-values by zone and shows where returns diminish with very high R-values.
Floors and Crawlspaces: Middle-ground Choices
Floor systems over unconditioned crawlspaces can use R-13 in joist bays if the climate is mild, but insulating under-slab or adding perimeter insulation may be better in cold zones. For shed floors or small outbuildings, R-13 often suffices; for living spaces above unheated garages or over a cold basement, prioritize higher R (or a combination of R-13 plus under-floor continuous insulation). For practical floor techniques, see our guide on how to insulate a shed floor.
Thermal Bridging, Air Sealing, and Continuous Insulation
Thermal bridging can cut wall effective R by 10–40%. Air leakage at the ceiling plane can render extra R almost useless. So the choice between R-13 and R-30 should be made in context: improving air sealing and adding a modest layer of continuous insulation often outperforms increasing cavity R alone. In practice, pair whichever cavity R you choose with a clear air-barrier strategy and address framing-related bridges.
Cost, Materials, and DIY Installation Considerations for R-13 vs R-30
Material Options and Cost Drivers
Key drivers are material type (fiberglass batts, cellulose, open- or closed-cell spray foam, mineral wool), thickness required, job complexity, and disposal. Ballpark material-only ranges (very approximate): R-13 batts $0.30–$0.75/ft²; R-30 blown-in cellulose/fiberglass attic fill $1.50–$4.00/ft² including materials but excluding labor. Labor rates and regional supply swings affect totals heavily; see our passive house costs for related budgeting context.
DIY Difficulty and Safety Notes
- Fiberglass batts: lowest skill threshold; require gloves, eye protection, N95 mask; avoid compressing batts.
- Cellulose loose-fill: requires a blower (rental) and careful depth control; dust and fines mean gloves and dust masks.
- Spray foam: proprietary equipment and ventilation; closed-cell requires certification and PPE — hire pros for full-cavity spray foam in most cases.
For a detailed material comparison and decision flow, consult the spray foam vs cellulose decision guide.
Tools, Prepping Cavities, and Air-sealing Tips
Essential prep includes sealing major penetrations (plumbing, electrical boxes, top plates), installing baffles at soffits in attics to preserve soffit airflow, and ensuring vapor control aligns with climate. Useful tools: utility knife, insulation supports, attic blower (rental), blower-door test if available, and simple hand tools for trimming batts. Advanced framing techniques reduce timber and create more continuous insulation space — see advanced framing tips.
When to Hire a Pro
Hire professionals when:
- Applying spray foam that requires certification.
- Work involves complex rooflines, structural modifications, or mold/rot detection.
- You're planning a full-envelope upgrade with new continuous insulation and detailed flashing.
- You want a blower-door test or duct sealing beyond basic DIY capability.
Which Should You Choose? Scenario-based Recommendations for R-13 vs R-30
Budget DIY: Low-cost, Quick Wins
If funds are limited and cavities are shallow, prioritize:
- R-13 in 2x4 walls with rigorous air sealing and selective exterior foam if budget allows.
- R-30 (or deeper) in the attic as the highest-priority thermal upgrade for most homes.
This sequence often yields the biggest comfort and bill reductions per dollar spent.
Cold Climates and Long-term Savings
For long heating seasons, prioritize attic R-30+ and wall R-values above R-13. If reframing to 2x6 studs is possible, move to R-19/21 cavity value, and add continuous insulation (R-5 to R-10) outside the sheathing to reduce bridging. Consider SIPs or thicker exterior insulation if wall thickness is constrained; see the SIPs overview for options delivering R-30+ with slimmer profiles.
Tiny Homes, Cabins, and Shallow Cavities
When depth is limited, performance per inch matters. Strategies:
- Use high-performance materials (closed-cell spray foam or rigid CI) to improve effective R.
- Consider a Larsen truss assembly to add insulation depth without changing main framing — see the larsen truss assembly.
- For tiny houses, our tiny-house insulation guide shows how to prioritize continuous layers and air sealing for best results.
Retrofit vs New Build Decisions
- New builds: choose deeper cavities and continuous insulation if budget permits; designing for R-30 in ceilings and R-20+ in walls pays off over the long run.
- Retrofits: attic R-30 is often the most cost-effective first step; wall upgrades using exterior foam or retrofit 2x6 cladding may be phased in later. See our passive retrofit tips for staged upgrade workflows.
This video provides a helpful walkthrough of the key concepts:
The Bottom Line
R-13 is a practical, low-cost choice for shallow cavities and mild climates; R-30 delivers substantially better thermal performance for attics and any ceiling plane where depth is available. Prioritize attic R-30 for most DIY projects, and pair whichever cavity R you choose with effective air sealing and strategies to reduce thermal bridging.
Frequently Asked Questions
Is R-13 enough for exterior walls?
R-13 fits standard 2x4 walls and can be acceptable in mild climates or for interior partitions. However, in cold or hot climates it often underperforms unless paired with continuous exterior insulation or careful air sealing to reduce thermal bridging. For higher performance without changing framing, adding rigid foam outside the sheathing or upgrading to 2x6 stud walls is common practice.
Check local code and energy guidance for minimums and climate-tailored recommendations; Energy Star provides a useful table of recommended R-values by climate zone.
Will R-30 pay for itself faster?
R-30 in ceilings typically offers faster payback than increasing wall cavity R from 13 to 19 or 21 because attics represent a major heat transfer area. Payback depends on climate, fuel prices, and existing insulation levels. In cold climates or where cooling loads are high, the operating-cost savings from R-30 can offset the higher upfront expense in a short time frame compared with low-use upgrades.
Can I layer R-13 to reach R-30?
Layering batt insulation in the same cavity to reach R-30 isn't practical because you need the physical depth (roughly 9–10" total for fibreglass R-30). In attics, layering loose-fill over existing batts is common to reach higher R. For walls, layering often requires adding exterior insulation or changing to deeper framing; a Larsen truss or exterior foam are strategies that effectively increase wall R without compressing batts.
Does insulation type matter more than R-value?
Both matter. R-value measures thermal resistance, but installation quality, air sealing, moisture control, and thermal bridging affect real-world performance. For example, closed-cell spray foam provides both higher per-inch R and air-sealing; cellulose offers good thermal mass and fills voids well. Choose the type that fits cavity depth, moisture risk, and your skill level — and pair it with an air-barrier strategy for best results.