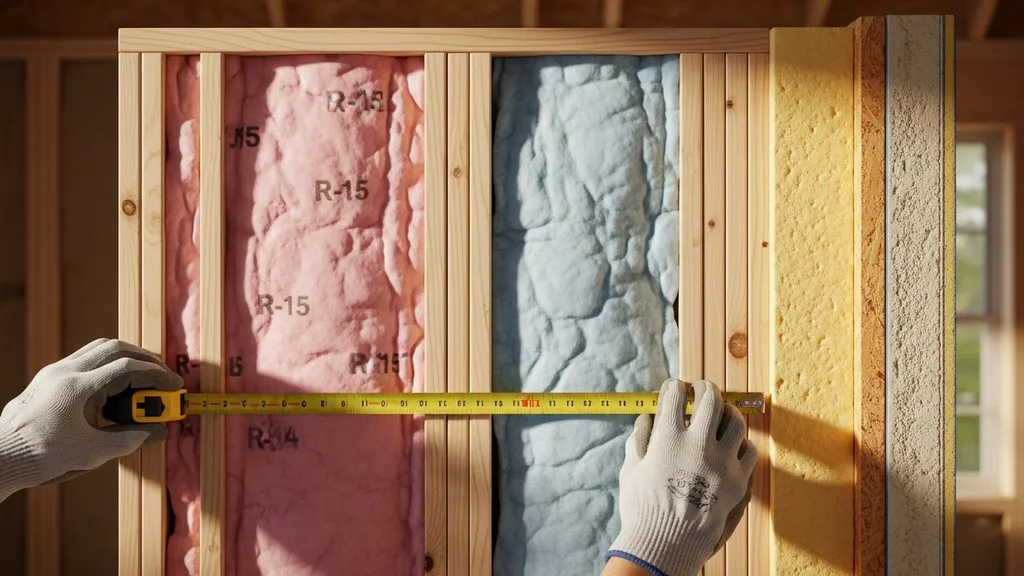
Compare R-15 and R-23 options, performance, thickness, and retrofit strategies to choose the right insulation for your climate and budget.
R-15 vs R-23 Insulation: Which Do You Need?
Choosing between R-15 vs R-23 insulation is one of the first technical decisions for a DIY self-builder planning wall assemblies or a retrofit. This article compares the two R-value targets, shows how each is typically achieved (2x4 vs 2x6 walls, cavity + continuous foam, spray foam, or dense-pack), and gives practical retrofit and new-build recommendations so budget-conscious builders can pick the right path for their climate and goals. The guide uses building science sources and hands-on options so readers can act with confidence.
TL;DR:
- R-15 is the typical target for a 2x4 cavity (batt insulation) — low cost and easy to install, best for mild climates or interior partitions.
- R-23 is common for 2x6 cavities, dense-packed cellulose, or cavity + exterior foam — higher thermal performance but higher material/thickness costs and moisture attention required.
- For most DIY retrofits, prioritize air sealing first; upgrade from R-15 to R-23 by dense-packing or adding continuous exterior rigid foam depending on access and moisture constraints.
| Assembly | Typical cavity thickness | Typical R/inch examples (range) | Cost rank | Best climate fit | Retrofit difficulty |
|---|---|---|---|---|---|
| 2x4 cavity batt (R-15) | 3.5" | Fiberglass 2.5–3.7, mineral wool ~3.0 | low | Mild | easy |
| 2x6 cavity batt (R-23) | 5.5" | Fiberglass/mineral wool similar R/inch | medium | Cool to cold | moderate |
| Dense-pack cellulose in 2x6 (R-23) | 5.5" | Cellulose ~3.5–3.8 /in | medium | Cool | moderate (equipment) |
| 2x4 cavity + exterior foam | 3.5" + foam | Polyiso ~5–6 /in, EPS/XPS lower | high | Cold | harder (cladding/furring) |
| Closed-cell spray foam (R-23 equivalent) | 3.5"–5.5" | Closed-cell ~6–7 /in | high | Cold | moderate–high |
Note: R/inch ranges are typical; for material specifics consult the U.S. Department of Energy and product datasheets. More detailed sections follow with trade-offs, retrofit paths, and scenario-based recommendations. The community discussion on common wall R-values and practical framing notes can help orient expectations — see one homeowner forum discussion for perspective: practical discussion of R-15 vs R-23 wall construction.
R-15 vs R-23 Insulation: Quick Overview and TL;DR
Why This Comparison Matters for DIY Self-builders
Planning wall insulation shapes wall thickness, window jamb depth, cladding fastening, and budget. For a straightforward new build with 2x4 framing, R-15 is the practical batt target. For a higher-performance envelope — especially in cooler climates — R-23 or an equivalent effective R-value is a common design choice. The decision affects whether to accept thermal bridging through studs, whether continuous insulation is needed, and how much heating or cooling load reduction can be expected.
Snapshot TL;DR — Short Trade-offs Table
(See the table above for a compact comparison of common assemblies, thicknesses, cost rank, and retrofit difficulty.) The table summarizes typical options DIYers encounter. Later sections cover real-world performance, moisture management, and step-by-step retrofit choices.
What R-15 Means and Common Assemblies That Deliver It
Standard 2x4 Cavity Batts (fiberglass/mineral Wool)
R-15 usually denotes the effective insulation in a 2x4 stud cavity (3.5 inches deep) filled with batt insulation. Typical batt materials include fiberglass and mineral wool; the U.S. Department of Energy lists common R/inch ranges for these materials (fiberglass batts are commonly rated roughly 2.5–3.7 per inch depending on product; mineral wool often sits around 3 per inch). For many DIYers, pre-cut R-15 batts are the simplest route: they're inexpensive, widely available, and straightforward to staple into cavities during framing or retrofit with walls opened.
Strengths
- Low material cost and available in standard widths.
- Installable by a small DIY crew with basic PPE and tools.
- Good for interior partitions and mild climate exterior walls.
Weaknesses
- Stud thermal bridging reduces whole-wall performance—studs at 1.25"–1.5" wide cut effective wall R.
- Requires careful fit and air-sealing to perform; gaps and compression lower effective R.
- Not ideal for cold climates without added continuous insulation.
Best for
- Budget new builds on 2x4 framing, mild coastal or temperate climates, and when exterior continuous insulation is not planned.
Thin Continuous Foam Plus Cavity Strategies
Another way to hit an R-15 target in narrower assemblies is to combine a thinner cavity batt with a small layer of rigid foam on the exterior or interior. Polyiso, EPS, or XPS rigid boards can add a few R-values per inch; polyiso often has a higher R/inch but performance changes with temperature. The Department of Energy's insulation types overview is a useful reference for R/inch expectations and typical installation locations.
Practical note: continuous foam reduces thermal bridging and raises effective whole-wall R even if cavity R is modest. However, adding exterior foam requires furring and adjustment to window flashing details.
When R-15 Isn’t Enough: Air Sealing and Thermal Bridging
Air leakage and studs often undermine batt performance. Industry guidance and building science resources emphasize that small improvements in air sealing frequently match or exceed the gains from raising cavity R by one or two increments. Before upgrading solely for R, address common leakage points (top plates, rim joists, window and door penetrations). For practical air-sealing steps see the site's air sealing checklist.
For alternative materials and approaches, readers curious about non-traditional products can review options like cork in our cork insulation ideas guide.
(See Energy Star's guidance on recommended insulation R-values for location-specific planning: recommended home insulation R-values — Energy Star.)
What R-23 Means and Common Assemblies That Deliver It
2x6 Cavity Batts and Dense-packed Cellulose
R-23 is a common practical target for a 2x6 framing cavity (5.5" deep). With standard fiberglass or mineral wool batts sized for 2x6, installers can reach that nominal R. Dense-pack cellulose is another common approach: when properly installed, dense-packed cellulose can deliver comparable or slightly higher effective R per inch and fills irregular cavities better, reducing convective losses. The Insulation Institute's product selection guide discusses batt use and installation practices for new construction and retrofits.
Strengths
- Better thermal resistance and whole-wall performance versus R-15.
- Less need for immediate continuous exterior insulation in many climates.
- Dense-pack options reduce settling and air movement within cavities.
Weaknesses
- Increased material cost and thicker wall; finishing details like window jamb depth and trim must change.
- Dense-pack typically requires rented equipment or a contractor for best results.
- In cold climates, cavity-only strategies must be combined with proper vapor control and air barriers to avoid condensation risk.
Best for
- New 2x6 construction on a modest budget that targets real thermal improvement without full exterior CI, or retrofits where wall depth can be increased.
Exterior Continuous Insulation Plus Cavity (thin Foam + Batt)
A widely recommended path to R-23 equivalent is to combine a modest cavity R with exterior continuous insulation (CI). For example, a 2x4 cavity partially filled plus 1–2 inches of polyiso can achieve an effective wall R close to a 2x6 cavity, while keeping the structural advantages of 2x4 framing. CI also reduces thermal bridging through studs and improves moisture control when detailed correctly. For deeper guidance on continuous exterior strategies and passive-house performance, see exterior insulation strategies.
Trade-offs include cladding attachment changes, furring strips, and upgraded window flashings.
Spray Foam Options and Hybrid Approaches
Closed-cell spray polyurethane foam (ccSPF) achieves high R/inch (commonly reported in product datasheets) and can reach R-23 in thinner cavities. Open-cell spray foam has lower R/inch but acts as an air barrier. Hybrids — a partial spray foam layer for air-sealing with a batt or dense-packed fill on top — are also used to balance cost and performance.
Strengths
- High R/inch for ccSPF; strong air-sealing properties.
- No need for extra CI in many cases.
Weaknesses
- Cost is substantially higher; environmental and VOC considerations vary by product.
- Requires professional installation for consistent results and code compliance.
For material comparisons and embodied carbon considerations, review the site’s spray foam vs cellulose guide.
Performance Comparison: Energy, Moisture Risk, and Comfort for R-15 vs R-23
Thermal Performance: Heat Flow and U-values (conceptual Comparison)
Increasing cavity R from R-15 to R-23 reduces heat flow through the wall, but returns diminish as total R grows — the difference between R-15 and R-23 is meaningful, yet it's not linear in energy savings because conduction through studs, windows, and air leakage fill part of the heat path. U-value is the reciprocal of the total wall R (including sheathing, cladding, and interior finishes). For whole-envelope planning, compare wall U-values with window U-values and attic R targets to prioritize upgrades.
Modeling studies and DOE guidance show that in many climates, combining modest wall upgrades with attic insulation and better air sealing often gives the largest annual energy savings. For readers planning whole-house upgrades, consult the attic R-value guide to compare attic vs wall trade-offs.
Moisture and Hygrothermal Considerations (risk of Condensation)
Higher cavity R alone doesn't guarantee safety in cold climates. Adding exterior continuous insulation reduces the risk of interior moisture condensing within framed cavities by keeping sheathing warmer. Building science references and ASHRAE/IECC-guided practices recommend using CI or careful vapor control strategies in colder zones. The Department of Energy's types-of-insulation guidance explains material behavior and installation roles in moisture-managed assemblies: types of insulation — Department of Energy.
If converting from R-15 to R-23 by adding foam outside, ensure window flashings, roof eaves, and ventilation details are adjusted — the exterior layer changes drying paths.
Air Sealing’s Role in Real-world Savings
Air leakage often undermines rated R-values. A modest air-sealing retrofit can cut heat loss comparable to raising cavity R by several points. Tightening top plates, sealing rim joists, and properly flashing and sealing window reveals are high-value steps. For practical checks and a prioritized list of leakage points, see the site's guide on common air leakage points and the detailed air sealing checklist.
Cost, Thickness, and Installation Considerations When Choosing R-15 or R-23
Material vs Labor Trade-offs and Retrofit Complexity
Material type drives price and installation method drives labor cost. Fiberglass batts are cheapest per bag and easy for DIY install. Dense-pack cellulose costs more in equipment and possibly labor but can be done by contractors with a blower truck. Closed-cell spray foam is the priciest and usually requires professional installers.
Hidden costs to factor:
- Wall furring and cladding attachment if adding exterior foam.
- Window jamb extensions and trim if wall thickness increases.
- Permit or inspection fees for major envelope changes.
Use the insulation savings calculator to estimate relative payback for different R choices before committing.
Wall Thickness, Framing Choices, and Trim/finish Impacts
Choosing R-23 often means 2x6 framing or adding exterior foam and furring. That affects window reveal depth, door jambs, siding starter strips, soffit details, and trim. For tiny homes or mobile units, the extra thickness may be unacceptable — in those cases, high-R per inch materials like closed-cell spray foam or carefully detailed CI are alternatives.
Recommended visual: production should include a thickness comparison graphic showing 2x4 vs 2x6 cavities and a cavity + foam option.
Permits, Code, and Passive House / Performance Targets
Building codes (IECC-based) and Energy Star recommendations vary by climate zone; colder zones often require or recommend higher wall R. For performance-focused builds (Near Passive or Passive House), continuous exterior insulation is commonly used to minimize thermal bridging and meet strict air-change and U-value limits. If targeting Passive House, external rigid foam choices and air barrier continuity will be essential; see the site's continuous insulation discussion at exterior insulation strategies.
For attic trade-offs and where to spend a dollar per R, review the best attic insulation guide.
Which Should You Choose? Scenario-based Recommendations
Below are concise, scenario-driven recommendations. Each scenario notes the preferred target (R-15 or R-23), suggested assembly, and immediate next steps.
Budget Retrofit (existing 2x4 Walls)
- Recommendation: Keep R-15 cavity, prioritize air sealing and attic upgrades; consider dense-pack cellulose to raise effective R toward R-23 if walls can be opened or blown from the exterior.
- Next steps: Use an infrared or blower-door test to identify leaks; consult the insulation savings calculator to compare attic vs wall investments.
New 2x6 Build on a Tight Budget
- Recommendation: Choose R-23 cavity insulation with 2x6 framing (batts or dense-pack) and focus on airtight detailing; add a thin 1"–1.5" exterior foam if budget allows for better whole-wall performance.
- Next steps: Detail window jambs for deeper reveals; factor in slightly higher framing and siding costs.
Cold-climate/high-performance Goals (near Passive)
- Recommendation: Aim beyond cavity R — combine cavity insulation with exterior continuous insulation (polyiso or EPS/XPS depending on moisture tolerance) to reduce thermal bridging. Exterior foam plus a moderate cavity achieves better hygrothermal performance than deeper cavity alone.
- Next steps: Reference Passive House detailing and ensure vapor control strategy matches the chosen insulation stack. Consider triple-pane windows for balanced envelope upgrades; see window upgrade trade-offs.
Tiny Homes and Mobile Units Where Space is Limited
- Recommendation: Use higher R/inch materials (closed-cell spray foam) or high-performance rigid boards on key walls; accept R-15 in non-critical partitions.
- Next steps: Check the mobile home insulation tips guide for thin-assembly strategies and ventilation impacts.
Sheds, Cabins, and Outbuildings — When R-15 is Enough
- Recommendation: R-15 is often adequate for seasonal cabins and many outbuildings. If year-round occupancy or a cold-climate cabin is planned, upgrade to R-23 or add exterior foam.
- Next steps: Use the shed insulation options and test quick payback with the shed insulation calculator.
Short video walkthrough This quick visual shows cavity thicknesses, batt vs dense-pack vs exterior foam details, and how window jambs change with thicker walls.
This video compares the options to help you decide:
How to Upgrade From R-15 to R-23: Practical Retrofit Strategies for Diyers
Option A: Dense-pack Cellulose or Fiberglass Into Existing Cavities
Scope: Blow dense-pack cellulose into wall cavities from interior or exterior. This raises effective R and fills irregular gaps. Tools/complexity: Requires a dense-pack blower; many DIYers rent equipment, but contractor installation ensures consistent density. Steps:
- Make small drill holes in the drywall or sheathing at stud bays (follow local code and electrical/plumbing avoidance).
- Inject cellulose to manufacturer-specified density to avoid settling.
- Repair holes, patch and repaint.
Pitfalls: Poor density leads to settling and reduced R. Insulate rim joists and top plates too; they are common leakage points.
Option B: Add Exterior Rigid Foam (fur Out and Re-clad)
Scope: Apply rigid foam (polyiso, EPS, or XPS) over existing sheathing, install furring strips, then re-clad. Tools/complexity: Carpentry skills required; more time and permit checks often needed. Steps:
- Inspect existing sheathing and flashing; correct damage before adding foam.
- Install continuous foam using mechanical fasteners and compatible adhesives per product guidance.
- Add rainscreen/furring and re-attach siding; adjust window flashings and sills.
Pitfalls: Improper detailing at windows and roof-wall intersections causes leaks. Choose foam type with an appropriate moisture and thermal profile — our polyiso vs XPS guide helps choose the right board.
Option C: Interior Foam or Insulated Strapping (when Exterior Work Isn't Possible)
Scope: Apply insulated strapping or thin foam on the interior and re-finish with drywall. Less ideal for moisture management but workable when exterior access is restricted. Tools/complexity: Moderate carpentry and finish work; interior foam moves vapor control boundaries and may affect HVAC distribution. Steps:
- Remove trim and baseboards as needed.
- Install thin rigid foam or insulated strapping to reach desired effective R.
- Reinstall drywall and trims, update window trims or jamb extenders.
Pitfalls: Moving the dew point inward may create condensation risk without proper vapor control; consult building science guidance for cold climates.
Step-by-step Checklist and Common Pitfalls
Checklist:
- Check local code and pull permits if required.
- Run a blower door test before changes to target air leakage areas.
- Choose material based on moisture and climate: polyiso loses some R at low temp, XPS/EPS have different moisture behaviors.
- Plan window/door trim changes and flashing details.
- If dense-pack is chosen, hire or train on blower operation.
Common pitfalls:
- Not addressing air leakage first.
- Skipping flashing and trim changes when adding exterior foam.
- Underestimating time and finish costs for thicker walls.
- Using thin interior foam in cold climates without vapor control planning.
For a contractor vs DIY decision on dense-pack or exterior foam work, read DIY vs hiring.
The Bottom Line
For many budget-conscious DIY builders, the choice between R-15 vs R-23 depends on climate, access for exterior work, and where each dollar buys the most whole-house benefit. R-15 is fine for mild climates or small outbuildings; R-23 or an equivalent cavity-plus-continuous-insulation approach is preferable for colder zones or when aiming for meaningful year-round energy and comfort gains. Use air sealing first, then model payback with the insulation savings calculator.
Frequently Asked Questions
Is R-23 worth the extra cost?
It depends on climate and existing envelope performance. In cool or cold climates, raising wall R to about R-23 reduces heat loss and improves comfort more than in mild climates. However, the cost-effectiveness depends on whether you must remodel window details, add furring, or hire spray-foam installers.
For many homeowners, addressing air leakage and attic insulation first yields larger annual savings than a small wall R increase. Use the insulation savings calculator to compare likely payback for your location and fuel costs.
Can I get R-23 in a 2x4 wall?
Not with standard batts alone. To reach an R-23 effective value in a 2x4 assembly, combine cavity insulation with continuous exterior rigid foam (polyiso, EPS, or XPS) or use high-R per inch materials such as closed-cell spray foam. Adding exterior foam increases wall thickness and requires updated flashing and cladding details.
Refer to the Department of Energy overview on types of insulation for comparative R/inch figures and installation locations: types of insulation — Department of Energy.
What's the best way to add insulation without removing drywall?
Blowing dense-pack cellulose or loose-fill fiberglass into cavities from the exterior or interior (via small drilled holes) is a common retrofit that avoids full drywall removal. Dense-pack fills voids and resists settling when installed to the correct density.
Dense-pack requires either rented equipment and careful technique or a contractor. If exterior work is possible, adding continuous rigid foam and furring can also be done without opening interior finishes but does affect exterior trim and siding.
How does climate affect whether I should choose R-15 or R-23?
Colder climates justify higher wall R because heating-day counts and heat loss are greater. Energy Star and code recommendations vary by climate zone. For cold regions, adding continuous exterior insulation is often recommended to control condensation and reduce thermal bridging.
For mild climates, R-15 with solid air-sealing and attention to windows and attic insulation may be the best budget trade-off. Consult the Energy Star recommended R tables linked earlier for zone-based guidance: recommended home insulation R-values — Energy Star.
Will upgrading insulation reduce heating and cooling bills enough to pay back the work?
Payback varies with energy prices, climate, the current condition of the envelope, and installation cost. Upgrading from R-15 to R-23 will save energy, but the incremental savings per dollar decline as you improve the envelope. Air sealing and attic insulation often return faster payback than wall-only upgrades.
Run specific scenarios through the insulation savings calculator and consider professional energy audits or blower-door tests to identify the highest-value improvements first.