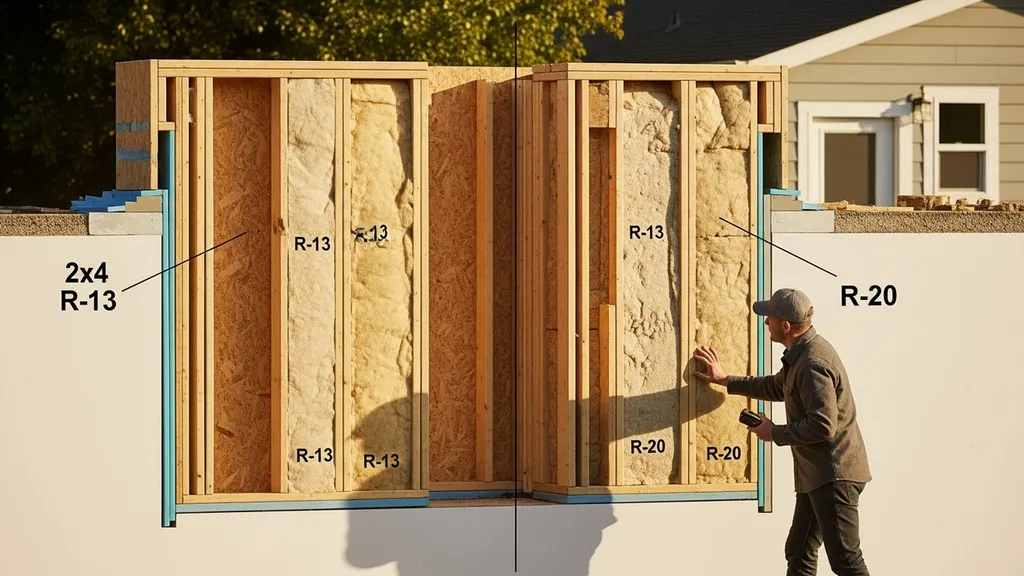
Compare R-13 and R-20 insulation for walls, cost, space, and retrofit options to decide which is right for your DIY eco home.
R-13 vs R-20 Insulation: Which Do You Need?
Deciding between R-13 vs R-20 insulation often comes down to wall depth, climate, and how much disruption you can tolerate during a retrofit. This article compares the two common wall R-values for DIY eco homes, explains how cavity R-values translate to whole-wall performance, and gives practical retrofit routes — from dense-packed cellulose to adding continuous rigid foam — so you can choose the most cost-effective, low-carbon option for your project. The primary goal: help budget-conscious DIY builders decide whether to accept a 2x4/R-13 assembly or pursue R-20-level performance with modest extra effort.
TL;DR:
- R-13 fills a standard 2x4 cavity (~3.5 in); it's low-cost and space-efficient but whole-wall performance falls short in cold climates.
- R-20 requires a 2x6 cavity (~5.5 in) or R-13 plus ~R-5 continuous foam; it reduces thermal bridging and improves whole-wall U-factor.
- For retrofits, dense-pack cellulose or exterior rigid foam often offers the best balance of cost, disruption, and carbon footprint — choose based on site access, cladding work, and moisture control.
Quick TL;DR and Comparison Table: R-13 vs R-20 Insulation
Short Answer: Which is Usually Enough
For mild climates with careful air sealing, well-installed R-13 in a 2x4 wall can perform acceptably when combined with continuous air barriers and high-efficiency heating. In colder zones or when targeting passive-house-level performance, R-20 (or R-13 plus continuous insulation) is a safer choice. The Department of Energy and Energy Star provide climate-based R-value guidance that helps set minimums for different regions; adapt those recommendations to your airtightness and heating strategy (recommended home insulation R–values - Energy Star).
Comparison Table: R-13 vs R-20 (performance, Depth, Cost, Best Uses)
| Feature | R-13 | R-20 |
|---|---|---|
| R-value (nominal) | R-13 cavity | R-20 cavity or R-13 + CI |
| Typical materials | Fiberglass batts, mineral wool, dense-packed cellulose | Thick batts in 2x6, dense-pack cellulose, or cavity + rigid foam |
| Cavity depth | ~3.5 in (2x4) | ~5.5 in (2x6) or 2x4 + foam |
| Thermal performance notes | Easier to fit in narrow walls; whole-wall R lower due to stud bridging | Higher whole-wall U-factor when combined with CI; reduces stud thermal bridging |
| Best uses | Interior partitions, mild climates, limited wall depth | Cold climates, new builds targeting higher R, retrofit with CI |
| Approx relative cost | Low | Medium–High |
| Retrofit difficulty | Easy–Moderate (batts/ dense-pack) | Moderate–Difficult (exterior foam, reframing) |
See Energy Star's climate-based recommendations for where higher cavity R-values become cost-effective: recommended home insulation R–values - Energy Star.
What R-13 Means and Where It’s Commonly Used
Overview: Typical Materials and Assemblies
R-13 is the nominal insulation value usually targeted for 2x4 stud cavities. Typical materials include fiberglass batts, mineral wool batts, and dense-packed cellulose blown into cavities. Nominal R-per-inch varies by material: fiberglass batts are around R-3.1–3.3 per inch, mineral wool slightly higher, while cellulose averages about R-3.6–3.8 per inch when dense-packed. In a 3.5-inch cavity, those figures yield roughly R-13. R-13 is common in interior partitions, garage walls, sheds, and older single-family homes with 2x4 framing.
Strengths of R-13
- Space-efficient: fits the narrow profile of 2x4 walls without changing cladding or trim.
- Low upfront cost: fiberglass batts are typically the least expensive option by material.
- Lower embodied carbon options: dense-packed cellulose is often a lower-carbon material compared with foam boards and spray foams.
- Simpler installation: batts can be installed or replaced without reframing.
Weaknesses of R-13
- Whole-wall performance is lower than cavity R suggests because of thermal bridging through studs and plates.
- In cold climates, R-13 may not meet code or practical comfort targets without added CI or superior airtightness.
- Limited headroom for installing services or adding interior finishes without compressing insulation (which reduces R-value).
For small structures with tight wall depths, see strategies tailored to narrow cavities in the best insulation for sheds and options used in mobile homes in best insulation for mobile home materials and r-values. For a material overview, the Department of Energy's guide to insulation types summarizes common products and how they are installed.
What R-20 Means and Where You’d Choose It
Overview: Typical Ways to Get R-20
R-20 is commonly achieved two ways: by using deeper cavities such as 2x6 framing filled with thicker batts or dense-packed cellulose, or by pairing a standard cavity fill (R-13) with continuous exterior insulation (e.g., R-5 polyiso or EPS/XPS panels). Continuous insulation (CI) reduces thermal bridging and raises the whole-wall effective R. Another route is insulated sheathing or 3/4"–1" foam plus an interior framed stud offset.
Strengths of R-20
- Better whole-wall performance when combined with CI, because it lowers heat flow through studs.
- More thermal buffer for moisture and condensation management in cold climates when detailed correctly.
- Easier path to meet modern code or energy targets for new construction, including assemblies that comply with prescriptive IECC/IRC options in some jurisdictions.
Weaknesses of R-20
- Greater wall thickness increases foundation and window jamb design complexity and can add to exterior finish costs.
- Upgrading an existing 2x4 wall to true R-20 often requires either exterior work (siding removal and CI) or reframing, both of which add cost and disruption.
- Foam-based approaches can have higher embodied carbon compared with cellulose or mineral wool.
For guidance on installing batts and loose fill to reach higher cavity R-values, see the industry PDF on fiberglass and batt usage from the Insulation Institute (A guide to selecting fiber glass insulation products for new ...). That resource explains practical removal and replacement steps when using batts for deeper cavities.
R-13 vs R-20: Thermal Performance, Airtightness and Whole-wall Effects
Cavity R-value vs Whole-wall U-factor
A cavity R-value is just one input to heat loss calculations. Whole-wall performance combines cavity insulation, studs, plates, and any continuous layers into a U-factor. Two walls with the same cavity R can have markedly different U-factors if one includes continuous exterior insulation or uses advanced framing with lower stud fraction. ASHRAE and DOE resources explain how to convert cavity R into whole-wall numbers for compliance and energy modeling.
Thermal Bridging and Stud Fraction
Studs, rim joists, and headers create continuous conductive paths through insulated cavities. The fraction of wall area taken by studs (stud fraction) matters: typical 2x4 framing with 16" o.c. has a higher stud fraction than 24" o.c., increasing heat loss. Adding CI (e.g., polyiso, EPS, or XPS) interrupts that path. In practice, adding ~R-5 of continuous exterior insulation to an R-13 cavity can move whole-wall performance closer to an R-20 assembly without reframing.
How Airtightness Changes Outcomes
Airtightness strongly influences the realized energy savings from insulation. Gaps, missed cavities, and unsealed penetrations let convective heat flow dominate conduction improvements. A blower door test will quantify leakage and help prioritize air sealing work that often returns more benefit per dollar than bumping cavity R. Practical guidance on how to prioritize air sealing is in how to air seal house passive builder. Community discussion on alternate code approaches and continuous insulation equivalencies highlights how jurisdictions balance cavity and CI requirements (Alternate to Code described R20+R5continuous insulation.).
Cost, Materials and Embodied Carbon Considerations Between R-13 and R-20
Material Cost vs Lifecycle Energy Savings
Upfront cost tiers are broadly: fiberglass batts (low), dense-packed cellulose or mineral wool (medium), rigid foam boards and spray foam (higher). While R-20 assemblies often cost more initially, lifecycle energy savings depend on climate, airtightness, and heating fuel prices. Use an insulation savings estimator to model your climate and fuel type before committing; the DIY tool how to calculate savings is useful for quick scenario runs.
Carbon Footprint of Common Insulation Materials
Embodied carbon varies widely: cellulose (recycled paper) often has one of the lowest embodied carbon footprints among common insulations. Mineral wool sits mid-range. Polyiso, XPS, and closed-cell spray foams typically have higher embodied carbon due to petrochemical content and blowing agents, though manufacturer improvements have reduced some impact. For projects prioritizing low carbon, dense-packed cellulose plus targeted CI with low-carbon products (e.g., cork or low-GWP foam) is a reasonable strategy; see the cork application note in the retrofit section below.
For a detailed material comparison, consult the site’s analysis of foam vs. cellulose: spray foam vs cellulose.
Practical Budgeting Tips for Diyers
- Prioritize air sealing and continuous air barriers before increasing cavity R.
- For limited budgets, install high-quality R-13 batts correctly and add a modest layer of CI later when funds permit.
- For new builds, factor additional window jamb depths and trim into the cost when moving to 2x6 framing.
- Use tools like the insulation savings calculator to compare payback under realistic local fuel prices.
How to Upgrade an R-13 Wall to R-20 (retrofitting Options)
Add Continuous Exterior Rigid Insulation
Adding continuous rigid foam (polyiso, EPS, or XPS) to the exterior raises whole-wall R and reduces thermal bridging. Typical approaches: remove siding, install 1"–2" of rigid board, flash and reinstall cladding; or install furring strips over foam to create an air gap for rainscreen and to provide secure attachment for siding. Pay attention to cladding attachment and fastener length. See technical trade-offs among foams in polyiso vs eps vs xps foam board energy efficiency. When adding exterior foam, detail the vapor profile and flashing at windows to avoid trapping moisture.
Dense-pack or Blown-in Cavity Fill
Dense-pack cellulose or blown-in fiberglass can be installed through drilled holes in the drywall or from the exterior after siding removal. This approach raises effective cavity R within the existing thickness. It’s a lower-cost retrofit with moderate disruption (drill-and-fill), and cellulose brings low embodied carbon. For many 2x4 walls, dense-packing can be the highest-value retrofit among insulation retrofit options because it boosts insulation without changing wall thickness.
Interior Thermal Upgrade Options
Interior insulated sheathing or furring combined with rigid foam can increase wall R from the inside. This method is invasive to interior finishes (drywall removed and replaced) but avoids exterior work. Interior foam must be detailed for vapor control and often requires a vapor retarder or careful hygrothermal design to prevent interstitial condensation.
When Reframing or Building a Thicker Wall Makes Sense
Reframing to 2x6 studs or building a new thicker wall is the most permanent solution and offers the simplest path to R-20+ cavity R. It’s most sensible during major renovations or when replacing cladding and windows anyway. Reframing allows deeper service cavities and better window detail integration but is the most disruptive and costly option.
Watch this step-by-step guide on choosing the best insulation for your home:
For cork as a low-carbon continuous insulation option, see practical uses in how to use cork for DIY home insulation. For technical comparisons of rigid foams, see polyiso vs eps vs xps foam board energy efficiency.
DIY Installation Tips and Common Mistakes When Choosing R-13 or R-20
Air Sealing: Why It’s the First Step
Air leakage can undo much of the thermal benefit of added R. Seal rim joists, service penetrations, top plates, and sill plates before insulating. Use gaskets, spray foam at odd penetrations, and taped membrane systems where practical. For step-by-step air-sealing techniques, refer to how to air seal house passive builder.
Handling and Installing Batts Correctly
- Fit insulation to fill cavities without compression.
- Cut full-height pieces to fill odd-sized studs and pack around wiring without large gaps.
- Avoid compressing batts behind window returns or in corners.
Incorrectly installed batts are a common loss driver; check common weak points in common air leakage points builders miss.
Avoiding Moisture and Condensation Traps
Moisture control depends on climate and assembly. Adding exterior foam often improves hygrothermal performance by keeping sheathing warmer, but interior foam can create a risk of cold sheathing unless a proper vapor strategy is used. If upgrading a wall, review local code and consider consulting hygrothermal guidance from ASHRAE or a building scientist for borderline cases.
Details That Matter (corners, Rim Joists, Window Returns)
- Insulate and air-seal rim joists with closed-cell spray foam or rigid foam plus sealant.
- Use insulated framing techniques or pocket-fill corners to prevent air bypass.
- Flash windows correctly when adding exterior foam; extend flashing over foam in many cases.
Additional installation and material-handling notes applicable in walls and attics are in the attic insulation guide and attic insulation materials.
Which Should You Choose? Scenario-based Recommendations
Tight Budget, Limited Wall Depth
If budget and wall depth are constrained, install high-quality R-13 batts (or dense-pack cellulose) with rigorous air sealing. Add targeted continuous insulation later on high-loss walls (north-facing, exposed gable ends). This approach balances immediate comfort with staged upgrades. Use the shed insulation calculator to test simple assemblies for small structures.
Building New with a Focus on Passive Performance
For new builds with passive-house goals, aim for 2x6 framing filled to R-20 or higher plus at least R-5–R-10 of CI. This combination reduces thermal bridging and simplifies meeting prescriptive code options; pair with strict airtightness and mechanical ventilation. See passive exterior insulation practices in exterior roof insulation notes and integrate daylighting strategies from the light shelves for passive homes guide.
Retrofit on an Older Home with Minimal Disruption
Dense-pack cellulose provides a good balance: moderate cost, low carbon, and minimal exterior changes. If siding replacement is already planned, prioritize adding exterior rigid insulation at that time — it yields a much larger jump in whole-wall performance per inch than cavity-only upgrades.
Cold Climates vs Mild Climates
Cold climates make higher whole-wall R and CI more cost-effective; aim for R-20+ cavity or R-13 + CI in heating-dominated zones. In mild climates, a well-installed R-13 with excellent airtightness and selective CI can be adequate.
For readers planning a full self-build and weighing wall-depth trade-offs, see how to build your own home and the small-build walkthrough in building a small cabin.
The Bottom Line
R-13 fits standard 2x4 construction and is a reasonable choice where wall depth or budget restricts options, but whole-wall performance benefits significantly from adding continuous insulation or moving to R-20 cavity assemblies. For DIY eco homes, prioritize airtightness and low-carbon materials (dense-pack cellulose or mineral wool) first; then pursue CI or thicker framing to reach R-20-level performance if climate and budget justify it. In short: air seal well, choose the lowest-carbon material that meets your thermal goal, and add CI when targeting cold-climate comfort or higher energy-performance standards.
Frequently Asked Questions
Can you get the same performance as R-20 with R-13 plus continuous insulation?
Yes, in many cases R-13 plus about R-5 of continuous exterior insulation can produce a whole-wall U-factor similar to an R-20 cavity because the continuous layer interrupts stud thermal bridging. The exact equivalence depends on stud fraction, the CI material's installed R per inch, and airtightness. For code compliance or precise energy modeling, convert the assembly to a whole-wall U-factor using ASHRAE or local compliance tools.
That said, locating the CI outside the sheathing usually improves moisture resilience in cold climates because it keeps the sheathing warmer; interior foam adds complexity to the vapor profile.
Is it worth reframing 2x4 walls to 2x6 for R-20?
Reframing to 2x6 provides permanent space for deeper cavity insulation and simplifies service routing and window jamb detailing. Whether it is worth the cost depends on project timing and budget: reframing is most sensible during major renovations or when replacing cladding. For many retrofits, exterior rigid foam or dense-pack cellulose gives similar thermal improvements with less disruption and lower cost.
Will thicker insulation cause moisture problems?
Thicker insulation itself doesn't automatically cause moisture problems, but changing the wall's thermal profile can alter where and when condensation forms. Adding exterior insulation tends to keep sheathing warmer and reduces condensation risk. Interior foam or adding impermeable layers can create vapor traps if not detailed correctly. Consult local code, follow hygrothermal design guidance (ASHRAE or building-science resources), and ensure proper flashing and ventilation where needed.
How much energy will I actually save by moving from R-13 to R-20?
The actual energy savings vary with climate, airtightness, heating fuel, and occupant behavior. In cold climates the incremental savings from R-20 versus R-13 are larger; in mild climates they are smaller. Use tools like the insulation savings calculator to model local conditions. Also consider that improving airtightness or upgrading windows may yield comparable or larger savings than increasing cavity R alone.
Which insulation types match R-20 with the lowest carbon footprint?
Dense-packed cellulose combined with selective continuous insulation (for example a thin layer of low-carbon foam or a natural product like cork) often yields a lower embodied carbon solution compared with thick foam or closed-cell spray foam. Mineral wool is another moderate-carbon option with good fire and moisture performance. Evaluate embodied carbon alongside lifecycle energy with a simple lifecycle check and prioritize materials with recycled content and low-GWP blowing agents when possible.