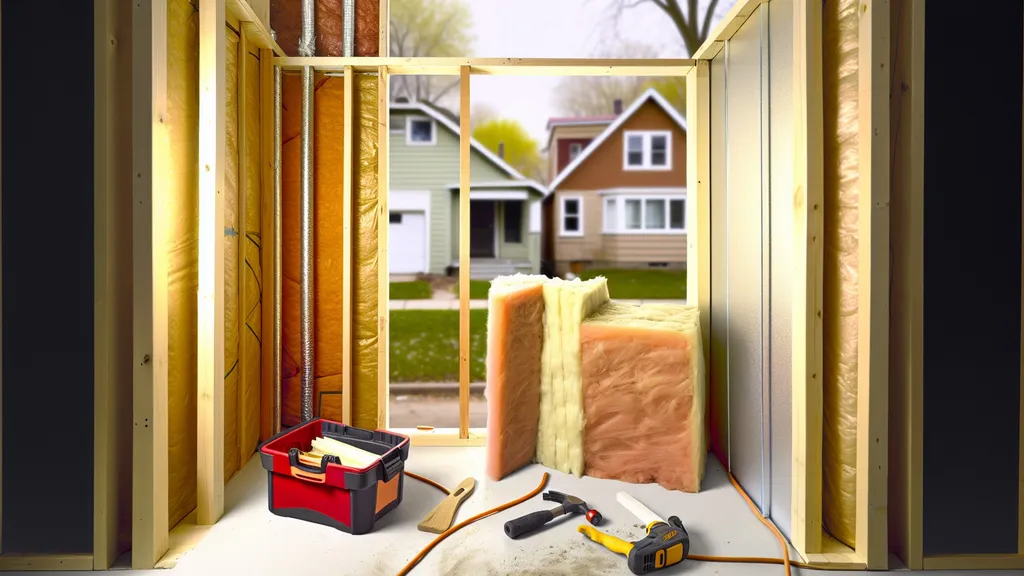
Compare R-15 and R-21 insulation for walls, cost, climate, and installation to decide which is right for your DIY build.
R-15 vs R-21 Insulation: Which Do You Need?
Choosing between R-15 vs R-21 insulation is one of the first big decisions for a DIY self-build or retrofit. This article compares performance, cost, installation realities, and climate-based recommendations so homeowners can decide whether to build with 2x4 walls, 2x6 walls, or a hybrid approach that uses continuous exterior insulation. The primary question answered here is simple: will the extra R-value of R-21 pay for itself in comfort and energy savings for your location and build?
TL;DR:
- R-21 provides roughly 30–40% more cavity R-value than R-15 and typically saves about 5% (zone 4), 8% (zone 5), and 12% (zone 6) of annual heating energy versus R-15 for typical framed walls.
- R-15 (2x4 cavity) is cheaper upfront — typical DIY material cost ~ $0.30–$0.60/sq ft; R-21 (2x6 cavity) materials ~ $0.50–$1.00/sq ft — but the real value often comes from fixing air leaks and thermal bridging first.
- Best practice: in cold climates choose R-21 or R-15 plus 1–2" continuous exterior insulation; in mild climates prioritize air sealing and use R-15 to control costs.
Related guides: R 15 vs r 20 insulation which do you need, R 13 vs r 23 insulation which do you need, R 30 vs r 38 insulation which do you need, R 13 vs r 21 insulation which do you need, Safer alternatives spray foam insulation performance, Ultimate guide to natural fiber insulation, and Fix damp crawl space insulation sealing drainage tips.
R-15 vs R-21 Insulation: Quick overview and TL;DR comparison
One common scenario: a first-time self-builder choosing insulation for exterior walls and weighing a 2x4 wall with R-15 batts against a 2x6 wall with R-21. The table below summarizes typical specs and real-world impacts.
| Feature | R-15 (typical) | R-21 (typical) |
|---|---|---|
| R-value per inch (typical) | ~3.4–3.7 (fiberglass), ~3.2–3.8 (cellulose) | ~3.6–3.9 (fiberglass high-density), ~3.7–4.0 (mineral wool) |
| Common material types | Fiberglass batt, mineral wool, dense-packed cellulose | High-density fiberglass, mineral wool, rigid inserts |
| Typical cavity depth | 2x4 framed cavity ≈ 3.5" | 2x6 framed cavity ≈ 5.5" |
| DIY material cost per sq ft (material only) | $0.30–$0.60 | $0.50–$1.00 |
| Installed cost per sq ft (contractor ranges) | $1.25–$2.50 | $1.80–$3.20 |
| Representative wall U-factor* | ~0.12–0.18 (depends on thermal bridging, cladding) | ~0.09–0.14 |
| Estimated annual heating energy impact (move from R-15 → R-21) | Zone 4: ~5% savings Zone 5: ~8% savings Zone 6: ~12% savings |
*U-factor varies widely with framing fraction, continuous insulation, and air tightness. These examples assume typical wood-framed walls without CI and average window area.
Industry guidance such as Energy Star's recommended R-values for different climates shows R-15/R-21 decisions depend heavily on location and the rest of the envelope; see the Department of Energy and Energy Star for region-specific tables. For whole-envelope planning, compare results from the Energy Star recommended home insulation R-values table and use that to set priorities between wall, attic, and slab insulation.
R-15 vs R-21 Insulation: R-15 insulation — what it is and when it works
Overview of R-15 (materials and typical wall assemblies)
R-15 is the common target for framed 2x4 wall cavities. Typical materials that achieve R-15 include standard fiberglass batts (R ≈ 3.4–3.7 per inch), mineral wool batts at standard density, and dense-packed cellulose if installed correctly. Because a 2x4 stud wall has ~3.5" of depth, R-15 is a natural fit without changing framing dimensions.
R-15 insulation performance depends on correct installation: full-height fill, no compression, and good contact with the framing plane. The Insulation Institute guide to fiberglass products explains product selection and installation details for batts versus loose-fill.
Strengths
- Lower material cost and lighter framing requirements — good for budget builds or retrofit where wall thickness is constrained.
- Easier to install for DIYers in new construction or when opening walls for renovation.
- Works well in mild climates where code minimums are lower; often acceptable in Zones 1–4 under prescriptive code paths.
Weaknesses
- Lower thermal resistance than R-21; offers less margin against cold snaps in climate zones 5–8.
- Performance sensitive to air leakage and compression — gaps around outlets, pipes, and at top/bottom plates can reduce effective R substantially.
- Higher thermal bridging impact because studs occupy a larger share of the wall cross-section in thinner walls.
Best for — common use cases
- Tiny homes, accessory dwelling units, and interior framed partitions where wall thickness matters.
- Budget-conscious retrofits where adding deeper framing or exterior continuous insulation isn’t possible.
- Warmer or mixed climates where heating demand is modest and cost sensitivity is high.
Use the term "r-15 insulation" in product searches and comparisons when shopping for batts or cellulose targeted for a 2x4 cavity.
R-15 vs R-21 Insulation: R-21 insulation — what it is and when it's preferable
Overview of R-21 (materials and typical wall assemblies)
R-21 is commonly achieved in 2x6 stud walls (≈5.5" depth) filled with high-density fiberglass batts, mineral wool, or dense-pack cellulose. R/inch values for higher-density options are often slightly better than standard batts, so R-21 can be reached without resorting to closed-cell spray foam in many assemblies.
The Department of Energy's guide to insulation provides background on materials and R-value calculations that help compare cavity-only approaches with hybrid solutions like cavity plus continuous insulation: Department of Energy's guide to insulation.
Strengths
- Higher thermal resistance reduces heat loss in cold climates and reduces peak heating demand.
- More forgiving of thermal bridging when combined with modest continuous insulation.
- Better acoustic performance in party walls and bedrooms when mineral wool or dense batts are used.
Weaknesses
- Higher upfront cost for materials and possible need for thicker framing, which increases lumber and trim costs.
- May require adjustments to window and door rough openings and exterior trim; joinery details can become more complex.
- If installed with poor air sealing or with significant thermal bridging, the incremental R may not deliver proportional energy savings.
Best for — common use cases
- New primary homes in cold climates (IECC zones 5–8) where long-term energy savings and occupant comfort are priorities.
- Self-builders planning to stay long-term or aiming for near-passive performance without full passive-house construction.
- Walls that will not be retrofitted easily later — better to oversize R now than to rebuild later.
If R-21 is not feasible in cavity alone, consider higher-performance materials or a hybrid approach discussed later. See our discussion of spray foam alternatives for options when high R per inch is required.
R-15 vs R-21 Insulation: Cost, payback, and budget tradeoffs
Upfront material and installation costs (DIY vs contractor)
Ballpark costs per 1,000 sq ft of exterior wall (material-only and installed):
- R-15 (material-only): $300–$600 — common fiberglass batts or cellulose.
- R-15 (installed): $1,250–$2,500 — depending on labor rates, access, and wall complexity.
- R-21 (material-only): $500–$1,000 — higher-density batt or mineral wool.
- R-21 (installed): $1,800–$3,200 — may rise if framing changes are required.
These ranges depend on local labor rates and whether you DIY. DIYers can cut the installed line-item but must account for time and potential rework if air-sealing is not done correctly.
Estimated energy savings and simple payback examples
Studies and modeling show diminishing returns as cavity R increases. A rough approach to payback:
- Assume converting 1,000 sq ft of wall from R-15 to R-21 yields an annual heating energy reduction of:
- Zone 4: ~5% → save roughly $75–$150/year depending on fuel cost.
- Zone 5: ~8% → save roughly $120–$240/year.
- Zone 6: ~12% → save roughly $180–$360/year.
Using those savings, simple payback on the incremental installed cost ($500–$900 extra for R-21) ranges from 2–6 years in cold climates and 4–12 years in milder climates. For detailed analysis, see industry work on real-world R-values and payback such as the Structural Insulated Panel Association's R-values in the real world.
When extra R-value isn’t worth the expense
- When the building has significant unaddressed air leaks or thermal bridges — sealing those often saves more than adding cavity R.
- On low-energy secondary structures (sheds, unconditioned garages) where occupant comfort or heating loads are minimal.
- If local code or incentives favor continuous insulation strategies — sometimes R-15 plus CI gives a better return than thicker cavities.
Lifecycle thinking matters: money spent on a continuous insulation layer or improved windows may beat simply increasing cavity R. Check for local utility incentives or rebates before investing — incentives can shift the payback dramatically.
R-15 vs R-21 Insulation: Installation realities — common mistakes and performance killers
Air sealing, compression, and gaps — why R-value on the label isn't enough
Label R-values assume perfect installation. Real-world losses from gaps, compression, and air leakage can reduce effective R by 10–30%. Typical mistakes include compressing batts behind pipes, leaving voids at top plates, and not sealing around electrical boxes. A blower-door test often reveals how much heat is escaping through air leakage rather than conduction.
Avoid these pitfalls:
- Fill cavities fully without compressing batts.
- Cut around obstructions rather than forcing insulation to bend.
- Seal top plates, rim joists, and penetrations so insulation can do its work.
For step-by-step air-barrier details see the guide on airtight membrane installation.
Thermal bridging and continuous insulation strategies
Thermal bridging through studs can cut whole-wall performance markedly. For example, a framed wall with 16" on-center studs and no CI can have a whole-wall R well below cavity R. Adding 1–2" of continuous exterior rigid insulation (polyiso, XPS, or EPS) reduces the effective bridge and can yield R-21-equivalent or better performance while keeping 2x4 framing.
Common fixes:
- Add 1" polyiso (R≈6) or 1.5" mineral wool CI to supplement cavity R.
- Use advanced framing to reduce stud fraction.
- Choose exterior sheathing systems with higher insulating value.
For rules on CI material choices see our coverage of polyiso insulation methods and the comparison of board options in polyiso vs EPS vs XPS comparisons.
Vapor control and moisture risks for different climates
Vapor drive, condensation, and moisture accumulation vary by climate. Misplacing vapor-impermeable insulation (e.g., foam on the warm side in cold climates) can trap moisture in the sheathing. Building codes and guides provide climate-specific guidance; for authoritative code-related requirements see the 2019 Energy Code insulation and QII requirements.
Short checklist:
- Align your air barrier and vapor control with the climate (cold climates usually favor a vapor retardant on the interior).
- Keep insulation dry during installation.
- Detail window and flashing transitions to avoid water infiltration.
For R-value context and definitions, consult the R-value (insulation) entry on Wikipedia))) for technical background.
R-15 vs R-21 Insulation: Climate and code — which R-value your region typically needs
IECC climate zones and recommended wall R-values
The International Energy Conservation Code (IECC) sets prescriptive wall R-values that differ by climate zone and by assembly type (cavity-only vs cavity+CI). As a quick guide:
- Zones 1–3: Lower wall R is often accepted; R-13 to R-15 is common.
- Zones 4–5: Mixed climates often push to R-20–21 or R-13 + R-5 CI.
- Zones 6–8: Cold climates typically require R-20 or higher, or equivalent CI strategies.
For exact local requirements and for trade-off options consult official code materials such as the 2019 Energy Code insulation requirements and your local building department.
Practical rules of thumb by region
- Southern states (Zones 1–3): R-15 with excellent air sealing often performs acceptably; prioritize attic insulation and HVAC efficiency.
- Mixed climates (Zone 4–5): R-21 or R-13 + 1"–2" CI gives better year-round comfort and durability.
- Cold climates (Zone 6–8): Target R-21+ in walls and consider deeper cavities or continuous exterior insulation to avoid condensation and reduce heating loads.
Basements and crawlspaces follow different rules; insulated above or on the interior of the foundation wall depending on use. Inspectors often look for compliance with the prescriptive path or approved performance path, so verify local interpretations.
When local code or passive-house goals push you beyond R-21
Passive House and other low-energy standards typically require far higher whole-wall performance, and R-21 cavity-only walls are usually insufficient. In those projects, builders commonly use SIPs, exterior CI plus cavity fill, or deeper framing to reach equivalent thermal performance. If pursuing those standards, plan details early to avoid rework.
R-15 vs R-21 Insulation: Alternatives and hybrids that beat the simple R-15 vs R-21 choice
Adding continuous exterior insulation (equivalent performance)
A common strategy is to pair R-13 or R-15 cavity insulation with 1–2" of exterior continuous insulation to equal or exceed R-21 whole-wall performance. For example:
- R-13 cavity + 1.5" polyiso (≈R-10–R-12) ≈ R-23 whole-wall when thermal bridging is reduced.
- Exterior mineral wool panels add both R and improved fire and acoustic performance.
This path is often more cost-effective than switching to 2x6 framing and helps control thermal bridging.
Using higher-performance materials (mineral wool, dense-pack cellulose, closed-cell spray foam)
- Mineral wool has slightly higher density and excellent moisture tolerance and sound control.
- Dense-pack cellulose provides good air-sealing when combined with an air barrier and is made from recycled material.
- Closed-cell spray foam provides very high R/inch (≈6.5–7) but has higher cost and environmental/health trade-offs; review safer alternatives in our spray foam alternatives.
Thin high-performance insulation and cost-effective combos
Thin, high-R materials such as 1–2" of polyiso or aerogel blankets can upgrade a 2x4 wall to near R-21 performance without reframing. Consider trade-offs:
- Exterior placement reduces condensation risk and protects sheathing.
- Interior foam layers complicate vapor control and service runs.
For a technical comparison of foam boards, see polyiso vs EPS vs XPS comparisons.
R-15 vs R-21 Insulation: Which should you choose? Scenario-based recommendations
If you’re building in a mild climate on a budget
Choose R-15 in a 2x4 cavity, and invest the saved funds in air sealing and attic insulation. Example: a zone 3 coastal build where heating is rare — tighter envelope plus HVAC efficiency will beat extra cavity R for the budget.
If you live in a cold climate and plan to stay long-term
Prioritize R-21 cavity or R-15 plus 1–2" continuous exterior insulation. Example: zone 6 primary residence — the extra R typically pays back in 3–7 years and improves comfort. Also seal the rim-joist and add insulated windows for best results.
If you want passive-house-level performance on a budget
Combine a moderate cavity R (R-13–R-15) with a thicker continuous exterior layer (2" or more of polyiso or mineral wool) and focus heavily on air tightness and mechanical ventilation. This hybrid achieves high whole-wall R without extreme framing changes.
If you have framing constraints (2x4 vs 2x6)
- If framing is already 2x4 and you can't reframe, add exterior continuous insulation to reach R-21-equivalent.
- If you're building new and can choose framing, 2x6 with R-21 is a simpler single-step solution if lumber cost and window detailing are acceptable.
This video compares the options to help you decide:
Recommended next steps for DIYers:
- Perform a simple heat-loss calculation or use an energy-modeling tool.
- Prioritize air sealing and attic insulation before deep investments in wall R.
- Check local code and utility rebates that may shift the cost-effectiveness.
The Bottom Line
R-21 offers clear advantages for cold climates, but the biggest performance gains for most DIY projects come from proper air sealing and reducing thermal bridging. When framing depth is constrained, combine R-15 cavity insulation with 1–2" of continuous exterior insulation to get R-21-equivalent results while controlling cost.
Frequently Asked Questions
Can I get R-21 in a 2x4 wall?
Yes, but not with standard low-density batts alone. Achieve R-21-equivalent performance in a 2x4 wall by combining R-13 or R-15 cavity insulation with 1–2" of exterior continuous insulation (polyiso, mineral wool, or rigid foam). This reduces thermal bridging and often costs less than reframing to 2x6 studs. See the alternatives section above for comparative examples and costs.
How much energy will R-21 save versus R-15 in my climate?
Estimated annual heating energy savings from R-15 to R-21 depend on climate: roughly 5% in mixed climates (zone 4), 8% in colder mixed climates (zone 5), and about 12% in cold climates (zone 6), assuming similar air tightness. Exact savings vary with window area, air leakage, and heating fuel price — use an energy model or consult local data for precise figures.
Is continuous exterior insulation better than thicker cavities?
Continuous exterior insulation reduces thermal bridging and often produces better whole-wall performance per dollar than simply increasing cavity depth. It also improves condensation control when placed outside the sheathing. For guidance on when to use polyiso or mineral wool as CI, see our posts on polyiso insulation methods and the board comparisons in polyiso vs EPS vs XPS comparisons.
Will adding insulation cause moisture problems?
It can if vapor control and placement are wrong for your climate. Exterior continuous insulation usually reduces the risk of condensation on sheathing in cold climates. Interior impermeable foam layers can trap moisture. Follow climate-based vapor control guidance and local code; see the 2019 energy code insulation requirements for prescriptive rules in many jurisdictions: https://www.energy.ca.gov/sites/default/files/2020-09/2019%20Insulation%20and%20QII%20Requirements_v3_ADA.pdf.
Which option is better for soundproofing?
Denser materials such as mineral wool and dense-pack cellulose provide better sound absorption than standard fiberglass batts. R-value alone doesn't determine acoustic performance, but moving to R-21 with mineral wool often improves both thermal and acoustic comfort. For party walls or bedrooms, choose higher-density batts or add a resilient channel and double drywall where budget allows.