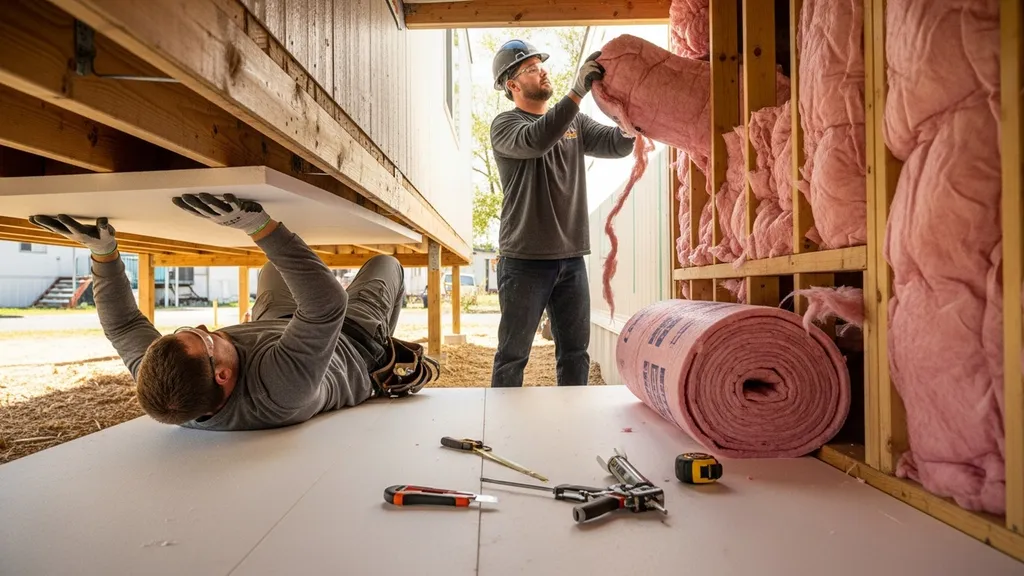
Compare insulation materials, installed R-values, costs, and DIY tips to pick the best insulation for a mobile home — walls, underbelly, roof, and floors.
Best Insulation for Mobile Home: Materials and R-Values
Mobile homes lose heat and gain it faster than typical site-built houses because of thin exterior panels, narrow wall cavities, and an exposed undercarriage. Choosing the best insulation for mobile home upgrades reduces bills, improves comfort, and prevents moisture damage. This guide compares materials, installed R-values, costs, and realistic DIY tips for walls, underbelly, roof/attic, and floors so a budget-conscious DIYer can plan an effective retrofit.
TL;DR:
- Choose closed-cell spray foam or taped XPS/polyiso at the underbelly for biggest heat-loss reduction; expect 10–30% heating savings from undercarriage work alone.
- For walls, dense-pack cellulose or fiberglass batts combined with 1" continuous rigid foam gives the best balance of cost and thermal bridging reduction; aim for installed R13–R20 depending on climate.
- Prioritize air sealing and moisture control first: seal ducts, skirt openings, and grade site drainage before adding insulation.
Related guides: Spray Foam vs Cellulose Insulation — Pros, Cons and Carbon Impact for Homes, Best insulation for attic materials and r values, and How to source local materials for DIY homes.
Related guide: Ultimate guide to recycled materials for DIY homes.
Why Insulation Matters in Mobile Homes
Mobile homes typically have thinner walls, single-stud construction, and ducts running through uninsulated cavities. These features create multiple heat-loss pathways: conduction through thin siding, thermal bridging at studs, convective losses through gaps, and radiation in poorly insulated ceilings. The Department of Energy identifies insulation and air sealing as two of the most cost-effective upgrades for older manufactured housing stock (Types of Insulation | Department of Energy).
Typical numbers: many older single-wide sidewalls have effective U-factors equivalent to R-5 to R-7 overall, while modest retrofits can raise installed R to R-13–R-15. Roof/ceiling areas often account for the largest share of heat loss — 30–40% in many manufactured homes — because ceiling cavities are shallow and ventilation may be inconsistent. Duct leakage in unconditioned cavities can add another 10–20% to heating/cooling loads if ducts are unsealed.
Key points (action items):
- Prioritize underbelly and skirting air sealing first to cut foundation losses.
- Set realistic R goals: R-13 for mild climates; R-20+ walls and R-49+ ceilings for cold climates.
- Fix moisture paths (grading, vents, wet skirting) before insulating.
- Seal ducts and major penetrations before adding insulation.
- Choose materials that fit narrow cavities or use continuous exterior foam to reduce bridging.
Common insulation materials used in mobile homes
Selecting the right product depends on cavity width, moisture risk, and budget. Below are the common choices with performance, moisture tolerance, cost tier, and DIY difficulty.
Fiberglass batts and blankets
- Typical R-value: ~2.2–2.7 per inch.
- Installed R: R-11–R-15 for 3.5" walls.
- Moisture tolerance: Poor when wet; loses R when compressed.
- Cost: Low ($0.30–$0.80/sq ft installed materials only).
- DIY difficulty: Easy to moderate; watch for gaps and compression. Good for interior wall access panels.
Loose-fill cellulose
- Typical R-value: ~3.2–3.8 per inch.
- Installed R: R-13–R-25 depending on depth.
- Moisture tolerance: Hygroscopic but can be treated; requires good vapor management.
- Cost: Low-medium ($0.70–$1.20/sq ft for blown-in only).
- DIY difficulty: Moderate; needs blower rental and careful dense-pack technique for narrow cavities.
Rigid foam boards (polyiso, XPS, EPS)
- Typical R-value: EPS ~3.6/in, XPS ~5.0/in, polyiso ~6.0/in at moderate temps (polyiso performance drops in cold).
- Installed R: 1" polyiso ~R6 (but cold performance varies), 1" XPS ~R5.
- Moisture tolerance: XPS good, EPS moderate, polyiso variable depending on facer.
- Cost: Medium ($0.80–$2.00/sq ft per inch).
- DIY difficulty: Easy to moderate; useful as continuous insulation to fight thermal bridging.
- Safety: No special PPE; cut with a utility knife.
Spray polyurethane foam (open- and closed-cell)
- Typical R-value: Open-cell ~3.5/in, closed-cell ~6–7/in.
- Moisture tolerance: Closed-cell is a vapor retarder and resists bulk water; open-cell does not.
- Cost: High ($1.50–$3.50+/sq ft for DIY kits; professional installs much higher).
- DIY difficulty: High for proper application; PPE and ventilation required. Licensed pros often recommended for whole-underbelly installs.
- Safety: Use respirator, gloves, eye protection; follow manufacturer cure times.
Reflective foil and radiant barrier options
- Typical effect: Reduces radiant heat gain/loss; effective in hot climates for attic/roof.
- Installed R: Not an R-value replacement; adds effective performance when combined with air gap.
- Cost: Low-medium ($0.30–$1.50/sq ft).
- DIY difficulty: Easy; must be installed with correct air gap.
For an expanded comparison of foam-board choices and performance trade-offs, see the in-depth comparison at polyiso vs other foam boards. The Insulation Institute offers an overview of the main types and installation considerations for homeowners (Insulation types | fiberglass, mineral wool, spray foam).
Common materials, comparison, and R-values (table + video)
Below is a compact comparison of typical materials and how they behave in mobile-home retrofit contexts.
| Material | Typical R/inch | Typical installed R (example) | Typical cost (materials) | Moisture tolerance | Best uses | DIY difficulty |
|---|---|---|---|---|---|---|
| Fiberglass batt | 2.2–2.7 | R-11 (3.5") | $0.30–$0.80/sq ft | Low | Sidewalls, ceilings with room | Easy |
| Cellulose (dense-pack) | 3.2–3.8 | R-15–R-20 (dense-packed) | $0.70–$1.20/sq ft | Medium | Sidewalls, attic | Moderate |
| EPS foam board | ~3.6 | R-3.6 per inch | $0.50–$1.00/sq ft/in | Medium | Continuous exterior | Easy |
| XPS foam board | ~5.0 | R-5 per inch | $0.80–$1.50/sq ft/in | Good | Underbelly, exterior CI | Easy |
| Polyiso foam board | ~6.0 (varies) | R-6 per inch (warm) | $1.00–$2.00/sq ft/in | Variable (cold drop) | Exterior CI above sheathing | Moderate |
| Open-cell spray foam | ~3.5 | Depends on depth | $0.80–$2.50/sq ft/in (kits) | Low | Small gaps, interior voids | Hard |
| Closed-cell spray foam | ~6–7 | High for thin layers | $1.50–$3.50+/sq ft/in | High | Underbelly, rim joist | Hard |
| Reflective foil | N/A | N/A | $0.30–$1.50/sq ft | Good | Attic roof in hot climates | Easy |
How to Read R-values and Installed Performance:
- Lab R per inch is measured under standard conditions; installed R drops with compression, gaps, or moisture.
- Thermal bridging reduces effective wall R when studs are conductive. Continuous exterior foam reduces that loss by adding a thermal break.
- Polyiso loses R-value at very low temperatures; see guidance on cold-weather use in our polyiso in cold climates resource and manufacturer data.
Watch this step-by-step guide on choosing the best insulation for your home:
For more on minimum insulation requirements and R-value guidance, Energy Star provides a concise fact sheet on insulation performance and code interactions (Insulation fact sheet.pdf - energy star).
Best insulation for mobile home: walls, underbelly, roof/attic, floors
This section gives targeted recommendations by area. Research and field experience indicate that undercarriage and ceiling upgrades often return the largest comfort and savings first.
Sidewalls and endwalls: best options and installation notes
- Recommended: Dense-pack cellulose or fiberglass batts in the stud cavity combined with 1" continuous rigid foam on the exterior to reduce thermal bridging.
- Why: Dense-pack fills narrow cavities better than batts in older framing and reduces convective loops. Adding rigid foam (XPS or polyiso) outside the siding moves the thermal break outward.
- R targets: Zone 3–4: installed wall R13–R15; Zone 5–7: R20–R21. These follow DOE guidance adapted to manufactured homes.
- Installation tips: Use an access panel to dense-pack through drill holes and seal with cardboard grommets around wiring. Avoid compressing batts; gaps reduce performance. For exterior foam, use furring strips to create drainage plane if the siding is not removed.
Underbelly and crawl spaces: moisture-first approach
- Recommended: Closed-cell spray foam directly to the underside for small areas, or taped/sealed XPS foam board with a moisture-permeable outer layer for larger DIY retrofits.
- Why: The underbelly is exposed to wind wash, water splash, and cold drafts. Closed-cell spray acts as insulation and an air/moisture barrier; XPS provides a durable, DIY-friendly alternative when taped and sealed correctly.
- R targets: Aim for R-10 to R-20 equivalent under the floor in most climates; higher in cold zones.
- Precautions: Address ground moisture, skirting ventilation, and drainage first; see the practical fixes in fix damp crawl space tips.
Roof and attic: vented vs unvented assemblies
- Recommended: If keeping a vented attic, add blown-in cellulose or fiberglass to achieve ceiling R targets. For retrofits that convert to an unvented (conditioned) attic, use closed-cell spray or continuous rigid foam above the roof deck.
- R targets: Zone 3–4: R-30–R-38 on ceilings; Zone 6+: R-49+.
- Trade-offs: Vented attics require careful baffle placement at eaves and sufficient intake/exhaust ventilation. Unvented assemblies simplify HVAC duct conditioning but require high-quality air barriers and vapor control. Our attic insulation guide explains venting and R targets for different climates.
Floors: options for cold floors and thermal bridging solutions
- Recommended: Insulate floor cavities with faced batts or rigid foam between joists, and insulate the perimeter and skirt with continuous foam to reduce heat loss through the edges.
- R targets: R-13 minimum in mild climates; R-19–R-30 in colder zones.
- Practical detail: For single-wide homes with shallow joists, fit polyiso or XPS under the subfloor where joist depth is insufficient. Seal rim joists carefully with spray or foam board and caulk.
Research into natural fiber alternatives (sheep wool, wood fiber, hemp) shows promising moisture-buffering and ecological benefits; see comparative results at the PubMed Central review (Identifying the most efficient natural fibre...). These can work in walls and ceilings where moisture management is controlled, but cost and availability vary.
DIY installation tips and materials checklist
Preparation and air sealing matter more than adding a few inches of insulation. A poor installation can negate higher R-values.
Air sealing and preparation before insulation
- Seal gaps around plumbing, wiring, and HVAC with low-expansion foam or caulk.
- Insulate and seal ducts — leaky ducts in unconditioned cavities can waste 10–30% of heating energy.
- Repair roof leaks, grade the site away from the skirting, and ensure skirting panels do not trap water.
For airtight membrane installation details, consult air-sealing membranes.
Step-by-step: insulating an underbelly and sidewall
- Inspect and fix moisture: remove wet insulation, grade soil, and repair skirting gaps.
- Air seal seams and penetrations using foam or caulk.
- For underbelly: attach taped XPS panels to the underside, sealing seams with foil tape and mechanical fasteners; for large or complex areas, consider closed-cell spray foam.
- For sidewalls: dense-pack cellulose via drilled holes in the interior or exterior, then patch and finish. Alternatively install batts and add 1" exterior foam with furring for siding.
- Recheck for gaps, seal edges, and reinstall trim.
Tools, PPE, and a shopping checklist
- Tools: Utility knife, caulk gun, tape measure, drill with hole saw, insulation blower (rental), foil tape, construction adhesive, furring strips.
- PPE: NIOSH-approved respirator for cellulose or fiberglass dust, gloves, eye protection. For spray foam, full-face respirator and training or hire a pro.
- Materials checklist: Fiberglass batts, cellulose bags (if blowing), polyiso/XPS boards, low-expansion spray foam, construction adhesive, foil tape, vapor-permeable membrane.
When evaluating spray-foam alternatives or safer DIY options, see our guide to safer spray-foam options. The HUD review of installation standards is a good technical reference for manufactured home installations and recommended practices (A review of manufactured housing installation standards - HUD user).
If work includes structural changes, HVAC replacement, or full underbelly spray foam over large areas, hiring a licensed contractor is often worth the cost. Small DIY retrofits like foam board under the floor or batt replacement are feasible for experienced homeowners.
Moisture control, ventilation, and underbelly solutions
Moisture is the most common failure point in mobile-home insulation projects. Wet insulation loses R and encourages mold.
Diagnosing damp undercarriage and mold risks
- Signs: musty odors, skirting that remains wet after rain, visible mold on insulation or floor joists, rust on metal components.
- Common causes: poor site grading, blocked skirting vents, ponding under the home, plumbing leaks, or vapor drive from warm interior to cold underfloor.
Before insulating, address these with the practical steps in fix damp crawl space tips and the DIY sequence in crawl-space repair steps.
Vapor barriers vs vapor-permeable assemblies
- Closed-cell spray foam provides both insulation and a vapor retarder; it works well under floors where bulk moisture is possible.
- A taped XPS underbelly with sealed seams gives a durable, DIY-friendly barrier but must be combined with moisture management (site grading, skirting).
- In many climates, a vapor-permeable approach (allowing walls to dry to the inside or outside) is preferable—avoid layering impermeable materials on both faces.
Ventilation strategies for older mobile homes
- If the crawlspace will remain ventilated, maintain 1–2% continuous ventilation area and ensure vents are free of debris.
- Consider a conditioned crawlspace: seal vents, insulate and condition the underfloor to reduce humidity and mold if ducts or plumbing are present below the floor.
- Use dehumidifiers in humid climates and ensure skirting allows some airflow without letting critters or high wind wash reach insulation.
EPA guidance on mold prevention and indoor air offers practical notes on moisture control and ventilation strategies; homeowners should follow local health and building guidelines to reduce mold risk.
Cost, energy savings, and simple payback examples
Upgrades vary by scope. Below are conservative sample scenarios with rough costs and payback estimates.
Scenario 1 — Underbelly upgrade on a 14×70 single-wide (980 sq ft floor):
- Option: Tape and seal 1" XPS underbelly panels across 980 sq ft plus fasteners and tape.
- Material cost: ~$0.90–$1.50/sq ft → $900–$1,470 materials.
- DIY labor: 12–24 hours for two people.
- Expected savings: 8–15% on heating bills depending on climate and existing condition.
- Payback: If annual heating bill reduction = $150–$300, payback = 3–10 years.
Scenario 2 — Wall dense-pack + 1" exterior foam on a single-wide:
- Materials: Cellulose dense-pack + polyiso/XPS on exterior → $1,500–$3,500 depending on scope and siding removal.
- Savings: 10–25% on heating/cooling when thermal bridging is significant.
- Payback: 5–12 years at $0.12/kWh or typical gas rates.
Scenario 3 — Full attic blown-in cellulose (R-38 target):
- Materials + blower rental: $400–$900 for a single-wide.
- Savings: 10–20% of HVAC energy depending on prior condition.
- Payback: 2–7 years.
These are simplified estimates; actual savings depend on fuel prices, climate zone, and existing leakage. Retrofitting the underbelly and sealing ducts typically gives the fastest payback for manufactured homes because of high initial leakage and low baseline insulation. Check for local rebates or weatherization programs that can offset costs.
Safety, building code, and fire considerations for mobile-home insulation
Manufactured homes have specific code and fire-safety requirements that differ from site-built houses.
Flammability and flame-spread ratings to watch for
- Many foam boards require a thermal barrier (e.g., 1/2" gypsum) when used on the interior; closed-cell spray foam can require an ignition barrier under certain conditions.
- Check product technical data sheets for flame-spread and smoke-developed indices and follow manufacturer instructions.
Local code and HUD/manufactured-home rules
- HUD standards govern manufactured housing construction and installation in the U.S. Some jurisdictions require permits or limit certain materials for retrofits.
- Before modifying structural systems, insulating exterior walls, or applying spray foam to major areas, contact the local building department for permit requirements and inspection rules.
When to get permits or call a pro
- Get a permit for structural changes, significant electrical work, HVAC replacement, or when local code requires it.
- Hire a licensed spray-foam contractor for whole-unit underbelly application or when controlling vapor and structural adhesion is critical.
Industry guidance from HUD and code bodies helps determine when licensed contractors and inspections are required; always keep product data sheets and installation records for future resale or warranty questions.
The Bottom Line
- Closed-cell spray foam or sealed XPS is best for underbelly work; dense-pack cellulose or batt + continuous rigid foam works best for walls; blown-in attic insulation is the most cost-effective ceiling upgrade.
- Aim for installed R targets by climate (e.g., walls R-13–R20, ceilings R-30–R49) and always pair insulation work with air sealing and moisture fixes.
- Order of operations: eliminate moisture and grade site → air seal ducts and penetrations → insulate underbelly/ceiling → add continuous foam or dense-pack in walls.
Frequently Asked Questions
What is the best R-value for a mobile home?
Target R-values vary by climate. For warm/mild climates aim for wall R-13 and ceiling R-30. For colder climates target wall R-20+ and ceiling R-49+. These are installed R targets and assume some air sealing; actual needs depend on existing construction and heating fuel. See the ceiling and attic recommendations earlier in the article for zone-specific guidance.
Can I add foam board to the exterior of a mobile home?
Yes. Adding 1" of continuous rigid foam (XPS or polyiso) on the exterior reduces thermal bridging and improves overall wall R. If siding must be removed, furring and a drainage plane help prevent moisture traps. Check local codes and manufacturer guidance before altering exterior finishes.
Is spray foam worth it for a mobile home?
Closed-cell spray foam is worth the cost in many cases for the underbelly and rim-joist areas because it provides insulation, air sealing, and moisture control in one step. However, it is expensive and requires proper PPE and application technique; for many DIYers taped XPS or dense-pack cellulose offers a better cost-to-benefit balance. See the safety section and our link to safer spray-foam alternatives for options.
How do I insulate the underbelly without professional help?
A common DIY approach is to attach taped and sealed XPS foam panels across the undercarriage, sealing seams with foil tape and using mechanical fasteners. Begin by addressing drainage and skirting issues. For modest budgets, combine foam board at the perimeter and batt insulation between joists where accessible. Avoid full closed-cell spray foam unless using a licensed applicator.
Will added insulation cause moisture or mold problems?
Added insulation can cause moisture problems if the site drainage, skirting, or ventilation is poor. Always fix bulk water problems and seal air leaks before insulating. Use vapor-permeable assemblies where needed so cavities can dry. In high-moisture areas, closed-cell foam or conditioned crawlspaces are safer choices. Refer to the crawl-space repair and damp-fix guidance earlier in this article.