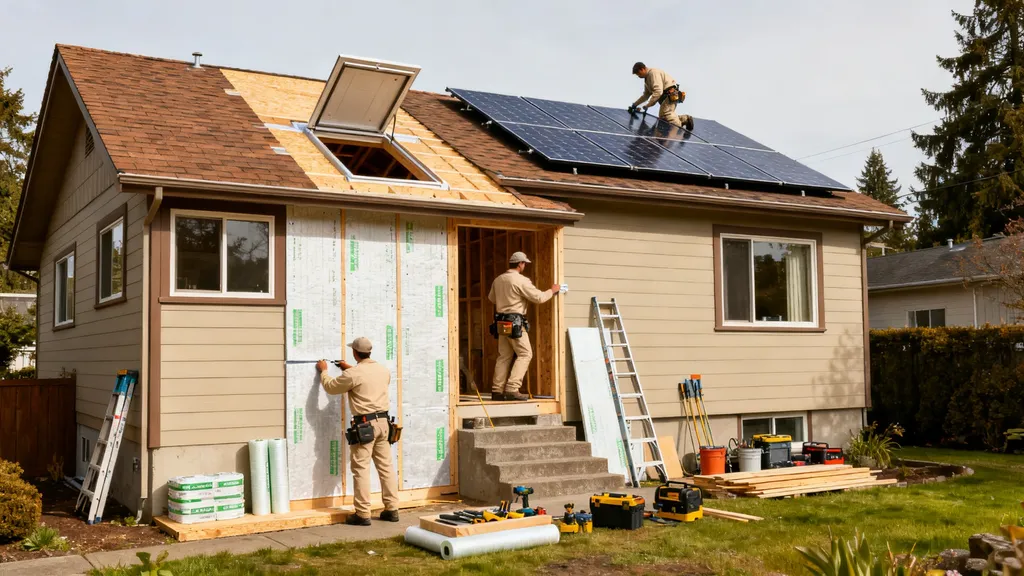
Practical guide for budget-conscious DIYers to plan and phase a net zero retrofit on an existing home — insulation, heat pumps, solar, costs and monitoring.
Net Zero Retrofits: Converting Existing Homes
Many homeowners ask whether a net zero retrofit is possible on an older, budget-conscious house. A net zero retrofit means cutting site energy use sharply through insulation and airtightness, replacing fossil-fuel systems with electric heat pumps, and adding on-site solar (often with storage) so annual energy exports offset remaining use. This guide explains how to scope, phase, and budget a retrofit so a typical suburban or rural house can reach net zero-aligned performance while keeping costs manageable.
For external source context, review Envelope Retrofit Guide: Net-Zero Strategies for Existing Buildings.
TL;DR:
- Start with a home energy audit and target the envelope first (air sealing, attic insulation) to get the biggest performance per dollar.
- Pair airtightening and insulation with balanced ventilation (ERV/HRV), then right-size a heat pump and add solar plus storage when the envelope is improved.
- Phase the work: quick wins first, then deeper wall/duct work and PV; use rebates and tax credits to lower upfront cost.
Why Net Zero Retrofits Matter for Converting Existing Homes
Imagine a homeowner in a 1970s suburban two-story who wants lower bills, fewer cold rooms, and resilience during outages. For most such homes, a net zero retrofit is the fastest path to those outcomes without demolition. Existing housing stock represents the bulk of future building energy use; upgrading those homes avoids the embodied carbon and cost of rebuilding.
Research and practice from institutions like the UK Green Building Council, New Buildings Institute, and university labs show staged retrofits can cut energy use dramatically, and deep retrofits have produced illustrative energy reductions in the 50–80% range in retrofit case studies (this is an illustrative range; outcomes vary by climate and baseline). The co-benefits are real: better moisture control, fewer drafts, improved indoor air quality, and often higher resale value for well-documented upgrades.
Key authorities to consult for retrofit strategy and policy perspective include the UK Green Building Council's net zero retrofit guidance. Their work highlights that early planning, whole-building thinking, and attention to airtightness and moisture management are necessary to avoid unintended consequences during retrofit projects.
Assessing Your Home: Scoping a Net Zero Retrofit
Start with an Energy Audit and Utility-data Review
Gather 12–24 months of utility bills to see seasonal patterns and baseline kWh/gas use. A basic audit lets you estimate which end-uses dominate: space heating, hot water, or plug loads. For many retrofit decisions, the practical step is to convert bills into site kWh and BTUs so you can compare before and after.
A professional audit provides a blower-door test, infrared thermography, and an energy model. If budget limits hiring a pro, start by documenting insulation levels (attic R-value, wall type), testing obvious thermal bridges, and checking existing heating equipment age and capacity.
Diagnostic Tests: Blower Door, Thermal Imaging, Combustion Safety
A blower-door test quantifies air leakage and identifies dominant leak locations when combined with smoke sticks or infrared imaging. Learn more about testing and interpreting results in our blower door testing overview.
Thermal imaging reveals cold spots that indicate missing insulation or thermal bridging. Also run combustion-safety checks for any gas appliances before tightening the envelope; that prevents back-drafting or CO risks.
Setting Retrofit Goals and an Action Priority List
Translate audit findings into measurable goals: target annual site kWh, a percent reduction goal, and an airtightness target (e.g., natural ventilation rate or ACH50 if pursuing Passive House levels). Decide whether the project aims for a shallow upgrade (low cost, high payback) or a deep retrofit (major envelope and system changes). For readers interested in rigorous airtightness targets and Passive House approach, see our passive house retrofit guide.
Prioritize measures by cost-effectiveness:
- Low cost/high impact: attic insulation, attic hatch sealing, rim-joist air sealing, HVAC tune-up.
- Medium cost/impact: wall insulation (where accessible), window repair or secondary glazing.
- Higher cost/deeper impact: external wall insulation, continuous insulation, full mechanical replacement, PV + storage.
Use a simple decision rule: if the attic R-value is below local code (or generally < R-30 in many climates), prioritize attic work first; if ducts run through unconditioned spaces, prioritize duct sealing or move to ducts inside the thermal envelope.
Envelope Upgrades for Net Zero Retrofits (insulation, Air Sealing, Windows)
Attic, Walls, and Under-floor Strategies
The attic is usually the quickest efficiency gain. Typical tasks include adding insulation to reach recommended R-values for your climate, sealing attic bypasses at top plates, and insulating/air-sealing the attic hatch. For homes with vented attics, ensure ventilation remains adequate after adding insulation. For flat roofs or cathedral ceilings, continuous insulation above the roof deck or closed-cell spray foam may be needed—these are more complex and often require a pro.
Wall retrofit options depend on wall type:
- Cavity fill (dense-pack cellulose or foam) for framed walls with adequate access.
- Internal insulation (drywall + insulation) when exterior access is limited.
- External insulated cladding or continuous insulation (rigid foam or mineral wool) when aesthetics and cladding replacement are planned.
Under-floor and rim-joist work prevents heat loss through exposed joists. Rim-joists are easy targets for DIY spray foam or rigid board with sealant.
Air Sealing: Common Leak Locations and DIY Tactics
Common leaks: top plates, junctions between floors, recessed lights, chimneys, plumbing/electrical penetrations, and the attic hatch. A practical checklist:
- Seal attic hatch with gasket and insulated box.
- Caulk and spray-foam penetrations for plumbing and wiring.
- Install foam gaskets behind outlet covers on exterior walls.
- Weatherstrip doors and repair exterior thresholds.
For how-to tips, consult our air-sealing tips. Remember that increased airtightness must be paired with controlled ventilation to maintain indoor air quality.
Windows: Repair, Secondary Glazing, or Replacement
Windows often drive comfort complaints. Low-cost options: weatherstripping, sash repair, and adding interior secondary glazing or insulated curtains. Secondary glazing can deliver much of the comfort benefit at a fraction of full replacement cost. Replace windows when frames are failing, when you want higher-performance glazing (low-E, argon), or when compressive improvements (e.g., external insulation) require new trim.
When replacing windows, choose ENERGY STAR-rated units appropriate to your climate zone. Keep in mind the embodied carbon and cost of replacements versus insulating and sealing first.
Comparison Table: Insulation Options for Retrofit Walls and Attics
| Insulation | Installation complexity | Moisture risk | Embodied carbon note | Best-use cases |
|---|---|---|---|---|
| Spray foam (closed-cell) | High (requires pro for full-depth) | Low when installed correctly; can trap moisture if not detailed | Higher embodied carbon per unit | Rim-joist, irregular cavities, when air barrier and insulation needed together |
| Cellulose (dense-pack) | Medium (dense-pack equipment) | Moderate; breathable, manages moisture well | Lower embodied carbon (recycled paper) | Cavity fills in existing framed walls and attics |
| Fiberglass batts | Low (DIY-friendly) | High if poorly installed; gaps reduce performance | Moderate | New framing or accessible attics with careful installation |
| Mineral wool | Medium | Low to moderate; fire-resistant and breathable | Moderate | Sound control, higher temp tolerance, good for retrofit cavities |
For a deeper comparison of spray foam versus cellulose and practical pros/cons, see our insulation material comparison.
Note on moisture: tighter buildings and added insulation change drying paths. Always coordinate vapor control strategy with local climate guidance and consider adding mechanical ventilation.
Mechanical & Renewable Systems: Heat Pumps, Ventilation, Solar and Storage for Retrofits
Choosing and Sizing Heat Pumps for Retrofit Homes
Right-sizing is key. Oversized units short-cycle; undersized units struggle on cold days. Use audit-based heat load calculations (Manual J or simplified estimates) after envelope improvements because the required heat load will drop as insulation and sealing progress. For retrofit constraints, ductless mini-splits (mini-splits) often avoid costly ductwork changes and are a good fit in older homes. For central systems, a cold-climate air-source heat pump or ground-source system may be appropriate.
For efficiency metrics and how to compare models, consult our heat pump efficiency ratings. Notable manufacturers in the mini-split and heat pump space include Mitsubishi and Daikin; for central VRF or heat-pump systems, Mitsubishi, Daikin, and Fujitsu are common options.
Balancing Ventilation: ERV/HRV and Distribution
When you tighten the envelope significantly, balanced mechanical ventilation with heat recovery becomes essential. Choose an ERV (energy recovery ventilator) in mixed-humidity climates and an HRV (heat recovery ventilator) in very cold/dry climates. Distribution matters: central ERV/HRV with short ducts to bedrooms and living rooms works well, but retrofits with multiple zones may prefer localized solutions.
Commission ventilation after envelope work to ensure designed airflow rates are delivered. Filters and maintenance schedules are part of long-term performance.
Solar PV and Battery Basics for Retrofit Constraints
Solar sizing depends on roof orientation, shading, and structural capacity. Typical retrofit constraints: limited roof area, shading from trees, and older roofs that may need replacement before PV. String inverters from brands like SMA, or microinverters from Enphase, are common choices; microinverters simplify panel-level optimization. For storage, chemistry choices include lithium-ion (e.g., Tesla Powerwall, LG Chem) and newer chemistries; each has different cycle life and depth-of-discharge characteristics.
When pairing with a reduced load thanks to envelope upgrades, you may need fewer panels to reach net annual generation. Consider whether export compensation makes sense for your site; review local rules in our net metering rules.
Safety and permitting: PV interconnection requires an electrician and local permits. Battery installation often requires additional codes (fire separation, disconnects).
Grid Interactions: Net Metering and Export Considerations
Where net metering is available, exporting excess generation can offset consumption. However, rules vary—some utilities limit export or credit at avoided cost. Check local utility tariffs before sizing PV solely to offset peak bills. Our net metering rules summary explains typical programs and how export rates affect PV sizing.
For DIY-capable readers installing mini-splits, see our mini split installation guide for practical notes; refrigerant handling and some electrical tasks still require certified contractors in many jurisdictions.
Costing, Incentives, Phasing, and Project Planning for a Net Zero Retrofit
Estimating Costs and Identifying Cost Drivers
Break budgets into three buckets: envelope work (insulation, windows, air sealing), mechanical systems (heat pumps, ventilation), and renewables (PV and batteries). Major cost drivers include:
- Need to open walls (increases labor and containment costs)
- Roof replacement prior to PV
- Electrical panel upgrades for EV charging or PV
- Access issues (tight sites, scaffolding)
For a deeper look at likely cost ranges and what to expect, consult our cost guide. That guide provides illustrative budgets and clarifies where to expect the biggest expenses.
Available Incentives, Rebates and Financing
Search national and state/provincial incentive databases (DSIRE in the U.S. is a common starting point) for tax credits, point-of-sale rebates, and low-interest loans for heat pumps and insulation. Federal and regional energy-efficiency tax credits often apply to qualified equipment. Utilities also run seasonal rebates for attic insulation, air sealing, and heat pump installations.
Third-party financing and on-bill programs can spread cost over time; compare term, interest, and whether the loan stays with the property at sale.
Recommended Phasing Plan and DIY vs Contractor Split
A practical phasing example:
- Phase 1 (Quick wins, DIY-friendly): attic insulation, attic hatch sealing, rim-joist sealing, duct sealing. These deliver immediate comfort and often high payback.
- Phase 2 (Medium complexity): wall cavity work, window repair or selective replacement, install ERV/HRV, and finalize airtightness. This may need contractors for dense-pack or external insulation.
- Phase 3 (Systems and renewables): install heat pump(s), electrify water heating, add PV and battery, and commission systems.
This DIY video shows you the hands-on process:
When to DIY vs hire pros:
- DIY: air sealing, adding attic insulation (loose-fill), replacing weatherstripping, simple PV racking (where local code and skill allow).
- Hire pros: full wall insulation from the exterior, major electrical upgrades, refrigeration-cycle work on heat pumps, PV interconnection.
Permits and inspections vary by jurisdiction—factor permit costs and time into planning.
Monitoring, Commissioning, and Long-term Performance for Net Zero Retrofits
Basic Commissioning Checklist for Retrofit Projects
Commissioning verifies that the retrofit meets design intent. Key steps:
- Re-run blower-door test after envelope work to confirm targets and locate remaining leaks.
- Balance and verify ventilation flow rates with an anemometer.
- Verify heat pump performance and setpoints; measure operating COP during typical conditions.
- Test PV production and inverter telemetry against expected yields.
Document settings and hand over a simple operating guide for occupants: thermostat schedules, ventilation override controls, and emergency shutoffs.
Setting Up Energy Monitoring and Useful Metrics
Track site kWh, heat pump energy and estimated COP, and PV production with a smart meter or CT-clamp monitor. Useful tools include Sense, Emporia, or open-source monitoring with CT sensors; for PV, inverter portals (Enphase, SolarEdge) provide panel- and string-level data. Our energy monitoring article explains sensor choices and metrics to follow.
Metrics to track:
- Monthly and annual site kWh and exported kWh
- Heat pump seasonal performance (SCOP or measured COP)
- Solar production per kW installed
- Indoor humidity and CO2 where indoor air quality is a concern
Maintenance and Performance Troubleshooting
Routine maintenance keeps systems performing:
- Replace or clean ventilation filters every 3–6 months depending on use.
- Inspect PV modules yearly for debris and shade changes.
- Test battery state-of-health per manufacturer guidance.
Troubleshooting tips:
- If rooms still feel cold after insulation, check for insulated-but-unventilated spaces and thermal bridges.
- Low heat pump COP may indicate refrigerant charge issues or impeding airflow—call a certified technician.
- If airtightness improves but indoor humidity rises, verify ventilation rates and ERV/HRV settings.
Key Points
- Start with data: bills, blower-door results, and attic R-value.
- Sequence work: envelope first, ventilation second, systems and renewables last.
- Monitor performance to validate savings and catch issues early.
- Use available incentives and phase projects to match budget and disruption tolerance.
The Bottom Line
A well-planned net zero retrofit starts with a focused audit, prioritizes high-impact envelope work and air sealing, pairs airtightness with balanced ventilation, and phases heat pump and PV installations to match reduced loads and cashflow. For budget-conscious DIYers: do attic and air-sealing work yourself, hire pros for wall openings and refrigerant/electrical work, and monitor performance to ensure the retrofit delivers the expected energy and comfort gains.
Frequently Asked Questions
How much energy can a typical retrofit save?
Illustrative deep-retrofit case studies report reductions in the 50–80% range for annual energy use, depending on baseline condition and climate; actual savings depend on the scope of envelope upgrades, behavioral changes, and mechanical efficiency. For planning, use audit results to set realistic targets for your home.
What should I tackle first if I have a limited budget?
Focus on low-cost, high-impact measures: attic insulation, attic hatch sealing, rim-joist air sealing, and duct sealing. These typically offer strong comfort and bill-reduction benefits per dollar and reduce the size needed for later heat pump and PV systems.
Can I install a heat pump without replacing ducts?
Yes. Ductless mini-splits let you add efficient electric heating and cooling without major ductwork. They are a common retrofit choice. If you keep ducts, prioritize sealing and insulating ducts in unconditioned spaces to maintain efficiency.
Will tighter homes cause indoor air quality problems?
Tightening the envelope improves comfort but reduces natural ventilation; installing a balanced ERV/HRV and following commissioning steps prevents pollutant buildup and maintains healthy ventilation rates. Verify ventilation during commissioning and maintain filters per schedule.
How do I find incentives for my retrofit?
Search national and regional incentive databases (for example, DSIRE in the U.S.), check utility rebate programs, and review federal tax credits for energy efficiency and clean energy. Include incentive searches in your early budgeting to lower net costs and prioritize eligible measures.