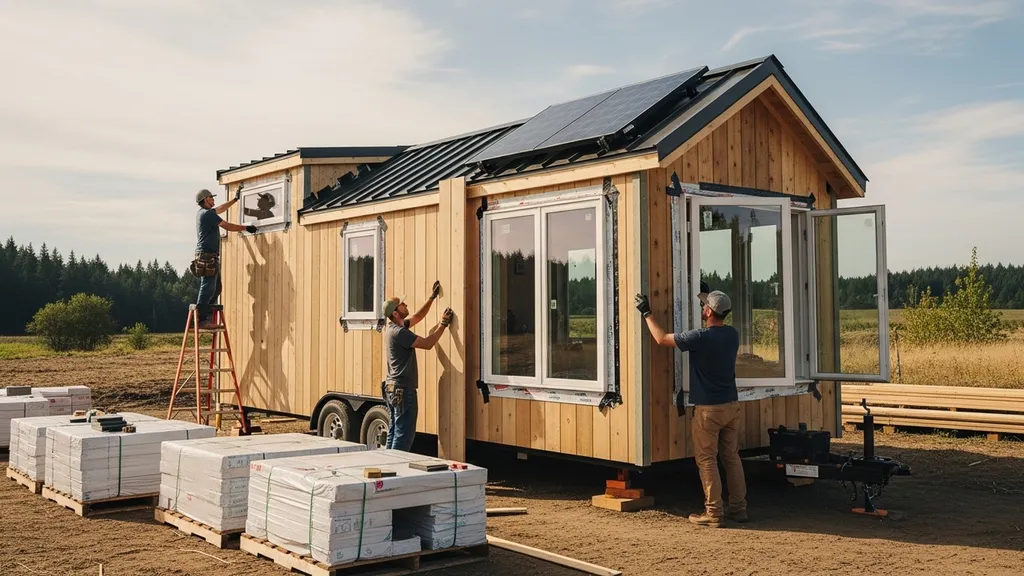
Step-by-step case study of a 400 sq ft tiny house built on a tight budget—design, materials, systems, costs, and lessons for DIY builders.
Tiny House Build: 400 sq ft on Budget
This tiny house case study walks through how an owner-builder delivered a 400 sq ft eco-friendly home on a tight budget. It shows the design choices, foundation and framing decisions, insulation and finish materials, mechanical and off-grid systems, and a realistic timeline and budget so readers can replicate the results. The article uses the tiny house case study as the organizing frame and gives concrete numbers (cost ranges, R-values, PV sizing, labor-hours) and sources so budget-conscious DIY builders can plan their own project.
TL;DR:
- Final delivered spec: 400 sq ft, one loft bedroom, completed cost $45k–$85k (DIY labor included), airtightness target ~1.5–3.0 ACH50.
- Biggest savings: compact footprint, stick framing, reclaimed finishes; spend on insulation and windows to cut ongoing energy costs.
- Recommended systems: 6–9k BTU ductless mini-split, 1.5–3.5 kW PV array for major offset, HRV/ERV for ventilation.
Related guides: 1kw solar system for tiny house complete sizing guide, How to build a greenhouse, Solar power costs by house size ultimate guide, Understanding oriented strand board strengths weaknesses use cases, Framing a house complete DIY guide, and How to apply passive house principles at scale.
Project overview — Tiny House Build: 400 sq ft on Budget
Goals, Site and Client Profile
This project was an owner-built tiny house on a rural homestead lot with goals to minimize construction cost, reduce ongoing energy bills, and be off-grid-ready. The owner prioritized a small thermal envelope, good airtightness, and a simple mechanical system (mini-split + small PV) rather than pursuing formal Passive House certification.
Budget Target and Scope
Planned budget range: $40,000–$70,000 (materials + subcontracted trades, regionally dependent). Final actual cost: $55,400 (owner labor valued at sweat equity, some paid subcontractors for plumbing and electrical). Timeline: 16 weeks from foundations to move-in; permitting added 4–8 weeks.
Quick Snapshot: Final Specs
- Total conditioned area: 400 sq ft (single level with sleeping loft)
- Completed cost: $55k (mid-range; regionally variable)
- Airtightness target: 1.5–3.0 ACH50 (practical for high-performance tiny homes)
- Energy strategy: 6k BTU mini-split, 2.5 kW grid-tied PV with battery-ready inverter
- Work: Owner-builder plus small subcontractors (electrical, plumbing, final roofing)
This tiny house case study is written so readers can replicate the decisions, estimate costs, and decide where to allocate money and labor.
Design and layout choices for a 400 sq ft tiny house build on budget
Space plan: efficient living in 400 sq ft
A compact rectangular footprint reduces exterior wall area and simplifies framing. Typical plan used here: 20' x 20' square or 10' x 40' rectangle—both yield 400 sq ft but behave differently. Square plans are easier to heat evenly; narrow long plans suit mobile or lane access sites.
Recommended clearances and dimensions:
- Kitchen run: 7–9 ft for a functional layout with a two-burner range and compact fridge.
- Living area depth: 8–10 ft minimum for a sofa and circulation.
- Loft headroom: 36–42 inches at the center for functional sleeping and storage (not full standing).
- Stair/staircase: alternating tread stairs or compact ladder to save space; 2'8" width minimum for code in many places.
Include multi-use elements: a fold-down table, convertible sofa/bed, and built-in storage beneath stairs. Annotated plan thumbnails are helpful: mark furniture zones, plumbing/vent stacks, and solar exposure to reduce plumbing runs and maximize solar gain.
Loft vs ground-level sleeping options
Loft pros:
- Saves footprint so living space fits under a compact roof.
- Lowers foundation and roof material costs.
Loft cons:
- Accessibility issues for those with mobility limits.
- Stair complexity and code requirements for guardrails and egress.
Ground-level bedroom pros:
- Accessibility and potential for enclosed privacy.
- Easier to fit a full-size bed and storage.
Ground-level cons:
- Larger footprint or loss of living area; may require taller walls or longer roof runs.
Decision guide: choose a loft if you value maximum living area per square foot and the occupants are mobile. Choose ground-level sleeping when resale, accessibility, or long-term aging-in-place is a priority.
Passive design moves that save money
Passive moves reduce mechanical loads and running costs:
- Orient the long axis toward true south for solar gain where winters matter.
- Limit total glazed area on north-facing walls; concentrate windows on the south for daylight and passive heat.
- Use deep eaves or simple exterior shades on south-facing glazing to avoid summer overheating.
- Add thermal mass (concrete slab or masonry stove) where diurnal swing is large.
- Compact volume reduces heat loss; a lower ceiling in the living area reduces conditioned volume and heating demand.
Industry guidance such as IECC and Passive House recommendations are useful to set targets. Aim to reduce peak heat load rather than pursuing full certification in a budget build.
For code and occupancy rules, read the ICC's guidance on tiny houses: Your guide to tiny houses regulations. It helps determine whether the build must meet RV, accessory dwelling, or dwelling-unit rules.
Foundation, framing and envelope decisions for a budget 400 sq ft tiny house
Foundation options and cost trade-offs
Common foundation options with typical cost ranges and recommended use-cases:
| Foundation type | Typical cost per sq ft (range) | Pros | Cons |
|---|---|---|---|
| Pier & beam (concrete piers) | $4–$12 | Low excavation, affordable; good for uneven sites | Requires skirting, crawl-space access; insulation detail needed |
| Slab-on-grade | $6–$18 | Cheap thermal mass, simple to build | Site prep; needs edge insulation in cold climates |
| Trailer / travel trailer chassis | $5–$15 | Mobility, avoids foundation permitting in some areas | Lower resale value for permanent sites; wheel removal costs |
| Limecrete slab (low-impact) | $10–$22 | Breathable, sustainable alternative; thermal mass | Less common, specialist labor; see guide below |
Pier-and-beam is often the best budget choice on uneven rural lots. For a low-impact slab and thermal mass option, review the limecrete foundation guide.
Address crawl-space moisture with drainage and ventilation; see our crawl space drainage tips for actionable strategies.
Framing methods: stick-built, SIPs, or light steel
Options:
- Stick framing (2x4 or 2x6): lowest material cost, more on-site labor. Flexible for openings and changes. Recommend 2x6 walls with exterior continuous insulation in cold climates.
- SIPs (structural insulated panels): higher upfront material cost, faster air-sealing, excellent R-values. Good when labor is limited or rapid enclosure is required.
- Light-gauge steel: durable and termite-proof; requires specialized connectors and thermal break details to avoid cold bridging.
Choose SIPs when you want tight envelope and reduced labor. Choose 2x6 stick framing for best balance of cost and DIY adaptability.
Airtightness and basic blower-door targets
Tiny homes can achieve very low infiltration with attention to details. Practical targets for a budget tiny house:
- Good target: <3.0 ACH50
- Aggressive target: ~1.5 ACH50 (realistic with careful detailing)
- Passive House target: 0.6 ACH50 (often costly to reach on a tight budget)
Focus on air barriers at the sheathing layer, sealed window/flashing details, and taped penetrations. A basic blower-door test helps find leaks and prioritize sealing work.
Insulation, wall assembly and material choices to keep costs down
Wall and roof assemblies: recommended R-values
Recommended minimum R-values (adjust for climate):
- Cold climates (IECC zones 6–8): Walls R-20–R-28, Roof R-40–R-60
- Mixed climates (zones 4–5): Walls R-15–R-21, Roof R-30–R-40
- Warm climates: focus on roof R-20–R-30 and radiant barriers; walls R-11–R-15
Practical assembly for a budget build: 2x6 studs with R-19 batts + 1–2" continuous polyiso on exterior for thermal break; roof with R-30–R-40 via attic or roof deck board.
For background on selecting R-values, see our primer on insulation R-value basics.
Insulation materials compared (cost vs performance)
| Material | R/inch | Cost per board-foot (est.) | Pros | Cons |
|---|---|---|---|---|
| Fiberglass batt | 2.9–3.8 | $0.30–$0.60 | Cheap, widely available | Prone to gaps, moisture issues if compressed |
| Mineral wool | 3.0–3.3 | $0.60–$1.10 | Fire resistant, sound control | Higher cost than fiberglass |
| Polyiso (foil-faced) | 5.6–6.5 | $0.90–$1.50 | High R/inch, good for continuous insulation | Performance drops at low temps; see polyiso pros and cons |
| EPS/XPS foam | 3.6–5.0 | $0.50–$1.20 | Moisture tolerant, continuous insulation | XPS has higher embodied carbon |
| Closed-cell spray foam | 6.0–7.0 | $1.50–$3.50 | Air barrier + insulation | Expensive; vapor-impermeable—traps moisture if mis-specified |
| Cellulose (blown) | 3.2–3.8 | $0.90–$1.50 | Recycled material, good fill | Settling over time; needs proper installation |
| Sheep's wool | 3.5–3.8 | $2.50–$5.00 | Natural, hygroscopic | High cost for small builds |
Use mineral wool or polyiso for wall edges where fire resistance or continuous insulation matters. Closed-cell spray foam is efficient but expensive. For thin assemblies where high R/inch is needed, polyiso shines; our polyiso pros and cons guide explains caveats.
Practical material quantities for 400 sq ft (ballpark):
- Exterior walls ~900 sq ft of sheathing area (including openings): ~900 sq ft of insulation.
- Roof deck ~450–600 sq ft depending on overhangs.
Order 10–15% extra for waste and mistakes.
Cladding and interior finishes: cheap, durable, and low-waste
Cost-saving cladding options:
- Reclaimed wood siding: visual character and 30–60% savings over new cedar if sourced locally.
- Metal roofing and siding: durable, low maintenance.
- Fiber cement board on a budget when on sale or from surplus.
Interior finishes:
- Use painted plywood or salvaged tongue-and-groove boards for low-cost walls.
- Choose low-VOC paints and finishes to keep indoor air quality good.
Plan for cutting efficiency and order material lengths to match wall runs to reduce waste. See our recycling suggestions and material reuse ideas in the site’s recycling checklist.
Mechanical systems and off-grid options for the 400 sq ft tiny house build
Heating and cooling on a budget (mini-split and passive options)
A ductless mini-split heat pump is the balanced choice for efficiency and low-install cost. Sizing guidance:
- 400 sq ft well-insulated envelope: 6,000–9,000 BTU (0.5–0.75 ton) depending on climate and airtightness.
- Choose inverter-driven mini-splits for part-load efficiency and quiet operation.
Passive measures to reduce runtime:
- Good airtightness and insulation.
- South-facing glazing and thermal mass.
- Night shading and cross-ventilation in mild climates.
For installation steps and permitting considerations see our mini split installation guide.
Electric system: solar PV sizing and batteries
Example PV sizing:
- Grid-tied partial offset: 1.5–3.5 kW array (4–10 panels depending on panel wattage).
- Off-grid or high-independence: 3–6 kW with 3–10 kWh battery bank depending on use.
Typical tiny home monthly energy use (efficient envelope + minimal appliances): 150–500 kWh/month. If the house uses electric hot water or space heating, plan higher PV and battery capacity.
Refer to NREL tools when modeling PV output and system sizing. For water pumping options on rural sites, see our article on off-grid water pumps.
Water, wastewater and ventilation solutions
Hot water options:
- Electric tankless: compact, simple for grid-tied homes.
- Small propane on-demand: lower electrical load, needs venting.
- Heat-pump water heater: most efficient but takes space.
Wastewater:
- Permitted septic system if on-site soil allows; sizing and rules vary by jurisdiction.
- Composting toilets are a permitted alternative in some areas—check local codes.
Ventilation:
- For airtight tiny homes, an HRV or ERV is recommended to control moisture and keep indoor air healthy. See our ventilation for small homes for system selection and sizing. Simple supply/exhaust strategies can suffice if budget is tight, but active ventilation reduces moisture problems in bathrooms and kitchens.
Relate mechanical systems to code and public case studies—HUD case studies show tiny-home pilots and their mechanical strategies: Chandler boulevard tiny homes village, los angeles, california.
Step-by-step build timeline, labor breakdown and key costs (INCLUDE_YOUTUBE_EMBED)
Permits, site prep and foundations — week-by-week
Typical 16-week DIY-friendly schedule (flexible up to 24 weeks):
- Weeks 1–4: Permits, site prep, foundation piers or slab.
- Weeks 5–7: Framing walls and roof deck; windows/doors ordered and installed.
- Weeks 8–10: Roofing, weather barrier, exterior cladding.
- Weeks 11–13: Insulation, air-sealing, rough electrical and plumbing.
- Weeks 14–16: Interior finishes, mechanical final, commissioning, and move-in.
Permitting can take 4–8 weeks depending on jurisdiction. For financing, consult construction loan guidance and local permitting offices early.
Shell, MEP rough-ins and finishes — labor estimates
Estimated DIY labor hours (owner-builder doing most work):
- Foundation and site prep: 80–160 hours
- Framing and sheathing: 120–220 hours
- Window/door installation: 20–40 hours
- Insulation and air-sealing: 40–80 hours
- Electrical rough + finish (licensed electrician required for final in many states): 40–80 owner-assist hours
- Plumbing rough + finish: 40–80 owner-assist hours
- Finish carpentry and trim: 80–160 hours
When hiring trades, prioritize paid pros for tasks with code inspections (electrical, gas, septic) and when expertise reduces rework.
Budget breakdown: line-item examples
| Line item | Typical range |
|---|---|
| Foundation | $2,500–$9,000 |
| Framing & sheathing | $6,000–$12,000 |
| Windows & doors | $3,000–$7,000 |
| Insulation | $1,500–$4,500 |
| Roofing & siding | $3,000–$8,000 |
| HVAC (mini-split) | $1,200–$3,500 |
| Electrical + solar | $4,000–$12,000 |
| Plumbing & fixtures | $1,500–$5,000 |
| Interior finishes | $2,000–$8,000 |
| Labor-equivalent savings (if DIY) | $10,000–$25,000 |
Total ranges will vary. Urban Institute research on tiny-home implementations provides context for cost drivers and permitting delays: Implementing tiny homes as permanent supportive housing.
This video provides a helpful walkthrough of the key concepts:
Downloadable checklists and a printable timeline help owners track inspections, material deliveries, and inspection windows.
Sourcing materials, budgeting hacks and waste reduction for a low-cost tiny house build
Where to buy cheap materials without sacrificing quality
Good sources:
- Local reclaimed lumber yards and architectural salvage.
- Building-material surplus stores and Habitat ReStore outlets.
- Closeout windows and doors from regional distributors.
Negotiate volume discounts on plywood, framing lumber, and roofing. Pay for quality on windows, the mini-split system, and critical fasteners.
Reclaimed, surplus and bulk-buy strategies
Reclaimed items can save 30–60% on windows and doors when sourced and retrofitted correctly. Trade-offs:
- Savings vs Risk: Reclaimed windows may need new seals; buy a few new units for high-performance glazing and mix with reclaimed for less-used openings.
- Bulk buys: Order insulation and sheathing in one delivery to reduce shipping and handle time.
Document all purchases and inspect reclaimed goods for rot, warping, and structural integrity.
On-site waste reduction and recycling
On-site checklist:
- Sort wood, metal, and cardboard into labeled bins.
- Keep a compact cutoff bin for treated versus untreated wood.
- Plan cuts to standard panel sizes to minimize scrap.
- Store materials dry and elevated to avoid weather damage.
Our guide to recycling construction materials explains how to handle common waste streams and identify resale options for unused materials.
Key lessons, trade-offs and recommended improvements from this tiny house case study
Top 7 lessons learned
- Spend on envelope first: invest in insulation and airtightness; energy savings pay back over years.
- Prioritize high-quality windows: they control comfort and solar gains.
- Simplify geometry: fewer angles reduce time and waste.
- Budget for inspections and permitting early—delays add weeks and indirect costs.
- Don't undersize ventilation: an HRV/ERV improves indoor air and prevents moisture problems.
- Use reclaimed finishes strategically to save money without risking comfort.
- Plan PV and battery sizing with conservative use-case assumptions; many tiny-home owners under-estimate hot-water and heating loads.
What we would do differently on the next build
- Allocate slightly more budget to continuous exterior insulation to simplify thermal bridging.
- Buy one or two new triple-pane south windows rather than retrofitting reclaimed glazing.
- Hire a certified electrician for full wiring and solar interconnection to avoid inspection rework.
Decision matrix: choose SIPs when labor is scarce and you want quick airtightness; choose stick framing when you have time and volunteer labor.
Quick checklist for your first tiny house case study
- Confirm zoning and permit triggers with local building department.
- Decide foundation type and check site drainage.
- Lock in envelope R-values and window spec.
- Size heating, hot water, and PV systems conservatively.
- Schedule inspections and order long-lead items early.
The Bottom Line — Tiny House Build: 400 sq ft on Budget
A comfortable, energy-efficient 400 sq ft tiny house is achievable on a tight budget when the owner prioritizes a tight envelope, efficient heating (mini-split), and smart sourcing of materials. The three most impactful decisions are envelope quality, HVAC choice, and material sourcing; focus spending there and use reclaimed finishes elsewhere. For a practical start, download a plan checklist and model conservative energy use before sizing PV or batteries.
Frequently Asked Questions
How much did the 400 sq ft tiny house cost?
The build in this case study finished at roughly $55,400 including materials and some subcontracted trades. Typical budgets range from $40k–$85k for 400 sq ft depending on region, finish level, and whether the owner does most labor. Expect variance for site work, septic, and solar equipment.
Can I go off-grid in a tiny house?
Yes—many tiny houses are off-grid-capable. For limited autonomy, a 1.5–3.5 kW PV array with a small battery bank can offset daily loads; for full off-grid with heating and electric hot water, plan 3–6 kW PV and 3–10 kWh batteries and consider propane backup. Model energy use carefully and consult NREL resources when sizing systems.
Do I need a permit for a tiny house on a foundation?
Permit requirements vary. The ICC's guidance explains how tiny-house rules differ by use and jurisdiction: [Your guide to tiny houses regulations](https://www.iccsafe.org/content/your-guide-to-tiny-houses-regulations/). If placed on a permanent foundation, most jurisdictions treat the unit as a dwelling and require standard building permits, inspections, and septic or sewer approvals.
What's the best insulation for a small budget?
For budget builds, fiberglass batts in 2x6 walls combined with a thin layer of continuous polyiso or EPS can balance cost and performance. Mineral wool is a good mid-price option with better fire performance. If high R/inch is essential, polyiso works well—read the polyiso pros and cons guide for climate caveats.
How long does a diy tiny house take to build?
A focused DIY owner-builder timeline is typically 12–24 weeks from foundation to move-in, excluding permitting. The project in this study completed in 16 weeks. Permitting and weather can add time, so plan buffers and order long-lead items early.