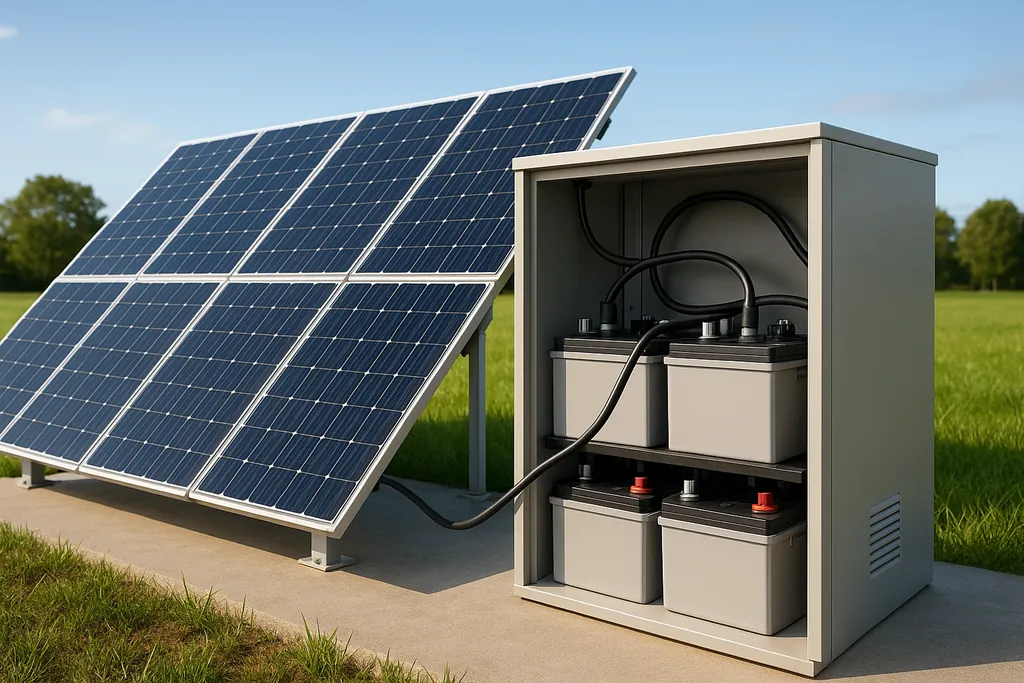
Learn how to effectively match solar panel and battery voltages to maximize efficiency and protect your solar power system.
How to Match Solar Panel Voltage and Battery Voltage
Want to get the most out of your solar power system? Start by matching your solar panel and battery voltages. Mismatched voltages can lead to wasted energy, damaged equipment, and reduced efficiency. Here's a quick breakdown of what you need to know:
- Battery Voltage Needs: Match your solar panel's open-circuit voltage (VOC) to your battery's nominal voltage. For example:
- 12V battery: Panels with VOC of 16.8–21.6V
- 24V battery: Panels with VOC of 33.6–43.2V
- 48V battery: Panels with VOC of 67.2–86.4V
- Solar Panel Specs: Check the VOC and maximum power voltage (VMP) to ensure compatibility with your battery and charge controller.
- Charge Controllers: Choose wisely:
- PWM controllers require panels to match battery voltage closely.
- MPPT controllers handle higher voltages and boost efficiency (90%+).
- Wiring Methods:
- Series wiring increases voltage for larger systems.
- Parallel wiring increases current for faster charging.
- Mixed wiring balances voltage and current for complex setups.
- Safety Tips: Regularly monitor voltage, avoid overvoltage/undervoltage, and use tools like multimeters and battery management systems (BMS).
Quick Comparison of Charge Controllers:
| Controller Type | Voltage Matching | Efficiency | Cost | Best For |
|---|---|---|---|---|
| PWM | Must match battery | Lower (60%-70%) | $20–$60 | Small systems |
| MPPT | Flexible voltage | Higher (90%+) | $100–$729 | Larger systems |
Proper voltage matching ensures efficient energy transfer, protects your equipment, and extends the lifespan of your system. Ready to dive deeper? Let's explore how to design a system that works perfectly.
Can you charge a 24V battery with a 20V solar panel and PWM charge controller?
Voltage Basics You Need to Know
Understanding voltage is key to ensuring your solar system runs smoothly and efficiently. Two important concepts to grasp are the difference between nominal and actual voltage, and the critical voltage measurements that influence system performance. Let's break these down to help you design a reliable and effective solar setup.
Nominal Voltage vs. Actual Voltage
Nominal voltage is essentially a standardized label manufacturers use to match system components. Actual voltage, on the other hand, fluctuates based on factors like sunlight and temperature.
For instance, a 12V nominal solar panel typically generates about 17VDC in full sunlight, while a fully charged 12V battery might show around 14.4V on a voltmeter [[5]](https://www.altestore.com/pages/the-big-4-demystifying-voltages). These differences highlight why both nominal and actual voltage need to be considered when designing your system.
| Nominal Voltage | VOC – Typical | VMP – Typical | Number of Cells in Series |
|---|---|---|---|
| 12V | 21V | 17V | 36 |
| 18V | 30V | 24V | 48 |
| 18V | 33V | 26V | 54 |
| 20V | 36V | 29V | 60 |
| 24V | 42V | 35V | 72 |
Open-Circuit Voltage (VOC) and Maximum Power Voltage (VMP)
When pairing solar panels with batteries and charge controllers, two voltage measurements are particularly important: Open-Circuit Voltage (VOC) and Maximum Power Voltage (VMP).
VOC represents the highest voltage a solar panel can produce when it's not connected to a load. To prevent damage, make sure the VOC (with a 3.5% safety margin) stays within your charge controller's voltage limit [[6]](https://www.solar4rvs.com.au/buying/buyer-guides/guide-to-understanding-solar-panel-specifications).
VMP, on the other hand, is the voltage at which the panel delivers its maximum power under standard test conditions. Typically, VMP is about 70% to 80% of the VOC. For example, a panel with a VOC of 30V will usually have a VMP between 21V and 24V [[3]](https://www.electronicsforu.com/market-verticals/solar/difference-nominal-voltage-voc-vmp-isc-imp-solar-panels). However, VMP isn't constant - it can fluctuate throughout the day due to temperature changes, shading, or debris on the panel. MPPT charge controllers are designed to adapt to these changes, ensuring the system operates at peak efficiency.
To properly charge batteries, the solar panel voltage must exceed the battery's working voltage by 20–30%. For example, a 12V deep cycle battery requires around 14–15V to fully charge, while a 12V solar panel typically produces 16–20V [[4]](https://www.jackery.com/blogs/knowledge/solar-panel-voltage). Balancing these voltage levels is crucial. Too little voltage can undercharge the battery, while too much can cause damage. By understanding these voltage relationships, you can build a system that's not only efficient but also safe and reliable.
How to Match Solar Panel and Battery Voltage
Let's dive into how to align solar panels and batteries for optimal performance by ensuring their voltages are compatible.
Step 1: Determine Your Battery Voltage Needs
Start by identifying the nominal voltage of your battery bank. Most residential solar setups use 12V, 24V, or 48V battery systems. To charge your batteries efficiently and protect them from overvoltage, design your system so the panel's Voltage Open Circuit (VOC) is 1.4 to 1.8 times greater than the battery's nominal voltage[[8]](https://suvastika.com/how-to-match-the-solar-panel-voltages-and-battery-voltage-in-solar-hybrid-pcu)[[1]](http://www.colemanair.us/vp_asp/scripts/articles/TheBasicsAndBeyond8_SolarPanels.htm).
Here's a quick guide for VOC ranges based on common battery systems:
| Battery System | VOC Range Needed | Ideal for Cold Areas | Ideal for Hot Areas/Long Runs |
|---|---|---|---|
| 12V | 16.8V – 21.6V | ~18V | 20V – 21.5V |
| 24V | 33.6V – 43.2V | ~36V | 40V – 41V |
| 48V | 67.2V – 86.4V | ~72V | 80V – 82V |
In colder climates, panels tend to produce higher voltages, so opt for a VOC closer to the lower end of the range. Conversely, in hot areas or when dealing with long cable runs, a higher VOC is better to counteract voltage drops and heat-related efficiency losses.
Once you've pinned down your battery voltage, the next step is to verify your solar panel specifications.
Step 2: Review Solar Panel Voltage Specs
To match your solar panels to your battery, check the panel's specifications for two key voltage metrics:
- Voltage Open Circuit (VOC): This is the maximum voltage the panel can generate when it's not under load.
- Voltage at Maximum Power (VMP): This is the voltage at which the panel delivers its peak power when connected to a load.
For example, a typical 150W solar panel designed for 12V systems might have a VOC of around 22V and a VMP of roughly 18V[[8]](https://suvastika.com/how-to-match-the-solar-panel-voltages-and-battery-voltage-in-solar-hybrid-pcu)[[7]](https://diysolarforum.com/threads/voltage-change-from-panels-to-batteries.23722). Many 12V panels use 36 cells to achieve this output.
Keep in mind that temperature affects panel voltage. Cold weather can increase the VOC beyond its rated value, while hot weather reduces it. Selecting the right panel for your local conditions is crucial. Panels with a VOC significantly higher than your battery voltage can waste energy and generate excess heat in the charge controller. On the other hand, a VOC that's too low can lead to inefficiencies like cable losses and slower charging[[8]](https://suvastika.com/how-to-match-the-solar-panel-voltages-and-battery-voltage-in-solar-hybrid-pcu).
Step 3: Select the Right Charge Controller
Once you've matched your voltage ratings, the final step is choosing a charge controller that bridges the gap between your panels and batteries. There are two main types:
- PWM (Pulse Width Modulation) Controllers: These require the solar panel voltage to closely match the battery voltage. They are simpler and cheaper but limit your panel options[[9]](https://www.morningstarcorp.com/faq/what-are-the-different-types-of-solar-charge-controllers).
- MPPT (Maximum Power Point Tracking) Controllers: These are more versatile. They can handle higher solar panel voltages and convert the extra voltage into additional charging current, improving energy efficiency.
Here's a comparison of the two:
| Controller Type | Voltage Matching Requirement | Efficiency | Cost Range | Best For |
|---|---|---|---|---|
| PWM | Must closely match battery voltage | Lower | $20 – $60 | Small systems, warm climates |
| MPPT | Can handle higher panel voltages | 90%+ efficiency | $100 – $729 | Larger systems or mismatched voltages |
> _PWM controllers require the solar panel voltage to align closely with the battery voltage, which limits panel compatibility._
> _MPPT controllers, however, operate at higher array voltages and can boost energy output by 5% to 30%, depending on climate conditions._
For DIY solar setups, MPPT controllers are often worth the higher upfront cost. They offer the flexibility to choose panels based on factors like price, availability, and performance, rather than being restricted by battery voltage. Plus, their efficiency increases as the voltage difference between the panels and batteries grows, making them ideal for systems where direct voltage matching isn't practical[[8]](https://suvastika.com/how-to-match-the-solar-panel-voltages-and-battery-voltage-in-solar-hybrid-pcu).
Wiring Methods for Voltage Control
Once your voltage specifications are set, the next step is to wire your solar panels correctly to manage voltage and current. How you connect your panels significantly impacts the system's performance. By understanding three key wiring methods, you can adjust your setup to match battery voltage requirements while staying within the limits of your charge controller.
Series Wiring for Higher Voltage
Series wiring connects solar panels end-to-end to increase voltage while keeping the current the same. This is done by linking the positive terminal of one panel to the negative terminal of the next. It's a great option when you need higher voltage to power larger battery banks or to meet inverter requirements.
For example, connecting two panels rated at 40 volts and 5 amps each in series results in a total of 80 volts while maintaining 5 amps[[10]](https://www.solarreviews.com/blog/do-you-wire-solar-panels-series-or-parallel). This configuration pairs well with MPPT charge controllers, which are designed to handle higher voltage inputs. For instance, Renogy MPPT Controllers can accept up to 100 volts of input[[11]](https://www.renogy.com/learn-series-and-parallel), and many string inverters operate within a voltage range of 300 to 500 volts[[10]](https://www.solarreviews.com/blog/do-you-wire-solar-panels-series-or-parallel). This makes series wiring especially useful for grid-tied systems.
However, there's a downside: series wiring is highly sensitive to shading. If one panel becomes shaded or fails, the performance of the entire string is affected. This method works best in areas with consistent, unshaded sunlight. If shading is a concern, you might want to consider a different wiring approach.
Parallel Wiring for Higher Current
Parallel wiring connects all positive terminals together and all negative terminals together, keeping the system voltage the same as a single panel while combining the current from each panel[[13]](https://www.alternative-energy-tutorials.com/solar-power/parallel-connected-solar-panels.html). For example, wiring two identical panels in parallel doubles the current output but keeps the voltage unchanged[[13]](https://www.alternative-energy-tutorials.com/solar-power/parallel-connected-solar-panels.html).
One major advantage of parallel wiring is that each panel operates independently. If one panel is shaded or malfunctions, the others can continue to perform at full capacity[[14]](https://lithiumhub.com/solar-panels-in-series-or-parallel-which-is-best-for-your-setup). This makes it a great choice for systems where shading is unavoidable or for setups requiring higher current, like 12V battery systems that benefit from faster charging.
That said, parallel wiring requires thicker cables to handle the increased current safely[[14]](https://lithiumhub.com/solar-panels-in-series-or-parallel-which-is-best-for-your-setup). Larger installations may also involve more complex components, such as branch connectors or combiner boxes[[14]](https://lithiumhub.com/solar-panels-in-series-or-parallel-which-is-best-for-your-setup). Additionally, all panels in a parallel setup must have the same voltage rating to avoid power losses[[13]](https://www.alternative-energy-tutorials.com/solar-power/parallel-connected-solar-panels.html).
Mixed Wiring for Complex Systems
Series-parallel wiring combines the benefits of both methods, offering precise control over voltage and current. This configuration is particularly useful for larger systems that need to stay within the voltage and amperage limits of a charge controller while maximizing overall power output.
For instance, using a Renogy 40 Amp MPPT Controller, which supports up to 800 watts and a maximum input of 100 volts, you could set up two strings of four panels each. If each panel has an open-circuit voltage of 22.5V, each string would produce 90 volts. Connecting these strings in parallel would keep the voltage at 90 volts while doubling the current to 10.58 amps[[11]](https://www.renogy.com/learn-series-and-parallel).
When designing a series-parallel system, it's crucial to balance your configuration. For example, if you have eight panels, create two equal strings of four panels each. Unequal string lengths can lead to power losses and reduced efficiency. For complex systems, especially those with varying roof orientations or shading patterns, consider connecting separate strings to different MPPT inputs on your inverter (if available)[[12]](https://aurorasolar.com/blog/solar-panel-wiring-basics-an-intro-to-how-to-string-solar-panels). This allows each string to operate at its optimal power point independently. Always verify voltage and current with a multimeter after installation to ensure everything is functioning properly[[15]](https://a1solarstore.com/blog/series-parallel-combo-how-to-connect-solar-panels-together.html).
Fixing Problems and Best Practices
Even the most carefully designed systems can experience voltage issues that impact performance or even lead to equipment damage. The trick is knowing what to look out for and using the right tools to keep your system running smoothly.
Avoiding Overvoltage and Undervoltage Problems
Overvoltage occurs when your system's voltage exceeds safe levels - often because solar panels are producing more power than the system can handle. According to a study by UNSW, over 53% of 12,000 monitored homes experienced power overvoltage problems. For homes severely affected, overvoltage cut-outs led to annual losses ranging from $225 to $900 [[16]](https://danthesolarman.com.au/overvoltage-is-impacting-your-solar-systems).
In colder climates, you may need to adjust voltage settings to account for increased output from solar panels during lower temperatures.
Undervoltage, on the other hand, happens when grid voltage falls below the minimum threshold your inverter requires to operate. This often occurs during times of high demand on the grid [[18]](https://www.quora.com/Why-is-a-solar-panel-inverter-getting-a-grid-undervoltage-problem). Both overvoltage and undervoltage can cause inverters to shut down, ultimately reducing your system's energy production.
Here's how to address these issues:
To Prevent Overvoltage:
- Use a 3-phase inverter to distribute current more effectively and reduce voltage stress [[16]](https://danthesolarman.com.au/overvoltage-is-impacting-your-solar-systems).
- Adjust your inverter's voltage settings to remain within acceptable limits.
- Install surge protection devices to manage sudden voltage spikes [[17]](https://www.felicityess.com/troubleshooting-guide-for-solar-inverter-system-ac-overvoltage).
- Select an inverter that can handle the maximum energy output of your system [[17]](https://www.felicityess.com/troubleshooting-guide-for-solar-inverter-system-ac-overvoltage).
To Prevent Undervoltage:
- Ensure your inverter settings are correctly configured to match grid voltage thresholds [[18]](https://www.quora.com/Why-is-a-solar-panel-inverter-getting-a-grid-undervoltage-problem).
- Check and tighten wiring connections to avoid unnecessary voltage drops [[18]](https://www.quora.com/Why-is-a-solar-panel-inverter-getting-a-grid-undervoltage-problem).
- Regularly monitor grid voltage using a multimeter to identify potential issues [[18]](https://www.quora.com/Why-is-a-solar-panel-inverter-getting-a-grid-undervoltage-problem).
Make it a habit to inspect wiring and voltage monthly, addressing any issues as they arise. Establishing clear safety margins and using reliable monitoring tools can help you catch and resolve problems before they escalate.
Safety Margins and Monitoring Tools
In addition to proper voltage adjustments, incorporating safety margins and monitoring tools is essential to maintaining system reliability. When calculating the maximum current for your charge controller, always add a 25% safety margin to account for changes in sunlight intensity, temperature shifts, and occasional current surges [[19]](https://www.solarctrl.com/blog/size-solar-charge-controller). For example, if you're working with a 1,000-watt solar array and a 24-volt battery bank, your charge controller should handle at least 52 amps: (1,000W ÷ 24V) × 1.25 ≈ 52A [[19]](https://www.solarctrl.com/blog/size-solar-charge-controller). To further ensure safety, reduce component ratings by 10–20%. For instance, if your solar panels have a maximum open-circuit voltage of 120V, opt for a charge controller rated around 150V.
Key Monitoring Tools:
- A reliable multimeter, like a professional-grade Fluke model, is essential for checking voltage, current, and continuity during installation and troubleshooting. For precise measurements of high voltages, consider tools like the Fluke 283 FC CAT III 1500V Digital Multimeter (~$629.00) or the Fluke 393 FC Solar Clamp Meter (~$799.99) [[23]](https://www.fluke.com/en-us/products/electrical-testing/best-solar-energy-industry-tools).
- Battery Management Systems (BMS) provide real-time data on voltage, current, temperature, and state of charge. Modern lithium-ion batteries often include built-in BMS units with Bluetooth or WiFi connectivity. Popular options include the Victron Energy Smart Battery Monitor and KiloVault's HLX (Bluetooth) and HAB (WiFi) models [[21]](https://www.streetlights-solar.com/best-practices-for-solar-battery-longevity.html)[[22]](https://www.altestore.com/blogs/articles/monitor-solar-batteries-the-ultimate-guide).
- Solar monitoring systems let you track your system's performance remotely using mobile apps or web-based platforms. These systems can alert you to potential voltage issues before they cause significant problems [[22]](https://www.altestore.com/blogs/articles/monitor-solar-batteries-the-ultimate-guide).
| Monitoring Type | Best For | Key Features |
|---|---|---|
| Multimeter Testing | Installation & troubleshooting | Precise voltage and current readings |
| BMS Monitoring | Battery health tracking | Real-time, cell-level voltage monitoring |
| Inverter-Based Monitoring | Overall system performance | Solar production and battery status |
| Shunt-Based Monitoring | Current flow tracking | Accurate charge/discharge data |
To extend the life of your equipment, install charge controllers and inverters in cool, well-ventilated spaces to prevent overheating. Overheating can not only reduce efficiency but also shorten the lifespan of your components [[19]](https://www.solarctrl.com/blog/size-solar-charge-controller). Additionally, tighten all electrical connections monthly to ensure stable voltage levels [[20]](https://igrowattinverter.com/solar-panel-fluctuation). By combining these practices with robust monitoring, you can keep your system running efficiently and avoid costly disruptions.
Conclusion
Matching your solar panel and battery voltages correctly is the cornerstone of an efficient solar power system. The process starts with understanding your battery's voltage needs, reviewing your solar panel specifications, and choosing the right charge controller to connect everything seamlessly.
For optimal performance, ensure your solar panel's open-circuit voltage (VOC) falls between 1.4 and 1.8 times your battery's nominal voltage [[1]](http://www.colemanair.us/vp_asp/scripts/articles/TheBasicsAndBeyond8_SolarPanels.htm). For example, a 12V battery system works best with panels that have a VOC between 16.8V and 21.6V, while a 24V system requires panels with a VOC between 33.6V and 43.2V [[1]](http://www.colemanair.us/vp_asp/scripts/articles/TheBasicsAndBeyond8_SolarPanels.htm). Choosing the right charge controller is equally important. MPPT controllers are generally more efficient than PWM controllers, especially when the panel voltage is significantly higher than the battery voltage [[2]](https://8msolar.com/how-do-i-know-if-my-solar-panels-are-compatible-with-battery-storage).
Your wiring configuration also plays a key role, allowing you to adjust the system's voltage and current to meet your specific needs, as explained in the previous section.
Investing time and effort in proper voltage matching delivers several benefits: improved efficiency, less stress on components, and a longer lifespan for your equipment. Systems with mismatched voltages waste energy, generate excess heat, and can shorten the lifespan of critical components like charge controllers [[8]](https://suvastika.com/how-to-match-the-solar-panel-voltages-and-battery-voltage-in-solar-hybrid-pcu). Regular monitoring and incorporating safety margins further enhance the reliability of your solar setup.
Whether you're assembling your first DIY solar system or upgrading an existing one, ensuring proper voltage matching will save you money and prevent future headaches. Your batteries will charge more effectively, your equipment will stay within safe operating limits, and you'll get the most out of your solar investment.
For more detailed instructions and expert advice on building efficient off-grid systems, check out [DIY Eco Homes](/).
FAQs
Why do solar panel and battery voltages need to match in a solar power system?
Matching the voltage of your solar panels to your battery is a critical step to ensure your solar power system runs smoothly and efficiently. If the voltages don't align, the batteries may not charge properly. This can lead to poor energy storage, potential damage to the batteries, and an overall drop in system performance.
For the system to work effectively, the solar panel voltage should typically be 20–30% higher than the battery voltage. This extra margin ensures the batteries can charge efficiently, even on cloudy days or when partial shading occurs. Proper voltage matching also minimizes energy loss, reduces strain on components, and helps extend the lifespan of the entire system.
By keeping the solar panel and battery voltages in sync, you can boost energy storage and maintain the system's reliability over time.
How does temperature affect solar panel voltage, and what should you consider for different climates?
Temperature plays a big role in how solar panels perform, especially when it comes to voltage. As temperatures climb, the voltage output of solar panels drops - generally by 0.4% to 0.5% per degree Celsius (around 0.2% to 0.3% per degree Fahrenheit). In hot climates, this can lead to efficiency losses, with energy output potentially falling by 10–15% on extremely hot days. On the flip side, cooler temperatures boost efficiency, allowing panels to produce higher voltage and generate more electricity.
When planning a solar energy system, it's crucial to factor in the local climate. For areas with high temperatures, you might want to choose panels designed to handle heat better, ensure there's good ventilation, or use mounting systems that improve airflow to keep panels cooler. These adjustments can help maintain efficiency and keep energy production steady throughout the year.
What makes an MPPT charge controller better than a PWM controller in solar power systems?
MPPT charge controllers are often chosen over PWM controllers due to their greater efficiency and ability to make the most out of available energy. By adjusting the voltage and current to align with your battery's requirements, they can boost charging efficiency by as much as 30%, particularly in cooler temperatures.
Another advantage is their superior performance in low-light or shaded conditions, which makes them well-suited for regions with inconsistent sunlight. MPPT controllers also accommodate higher voltage solar panels, offering more flexibility in system design while potentially cutting down on wiring expenses. These qualities make MPPT controllers an excellent option for optimizing energy storage and overall system performance.