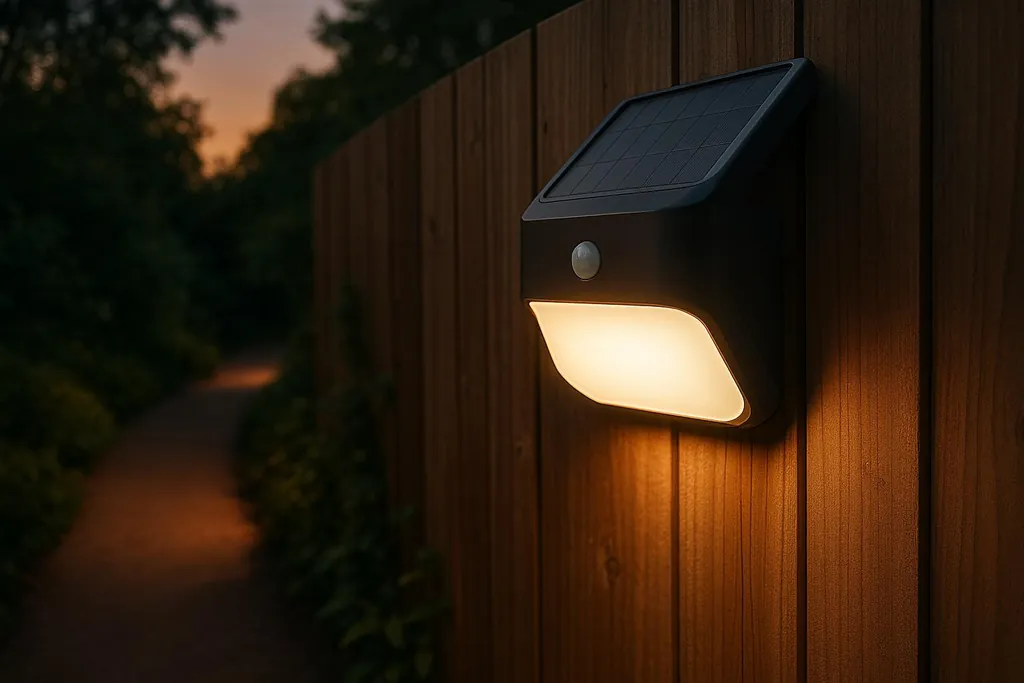
Learn how to set up DIY solar motion sensor lights to enhance outdoor security and reduce energy costs with eco-friendly solutions.
DIY Solar Motion Sensor Light Setup
Solar motion sensor lights are an easy, cost-effective way to improve outdoor lighting and security while reducing energy bills. Here's what you need to know:
- Key Benefits:
- Save 30–50% on outdoor lighting costs.
- Reduce your carbon footprint by up to 1 ton annually (equivalent to planting 40 trees).
- No wiring or ongoing electricity costs.
- Long-lasting LEDs (approx. 50,000-hour lifespan).
- Enhanced security and safety in dark areas.
- How It Works:
- Solar panels charge a battery during the day.
- Motion sensors activate LED lights at night when movement is detected.
- What You Need:
- Solar panel, rechargeable battery, LED light panel, PIR motion sensor, charge controller, and weatherproof housing.
- Tools: Drill, screwdrivers, wire strippers, multimeter, and more.
- Installation Tips:
- Choose a south-facing spot with direct sunlight.
- Mount 6–10 feet high for optimal motion detection.
- Adjust the motion sensor sensitivity to avoid false triggers.
This project is simple, eco-friendly, and pays for itself in 2–3 years. Let’s dive into the details to help you set up your own solar motion sensor light!
How to make LED Solar Motion Sensor Light || PIR Motion Sensor Light
Materials and Tools You'll Need
To build a reliable and efficient solar motion sensor light, you'll need a handful of essential materials and tools. Here's a breakdown of what you'll need to get started.
Required Materials
For an effective and self-sustaining light setup, you'll need six key components .
- Solar Panel: This is your power source. Opt for monocrystalline panels, which can achieve up to 35% conversion efficiency .
- Rechargeable Battery: A lithium-ion battery is a great choice for storing energy collected during the day. These batteries are known for their long lifespan and consistent performance. Make sure to pick one with enough capacity to power your light through the night .
- LED Light Panel: LEDs are perfect for solar systems because they consume minimal energy. Choose LEDs with high luminous efficacy to maximize light output .
- PIR Motion Sensor: This sensor detects movement and activates the light only when needed, helping to conserve battery power .
- Charge Controller: This device regulates voltage to prevent overcharging the battery. While MPPT controllers can boost energy harvest by up to 30%, a simpler PWM controller is often sufficient for DIY setups .
- Weatherproof Housing: Protect your components from the elements with a durable enclosure. Look for IP65-rated housings that can withstand year-round outdoor conditions .
You'll also need additional materials like connecting wires (14–16 AWG for most setups), mounting brackets (aluminum or stainless steel), screws, anchors for securing the light, and waterproof connectors to seal any wire joints.
Tools for Installation
Chances are, you already own many of the tools required for this project. Here's what you'll need:
- Cordless or Corded Drill: Use this for drilling pilot holes and mounting the components .
- Screwdrivers: Various sizes will come in handy for assembling and securing parts.
- Wire Strippers and Cutters: These are essential for preparing clean electrical connections .
- Multimeter: A must-have for testing voltage, current, and continuity during assembly and troubleshooting.
- Soldering Iron, Hot Glue Gun, and Hobby Knife: These tools are useful for detailed electrical work and securing components .
- Tape Measure: Ensures proper spacing and alignment during installation .
- Caulk Gun and Weatherproof Sealant: Use these to seal around mounting points and prevent water leaks .
- Hacksaw: If you're working with metal mounting rails, a hacksaw allows you to cut them to size .
- Flat Pry Bar: Useful for sliding flashing under shingles when mounting on a roof .
Once you’ve gathered your materials and tools, you’re ready to move on to sourcing the components.
Where to Buy Components
Finding quality parts at reasonable prices is key to building a durable solar motion sensor light. Here are some reliable options:
- Signature Solar: This retailer offers a wide range of solar panels, batteries, and charge controllers. For example, their JA Solar 540W Bifacial Solar Panel is priced at $191.70, while REC TwinPeak 350W panels are available for $78.00 .
- Amazon and eBay: Both platforms feature extensive selections from various vendors. Be sure to check reviews to gauge product quality and seller reliability. Note that shipping costs for heavier items, like batteries, can add up.
- Used Panels: For budget-friendly options, consider used panels. In 2021, a user on the DIY Solar Power Forum shared positive experiences purchasing used panels from Santan Solar on eBay . Just be sure to ask about the panels' history and remaining lifespan.
- Local Electrical Supply Stores: These stores often stock basic components like wires, connectors, and enclosures. While their solar-specific inventory might be limited, you can avoid shipping costs and get immediate access to smaller items.
- DIY Solar Depot: Known for offering quality products at competitive prices, this retailer also provides design assistance and customer support for first-time builders .
Some online retailers also offer local pickup options at distribution centers in major cities, which can help you save on shipping costs.
The total cost of your DIY solar motion sensor light will depend on the components you choose and your specific installation needs. Investing in high-quality parts will ensure your setup is both efficient and long-lasting.
Planning and Site Selection
Getting the location right is crucial for reliable performance. The spot you choose affects how well your solar panel charges and how effectively the motion sensor works.
Picking the Best Location
The first thing to consider is sunlight. Your solar panel needs steady, direct sunlight to keep the battery charged and the light running smoothly. In the Northern Hemisphere, south-facing locations are ideal because they soak up the most sunlight during the day . A quick test between 11 AM and 1 PM can help you spot any areas prone to shade - those spots won’t work well for solar charging .
If you’re unsure, check your property at various times of the day or use digital tools to confirm consistent sunlight exposure .
Next, think about motion detection. Decide what areas you need to monitor, like doorways, driveways, or dark corners, and make sure the sensor has a clear, unobstructed view . This step ensures your light will cover the right spots and operate efficiently.
Height and positioning are also key. Mounting your light between 6 and 10 feet above the ground tends to work best . Alicia, an editor at Reolink, offers this advice:
> For optimal performance, consider mounting the lights six to ten feet above the ground and positioning them to detect movement predominantly within the sensitivity zone rather than directly toward the detector .
The purpose of your light also plays a role. Security lights should be mounted higher and angled to cover entry points, while pathway lights can be placed lower for better ground illumination .
Don’t forget about weather protection. In areas with heavy rain or snow, mounting the light slightly higher than the minimum height can reduce exposure to damage and cut down on maintenance needs . Choose a spot that’s easy to access for cleaning the solar panel and performing routine upkeep.
To avoid false triggers - like those caused by small animals, cars, or moving plants - you can adjust the motion sensor’s sensitivity. Pick a location that lets you fine-tune the sensor’s range without sacrificing coverage .
Preparing the Installation Area
Once you’ve found the perfect spot, it’s time to prep the area for installation. Start by clearing any obstacles .
Check that the mounting surface is strong and stable. For walls, ensure there’s solid backing or use studs for support. On masonry, use the right anchors to secure the fixture. If the light is ground-mounted, make sure the soil is firm and drains well to prevent settling or water damage.
Take accurate measurements and mark your installation points carefully . If you’re installing multiple lights, space them out to ensure even light distribution across your property.
Accessibility is another factor to keep in mind. Make sure you can easily reach the solar panel and battery compartment for cleaning and maintenance. For higher mounting spots, plan how you’ll safely use a ladder.
Before you finalize the setup, test the motion sensor’s range by walking through the area from different angles. This will help you pinpoint any adjustments needed .
Waterproofing is also essential. Seal any mounting holes and protect electrical connections from moisture. Mount the light vertically to maintain its water resistance . Position the solar panel to face the sunniest area - typically south-facing in most U.S. locations - though you may need to tweak the angle depending on nearby buildings or terrain.
Taking the time to plan and prepare can save you from costly mistakes down the road. With the site ready, you’re all set to move on to assembly and installation.
Assembly and Installation Steps
Now that your site is prepped, it’s time to bring everything together. This stage demands careful attention, especially when dealing with electrical components and ensuring connections are weatherproof.
Wiring the Components
Start by gathering all the electrical components in a dry, clean workspace. Wear insulated gloves to protect yourself from shocks.
As Midsummer Energy explains:
> "Solar charge controllers are extremely simple to wire. Most only require four connections. Two wires - positive and negative - run from the solar panel to the charge controller, and another two wires run from the charge controller to the battery bank. That's it!"
Begin by connecting the solar panel’s positive and negative wires to the corresponding terminals on the charge controller. This device regulates the power flow, preventing overcharging and ultimately extending your battery’s life.
Next, wire the battery connections. Run a second set of wires from the charge controller’s battery terminals to your battery pack - ensure positive connects to positive and negative to negative. Double-check all connections to avoid power loss or arcing.
For the LED light and motion sensor, connect them to the battery’s output terminals. Many motion sensor lights come with pre-wired connections, typically featuring a power input, ground, and signal wire.
To protect your setup from the elements, seal all joints with waterproof connectors, electrical tape, and a layer of waterproof sealant. Use zip ties to secure cables and keep them safe from wind, animals, or sharp edges. Route the wires away from high-traffic areas to avoid accidental damage.
Before powering up, verify all connections using a multimeter. Loose or faulty connections can lead to inconsistent operation or even complete failure.
Once the wiring is secure and properly sealed, move on to mounting the components.
Mounting and Positioning
With the wiring done, it’s time to secure everything in place for long-term durability. Start with the solar panel. Position it facing true south and tilt it between 25° and 45° to match your latitude. Using adjustable mounting brackets allows you to tweak the angle as seasons change.
Andrei Marveaux, Director at SolarTech Solutions, recommends:
> "Consider using a remote solar panel that's connected to the lights. This way, you can place the panel in the best possible sun."
Mount the fixture vertically to encourage water runoff. Choose the right hardware for your surface - masonry anchors for brick or concrete, wood screws for wooden surfaces, and toggle bolts for hollow walls. Secure the fixture tightly to prevent movement from wind, and seal any openings with outdoor-grade silicone caulk to protect the electrical connections.
For the motion sensor, angle it to cover your desired detection area. A downward angle works well for driveways and paths, while an outward angle is better for broader spaces. Ensure all cables between components are weather-resistant and securely fastened.
Testing and Setup
Once everything is mounted, it’s time to test the system.
Simulate nighttime by covering the solar panel with an opaque material. This should trigger the light if the motion sensor detects movement. Walk through the detection zone at various angles to confirm the sensor covers the desired range.
If the light doesn’t activate, check if the batteries have had enough charging time. New batteries often require several hours of direct sunlight to power the system effectively. Test each component step by step: ensure the solar panel is positioned to receive direct sunlight during peak hours (typically 10 AM to 2 PM), clean off any dust or debris, and confirm that all wiring is secure and free of corrosion. Adjust the sensor’s sensitivity settings if needed.
For any issues, try resetting the system. Turn it off, disconnect the batteries, wait a few minutes, and reconnect everything. Testing under different weather conditions is also a good idea, as extreme temperatures can impact battery performance and sensor response.
Finally, jot down your settings for future reference. With everything tested and working, your DIY solar motion sensor light is ready to provide reliable, off-grid lighting.
Troubleshooting and Maintenance
Once your solar motion sensor lights are installed and tested, the next step is addressing potential issues and performing regular upkeep. Even the most reliable systems can run into problems, but most of these are easy to resolve. Routine maintenance ensures your lights remain functional for years to come.
Common Problems and Fixes
Solar motion sensor lights often face challenges due to their outdoor placement and reliance on batteries. Knowing the typical issues can help you troubleshoot efficiently and get your lights back in action.
One of the most frequent problems involves the battery. Rechargeable batteries in solar lights typically last for 300–500 charge cycles before losing their ability to hold a charge effectively . If your light isn’t turning on or only stays on briefly, the battery could be the issue.
Environmental factors can also interfere with performance. Dust, leaves, or even snow on the solar panel can block sunlight, reducing charging efficiency. Additionally, nearby porch or street lights might confuse the sensor, preventing it from activating at night.
Sensor alignment issues may arise over time as mounting hardware loosens or weather shifts the fixture. If the sensor is aimed too high, it may miss ground-level movement. Conversely, if it’s pointed too low, it could trigger unnecessarily due to animals or debris.
Here’s a quick reference table for common issues and their solutions:
| Issue | Possible Causes | Solutions |
|---|---|---|
| Light Won't Turn On | Dead battery, dirty solar panel, faulty motion sensor | Replace battery, clean solar panel, reposition panel, test or replace sensor |
| Light Turns On for No Reason | Over-sensitivity, sunlight interference, sensor settings | Adjust sensitivity, reposition sensor, check for nearby obstructions |
| Light Keeps Flickering | Weak battery, loose wiring, inconsistent charging | Replace battery, inspect wiring, ensure better solar exposure |
| Light Not Detecting Motion | Misaligned sensor, low sensitivity, obstructions | Reposition sensor, adjust sensitivity, clear any obstructions |
| Short Battery Life | Poor solar charging, low-quality battery, excessive use | Replace battery, opt for energy-efficient models |
Occasionally, you might encounter electronic glitches, such as the light turning on randomly or failing to detect motion entirely. To fix this, try resetting the system. Turn it off for 48 hours, then ensure it’s set to MOTION mode rather than TEST mode .
Another issue to watch for is corrosion or condensation inside the housing, which can result from poor sealing. Check the waterproof seals annually and, if needed, reapply outdoor-grade silicone caulk to keep moisture out.
Regular Maintenance
Staying on top of regular maintenance can prevent a lot of headaches and keep your system running smoothly. Focus on three key areas: the solar panel, the battery, and the hardware.
Solar panel cleaning is essential for maintaining charging efficiency. Dust, water spots, and bird droppings can block sunlight and reduce performance. Clean the panel monthly using water and a soft cloth - avoid harsh chemicals .
Battery care involves monitoring its performance and replacing it before it fails completely. Test your system monthly by covering the solar panel and triggering the motion sensor after dark. If the light seems dim or shuts off quickly, it’s time to replace the battery. Most rechargeable batteries begin to decline after 18–24 months of regular use.
Hardware checks are equally important. Inspect the mounting screws every few months and tighten any that may have loosened due to wind or temperature changes. Misaligned sensors can lead to poor detection or false triggers, so ensure everything is securely in place.
Environmental adjustments can also make a big difference. Trim back any vegetation that might block sunlight or interfere with the sensor’s view. Make sure the solar panel gets 6–8 hours of direct sunlight daily . As the seasons change and the sun’s angle shifts, you may need to reposition the panel for optimal exposure.
Finally, sensitivity settings can help fine-tune your system. If small animals or blowing debris are causing false triggers, reduce the sensitivity. On the other hand, if it’s not detecting normal movement, increase the sensitivity or adjust the sensor’s angle for better coverage.
Conclusion
Creating a solar motion sensor light combines hands-on DIY skills with eco-friendly benefits. The process is simple: choose the right spot, install the light, and fine-tune the settings as needed . This setup enhances the safety and energy efficiency of your off-grid home - no complicated wiring required.
This DIY project can reduce outdoor lighting costs by as much as 50% while shrinking your carbon footprint. Many systems pay for themselves within 2-3 years . Plus, they run entirely off the grid and need very little upkeep.
To keep your system running smoothly, focus on a few key steps: ensure the solar panel gets maximum sunlight, clean it regularly, adjust the sensor sensitivity, keep the area clear of obstructions, and inspect the setup periodically . Aim for 6-8 hours of direct sunlight daily, and clean the panels every 3-4 months. These habits not only boost the light’s performance but also help the system last longer .
FAQs
Where should I install a solar motion sensor light for the best performance?
To get the most out of your solar motion sensor light, install it at a height of 6 to 10 feet. This range allows the sensor to pick up movement effectively while delivering sufficient brightness to the area. Aim the light toward the specific spot you want to monitor - think driveways, walkways, or entry points.
Avoid mounting it too high, as this can limit the sensor's ability to detect motion and reduce its coverage. Also, ensure the solar panel is exposed to direct sunlight for most of the day. Keep it clear of any obstructions like trees or buildings to maintain optimal performance and reliable operation.
What should I do if my solar motion sensor light isn’t working properly?
If your solar motion sensor light isn’t working, start by checking the battery. Ensure it’s fully charged or replace it if necessary. Next, clean the solar panel to remove any dirt or debris that might block sunlight, and confirm it’s positioned to receive direct sunlight without any obstructions.
Take a close look at the wiring connections to see if there are any loose or damaged parts. Test the motion sensor to determine if it’s operating properly - if it isn’t, you may need to replace it. Another quick fix is resetting the system by disconnecting and reconnecting the power.
Following these steps can often resolve common problems and get your light back in working order.
What are the best ways to maintain and extend the life of my solar motion sensor light?
To keep your solar motion sensor light running smoothly and lasting longer, regular upkeep is essential. Start by cleaning the [solar panels](/blog/how-to-choose-solar-panels-that-match-your-roof) every few months with a soft cloth and some mild soapy water. This helps remove dirt and debris that can block sunlight and reduce the light's efficiency.
Make it a habit to inspect the system for any signs of wear. Check the batteries and clean off any corrosion on the terminals. If the batteries seem to be losing their charge quickly, it might be time to replace them. Ensure the light is installed where it gets plenty of direct sunlight - shaded spots can interfere with charging.
Also, keep an eye out for damage, such as cracks, rust, or loose connections, and address these issues as soon as possible. With a little care and attention, your solar motion sensor light can continue providing dependable, eco-friendly illumination for years.