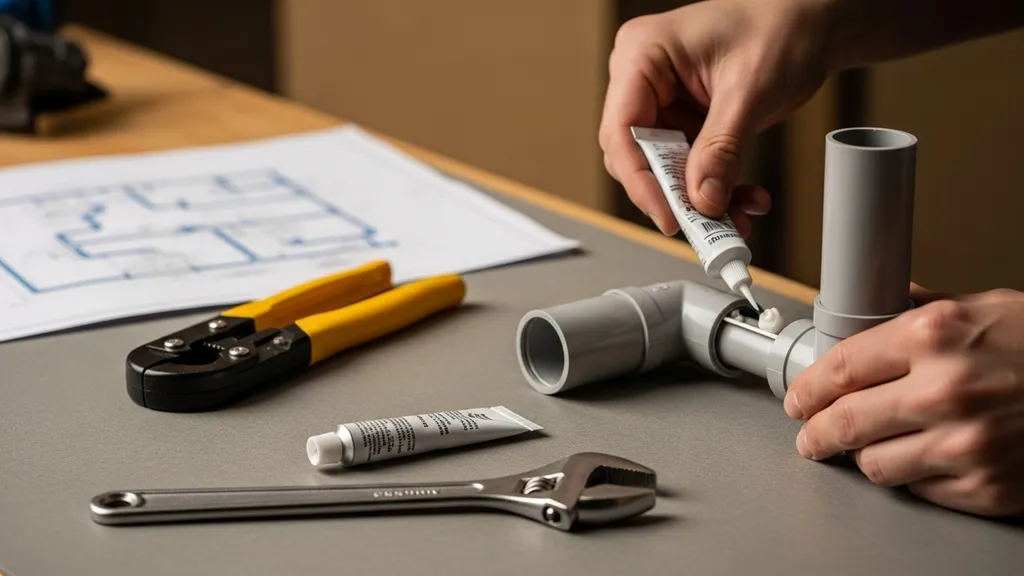
A practical, step-by-step guide to DIY plumbing for owner-builders: planning, materials, installation, wastewater options, and testing.
Plumbing Basics for Owner-Builders
DIY plumbing is one of the most practical skills an owner-builder can learn: it lowers labor costs, speeds up schedules, and gives control over materials and efficiency choices. This guide shows how to plan a code-compliant system, select tools and materials, route supply and waste lines, size hot water, choose wastewater options, perform tests, and prepare for inspections. Expect clear numbers, material-cost ranges, example layouts for a small home, and links to authoritative manuals and local-permit resources.
TL;DR:
- Plan first: confirm water source, perform a perc/soil test if needed, and expect permit review in about 2–6 weeks.
- Use PEX manifold systems for easy DIY installation; budget $40–$200 for PEX tools and 15–25% of rough-in budget for materials.
- Test and document: hold a 50 psi water test 15 minutes (or per local code), install accessible shutoffs and cleanouts, and call a licensed pro for drainfields or gas/sewer tie-ins.
Related guides: Best DIY Crawl Space Repairs to Stop Moisture and Mold: Top 10 Picks for 2026 and DIY Moisture Absorbers vs. Store-Bought Options: A Side-by-Side Comparison (2026).
Plumbing Basics for Owner-Builders: Planning a code-compliant system
Assessing the water source, wastewater path, and local codes before trenching saves time and money. Start by mapping property boundaries, distance to the nearest sewer main, and elevation (which affects gravity flow). Confirm whether the property uses municipal supply, a well, or hauled water. Municipal connections typically require coordination with the utility and a tap fee; wells require pump sizing, pressure tanks, and water-quality testing.
- Fixture unit demand: Plumbing codes use fixture units to size mains and drain capacity. Typical ranges: a small 2–3 bedroom home ≈ 20–35 fixture units; a larger home 40–60. Fixture unit values come from the IPC or UPC tables adopted locally.
- Permits and timelines: Many jurisdictions take 2–6 weeks to review permit packages; engineered septic/drainfield designs add time. Contact the local building department and county health department early.
- Soils/percolation tests: Perc tests are required where septic is considered; expect lab or county fees, and possibly a 1–3 week scheduling window.
- Who to contact: Local building department for plumbing permits and code reference (IPC or UPC), county health for septic approvals, and licensed installers for quotes on complex work.
Compare sewer hookup vs septic vs composting toilets:
- Sewer hookup: Lower maintenance, higher upfront tap/connection fees if far away. Permitting is straightforward through the utility.
- Septic: Higher install cost ($5,000–$30,000+ depending on site and system), needs a suitable drainfield and maintenance (pumping every 3–5 years typical).
- Composting toilets: Low water use and smaller permit footprint in some states; check local acceptance before relying on one for whole-house sanitation. For efficiency in fixtures and moisture control, see the water-efficient plumbing guide.
Authoritative drawings and model systems help during planning; the National Institute of Standards and Technology provides plumbing reference drawings that illustrate complete, functioning systems: NIST reference plumbing drawings.
Plumbing Basics for Owner-Builders: Essential tools, safety, and materials
Must-have tools for owner-builders
- Tubing cutter: $15–$40 — clean cuts on PEX, copper, CPVC.
- PEX crimper or expansion tool: $40–$200 depending on brand and type (crimp vs expansion).
- Adjustable wrench and basin wrench: $20–$60.
- Pipe wrenches: $20–$60 each for iron fittings.
- Soldering kit and gas detector: $50–$150; use gas detector whenever soldering inside confined spaces.
- Drill and hole saws: $75–$200.
- Pressure-testing pump or air test kit: $50–$200.
- Moisture meter and leak-detection dye: $50–$150.
Budget tip: Rent specialty tools like backhoe, mechanical pumps, or large-expansion PEX units for the day to keep costs down.
Materials overview: PEX, copper, CPVC, PVC and ABS
| Material | Typical lifespan | Cost per linear foot | Flexibility | Corrosion resistance | Best uses |
|---|---|---|---|---|---|
| PEX (A/B) | 30–50 years | $0.60–$1.50 | High | Very good | Interior supply, manifolds, buried in conditioned spaces |
| Copper | 50+ years | $2.50–$6.00 | Low | Excellent, can corrode in acidic soils | Exposed runs, long-term durability, potable water where allowed |
| CPVC | 30–40 years | $0.80–$2.00 | Moderate | Good | Hot-water branches where copper not preferred |
| PVC (Schedule 40) | 25–50 years | $0.50–$2.00 | Low | Excellent for waste | Above-ground drain lines, vents |
| ABS | 25–50 years | $0.50–$2.00 | Low | Excellent | Drain/waste applications (regional preference) |
Notes:
- PEX types: PEX-A (more flexible, expansion fittings) vs PEX-B (stiffer, crimp fittings). Use oxygen-barrier PEX for hydronic loops to prevent corrosion in boilers.
- Copper resists UV and high temperatures but can be expensive and needs soldering skills.
- Industry summaries show low failure rates for PEX when installed per manufacturer instructions; failures often trace to poor connections rather than the tubing itself.
Safety, PPE, and pressure-testing gear
- PPE: Eye protection, gloves, hearing protection when cutting, respirator when solvent welding or soldering.
- Gas and CO detectors: Use when soldering in enclosed spaces or working near combustion appliances.
- Pressure testing: Use a certified test pump for water or air tests; follow local code for allowed methods.
Federal and VA plumbing design manuals provide construction and safety guidelines: see the VA’s plumbing design manual for general requirements (PG 18-10 - Plumbing Design Manual). For reuse and waste reduction when cutting pipe and fixtures, review strategies in the site waste guide: 10 ways to reduce construction waste. For recycling scrap materials, use the recycling materials checklist and consider reclaimed options in the sustainable materials guide.
Plumbing Basics for Owner-Builders: Water supply layout and hands-on installation
Designing a manifold-based supply system
A central manifold simplifies balancing and isolation: position it near the mechanical room or utility wall close to the hot-water source. Typical layout for a small 2–3 bedroom home:
- Main incoming shutoff (3/4" or 1") at the meter or well pressure tank.
- Pressure regulator set to 45–60 psi (common setpoint 50 psi).
- Whole-house sediment filter (if needed) after the main shutoff.
- Manifold with 3/4" inlet(s) and 1/2" or 3/8" branch feeds to fixtures.
Use 3/4" or 1" trunk lines from manifold to groups of fixtures if distances exceed 50 ft. Branch runs to fixtures commonly use 1/2" PEX; 3/8" is fine for low-flow fixtures and icemaker lines.
Routing lines, minimizing heat loss, and cold-water strategies
- Run hot water lines inside conditioned spaces where possible to limit heat loss. When exterior walls are unavoidable, wrap hot lines in pipe insulation with an R-value-equivalent rating; typically 1/2" to 1" closed-cell insulation reduces standby loss measurably.
- For hot recirculation, recommended distances and loop sizes vary; aim to limit return distances so that water reaches fixture within 30–60 seconds. Consider demand recirculation pumps with timers or sensors to save energy.
- Cold-water strategies include installing pressure-reducing valves, using a dedicated line for boilers/chillers, and planning for thermal expansion (install expansion tanks when required).
Shutoffs, pressure regulation, and backflow prevention
- Provide a main shutoff at entry and local shutoffs at manifolds and fixtures where possible.
- Install pressure regulators set to 45–60 psi downstream of the meter. High pressure shortens fixture life.
- Install backflow preventers where required by code, especially at irrigation and non-potable connections.
Watch this step-by-step guide on installing pex pipe the easiest way:
For PEX installation details, the HUD PEX design guide is a helpful reference for novices: Residential PEX water supply design guide. If adding sensors, leak detection, or remote shutoffs, see the smart setup instructions at smart water system setup.
Plumbing Basics for Owner-Builders: Drainage, vents, traps and common layout rules
How traps and trap arms work
A trap forms a water seal that prevents sewer gases from entering occupied spaces. Typical trap seal depth is 2" minimum. Trap arms connect trap outlets to the vent or drain; their maximum length is limited by code based on trap size and pipe slope. Common fixture connections:
- Bathroom sink: 1-1/4" trap
- Shower/tub: 2" drain
- Toilet: 3"–4" (depending on toilet and code)
Venting basics and practical vent layouts
Vents equalize pressure to prevent siphoning of trap seals and allow proper flow. Common vent rules: maintain vent sizing per code and keep vent stacks vertical as much as possible. In many jurisdictions, a 2" vent serves multiple fixtures; local codes specify exact minimums.
Slope requirements, cleanouts, and common mistakes
- Slope: 1/4" per foot for 3" and smaller lines; 1/8" per foot may be permitted for 4" lines in some codes.
- Cleanouts: Install at changes of direction greater than 45°, at base of stacks, and every 50–100 ft of straight run depending on code.
- Common mistakes: insufficient slope (causes slow drains), blocked or undersized vents (siphoning), inaccessible cleanouts, and using incorrect trap types.
Federal plumbing manuals can clarify venting and traps in more detail: Plumbing manual - federal guidance.
Plumbing Basics for Owner-Builders: Hot water systems — choosing and sizing for DIY homes
Comparison table: tank, tankless, and heat pump water heaters
| Type | Typical efficiency | Install complexity | Cost range | Ideal use cases | Maintenance |
|---|---|---|---|---|---|
| Storage tank (electric/gas) | UEF 0.60–0.95 | Low–medium | $600–$2,500 | Simple installs, lower upfront cost | Flush annually |
| Tankless (gas/electric) | UEF 0.82–0.99 | High (venting/gas) | $800–$3,500+ | Continuous hot water, small footprint | Descale for hard water |
| Heat pump water heater | UEF 2.0+ | Medium (space for ambient heat) | $1,200–$4,000 | High efficiency where ambient heat available | Regular maintenance, filter changes |
Efficiency ranges are from Energy.gov water-heating guidance: Energy Saver - water heating overview.
Sizing basics and first-hour ratings
For a 2–3 bedroom home, estimate peak demand using fixture flow rates:
- Shower: 1.5–2.5 GPM
- Kitchen sink: 1.5–2.2 GPM
- Bathroom sink: 0.5–1.5 GPM
Sample peak: two simultaneous showers (2 x 2.0 GPM) + one sink (1.5 GPM) = 5.5 GPM. For storage tanks, use first-hour rating (FHR): choose a tank with FHR ≥ expected peak plus safety margin. A 40–50 gallon electric tank often fits 2–3 bedroom homes; tanks with 60–80 gallon capacity are typical for higher demand.
Off-grid and solar-compatible options
- Solar thermal: Works well for households with high solar access; pairing with a storage tank provides reliable supply.
- Heat pump water heaters: Compatible with grid-tied PV systems; very efficient per Energy.gov.
- Wood-fired boilers or batch heaters: Practical in off-grid cold climates; need a robust flue and daily tending.
When pairing solar or off-grid power, design the hot-water system to prioritize low standby losses (insulation, timer controls, or demand recirculation). For off-grid energy pairing strategies, consult the ultimate guide to wind solar hybrid systems.
Plumbing Basics for Owner-Builders: Wastewater solutions — septic, composting, and micro-treatment
How on-site septic systems work and sizing considerations
A conventional septic system has three main components: septic tank, distribution box, and drainfield. Tank sizing is based on bedrooms or daily design flow; common household tanks are 1,000–1,500 gallons. Drainfield sizing depends on perc test results and soil absorption rates. Typical septic installation costs vary widely: $5,000–$30,000+ depending on system type, site prep, and local requirements. Failures often stem from a high water table, overloaded systems, or solids entering the field.
Composting toilets: costs, permits, and maintenance
Composting toilets come in two main types: self-contained (installed in bathroom footprint) and central (a larger unit located elsewhere). Costs range from $800 for basic self-contained units to $5,000+ for central systems with automated mixing and ventilation. Permit acceptance varies by jurisdiction; consult the permit guide for composting toilets and the composting toilet installation guide. Typical maintenance includes periodic removal of composted solids and monitoring moisture and carbon balance.
Graywater reuse (lavatory and laundry) can reduce septic load but may require dedicated systems and local approval. EPA and university extension publications provide guidance on safe graywater practices.
When to hire a pro: drainfields, engineered systems, and failure signs
Hire a licensed designer or installer when:
- The site requires engineered septic systems or mound systems.
- The drainfield area has poor percolation or high seasonal groundwater.
- There is evidence of system failure: soggy patches, sewage odors, backed-up fixtures.
If planning a complex micro-treatment system, consult soil experts and the county health department early.
Plumbing Basics for Owner-Builders: Testing, inspections and common troubleshooting
Pressure testing: water and air test protocols
- Water test: Common practice is to pressurize to 50 psi and hold for 15 minutes; verify no pressure drop. Follow local code if it specifies a different duration or pressure.
- Air test: Codes often allow low-pressure air tests (e.g., 5–10 psi) for drain/waste/vent systems; use a calibrated pressure gauge and comply with code limits to prevent over-pressurizing plastic pipes.
When isolating zones for testing, label and cap all open ports; record start and end pressures for inspectors.
Common DIY troubleshooting steps (no hot water, slow drains, leaks)
- No hot water: Check power/gas supply to the water heater, reset switches, confirm thermostat settings, inspect for tripped high-limit switches. For tankless units, check error codes and inlet water flow.
- Slow drains: Use a plunger, remove the trap for sinks to check obstructions, and inspect venting if multiple fixtures slow simultaneously.
- Leaks: Use food-grade dye in tanks to trace leaks visually, use a moisture meter near suspicious areas, listen for running water behind walls during quiet hours, and check water meters for phantom flow.
Preparing for inspection and a handoff checklist
Prepare a packet for the inspector with:
- Site plan showing septic/drainfield and setback distances.
- Materials list (pipe types, fittings, fixture specs).
- Test results and signed pressure test logs.
- Permits and work-order receipts.
Smart leak sensors help catch slow leaks before they cause damage; see the smart water system setup at smart water system setup.
Key points: Quick checklist for owner-builders doing DIY plumbing
Project checklist: planning to inspection
- Confirm permits and local code (IPC or UPC) before digging.
- Get soils/percolation tests if septic is planned.
- Centralize the manifold near the mechanical room.
- Make cleanouts and shutoffs accessible.
- Schedule inspections after rough-in and pressure tests.
Budget checklist: materials, tools, and contingency
- Materials often 15–25% of rough-in budget.
- Tools may cost $300–$800 to purchase; renting saves money for one-off tools.
- Contingency: 10–20% for unexpected site conditions or permit changes.
Top safety and code reminders
- Do not tie into gas or sewer mains without licensed tradespeople where required.
- Pressure-test per local code and document results.
- Use water-efficient fixtures to reduce load on septic and hot-water demand; see the water-efficient plumbing guide.
The Bottom Line
Plan plumbing around site constraints and codes first; choose materials that match the owner's skill level and climate (PEX for ease, copper for specific durability needs). Prioritize water efficiency, accessible shutoffs, and thorough testing. DIY plumbing can save money and increase control, but call licensed professionals for drainfields, gas hookups, and complex tie-ins.
Frequently Asked Questions
Can an owner-builder legally do their own plumbing work?
That depends on jurisdiction. Many areas allow owner-builders to perform work on their own property but still require permits and inspections. Some tasks—gas connections, sewer mains, and certain utility tie-ins—often require a licensed plumber. Always check with the local building department and obtain written permit requirements before starting work.
Keep records of permits, test results, and receipts to present to inspectors and for future resale documentation.
Is PEX better than copper for a DIY home?
PEX is generally easier for owner-builders: it’s flexible, faster to install with manifolds, and less expensive per foot than copper. Copper lasts long and resists UV and high temperatures but requires soldering skills and higher material cost. For most owner-built homes, PEX offers the best balance of ease, cost, and reliability when installed per manufacturer instructions.
How do I know whether I need a septic system or can tie into sewer?
Determine distance to the nearest sewer main and ask the local utility about tap fees and availability. If sewer access is not practical, a septic perc test and county health approval are required to size a drainfield. If soil or topography is poor, an engineered system or alternative sanitation (like composting toilets) may be necessary.
What are the simplest leak-detection and pressure-test methods?
For supply lines, record system pressure with a gauge and watch for drops over a 15-minute interval at 50 psi (or follow local code). For small, hidden leaks, use food-grade dye in tanks, a moisture meter on suspect walls, and smart leak sensors that alert remotely. For drain systems, dye testing and visual inspection of trap seals helps isolate problems.
When is it necessary to hire a licensed plumber?
Hire a licensed plumber for gas appliance hookups, complex water heater installs (especially gas or tankless that require venting), sewer-main connections, and septic drainfield design or repair. Also call a pro if troubleshooting shows repeated failures, unusual odors, or signs of contamination—these can be safety or health hazards.