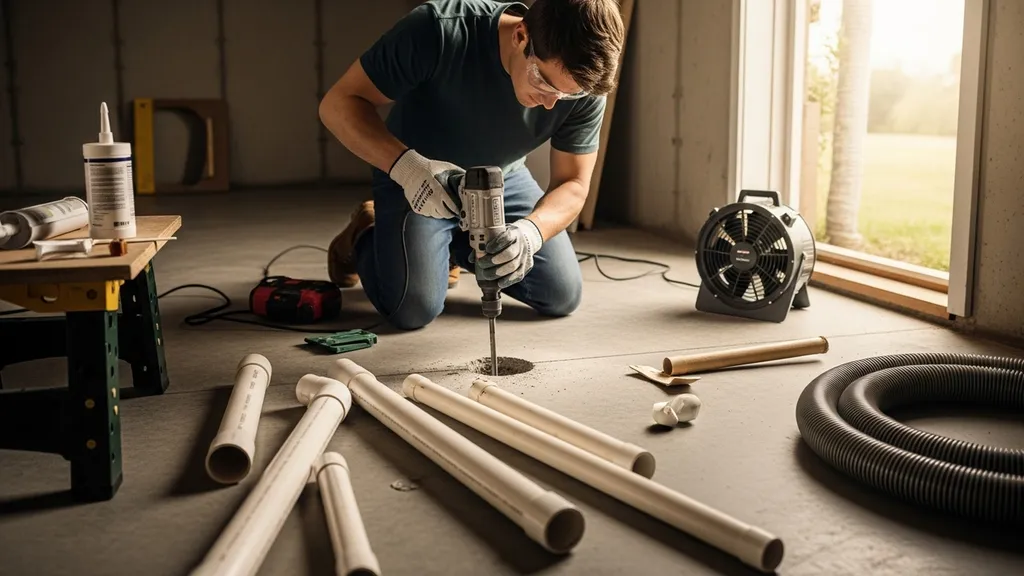
Practical, budget-friendly guidance for DIY radon mitigation: how to test, interpret results, and remediate common house types safely.
Radon Mitigation: DIY Testing and Remediation
A budget-conscious DIY homebuilder who finds a high radon reading faces a clear, solvable problem: reduce indoor radon levels to lower long-term lung cancer risk. This guide explains practical radon mitigation steps you can do yourself — from buying the right radon testing kit to installing a basic sub-slab depressurization system — and when to bring in a professional. It covers test types, how to place monitors, interpreting pCi/L results, common DIY fixes, parts and tools, safety and permitting, and follow-up testing so remediation actually works.
TL;DR:
- Test first: short-term kits cost $10–$40; long-term alpha-track tests cost $30–$80 and give a better seasonal average.
- Act at or above 4 pCi/L per EPA guidance; try sealing plus targeted suction (sub-slab depressurization) for larger reductions.
- DIY SSD kits with a proper fan, piping, and seals typically cost $300–$1,200; hire a certified mitigator for complex foundations or persistent high readings.
Why Radon Mitigation Matters for DIY Homebuilders
Health Risks and Key Facts
Radon mitigation matters because radon is a naturally occurring radioactive gas and a leading cause of lung cancer after smoking. The U.S. Environmental Protection Agency (EPA) recommends action at 4 picocuries per liter (pCi/L), while the World Health Organization (WHO) suggests lower reference levels where feasible. Radon exposure risk rises with concentration and time spent in the affected space; a sustained level of 4 pCi/L represents a measurable increase in lifetime lung-cancer risk. Seasonal and geographic variability are common: many homes record higher radon in winter when buildings are closed up and soil-gas flow increases. For practical homeowner guidance about methods and materials, see this vendor step-by-step overview of DIY options and required piping sizes from Airthings: DIY radon mitigation: a step-by-step guide to a radon-free home.
How Radon Enters Buildings
Radon migrates from soil and rock into buildings through pressure differences and pathways. Typical entry points include slab cracks, joints between slab and foundation walls, gaps around utility penetrations and sumps, and uncapped crawlspaces. Older foundations with unsealed rim joists or missing membranes are particularly vulnerable. Mitigation fits into a broader indoor-air-quality and airtightness strategy: gas entry is reduced by sealing major leaks and managing the pressure field beneath and inside the slab, which complements passive-house air-sealing best practices without conflicting with planned ventilation upgrades.
Radon Mitigation: How to Test at Home (DIY Methods)
Short-term vs Long-term Testing — Pros and Cons
DIY radon testing begins with choosing short-term or long-term testing. Short-term tests (2–7 days) are quick and inexpensive, useful for an initial screen before buying a home or starting remediation. Long-term tests (90+ days) capture seasonal variation and give a better estimate of annual average exposure. Short-term tests can be influenced by recent weather, HVAC operation, and times when doors and windows were left open. If a short-term test reads above the EPA action level, follow up with a long-term test or repeat short-term tests in different seasons to confirm.
Choosing a Test Kit: Charcoal, Alpha-track, and Digital Monitors
There are three common consumer options:
- Charcoal canister (short-term): Low cost ($10–$30). Place for 2–7 days and send to a lab. Sensitivity is limited; humidity and high airflow can bias readings.
- Alpha-track detector (long-term): Mid cost ($30–$80). Leave in place 90 days to one year; lab returns an average. Best for baseline and seasonal exposure estimate.
- Digital continuous monitor: Higher cost ($150–$400). Provides hourly data and helps troubleshoot pressure and ventilation effects. Some models are brand-specific and include logging and alerts.
A university extension guide outlines dos and don'ts and reinforces placing tests on the lowest lived-in level: Radon mitigation dos and don'ts - caes field report.
Where and When to Place Tests
- Place detectors in the lowest level of the home that is used regularly (finished basement, ground floor living space).
- Avoid windows, exterior walls, doors, drafts, and HVAC vents. Keep detectors at least 20 inches above the floor and away from obstructions.
- Follow closed-house protocols for short-term tests: keep windows and doors closed 12 hours before and during the test when possible, unless outdoor conditions make this unsafe.
- Test during typical occupancy patterns; repeat tests during winter when radon tends to peak. If you get a single elevated short-term result (above 4 pCi/L), retest with either a long-term device or two additional short-term tests spaced over a few weeks.
Radon Mitigation: Interpreting Test Results and When to Act
Understanding Pci/l and What the Numbers Mean
Radon concentration is reported in picocuries per liter (pCi/L) in the U.S. The EPA action level is 4 pCi/L; however, risk exists below this level and declines as concentrations fall. As an example, reducing indoor radon from 8 pCi/L to below 2 pCi/L cuts the average annual exposure by 75%. Policy and guidance documents emphasize action at or above 4 pCi/L but also recommend reductions where practical — use the EPA consumer guide for clear thresholds and homeowner steps: Consumer's guide to radon reduction - how to fix your home.
Repeat Testing, Averaging, and Seasonal Adjustments
- If a short-term test returns >4 pCi/L, run a follow-up test: either a long-term alpha-track or multiple short-term tests to compute an average.
- For borderline levels (2–4 pCi/L), consider a long-term test or inexpensive interim fixes like sealing and improved ventilation before committing to a fan-driven system.
- Average multiple readings over time to account for seasonal variation. Document dates, test type, and placement so you can compare pre- and post-mitigation results meaningfully.
Radon Mitigation: DIY Remediation Techniques and How They Work
Sub-slab Depressurization (SSD) — the Core DIY Option
Sub-slab depressurization (SSD), also called active soil depressurization, is the most effective and widely used method. It works by creating a negative pressure field beneath the slab so soil gas is drawn into a pipe and vented outdoors before it can enter the home. Typical components include a suction point (core-drilled hole or existing sump), PVC piping (3–4 inch schedule 40), a radon-rated in-line fan, a termination point 10 feet above grade or away from openings, and sealing of slab penetrations.
Table: Common mitigation methods and typical performance
| Method | Typical reduction (%) | Difficulty | Approx DIY cost range | When appropriate |
|---|---|---|---|---|
| Sub-slab depressurization (SSD) | 50–99% | Medium–Hard | $300–$1,200 | Slab-on-grade, basements, moderate-to-high readings |
| Sump pit sealing + targeted suction | 30–80% | Easy–Medium | $150–$600 | Homes with sump pits or single access points |
| Crawl space sub-membrane depressurization | 40–90% | Medium | $400–1,200 | Homes with crawl spaces and exposed soil |
| Sealing cracks and penetrations only | 10–30% | Easy | $20–$200 | Low-level or interim reductions; best combined with SSD |
| Passive venting (no fan) | 0–30% | Easy | $50–$300 | Very low initial readings; often insufficient alone |
| Increased ventilation / HRV/ERV | 10–40% | Medium | $200–$2,500 | Use when balanced ventilation needed; may increase energy use |
Stepwise overview for a DIY SSD installation:
- Locate suction point: Choose a central slab location or use an existing sump. Prefer areas near plumbing chases or slab cracks when core drilling is difficult.
- Drill or core: Create a 2–4 inch suction opening into the slab (typical core drill or hammer drill and masonry bit). Remove dust and debris.
- Install piping: Run 3–4 inch PVC from suction point up to an exterior wall or through attic space to an outdoor termination. Use solvent-weld joints and support straps.
- Choose a fan: Select a radon-rated inline fan with continuous-duty rating. Fans sized ~80–150 CFM are common for single-family SSD systems; actual CFM depends on system length and static pressure.
- Mount and wire the fan: Install the fan in an accessible, weather-protected location (crawlspace, attic, or outside protected box). Follow local electrical code and secure an outlet or hardwired circuit; a licensed electrician may be required.
- Terminate outdoors: Exhaust at least 10 feet from windows, doors, and openings, and above roofline if possible. Add a rain cap and screen.
- Seal slab: Seal the core hole and visible slab cracks with epoxy or polyurethane caulk and cover edges with a bead of sealant to help the fan draw beneath the slab.
- Test after startup: Use short-term or continuous monitors to confirm reduction.
Safety and practical notes:
- Confirm local permit and electrical inspection requirements before hardwiring a fan. Fans require continuous operation.
- Route exhaust away from air intakes and openings to prevent re-entry. Weatherproof and secure piping and fan.
- Expect wide performance variation; proper suction location and slab sealing matter. Research and industry guides from the CDC outline common methods and confirm that vent-pipe systems with fans are the most used: Reducing radon levels in your home.
Watch this step-by-step guide on installing a radon mitigation system yourself and save money:
Sump Pit Sealing and Targeted Suction
Sump pits are common entry routes. Sealing the sump lid with a gasket and routing an SSD pipe through the sump cover is one of the easiest targeted fixes. If the home has a sump that already vents, convert it to a sealed suction point and connect to a radon fan. A well-executed sump conversion plus small fan often drops readings significantly.
Active Soil Depressurization vs Passive Vents
Passive venting (no fan) uses stack effect and roofing temperatures to vent sub-slab gas; it’s low-cost but unpredictable. Active SSD with a fan provides reliable suction and is the preferred professional method. Many DIYers start with sealing and passive vents, then upgrade to active SSD if readings stay high.
Radon Mitigation: Sealing, Ventilation, and Crawl Space Strategies
Effective Air-sealing Techniques for Radon Reduction
Targeted air sealing reduces radon entry and improves mitigation performance. Key leak sites include slab perimeter joints, rim joists, plumbing penetrations, and utility chases. Recommended materials:
- Polyurethane caulk for slab cracks and small gaps.
- Closed-cell spray foam for rim-joist cavities and larger openings.
- Backer rod plus sealant for wide control joints.
- Butyl or silicone gaskets for sump covers.
For detailed airtightness techniques that complement radon work, see the step-by-step air-sealing methods in this guide: air-sealing methods.
Crawl Space Remediation Options
Crawl spaces can be managed by encapsulation with a vapor barrier, sealing vents, and either sub-membrane depressurization or conditioned crawl-space strategies. Encapsulation involves a polyethylene membrane sealed to the foundation walls and supports. Sub-membrane depressurization uses a fan and suction point under the membrane to vent soil gas. Moisture control remains essential: poorly handled encapsulation can trap humidity and cause wood decay. For practical repair steps and moisture-focused work, consult our articles on crawl space repair tips and moisture control options.
Ventilation Adjustments and Whole-house Strategies
Mechanical ventilation can reduce radon by diluting indoor air, but the relationship is complex: ventilation that creates negative pressure (exhaust-only systems, strong kitchen or bathroom fans) can draw more soil gas in. Balanced ventilation systems like HRV/ERV can lower radon while controlling energy loss, but they must be designed to maintain neutral or slightly positive pressure relative to the soil. Small, temporary ventilation tactics — running a window fan or increasing whole-house air exchange — can be useful interim steps but won't reliably replace SSD for moderate-to-high radon.
When planning ventilation changes for radon, refer to off-grid low-energy ventilation tactics if power is limited: see our off-grid ventilation tips. For crawlspace insulation and sealing choices that impact radon and moisture, compare foam board options in foam board comparisons and rim-joist details in wall assembly and insulation.
Radon Mitigation: When to Hire a Professional
Signs a Home Needs a Pro-level Solution
Hire a professional if the home has complicated foundation types (basement plus slab on grade plus crawlspace), persistent high readings after DIY attempts, multi-level or commercial properties, or if the DIYer is uncomfortable with electrical work, core drilling, or roof penetrations. Also consult a pro for SIP (structural insulated panel) buildings since wall/floor interfaces may complicate mitigation; see SIP-specific considerations in SIP construction notes.
What Certified Mitigators Bring: Testing, Design, and Standards
Certified mitigators design systems to AARST/ANSI standards and provide post-installation testing to confirm effectiveness. They can size fans, locate suction points more precisely, and handle difficult routing and permit coordination. The SWAT Environmental mitigation guide explains system user expectations and common vendor practices: Radon mitigation system user guide.
Permits, Warranties, and Record-keeping
Professionals often include workmanship warranties and documentation for lenders and future buyers. Expect professional mitigation quotes to range from a few hundred to several thousand dollars depending on system complexity and local labor rates. Ask contractors for expected reduction percentage, post-installation test plans, electrical and building permits, and written warranty terms. For exterior retrofits that affect the envelope, such as adding exterior foam or major siding work, consider specialist contractors: exterior foam installation. Also, minimize radon leaks from plumbing by considering efficient plumbing design during repairs.
Radon Mitigation: Materials, Tools, and Budget-friendly Cost Estimates
Parts List for a Basic DIY SSD System
- Core drill or masonry bit (rental if needed)
- 3–4 inch PVC pipe and solvent-weld fittings
- Radon-rated inline fan (continuous-duty, ~80–150 CFM for typical single-family runs)
- Exterior termination cap and rain cap
- Rubber gasket or sealed sump lid (if using sump)
- Polyurethane caulk or epoxy for slab cracks
- Straps and supports, pipe flashing through roof or wall
- Electrical conduit, weatherproof junction box and wiring materials
- Manometer or simple U-tube gauge for performance checks
Tools and Skills You’ll Need
- Masonry drilling skills or rental core-drill experience
- PVC solvent welding and cutting
- Basic electrical knowledge for outlet or hardwired fan connection (hire an electrician for permanent circuits)
- Sealing and finishing skills for slab and rim-joist work
- Safety equipment: N95 or better respiratory protection, eye protection, hearing protection when drilling
Ways to Save Without Compromising Safety
- Rent specialty tools (core drill) rather than buy.
- Start with sealing visible cracks and converting a sump pit before full SSD to test if reductions are sufficient.
- Select a mid-range radon fan rather than premium commercial units if system runs are short; avoid undersized cheap fans.
- Reuse non-critical supports or piping from previous projects, but never compromise fan or electrical safety.
- Prioritize sealing and targeted suction first; often the biggest bang for the buck is reducing leakage and closing major entry paths.
Typical DIY parts-only cost: $300–$1,200. Typical professional installation: $1,000–$3,000+ depending on complexity and local rates.
Radon Mitigation: Post-remediation Testing and Maintenance
How and When to Retest After Remediation
Retest within 24–72 hours after the mitigation system stabilizes for a short-term confirmation that levels fell below the action level. Then run a long-term alpha-track test (90+ days) or use a continuous monitor over several months to confirm seasonal performance. Keep copies of pre- and post-mitigation test results in a safe file for future buyers or for warranty claims.
Monitoring Options and Expected Upkeep
Continuous radon monitors provide real-time performance data and are helpful when troubleshooting or logging for a season. Fans are continuous-duty devices; expect fan life of 5–15 years depending on model and environment. Noisy operation or marked changes in pressure gauge readings suggest bearing wear or blockage.
Troubleshooting Common Post-installation Issues
- No or small pressure differential: Check for poor seal at suction point, disconnected piping, or buried sections that reduce flow.
- Blocked outlet or re-entry: Ensure termination is clear and not too close to windows or air intakes.
- Electrical faults: Confirm power supply and fusing; consult an electrician if wiring looks unsafe.
- Inadequate reduction: Add additional suction points, improve slab sealing, or consult a pro for advanced diagnostic testing.
For longer-term monitoring and cross-tracking with energy use, see long-term monitoring advice in our energy tracking content: long-term monitoring tips.
Radon Mitigation: Key Points Checklist for DIY Testing and Remediation
Before You Test
- Prepare the house: Close windows and exterior doors 12 hours before short-term tests when safe.
- Placement: Put detectors on the lowest lived-in level at least 20 inches off the floor and away from drafts.
- Record details: Note start/end times, test location, and occupants’ behavior that could affect results.
If You Get a High Result
- Retest to confirm: Use a long-term alpha-track or run multiple short-term tests.
- Reduce occupancy: Avoid spending extended time in the affected level until levels fall.
- Try immediate fixes: Seal visible cracks, cover sump openings, and increase temporary ventilation while planning a permanent solution.
If You Decide to DIY a Fix
- Start with sealing and sump conversion: These are lower-cost and often effective initial steps.
- Plan an SSD system: Identify suction point, route piping, and choose an inline radon fan that fits your static pressure needs.
- Follow permit and electrical rules: Obtain permits where required and hire an electrician for permanent wiring.
- Test after startup: Run a short-term test within 72 hours and a long-term test for seasonal confirmation.
- Keep records: Save test reports, fan model and wiring info, and any warranty paperwork.
For related retrofit guides and step-by-step projects, visit the DIY building guides hub.
The Bottom Line
Radon mitigation starts with testing: confirm the problem, then act. Use sealing and targeted fixes for low-to-moderate readings and consider a DIY sub-slab depressurization system when comfortable with drilling and electrical work. For complex foundations or persistent high readings, hire a certified mitigator and follow AARST/ANSI guidance. Test again after any intervention to verify success.
Frequently Asked Questions
Is DIY radon mitigation effective?
DIY mitigation can be effective for many single-family homes, especially when the problem is straightforward (slab cracks, single sump). Simple measures like sealing and a properly installed sub-slab depressurization (SSD) system often lower concentrations substantially. Use post-installation testing to verify results, and call a certified mitigator if levels remain above 4 pCi/L or if the foundation is complex.
How long do radon mitigation systems last?
Radon fans typically last 5–15 years depending on model and operating conditions. PVC piping and seals can last decades if installed correctly. Plan for periodic fan checks, keep spare parts on hand, and retest every few years or after major changes to the building envelope.
Can ventilation alone fix radon?
Ventilation can reduce radon by dilution but may be unreliable or energy-intensive as a long-term solution. Balanced systems (HRV/ERV) that control pressure and heat recovery can help, but SSD is the most predictable method to reduce soil-gas entry. For temporary relief, increased ventilation may lower short-term readings while planning a permanent fix.
Do I need a permit to install a radon fan?
Permit requirements vary by jurisdiction. Electrical connections for a permanently wired fan often require a permit and inspection. Check local building code offices before installation and hire a licensed electrician for permanent wiring to ensure compliance and safety.
How often should I retest my home?
Retest within 24–72 hours after a mitigation system is installed for a short-term check, then use a long-term test (90+ days) to confirm seasonal performance. After that, retest every 2–5 years or sooner if you renovate the foundation, add a new HVAC system, or notice system issues like unusual fan noise.