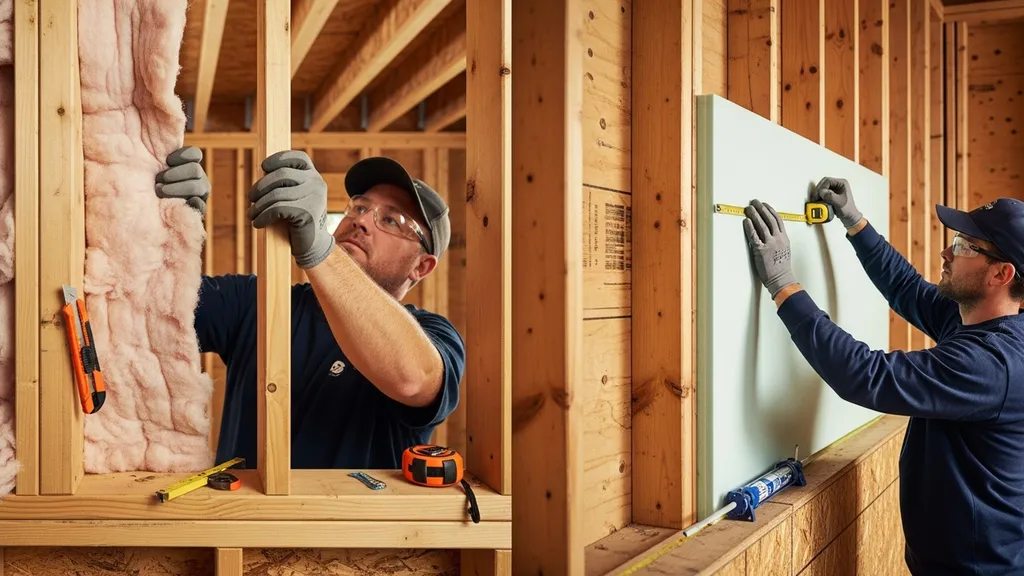
Clear, practical guidance to help DIY builders choose between R-20 and R-23 insulation for walls, roofs, and retrofits.
R-20 vs R-23 Insulation: Which Do You Need?
Choosing between R-20 and R-23 insulation is a common decision for DIY builders finishing a 2x6 wall, upgrading an older home, or specifying insulation for a tiny house. This article on r20 vs r23 insulation explains what the numbers mean, how much real-world difference 15% more R-value makes, and which materials and assemblies hit those targets without unnecessary cost. Readers will get a clear comparison of fiberglass batts, mineral wool, rigid foam, closed-cell spray foam, and blown-in cellulose — plus scenario-based recommendations for cold climates, mild retrofits, and small-cavity builds.
TL;DR:
- R-23 provides about 15% higher thermal resistance than R-20 (R-23 ÷ R-20 = 1.15), but energy savings are smaller and depend on climate, orientation, and fuel type.
- Best cost-performance: in mild climates, install R-20 cavity fill and focus on air sealing; in cold climates or thin assemblies, use continuous exterior foam or high R/inch materials to reliably reach R-23.
- For shallow walls or tiny homes, choose rigid polyiso or closed-cell spray foam to reach R-23 without excessive thickness; for budget retrofits, blown-in cellulose or dense-pack batts are practical.
R-20 vs R-23 Insulation: Quick Overview and Why This Comparison Matters
What R-value Means for Heat Flow
R-value is a material’s thermal resistance per unit area; higher numbers slow conductive heat transfer. The Department of Energy defines R-values as the measure of resistance to conductive heat flow — useful when comparing insulation products and assemblies (Department of Energy's guide to energy efficiency). In simple terms, doubling R-value halves conductive heat flow through a uniform wall under steady conditions, but real walls have framing, air leaks, and thermal bridges that change performance.
Why the Difference Between R-20 and R-23 Can Matter (and When It Won't)
Numerically, R-23 is roughly 15% higher than R-20 (R-23 ÷ R-20 = 1.15), which looks significant. The practical effect on annual heating bills, however, depends on the climate zone, orientation of the wall/ceiling, and the heating fuel price. In many temperate climates, the incremental energy savings from R-20 to R-23 are modest; sealing air leaks and adding continuous insulation to reduce thermal bridging often deliver larger benefits. Energy Star’s recommended R-values by climate zone are a good starting point when deciding how high to aim: they map cost-effective insulation levels for ceilings, walls, and floors (Energy Star recommended home insulation R–Values).
R-20 vs R-23 Insulation: Compare at a Glance (TL;DR Table)
| Option | Typical assembly achieving R-20 | Typical assembly achieving R-23 | Approx. thickness needed | Cost relative | Pros | Cons | Best for |
|---|---|---|---|---|---|---|---|
| Fiberglass batts | Standard 2x6 cavity, standard-density batts | Denser batts or 2x6 batts + 1/2" interior foam | 5.5–6" (cavity), +0.5" for small CI | Low | Low cost, DIY-friendly | Sensitive to gaps/compression; stud thermal bridging | Budget new builds with proper air sealing |
| Mineral wool batts | 2x6 cavity mineral wool R≈3.3/in | Denser mineral wool batts sized for 2x6 | 5.5–6" | Medium | Fire resistance, sound control, moisture tolerant | Heavier, slightly higher cost | Cold-climate 2x6 walls needing fire/sound performance |
| Rigid foam boards (polyiso/XPS/EPS) | Exterior CI: 1.5–2" polyiso over cavity R-fill | 2–2.5" polyiso continuous + cavity fill | 1–2.5" exterior | Medium | High R/inch (polyiso), reduces thermal bridging | Polyiso temp dependence, moisture risk for EPS/XPS | Assemblies needing thin CI or thermal break |
| Closed-cell spray foam | Thin layer in cavity (approx. 3–4") | Full cavity spray to R-23 (2.5–4") | 2–4" | High | Air barrier + high R/inch (R≈6–7/in) | Cost, embodied carbon, requires pro | Tiny homes, tight spaces, air-sealing priority |
| Blown-in cellulose | Dense-packed cellulose in 2x6 cavity | Dense-pack to slightly higher density or add 1/2" foam | 5.5–7" (dense-pack) | Low–Medium | Retrofit-friendly, good coverage | Settling, needs correct dense-pack technique | Retrofits and irregular cavities |
Notes: R-per-inch values vary by manufacturer and temperature. For installation guidance in rafters and attics, see best-practice tips on laying and supporting batts discussed by building guides such as the Australian YourHome insulation guide.
For payback modeling on your local climate and energy costs, try the insulation savings calculator.
R-20 vs R-23 Insulation: Fiberglass Batts — the Common Budget Option
Overview and How R-20 and R-23 Are Achieved with Batts
Fiberglass batts are priced low and widely sold in standard widths sized to 2x4 or 2x6 cavities. Typical R-per-inch for fiberglass batts ranges from about R-2.9 to R-3.8 per inch depending on density and product line. A standard 2x6 cavity (nominal 5.5" depth) commonly accepts an R-20 batt designed for that cavity. To reach R-23 with fiberglass a builder can use denser or higher-performance batts (some manufacturers sell “R-23 for 2x6” options) or combine an R-20 cavity fill with thin interior foam sheathing to add a little continuous insulation. Remember that product labels and manufacturer datasheets define the nominal R-values; installed performance drops if batts are compressed or gaps are left.
Strengths
- Low material cost and easy availability at big-box stores.
- Familiar installation technique for many DIYers.
- Works well where wall depth matches batt thickness (2x6 studs for R-20).
Weaknesses
- Performance is vulnerable to installation errors: gaps, compression at electrical boxes, and incomplete fills reduce effective R.
- Fiberglass does not act as an air barrier — required air sealing must be done separately, or benefits are reduced.
- Studs and plates create thermal bridges; a 2x6 wood stud reduces whole-wall effective R compared with nominal cavity value.
Best For
Budget-conscious new builds where stud depth accommodates batts, and where the builder will pair batts with a solid air-sealing strategy. For attic and ceiling guidance that complements batt selection, consult the attic insulation guide. To understand typical leakage points that undermine batts, see common problem areas in common air leakage points.
R-20 vs R-23 Insulation: Mineral Wool Batts — Fire and Moisture Benefits
Overview and Typical R-values
Mineral wool (rock wool) batts are made from molten rock or slag spun into fibers and compressed to batt form. R-values for mineral wool typically fall in the R-3.0 to R-3.3 per inch range depending on product. Many manufacturers offer R-23 batts sized for 2x6 cavities, so in a new 2x6 wall you can hit R-23 without extra foam. The Insulation Institute’s compressed-batt guidance provides useful reference charts comparing nominal and compressed R-values for fibrous insulations (Estimated R-values for compressed fiberglass batts).
Strengths
- Higher density than standard fiberglass gives better sound attenuation.
- Non-combustible base materials improve fire resistance and compartmentation.
- More tolerant of incidental moisture and does not lose much R when wet compared with some foams.
Weaknesses
- Cost is higher than fiberglass batts.
- Still not an air barrier; air sealing is required to realize full performance.
- Heavier and slightly harder to cut and fit in tight cavities.
Best For
Builders who prioritize fire safety, acoustic performance, or moisture resilience and want to reach R-23 in a 2x6 cavity without complex layers. If you plan to use batts, pair them with clear air-sealing work; see our how to air seal guide for durable strategies.
R-20 vs R-23 Insulation: Rigid Foam Boards (polyiso, XPS, EPS) — Adjusting R Without Thicker Cavities
Overview and How Foam Board Can Hit R-20 or R-23
Rigid foam boards let you add R-value without deepening the stud cavity because they offer higher R-per-inch than fibrous batts. Polyiso often provides the highest nominal R-per-inch (commonly R-5.6–R-6.5 at moderate conditions), while XPS and EPS offer lower R-per-inch (XPS around R-4.5–R-5, EPS R-3.6–R-4.2) depending on product grade. Using continuous exterior foam of 1.5–2" polyiso combined with cavity insulation will push whole-wall assemblies from R-20 to R-23 equivalent while cutting thermal bridging.
Strengths
- Achieve higher whole-wall effective R with less thickness.
- Exterior continuous insulation reduces thermal bridging through studs and raises whole-wall performance even if cavity R stays the same.
- Polyiso is light and easy to cut; EPS is economical for larger projects.
Weaknesses
- Polyiso’s R-value falls with low outdoor temperatures; check manufacturer charts for climate-adjusted values.
- XPS has higher embodied greenhouse gas (GWP) in many formulations; EPS is more moisture-tolerant but must be protected from water exposure.
- Boards require careful detailing at windows, corners, and penetrations to maintain continuous insulation.
Best For
Assemblies constrained by stud depth or where reducing thermal bridging is a priority. For selection guidance among polyiso, EPS, and XPS see our comparison post on polyiso comparisons. For performance benefits of continuous exterior foam on roofs or walls, read about exterior insulation performance. Alternative natural options such as cork can be considered in retrofit scenarios — see how to use cork. Sheathing and substrate choices interact with exterior foam; a useful reference is blandex vs plywood.
R-20 vs R-23 Insulation: Closed-cell Spray Foam — High R/inch, Air Sealing at Once
Overview and How Spray Foam Fits R-20 and R-23 Goals
Closed-cell spray polyurethane foam (ccSPF) offers high thermal resistance — typically R-6 to R-7 per inch depending on formulation — and functions as both insulation and an air/moisture barrier when applied continuously. To reach R-20, a thin 3–4" layer may suffice; to reach R-23, 3.5–4" may be enough depending on product. You can also use a thin spray-foam liner (1–2") in the cavity to provide air sealing and then add exterior foam for whole-wall R targets.
Strengths
- High R-per-inch solves thickness constraints in tiny homes and thin walls.
- Acts as an air barrier and vapor control layer when properly installed.
- Excellent gap-filling properties around irregular framing, penetrations, and blocking.
Weaknesses
- Material and installation costs are significantly higher than batts or blown-in cellulose.
- Installation requires trained contractors and attention to safety, mixing ratios, and set times.
- Higher embodied carbon compared with cellulose or mineral wool; weigh carbon vs performance goals.
Best For
Compact assemblies where thickness limits make fibrous batts impractical, or where combined air sealing and insulation speed is valuable. For a comparison of embodied carbon and cost against other retrofit materials see spray foam vs cellulose.
Note on codes and ventilation: Some jurisdictions regulate spray foam thickness and thermal barriers; check local code and plan ventilation strategy if spray foam reduces uncontrolled envelope leakage.
R-20 vs R-23 Insulation: Blown-in Cellulose and Loose-fill — Retrofit-friendly Choices
Overview for Retrofits and Irregular Cavities
Blown-in cellulose is made from recycled paper treated for fire resistance and is a cost-effective way to add R-value in attics and existing wall cavities. Dense-packed cellulose can reliably achieve R-20 to R-23 in a 2x6 cavity when installed correctly; typical attic loose-fill densities vary but dense-pack installs require professional-grade machines and installers to reach the target density that limits settling.
Strengths
- Good coverage in irregular cavities and around obstacles such as wires and plumbing.
- Lower embodied carbon compared with foam and mineral wool.
- Often lower installed cost for attic and wall retrofits than spray foam.
Weaknesses
- Settling risk if not installed at specified density; measure installed depth and density.
- More air-permeable than foam; combining with sealed air barrier or thin exterior foam is advisable for best performance.
- Moisture intrusion can reduce installed R; ensure wall cavities are dry before installation.
Best For
Homeowners retrofitting walls and attics where cavities are irregular or where budget and carbon footprint favor cellulose. For attic-specific options and material comparisons, see attic insulation options.
R-20 vs R-23 Insulation: Which Should You Choose? (scenario-based Recommendations)
Cold Climate Homes and Heating-fuel-sensitive Choices
If you live in climate zones with long, cold winters and expensive heating fuels, the incremental investment to reach R-23 is often justified when combined with continuous exterior insulation to reduce thermal bridging. Recommendation: specify R-23 in 2x6 walls by using R-23 mineral wool batts or R-20 cavity + 1.5–2" exterior polyiso to hit whole-wall targets. Prioritize an external thermal break and a continuous air barrier strategy to protect against condensation risks that can occur in cold climates.
Mild Climate or Retrofit Upgrades
In temperate climates, the most cost-effective upgrades are usually air sealing plus moving a cavity from R-11 to R-20; moving from R-20 to R-23 yields smaller savings. For many retrofits, aim for R-20 cavity fill with dense-pack cellulose or batts, then focus saved budget on sealing leaks and insulating the attic. Use the insulation savings calculator to model local payback.
Small Cabins, Sheds, and Tiny Homes
When wall thickness is limited, prioritize high R-per-inch options: thin polyiso boards or closed-cell spray foam can achieve R-23 in less depth than fibrous batts. See our recommendations for small structures and layout constraints in best insulation for sheds and use the shed insulation calculator for sizing guidance. For non-traditional mobile cabs, consult mobile home insulation options.
Budget-first vs Performance-first Decision Paths
- Budget-first: Aim for R-20 cavity fill with careful air sealing. Use blown-in cellulose for retrofits and standard fiberglass batts for new framing.
- Performance-first: Spend on continuous exterior foam or closed-cell spray foam to reach R-23 whole-wall performance and reduce thermal bridging. If carbon footprint matters, balance spray-foam use with cellulose or mineral wool in other assemblies.
What to check before deciding: climate zone, wall depth, moisture risks (cladding type, rainscreen), DIY skill level, and local code requirements. For whole-cabin planning guidance that includes insulation choices, see how to build a small cabin.
Before watching installers, many readers find a short how-to decision video helpful. The video below shows real installation examples and walks through the factors above:
Watch this step-by-step guide on choosing the best insulation for your home:
The Bottom Line
R-23 is about 15% higher R-value than R-20, but the real-world benefit depends on climate, detailing, and thermal bridging. For budget projects in mild climates, install R-20 well and seal air leaks; for cold climates, thin-wall builds, or performance-first projects, invest in R-23 using mineral wool, exterior continuous foam, or high R/inch spray foam.
Frequently Asked Questions
Does R-23 save 15% more energy than R-20?
Not directly. While R-23 is numerically about 15% higher than R-20 (R-23 ÷ R-20 = 1.15), annual energy savings are smaller because other heat-loss paths (air leaks, windows, thermal bridging through studs) also matter. Savings vary by climate and heating fuel. Use tools like the insulation savings calculator and follow Energy Star guidance on cost-effective R-levels for your climate to estimate payback.
Can I mix R-20 and R-23 in the same wall?
Yes. Layering a cavity R-20 batt with a thin continuous foam board (for example, 1/2"–1") can provide the additional insulation to reach whole-wall performance similar to R-23 while reducing thermal bridging. Alternatively, a high-R cavity fill with exterior foam can achieve R-23 equivalence. Remember to detail air and vapor control layers so moisture doesn’t accumulate in the assembly.
When is continuous exterior insulation a better idea?
Continuous exterior insulation is a strong option when thermal bridging through studs reduces whole-wall effectiveness, or when you need to raise whole-wall R without deepening studs. Exterior polyiso or EPS/XPS reduces heat flow through framing and can allow an R-20 cavity to perform like a higher-R assembly. For roof-specific guidance and passive-house-related performance, see the article on exterior insulation performance.
Will upgrading from R-20 to R-23 prevent condensation or mold?
Upgrading R-value alone does not guarantee condensation control. Condensation risk depends on vapor drive, where the dew point falls inside the wall, and how vapor-permeable each layer is. In cold climates, adding exterior continuous insulation moves the thermal profile outward and reduces interior-side condensation risk. Good air sealing and appropriate vapor control details are essential; consult local code and product datasheets for compatible assemblies.
How do I measure installed R-value and verify performance?
Installed R-value can be estimated by measuring depth, product type, and density, but performance verification uses diagnostics: a blower-door test measures whole-house air leakage, and infrared thermography identifies cold spots and missing insulation. For cavity-fill installs like dense-pack cellulose, installers should provide depth and density documentation. If you suspect poor performance after installation, combine a blower-door test with a visual inspection and thermal scan to find leaks and compressions; see the guide on common air leakage points for typical problem areas.