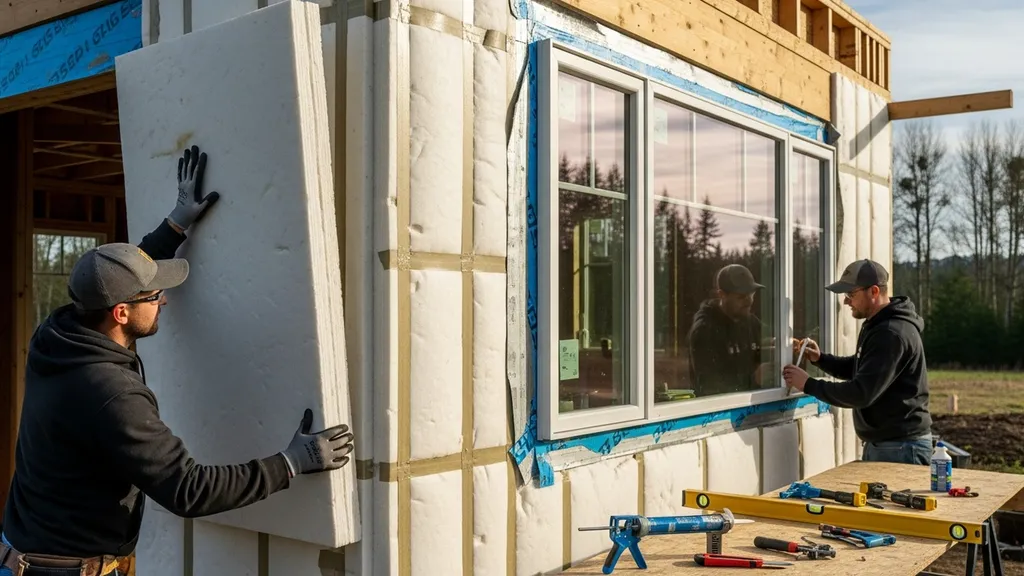
A practical case study showing how a budget-conscious self-builder approached a passive house on a $150k budget — design choices, cost breakouts, and lessons.
Passive House Build: $150k Budget Case Study
This passive house case study walks through how an owner-builder kept a certified-style low-energy home within a $150,000 construction budget. Readers will get concrete numbers (square footage, cost splits, timeline), the design and construction decisions that mattered, the mechanical systems chosen, and owner-builder strategies that cut cost without blowing the envelope performance. The goal: practical, replicable moves a budget-focused self-builder can use to reach Passive House-level airtightness and low heating demand while controlling upfront costs.
TL;DR:
- This project delivered ~950 ft² conditioned space for $150k, with ~40–45% of budget on envelope, windows, and foundations.
- Priorities were airtight construction to 0.6–1.0 ACH50, mid-range triple-pane windows, and a compact rectangular form — saving $15k–$25k vs premium window/spec choices.
- DIY framing/insulation plus selective subcontracting for HVAC and electrical reduced labor spend by ~30%, and solar PV was deferred to a second phase.
Project Snapshot — Passive House Build: $150k Budget Case Study
Project At-a-glance (scope, Size, Climate)
This case project reported roughly 950 ft² of conditioned living area on a temperate site (climate zone 5). The owner-builder targeted a blower-door result in the 0.6–1.0 ACH50 range, with continuous exterior insulation and airtight interior membrane. Conditioning loads were sized to a small ductless heat pump system. These parameters kept mechanical capacity and installation complexity low while meeting the performance goals often sought in a passive house case study.
Research and comparable certified projects show that small footprint and moderate climate are the two biggest determinants of hitting aggressive budgets. For readers in colder zones, see the cold-climate design guide for adjustments to insulation and foundation strategy.
High-level Cost Breakdown (major Categories)
The build allocated the $150k roughly as follows (rounded estimates reported by the project team):
- Envelope, windows, foundations: 40% ($60k)
- Structure and labor (framing, roofing): 20% ($30k)
- Mechanical systems (HRV/ERV, heat pump, DHW): 12% ($18k)
- Windows and doors: 10% ($15k)
- Exterior finishes and siding: 8% ($12k)
- Site work, permits, contingencies: 6% ($9k)
- Electrical, small tools, fixtures: 4% ($6k)
These figures are project-specific — regional labor, land costs, and permit fees change totals quickly. The project negotiated discounts on bulk insulation and deferred higher-end finishes, which moved dollars to the envelope and mechanicals.
Timeline and Delivery Model (DIY vs Subcontractors)
The owner-builder delivery model blended DIY labor and targeted subcontracting:
- Pre-construction and permitting: 8–10 weeks
- Foundation and slab: 3–4 weeks
- Framing and roof: 4–6 weeks (DIY lead with two hired framers for complex lifts)
- Air-sealing and insulation: 4–6 weeks
- Windows/doors, flashing: 2–3 weeks
- Mechanical rough-in and commissioning: 3–4 weeks (HVAC, electrical by licensed contractors)
- Interior finishes and inspections: 6–8 weeks
Total elapsed time: about 9–11 months from breaking ground to final occupancy sign-off. The project used subcontractors for trades requiring licenses and for speed: plumbing, electrical, and HVAC. This delivery split reduced risk while letting the owner save on labor by doing framing, insulation, and finishes.
Design Decisions That Made the $150k Passive House Possible
Simplified Form and Orientation to Reduce Load
Keeping the house compact and boxy reduced external area and thermal-bridge exposure. The plan was a simple rectangular footprint with a single gable roof and a long south façade for solar gain. A compact form reduces required insulation thickness and window area for the same internal area, saving both material and labor costs.
Design standards such as PHIUS guidance emphasize orientation and form for performance. The project followed those principles, focusing glazing on the south side, limiting east/west glazing, and using modest overhangs sized for summer shading. For retrofit-minded readers, many of these moves translate — see the site's retrofit tips.
Compact Footprint and Room Layout Choices
Open-plan living zones and multi-use spaces kept square footage low without feeling cramped. Bedrooms were sized for function rather than luxury; circulation was minimized. That allowed the owner to keep conditioned area under 1,000 ft², a critical lever in hitting a $150k target. Smaller area multiplies savings across foundation, roof, windows, and HVAC.
Window Strategy: Performance Vs. Budget
Windows are often the largest single component cost in a passive-focused build. This project selected mid-range North American triple-pane frames (U-values around 0.16–0.20 Btu/hr·ft²·°F) instead of premium imported passive-house-certified units. The trade-off: slightly higher transmission losses offset by superior air sealing, continuous exterior insulation, and careful shading.
Practical window approach:
- Prioritize south glazing for passive gain.
- Keep east/west glazing limited to reduce summer overheating.
- Use window sealing tips to get airtight transitions without premium frames.
Choosing fewer, well-placed windows with very good installation and sealing provided the most cost-effective reduction in heating load for this build.
Construction Methods and Materials Used in the Case Study (comparison Table)
Walls and Foundations: Choices Evaluated
The project evaluated three wall system approaches: deep double-stud with cellulose, structural insulated panels (SIPs), and insulated concrete form (ICF) foundations with a simple framed wall above. The final choice favored a modified double-stud wall with exterior continuous insulation where needed — chosen because of material availability, contractor familiarity, and low specialized tooling for DIY builders.
Recommended insulation targets for the project:
- Walls: Effective R-40–R-50 (combined cavity + continuous)
- Roof: R-60–R-80 (cold climates should push higher)
- Slab edge: Insulate vertical perimeter to R-20 typical
See the site's wall system comparison for deeper trade-offs between labor and thermal performance.
Roof and Insulation Approach
The build used a vented roof with dense-pack cellulose in the rafter bays plus an additional layer of polyiso on top of the sheathing for continuous insulation over framing. This reduced thermal bridging at rafters and allowed a thinner overall assembly than deep rafter bays alone. For projects preferring unvented roofs or cold climates, exterior roof insulation methods are covered in the roof insulation guide.
Comparison/specs Table: Double-stud vs Sips vs ICF
| System | Approx. material cost/ft² | Labor intensity | Typical thermal performance | DIY suitability |
|---|---|---|---|---|
| Double-stud wall (cellulose) | $18–$30/ft² | Medium | R-40–R-60 (depends on CI) | High |
| SIPs (factory) | $28–$45/ft² | Low | R-35–R-50 (tight) | Low–Medium |
| ICF (foundation) | $20–$35/ft² (foundation) | High | Very high mass and CI | Low |
Notes: Costs are rough ranges; local pricing varies. Double-stud walls score well for owner-builders because they use commodity materials and standard carpentry skills. SIPs reduce on-site labor and give consistent airtightness, but require freight, crane/lift, and panel handling. ICF is effective for foundations and below-grade walls but is labor and machinery intensive.
For embodied carbon and product sourcing, the project referred to the site's sustainable materials guide before finalizing suppliers. External case study literature on passive projects' wall choices can help refine trade-offs; see the Passive House case studies compilation for examples of how walls were built in other projects (Passive House in the Woods case study).
Airtightness and Air-sealing Strategy on a Tight Budget
Key Air-sealing Details the Build Prioritized
Airtightness was the single highest-value target for the budget. Specific details prioritized:
- Continuous interior air barrier with taped OSB or a smart membrane across the interior face of the sheathing.
- Sealed window and door rough openings with flashing tapes and an adjustable compression gasket.
- Airtight service chase design for plumbing and electrical to keep penetrations consolidated.
- Taped seams at all panel joints, including rim joists and knee walls.
Industry studies suggest that moving from 3.0 ACH50 to 0.6 ACH50 reduces heat loss massively; for this reason, the build focused labor and materials on sealing rather than upgrading to premium windows.
Sequencing: When to Test and How to Fix Leaks
The project ran a sequence of blower-door tests to avoid rework:
- Baseline rough-in test (after envelope sheathing and initial membrane) to find major leakage paths.
- Pre-drywall test after rough-ins and primary sealing work.
- Final test post-trim and full ventilation commissioning.
Fixes targeted the largest leakage areas first. Typical leak sources included rim joists, top plates (around chimneys and piping), and window head/side flanges. The team used the air-seal checklist and checked common trouble spots using the site's list of common leakage points.
Tools and Materials That Give the Most Airtight Bang for the Buck
Cost-effective products used in the build:
- High-performance acrylic and butyl flashing tapes for window perimeters
- Low-VOC liquid-applied membrane for odd shapes (bath walls, transitions)
- Gasketed framing for service penetrations and rough openings
- Canned spray foam for small penetrations and voids
- Continuous taped OSB or membrane for the main air barrier
Academic evaluations of airtightness strategies recommend paying for quality tape and membranes over decorative finishes; the energy savings compound over time. For research on performance indicators and airtightness impacts, consult the passive-buildings literature (case study review on building performance).
Mechanical Systems and Renewables Included Within the $150k Budget
Ventilation (HRV/ERV) Selection and Sizing
The project installed an ERV sized for the house volume and occupancy: roughly 40–60 CFM continuous balanced ventilation for a two-to-three bedroom small house, using unit heat/energy recovery efficiencies above 70%. The owner selected a mid-range ERV instead of a top-tier German unit to save cost but emphasized high-quality duct sealing and simplified duct runs.
Sizing rule of thumb used:
- Continuous flow = 0.35 ACH × house volume (for whole-house ventilation) or follow ASHRAE 62.2 simplified method.
Correct installation and commissioning are more important than picking the highest-cost unit. Units from established brands (e.g., Zehnder, Lifebreath) range in price; the project selected a reliable but mid-priced model and budgeted for professional commissioning.
Heating and Hot Water Strategy (heat Pump Options)
Heating and DHW used compact electric heat pump technology:
- Space heating: single or two mini-split heat pumps (air-source), sized to the building heating load with modest oversizing cushion.
- Hot water: heat-pump water heater or small combi unit where available.
Mini-splits from mainstream manufacturers (Mitsubishi, Fujitsu, Daikin) were used because they offer proven efficiency and service networks. The project avoided a full hydronic system to reduce plumbing complexity and contractor costs.
Expected costs (ranges):
- ERV installation: $2,500–$6,000 (unit + ducting + commissioning)
- Mini-split(s): $4,000–$8,000 installed for small homes
- Heat-pump water heater: $1,200–$3,500 installed
Solar PV and Battery Considerations for Partial Off-grid Goals
The $150k build included a modest PV-ready electrical panel and conduit for future rooftop expansion; a small PV array was deferred to phase 2. This kept initial costs down while preserving the option to add renewables later. Where owner budgets allow, small PV arrays (7 kW or 10 kW) offset bills quickly but add upfront cost; see the site's PV sizing guides for examples: 7 kW sizing and 10 kW guide. A general PV costs primer is available in the solar cost guide.
On constrained budgets, batteries often have lower immediate return than panels; the project prioritized envelope and ventilation first, then planned a small PV array later with a battery only if resilience or off-grid operation was required.
For general design alignments and passive-building mechanical recommendations, see broader case studies and design guides such as those from PHIUS (passive building design guide).
Labor, Permits, and DIY Strategies That Saved Money
Which Trades a Confident Diyer Can Realistically Tackle
The owner-builder tackled:
- Site prep and basic excavation
- Framing and roof sheathing (with hired help for lifts)
- Insulation installation (dense-pack or batt as specified)
- Air-sealing and interior finish work
Left to licensed contractors:
- Electrical and final panel hookup
- Gas or complex plumbing (if present)
- HVAC final commissioning and warranty-sensitive installs
Framing and insulation are high-value DIY tasks; the site's framing guide was used as a reference. Doing your own work saves money but increases time on the schedule and requires realistic assessment of skill.
Cost-saving Sequencing and Subcontracting Strategies
The project used block contracting to reduce management overhead:
- Bundle foundation and concrete work with one contractor to get quantity pricing.
- Schedule a single mechanical contractor to do HVAC and venting in one visit.
- Buy insulation and windows in bulk and schedule delivery just-in-time.
This sequencing reduced idle labor days and kept material storage costs down. A rule used: pay for professional inspection and commissioning on system-critical installs (HVAC, ERV, electrical) even if doing other work yourself.
Permits and Paperwork: Common Traps and Time-savers
Owner-builders must plan permit lead time into the schedule and budget for inspection rework. The project used a permit checklist based on the site's permit checklist to avoid common traps: seismic anchorage details, combustion appliance ventilation, and insulation R-values tied to climate zone. Insurance coverage during DIY builds and keeping permits visible on site reduced inspection friction.
For context on construction methods and permitting impacts, industry case studies offer additional detail on how permits affected scheduling and costs in similar passive projects (Passive House case studies collection).
Lessons Learned and Trade-offs From the Passive House Build: $150k Budget Case Study
Biggest Savings That Didn't Hurt Performance
- Prioritized airtightness and continuous insulation over premium windows. This produced near-passive heating loads at lower cost.
- Kept the plan compact and simple, avoiding complex geometry and expensive flashing details.
- Phased solar and high-end finishes to a later date, directing funds to the envelope first.
False Economies to Avoid
- Skimping on blower-door testing and commissioning; leaks found late are expensive to fix.
- Choosing the lowest-cost ventilation unit without planning for accessible filters and service.
- Over-specifying glazing quality when installation quality and air sealing would have delivered better performance per dollar.
Value vs Cost Matrix Used to Prioritize Features
- Envelope airtightness: High value, medium cost (priority 1)
- Windows: High value, high cost (priority 2)
- Mechanical efficiency (ERV, heat pump): High value, medium cost (priority 3)
- Solar PV: Medium value, high cost upfront (defer to phase 2)
- Finish upgrades: Low immediate energy value, optional
Embed: This short walkthrough video shows how these trade-offs looked on site; viewers can see the air-sealing detail, the window junctions, and the owner-builder choices in practice:
Check out these helpful tips and techniques:
For additional operating-cost reduction techniques and phased net-zero approaches, see the site's net-zero strategies.
The Bottom Line — Can You Build a Passive House on $150k?
A passive house case study like this shows that $150k can work when the build is small (sub-1,000 ft²), the builder contributes significant labor, the climate is moderate, and high-cost items (premium windows, full PV) are deferred. Early decisions to lock in a compact plan, prioritize airtightness, and choose mid-range mechanicals are the most reliable ways to stay within budget.
Checklist for readers:
- Lock conditioned area early.
- Decide wall system and insulation strategy before pricing.
- Budget for blower-door testing and commissioning.
- Plan PV and batteries as a later phase if cashflow is constrained.
Frequently Asked Questions
How small does a passive house need to be to hit $150k?
There is no fixed size, but the case project shows a realistic target around 800–1,000 ft² conditioned space when owner labor is significant and the climate is temperate. Smaller area multiplies savings because foundation, roof, and window costs scale with perimeter and area. If land, permit, or utility connection fees are high in your area, budget limits will push the minimum viable size down further.
What airtightness target should a DIY-focused passive house aim for?
Certified Passive House requires 0.6 ACH50, but for budget builds a pragmatic target is 0.6–1.0 ACH50. Hitting 1.0 ACH50 with excellent insulation and a quality ERV/HRV will already produce low heating loads. The key is incremental blower-door testing at rough-in and pre-drywall stages to correct major leaks before finishes are installed.
Can you add solar later and still meet passive house goals?
Yes. Passive house performance concerns primarily energy demand (heating/cooling), not supply. It’s common to design conduit, roof space, and panel locations during initial construction and install PV later. This phased approach preserves upfront budget for envelope and mechanicals, while leaving room for renewables once operating savings are understood.
Which wall system gives the best cost-to-performance ratio?
For owner-builders on a budget, a deep double-stud wall with cellulose and continuous exterior insulation often delivers the best mix of cost, DIY suitability, and thermal performance. SIPs reduce on-site labor and offer predictable airtightness but have higher material and handling costs. See the detailed wall system comparison for trade-offs.
How much of the work should an owner-builder attempt?
Owner-builders commonly handle framing, insulation, air sealing, and interior finishes to save money. Trades requiring licenses — electrical, complex plumbing, and HVAC commissioning — are usually subcontracted to protect safety and warranties. Use the site's framing guide and the permit checklist to plan which scopes to DIY and which to hire out.