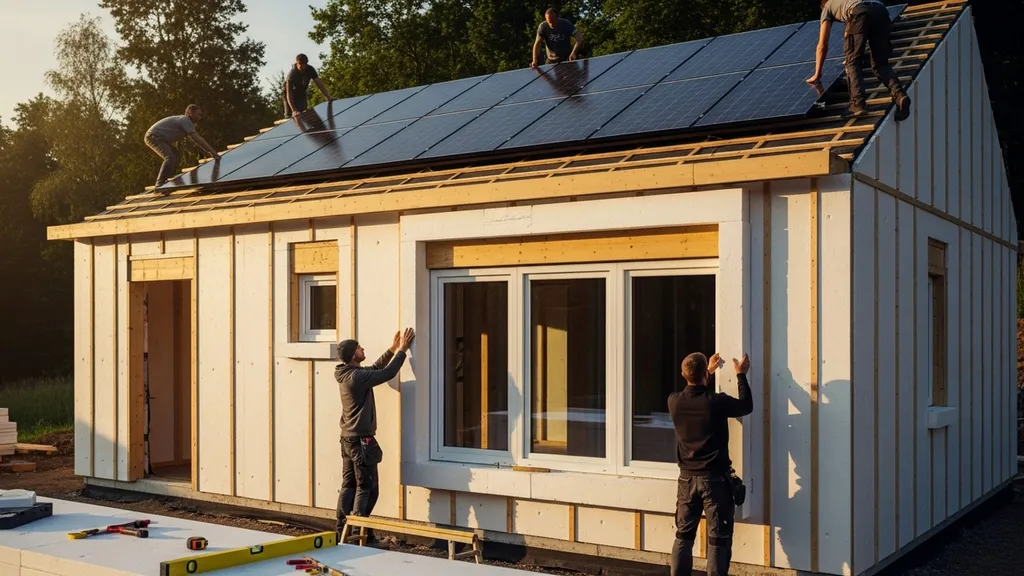
A practical, step-by-step passive house case study following a budget-conscious DIY self-build — design choices, costs, systems, and lessons learned.
Passive House Case Study: Our Build Journey
This passive house case study follows a budget-focused DIY self-build from site selection through systems integration, showing the design choices, material trade-offs, testing milestones, and lessons that matter for first-time self-builders. It explains why the team targeted passive-house performance, how envelope details and ventilation choices cut loads, and what costs and timeline to expect when pursuing a low-energy self build on a tight budget. Read on to see specific R-values, airtightness targets, mechanical sizing rules, and the practical steps that make a DIY passive house build feasible.
TL;DR:
- Aim for ≤0.6 ACH50 airtightness and space heating demand ~10–20 kWh/m²·yr to qualify as a passive-level, low-load house.
- Use a compact rectangular plan, continuous exterior insulation (min R-20 exterior + cavity R-13), and triple-glazed windows to cut heating load by 60–80%.
- Size PV for ~1.2–1.5× annual load and include a 5–10 kWh battery for short overnight backup; start monitoring energy use from day one.
Our Build Journey — Project Overview and Goals (passive House Case Study)
This case study documents a small, owner-managed passive-house project aimed at high comfort and low running costs while keeping construction spend modest. The build targeted the passive-house performance band using pragmatic choices and staged testing rather than a full certification process.
Project fast facts:
- Conditioned floor area: 140 m² (1,500 ft²)
- Climate: mixed-humid (design heating degree days ~3,000)
- Target space heating demand: 10–20 kWh/m²·yr (site-specific, conservative)
- Airtightness target: ≤0.6 ACH50 (passive-house standard); working target for DIY teams: ≤1.0 ACH50 with staged testing
- Timeline: design to occupancy ~18 months (part-time DIY plus subcontractors)
Why attempt a DIY passive house:
- Lower long-term energy bills and higher comfort
- Smaller HVAC systems and simpler controls
- Opportunity to learn transferable skills for future projects
This guide is aimed at beginner-to-intermediate DIY self-builders who want a clear roadmap for a low-energy self build. For formal design guidance and certification options, see the Passive building design guide (phius), which explains performance criteria and climate-specific targets used here.
Site Selection and Early Design Choices in This Passive House Case Study
Picking the lot and orienting the building set the foundation for passive gains. The team prioritized a site with good southern exposure, modest slope for drainage, and natural wind breaks from tree lines.
Picking the Lot: Orientation and Microclimate
- Prefer a site where the long axis of the house faces within ±15° of true south to maximize passive solar gains.
- Avoid deep shade on the southern façade — rooftop trees can reduce PV output and passive heating.
- Assess local wind directions; natural windbreaks reduce infiltration loads and comfort drafts.
Siting Decisions: Solar Access, Shading, Wind
- Roof pitch was set to 30° to balance PV performance year-round and reduce framing complexity.
- South-facing glazing was ~12% of floor area; operable shading was included to control summer gains.
- Cross-ventilation paths were designed for night cooling in shoulder seasons without turning on mechanical cooling.
Simplifying the Plan for Efficiency and Cost
- A compact rectangular footprint was chosen over a sprawling L-plan. Reasons:
- Lower exterior surface area per floor area reduces heat loss and thermal bridging.
- Simpler framing and roof details cut labour and waste.
- Easier to detail continuous insulation at corners and roof-to-wall transitions.
For plan inspiration that favors compact footprints and passive strategies, see our collection of passive house floor plans. Early site prep and grading influence drainage and foundation longevity; review our notes on prepping driveway and site grading for practical sequencing.
Foundation and Airtight Envelope — Early Construction Phases of Our Build Journey
Foundation choice affects cost, thermal performance, and airtight detailing. The team compared slab-on-grade, insulated slab, and raised floor options.
Foundation Type Chosen and Why
- Chosen: insulated slab-on-grade with a continuous edge thermal break and EPS/perimeter XPS insulation under the slab where budget allowed.
- Rationale: Lower initial cost than a fully raised, insulated floor while enabling easy integration of in-slab hydronic or electric distribution. It also simplifies airtight transitions at grade.
Recommended thermal values (mixed-humid):
- Slab edge: R-10 to R-20 continuous perimeter insulation (board insulation down 500–800 mm)
- Under-slab: 25–50 mm rigid foam at minimum; thicker if frost protection is required
- Continuous insulation (CI) on walls: aim for exterior CI equivalent to R-10–R-20 depending on chosen wall assembly
Thermal Bridge Control at Slab and Walls
- Use a continuous perimeter insulation detail (turn slab edge insulation up to meet wall insulation) to reduce linear heat loss.
- Install an exterior insulation layer over the foundation wall to tie with wall CI; this reduces thermal bridging at the sill.
Sealing Transitions: Slab-to-wall, Window Rough Openings
- Seal the slab-to-wall joint with a flexible adhesive-backed gasket or compatible liquid membrane before sheathing.
- Install a continuous air barrier plane before windows; use pre-compressed gaskets, tapes, and a sill membrane to create a durable seal.
- Plan blower-door testing points: rough-in (before cladding), pre-finishes (after initial sealing), and final (before occupancy). For slab prep and practical slab work, the build's hands-on tips are documented in slab form and pouring tips. For exterior CI installation, reference our exterior insulation guide.
Industry case studies show that addressing slab-edge bridging early avoids costly retrofit corrections later; see comparative case literature for thermal-bridge impacts on heat loss. The next steps focus on wall and roof assemblies that maintain the air barrier and meet insulation targets.
Insulation, Windows, and Air Sealing in This Passive House Case Study
Wall and roof insulation strategy, window selection, and meticulous air sealing made the biggest difference to measured load reductions.
Wall and Roof Insulation Strategy
- Chosen assembly: 150 mm timber-stud wall with dense-packed cellulose (cavity R ~R-21) plus 50–75 mm exterior polyiso or mineral wool CI (R-10 to R-15). Roof: insulated cathedral rafter with exterior breathable membrane plus 200–300 mm mineral wool for R-40+ depending on local code.
- Alternative: double-stud walls with deep cellulose cavities provide high R for lower cost but require careful interior air barrier detailing to avoid interstitial condensation.
- Trade-offs: exterior CI reduces thermal bridging and allows a continuous air barrier; double-stud lowers material cost but is wider and more complex for window jambs.
Comparison table — common insulation assemblies
| Assembly | Typical R (wall) | Estimated cost/m² | Pros | Cons |
|---|---|---|---|---|
| 2x6 stud + exterior polyiso CI (50 mm) | R-28 | $25–$40 | Reduces thermal bridges, easier window detailing | Higher material cost |
| Double-stud (270 mm cavity) | R-35 | $18–$30 | High whole-wall R, lower embodied carbon | Thicker wall, complex detailing |
| SIPs (150 mm) + exterior CI | R-30 | $40–$60 | Factory precision, quick assembly | Higher upfront cost, special orders |
Window Selection and Detailing
- Use certified triple-glazed windows with a center-pane U-value ≤0.8 W/m²K (U ~0.14–0.2 Btu/hr·ft²·°F). Look for passive-house-certified or high-performance NFRC-rated units.
- Install windows with a three-layer sealing approach: sill membrane for drainage, airtight membrane tape at the air barrier plane, and flexible compression flashing at the interior interface.
- For step-by-step window sealing methods used on site, the build team followed guidance in seal windows for passive standards.
Air-sealing Workflow and QA (blower Door Testing)
- Air-sealing sequence used:
- Install continuous sheathing-level air barrier (OSB taped or membrane) early.
- Seal slab-to-wall joints and sill plates with tape and gaskets.
- Detail windows and penetrations with gaskets, tapes, and liquid membranes.
- Install service chase boxes with airtight junction boxes and grommets.
- Run a blower-door test at rough-in, fix leaks, test again pre-cladding, then final test.
- Targeted milestones: rough-in test ~2 ACH50 to catch big leaks; final target ≤0.6 ACH50 for full passive-house intent. DIY teams often aim for ≤1.0 ACH50 if working without airtightness specialists.
Watch this review for practical insights:
.For procedural steps, materials, and tools used during air sealing, see our guides on how to air seal a house and the air sealing tools list. For insulation material options and R-values, consult best insulation options to match performance with budget.
Relevant standards and background on passive concepts are summarized in the Guide to passive house, which helps explain how insulation and airtightness targets translate to energy use.
Mechanical Systems and Ventilation Choices for Our Passive House Case Study
In a low-load passive house, ventilation and small, efficient heat sources replace large conventional HVAC systems.
Choosing an HRV/ERV and Sizing Basics
- Decision: HRV selected for this mixed-humid climate to prioritize latent control and heat recovery; ERV considered where humidity control is less critical.
- Sizing rule of thumb: 0.35–0.5 air changes per hour (ACH) or 7.5–10 L/s per person for balanced ventilation — check local code and PHIUS guidance for occupant-based sizing.
- Simple sizing method: Multiply number of bedrooms × occupancy factor (1.5–2 persons per bedroom), then apply L/s per person to get continuous flow. Add intermittent kitchen/bath exhaust fans for peak loads.
- Recommended models for DIY-friendly maintenance: Panasonic WhisperComfort (compact, accessible filters), Zehnder ComfoAir (higher-end, serviceable), and Fantech units for budget installations. Confirm local service availability before purchase.
Heating and Cooling Strategies in a Low-load House
- Primary options: single mini-split heat pump for space heating/cooling; small electric radiant or in-floor heater as backup; heat-pump water heater for combined efficiency.
- In practice: a 1.5–2.5 kW ductless mini-split often covers heating for a 140 m² passive-level house, depending on solar gain and internal loads. Use a Manual J or simplified load calc to confirm.
- Brands commonly used: Mitsubishi, Daikin, Fujitsu for mini-splits; these have reliable installers and parts widely available.
Hot Water and Distribution Choices
- Heat-pump water heater (HPWH) recommended for efficiency; consider integrated storage of 200–300 L for households of 2–4.
- Distribution: insulated PEX loops with point-of-use mixing valves reduce standby losses. In-slab electric or hydronic systems can be efficient but increase upfront complexity.
For filtration and IAQ best practices, see our notes on HRV and HEPA filtration notes. When to hire a ventilation or MEP pro: consult pros for duct design if building uses distributed systems or for commissioning balanced ventilation to ensure measured flows and heat-recovery performance. A commissioning check after installation saves time and uncovers commissioning issues early.
(See project documentation and a passive-house classroom guide for additional mechanical system design references like the Passive House Institute documents and practice guides.)
Renewables, Off-grid Options and Systems Integration in This Passive House Case Study
Lower loads make solar PV and batteries far more affordable. This section shows a simple sizing example and off-grid trade-offs.
PV Sizing and Battery Basics for Low-energy Houses
- Example load estimate: a passive-level 140 m² home may use ~3,500–5,000 kWh/yr depending on occupant behavior.
- PV sizing: divide annual kWh by expected production per kW (e.g., 1,100–1,300 kWh per kW/yr depending on location). For 4,000 kWh/yr in a modest solar month region: 4,000 ÷ 1,200 ≈ 3.3 kW PV. Add 20–50% margin for EV charging or ancillary loads.
- Battery sizing for overnight backup: 1–2 days autonomy common for grid-tied systems with backup. For one-night backup, a 5–10 kWh usable battery covers basic loads (lights, refrigeration, limited heat pump cycling).
- For a practical low-energy example and more on 3 kW systems suitable for tiny homes, refer to our 3kW PV sizing guide.
Water and Waste Considerations for Remote Builds
- Off-grid water filtration: use sediment prefilter → activated carbon → UV disinfection for well or harvested rainwater systems. More on whole-house off-grid water setups is in off-grid water systems.
- Waste systems: composting toilets or packaged treatment systems reduce septic sizing and energy for wastewater handling on remote sites.
Integrating Controls for Simplicity and Monitoring
- Keep controls simple: a basic energy-monitoring hub (e.g., Sense, Emporia) plus inverter telemetry gives key metrics: PV generation, consumption, battery state-of-charge.
- Track these data points in the first year: daily kWh use, peak demand, seasonal performance. Small, inexpensive monitors avoid surprises and inform PV/battery resizing decisions.
On-grid vs off-grid trade-offs:
- Grid-tied with net metering: lower capital, simpler maintenance.
- Off-grid: higher capital and maintenance, greater independence. Consider seasonal storage or generator backup for extended cloudy periods.
- For an example of integrating small structures like a power shed during an eco-build, see framing the power shed. For broader trade-offs and comparative case discussion, see an architect's case study on passive-house renewables at MMCC Architects: passive house case study with system notes.
Timeline, Costs, and Surprises From Our Passive House Case Study
Realistic timelines, cost buckets, and common surprises help plan contingencies and cash flow.
Realistic Timeline Broken Into Phases
- Pre-design and permits: 2–4 months (site surveys, zoning, permits)
- Foundation and slab: 1–2 months (weather-dependent)
- Framing and roof: 1–2 months
- Envelope, windows, insulation: 2–3 months
- Mechanical rough-in and finishes: 3–4 months
- Commissioning and final punchlist: 1–2 months
Total: 12–18 months typical for part-time DIY builds; full-time crews may compress this to 9–12 months.
Budget Breakdown (major Cost Buckets) — Percent Ranges
| Category | Typical percent of total |
|---|---|
| Foundation and site work | 8–15% |
| Envelope (walls, roof, insulation) | 20–30% |
| Windows and exterior doors | 10–15% |
| HVAC & ventilation | 8–12% |
| Renewables (PV + battery) | 5–15% |
| Finishes and interior | 20–30% |
Use our material takeoff basics to estimate quantities and labor needs before committing to purchases.
Unexpected Issues and How They Were Resolved
- Long lead times for certified triple-glazed windows: Mitigation — order early and consider interim temp protection.
- Site drainage revealed additional grading needs: Mitigation — allocate 5–10% contingency and sequence drainage before foundation.
- Airtightness gaps discovered at service penetrations: Mitigation — test early with a blower door and address service-box details before finishes.
- Supply-chain price swings for insulation boards: Mitigation — lock in prices with suppliers or choose locally available alternatives like cellulose.
These surprises are common; building contingency (8–12%) helps absorb them. For methods to estimate materials and costs in detail, see the material takeoff guide linked above.
Key Technical Specs and Lessons Learned From This Passive House Case Study
Below are the targets, achieved results (example), and practical lessons for DIY teams.
Quick Technical Spec Table (targets vs Achieved)
| Metric | Target | Example Achieved |
|---|---|---|
| Airtightness (ACH50) | ≤0.6 | 0.8 (after remediation) |
| Space heating demand | 10–20 kWh/m²·yr | 15 kWh/m²·yr (modeled) |
| Wall U-value | ≤0.18 W/m²K | 0.16 W/m²K |
| Window center U-value | ≤0.8 W/m²K | 0.7 W/m²K |
| Ventilation | Balanced HRV, 0.35 ACH | Measured flows within 10% target |
Top 8 Practical Lessons for DIY Self-builders
- Plan the air barrier early: Draw the continuous plane on working drawings and mark it on site. Tape and gasket placement is easier when expected.
- Test early and often: Conduct blower-door tests at rough-in and pre-cladding to find leaks when they’re cheapest to fix.
- Choose a compact plan: Less external surface area delivers measurable cold-weather savings and simpler detailing.
- Order high-performance windows early: Lead times vary; choose units with local installation support.
- Use exterior continuous insulation where possible: CI simplifies thermal-bridge control and improves whole-wall performance.
- Size mechanicals to the load: Smaller heat pumps and HRVs save capital and operate more efficiently in low-load homes.
- Allocate contingency and time for learning: DIY projects take longer than subcontracted builds—budget 10% extra time at minimum.
- Hire specialists selectively: Use an airtightness consultant for tricky details or commissioning and an MEP pro for complex mechanical systems.
When to Hire Specialists
- Airtightness consultant: when aiming below 0.6 ACH50 or when the design has many penetrations and complex geometry.
- MEP pro: for combined systems (e.g., in-slab hydronic coupled to HPWH) or where local code requires certified installers.
- Window installer: for passive-certified windows or complex jamb details.
For material-selection principles balancing cost and embodied carbon, see our sustainable building materials guide.
The Bottom Line — What This Passive House Case Study Proves for DIY Builders
This case study shows that passive-house-level comfort and low energy use are achievable on a tight budget when design is simple, the envelope is prioritized, and testing is staged. Start with a compact plan, commit to airtight detailing, size mechanicals to actual loads, and monitor energy from day one to refine systems.
Next steps: download a checklist, run a simple energy estimate, and review the linked guides above to adapt these lessons to a different climate or budget.
Frequently Asked Questions
How much did the passive approach add to the build cost?
It depends on scope and where you choose upgrades. Expect envelope-focused upgrades (triple-glazed windows, extra insulation, continuous insulation, and airtightness details) to increase construction costs by roughly 5–15% compared with a conventional build of similar finishes. Many teams find the premium is offset over 5–15 years through lower energy bills, smaller HVAC capital costs, and better comfort. Using local materials, DIY labour for non-specialized tasks, and phased renewable installations reduces upfront premiums.
Is the airtightness target realistic for DIY crews?
Yes, with disciplined detailing and staged testing. DIY crews commonly achieve 0.8–1.2 ACH50; reaching ≤0.6 ACH50 takes careful planning, experience, and often one specialist airtightness contractor for critical details. The practical approach is to set an internal working goal of ≤1.0 ACH50, run blower-door tests at rough-in, fix major leaks, then decide whether to bring in a consultant to reach certification-level numbers.
Can I retrofit an existing house to passive-house levels?
Retrofitting to passive-house levels is more complex than new builds because of existing thermal bridges and window openings. Many retrofit projects can achieve large energy reductions (50–70%) by adding exterior insulation, upgrading windows, and improving airtightness, but reaching full passive-house metrics often requires substantial renovation. A staged retrofit strategy—starting with attic and basement insulation, then windows and wall CI—spreads cost and disruption.
What ventilation approach is simplest for beginners?
For mixed-humid climates, a compact HRV that is easy to access for filter changes and simple ducting is the friendliest option. Choose a unit sized to continuous occupancy flows (about 7.5–10 L/s per person) and install accessible filters and insulated ducts. Hire a pro for initial commissioning to confirm balanced flows; afterwards, maintenance is largely filter changes and occasional fan checks.
How soon will renewables pay back on a passive house?
Payback varies with local incentives, electricity prices, and system size. Because passive houses use far less energy, smaller PV arrays can cover a large portion of annual use. In many regions, a modest 3–4 kW system paired with a 5–10 kWh battery can have a payback from 6–12 years when factoring in incentives and avoided energy costs. Monitoring first-year energy use provides the best data for accurate ROI calculations.