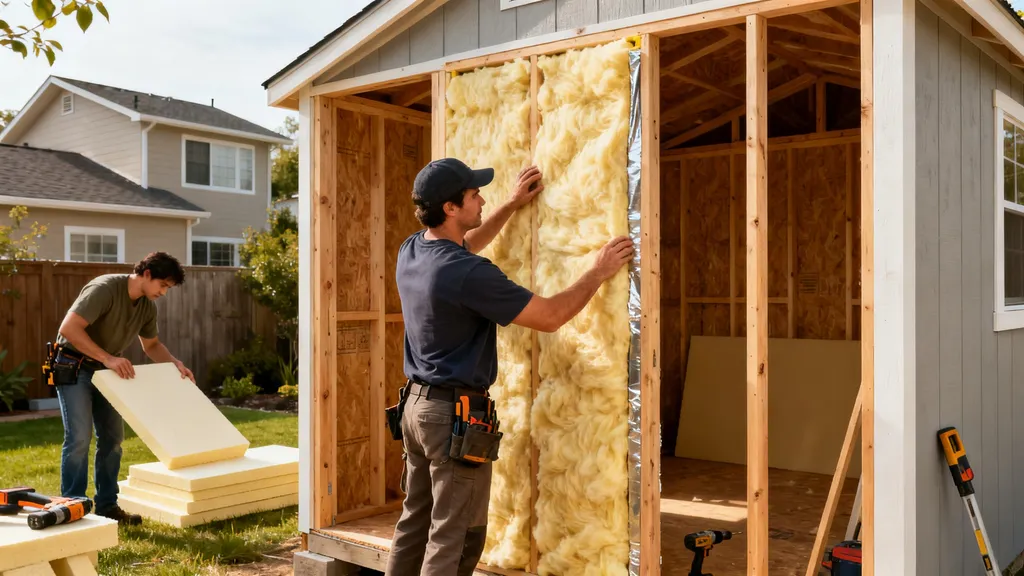
Step-by-step guide to building insulated shed walls that cut heat loss, control moisture, and fit a DIY budget. Practical options and detailing tips.
Insulated Shed Wall Assembly: Keep IT Warm
Insulated shed walls are the single most effective retrofit or build choice for turning a cold, damp storage box into a usable, year‑round workspace. This guide shows what materials work best, how assemblies differ, and the step‑by‑step details that stop heat loss, limit condensation, and keep tools and finishes safe. Read on to decide which approach fits your budget, climate, and DIY skill level—and to learn the airtight and moisture details that actually make insulation perform.
TL;DR:
- Choose the assembly that matches use and climate: cavity insulation for low-cost, exterior continuous foam to reduce thermal bridging, or double‑stud/panel for best thermal performance.
- Prioritize air sealing and a clear vapor/drying strategy—seal top plates, penetrations, and window/door rough openings to avoid condensation.
- Use appropriate materials for your priorities: batts for low cost, mineral wool for wet locations, rigid foam for exterior continuous insulation, and know when spray foam is overkill.
Why Insulated Shed Walls Matter
Imagine pulling out a power tool in a damp, chilly shed: metal bits are cold, batteries lose capacity, and wood can warp. Insulating shed walls changes that. For small buildings, walls are a major thermal path; improving wall insulation reduces heat loss, stabilizes interior temperatures, and cuts condensation risk on cold interior surfaces. The U.S. Department of Energy highlights wall upgrades as highly effective for improving energy performance, and building‑science approaches like Passive House emphasize airtight walls plus continuous insulation to control heat flow and moisture (Department of Energy building technologies guide).
When Insulating a Shed Makes Sense
- Protect tools and materials: Stable interior temperatures reduce rust and moisture damage.
- Enable year‑round use: A workshop or tiny office requires more consistent temperatures than an occasional garden shed.
- Prevent condensation and mold: Cold exterior walls + humid interior air = surface condensation; insulation moves the cold surface inward and helps manage dew points.
- Improve energy efficiency: Even modest heat sources last longer when the envelope is insulated and sealed.
Consider the shed’s use, occupancy, and local climate. In mild climates, minimal R‑value and good air sealing may be fine. In cold or humid climates, more continuous insulation and a clear vapor/drying approach are necessary. Passive House and airtightness principles are helpful concepts: reducing uncontrolled air leakage often gives bigger performance gains than adding more insulation without sealing.
Choosing Insulation for Insulated Shed Walls (comparison and Specs Table)
Picking insulation depends on budget, skills, moisture exposure, and whether you’ll insulate inside the stud cavity or outside with continuous insulation. Below is a compact comparison of common materials.
| Material | Typical R-value per inch | Moisture tolerance | Ease of DIY installation | Pros / Cons / Use cases |
|---|---|---|---|---|
| Fiberglass batts (e.g., Owens Corning) | 3.0–3.7 | Low — loses performance if wet | Easy | Low cost, familiar; best for dry, ventilated cavities |
| Mineral wool (rock wool) | 3.0–4.0 | High — resists water and mold | Moderate | Fire resistant, good for damp sheds or where condensation possible |
| Polyiso rigid foam | 5.6–6.5 | High — closed face resists moisture | Moderate | Excellent continuous exterior insulation to reduce thermal bridging |
| XPS / EPS rigid foam | 3.6–5.0 | Moderate — XPS more moisture resistant | Moderate | Durable, easy to cut; EPS lower cost but lower R/in |
| Cellulose (dense‑pack) | ~3.2 | Moderate — can handle some moisture if dried | Difficult | Good retrofit for irregular cavities, good thermal mass |
| Spray polyurethane foam (closed-cell) | 6.0–7.0 | Very high — acts as air/vapor barrier | Hard (requires pro/rigid PPE) | High R, excellent air sealing, costs more and needs professional handling |
Choose by priorities: cost, moisture resistance, thermal performance, and ease of installation. Rigid foam (polyiso, EPS, XPS) is the best choice when you want continuous exterior insulation to cut thermal bridging across studs. Fiberglass batts are the cheapest and easiest for stud‑cavity installs but perform poorly if they get wet and they don’t address stud thermal bridging. Mineral wool offers a middle ground for durability and moisture tolerance.
For a deeper dive on product choices and R-values by application, see our best insulation for sheds. If you're avoiding spray foam for health or cost reasons, our spray foam alternatives article lays out options and trade-offs.
(Secondary keyword usage: shed wall insulation, shed insulation r-value, exterior insulation for sheds)
Insulated Shed Wall Assembly Options (step-by-step)
Here are three practical assemblies that balance cost, performance, and DIY complexity. Each includes a concise checklist and climate/use recommendations.
Option a — Stud Cavity Insulation (fast, Familiar)
Step-by-step checklist:
- Frame walls with straight studs and plate blocking.
- Install structural sheathing (OSB or plywood); fasten per manufacturer.
- Fit insulation batts or mineral wool into cavities, cutting to snugly fill around wiring and openings.
- Install an interior air barrier: sealed drywall or taped interior membrane.
- Seal top and bottom plates with caulk or compressible foam; seal electrical boxes.
- Finish interior with drywall or alternative finish.
Pros: Low cost, easy to DIY, quick. Best climates and uses: mild climates or storage-only sheds, or when budget and speed matter. Cons: thermal bridging through studs, less effective in cold climates unless upped R‑value.
Option B — Exterior Continuous Rigid Foam (reduces Thermal Bridging)
Step-by-step checklist:
- Frame as above; sheathe walls with a structural panel.
- Install continuous rigid insulation (polyiso or EPS) over sheathing, staggering joints.
- Tape seams and apply moisture‑resistant WRB or housewrap over foam if required.
- Add furring strips or rain‑screen battens to create a drainage/ventilation gap.
- Install cladding over furring strips; seal at windows/doors.
- Insulate interior cavity as desired (thin batt or mineral wool) and air‑seal interior.
Pros: Significantly reduces thermal bridging and raises effective wall R, improves moisture resilience when detailed correctly. Best climates: cold climates and humid climates where moving dew point through the wall is a concern. Cons: more labor, material cost, and need for proper fastening and fire/code detailing; see our exterior insulation guide for fastening techniques and details.
Option C — Double‑stud or Insulated Panel Approach (better Thermal Performance)
Step-by-step checklist:
- Build an outer and inner stud wall with an offset for reduced thermal bridging, or use SIPs/structural insulated panels.
- Fill cavity with high‑R insulation (dense‑pack cellulose or mineral wool).
- Ensure continuous interior airtight layer and an exterior WRB with drainage gap.
- Seal all seams and penetrations; finish interior and exterior.
Pros: Higher whole‑wall R with lower bridging; great for workshops and tiny homes where performance matters. Best climates: cold climates and for year‑round use. Cons: higher complexity and framing materials, more wall thickness.
Before starting any option, watch a hands‑on assembly video that demonstrates mounting, seam‑taping, and common mistakes. Viewers will learn proper sequence and sealing techniques for both cavity and exterior foam installs:
Watch this step-by-step guide on installing insulation:
Across all options, use tape‑and‑seal methods for air barriers (butyl flashing tape, housewrap tape, and compatible foam adhesives). For airtightness and air barrier strategies refer to ASHRAE and Passive House guidance on controlled ventilation and layer continuity.
Building Sequence for Insulated Shed Wall Assembly: Framing to Finish
A clear build sequence keeps mistakes to a minimum. Below is a typical order with practical tips and tool/safety notes.
- Foundation and floor: Start with a level, well‑draining foundation. For options see our guide on shed foundations. Support and anchor points matter for wall alignment.
- Framing: Lay out studs accurately, use a plumb line, and toe‑nail or use metal connectors for strength. Keep top plates and bottom plates true to help with air‑sealing later.
- Sheathing: Choose structural sheathing suitable for your cladding and wind loads. For a full discussion, see our guide to wall sheathing. Fasten per manufacturer spacing to avoid squeaks when cladding is applied.
- Exterior insulation (if using): Attach rigid foam with adhesive and mechanical fasteners, tape seams, and install a WRB or drainage plane over or under the foam as your assembly requires.
- Air barrier and vapour approach: Decide whether your assembly needs an interior vapor retarder based on climate. Tape sheathing seams or install a dedicated air‑barrier membrane. Seal top/bottom plates and rim joist with low‑expanding foam or gasket tape.
- Insulation installation: Fit batts carefully; compressing batts reduces R. For dense‑pack cellulose or spray foam, follow manufacturer density and ventilation requirements.
- Details and penetrations: Seal around windows, doors, pipes, and wiring with backer rod + sealant or fire‑rated expanding foam where allowed. Install flashing and sill pans on openings.
- Interior finish: Install drywall, plywood, or other finishes. For durable alternatives see our interior finish options.
Tooling checklist
- Basic: circular saw, drill/driver, hammer, tape, level.
- Insulation tools: utility knife, insulation supports, blower for cellulose (rented), caulk gun.
- Safety: NIOSH‑rated respirator for cellulose or dusty work, gloves, eye protection, long sleeves for mineral wool.
Fastening patterns and sealing
- Fasten sheathing along studs at manufacturer spacing; avoid long unsupported spans.
- Run a continuous bead of sealant along top plates before sheathing; seal seams with compatible tape.
- Seal rim joists with closed‑cell spray or cut rigid foam with gasket and sealant.
(Secondary keyword usage: insulated shed wall assembly)
Airtightness, Moisture Control, and Ventilation for Insulated Shed Walls
Air leakage is often the reason insulated sheds still feel cold or develop condensation. Airtight walls cut uncontrolled heat loss and reduce moist air that condenses on cold surfaces.
Common Leakage Paths and Simple Sealing Techniques
- Top plates and bottom plates: Seal with gasket tape or low‑expansion foam before sheathing.
- Electrical penetrations: Use foam gaskets or non‑hardening sealant around boxes; consider external box extenders to keep boxes within insulation plane.
- Window and door rough openings: Flash and tape the WRB, use sill pans, and seal jambs with low‑modulus sealant.
- Rim joists and service entries: Insulate and seal with rigid foam and spray foam or rope gasket.
Vapor Control vs Drying Potential: Smart Strategies
- There’s no one‑size‑fits‑all vapor barrier rule. Vapor retarder placement depends on your heating and cooling climate. The governing idea: give assemblies a way to dry to at least one side. Assemblies with exterior continuous foam move the dew point outward and generally reduce risk of interior vapor drive; cellulose and mineral wool favor drying to the interior if the exterior is ventilated.
- For more rigorous airtightness goals or testing, consider a blower‑door test; our air‑tightness testing article explains targets and procedures.
Ventilation Options for Small Insulated Sheds
- Passive vents: Simple soffit or ridge vents help unheated storage but do not control humidity well for conditioned sheds.
- Small controlled fans: Inline fans, a small heat‑recovery ventilator (for year‑round offices), or intermittent exhaust can manage humidity.
- Dehumidifiers: Portable units or DIY passive strategies help shops with high humidity—see our dehumidifier ideas.
Aim for a manageable compromise: seal the envelope to reduce uncontrolled flows, then provide predictable ventilation sized to occupants and moisture loads. For frequently occupied or heated sheds—like a home office or workshop—controlled ventilation pays off.
Detailing Windows, Doors and Penetrations in Insulated Shed Walls
Well‑executed details make or break performance. Photos of these details help, but clear descriptions get you started.
Flashing and Sill Pan Basics for Shed Windows
- Install a sloped sill pan under the window and integrate it with the WRB. Tape or seal at the sill and jambs with compatible flashing tape.
- Insulate the jambs with compressible foam backer or low‑expansion foam to reduce cold spots.
- For conditioned sheds, consider insulated or low‑e windows to reduce heat loss through glazing.
Door Insulation and Weather‑tight Details
- Use a door with an insulated core for conditioned sheds; add continuous weatherstripping at jambs and a gasketed threshold.
- Ensure the header and jambs have continuous insulation; avoid leaving a pocket of uninsulated space at the door frame.
- If the door opens to the elements, add a storm door or insulated garage‑type door for better performance.
Electrical Boxes, Piping, and Other Penetrations
- Use gasketed boxes or foam gaskets behind boxes to maintain air barrier continuity.
- For small plumbing or conduit penetrations, use closed‑cell spray foam or backing rod plus sealant to fill gaps.
- Label large penetrations and plan their routing so insulation remains continuous; wall‑mounted HVAC (mini‑split) lines should be sealed where they pass through the wall.
When discussing rough openings and framing detail, consult our shed framing basics to size and brace openings correctly. If you plan a wall‑mounted HVAC like a mini‑split, follow manufacturer instructions and our mini‑split installation guidance on line set penetrations and wall sleeves.
Cost vs Performance for Insulated Shed Walls — Key Points and Quick Comparisons
Key points
- Cheapest upfront: Fiberglass batts in framed cavities — low material cost, low skill required.
- Best thermal-bridging reduction: Exterior continuous rigid foam — raises effective wall R and reduces cold studs.
- Best moisture tolerance: Mineral wool or exterior foam — cushions against condensation and water exposure.
- Highest airtightness with highest cost: Closed‑cell spray foam — air barrier and high R but more expensive and typically needs professional install.
Simple Example Scenarios
- Garden tool shed (occasional use): Stud cavity batts, taped interior drywall or OSB for air sealing; low skill and low cost. Time/skill: Low. Best assembly: Option A.
- Year‑round workshop with power tools: Exterior continuous foam over sheathing, cavity mineral wool, and controlled ventilation. Time/skill: Medium. Best assembly: Option B.
- Tiny office or insulated tiny home: Double‑stud or SIPs with dense‑pack insulation, high attention to airtightness and ventilation (HRV/ERV). Time/skill: High. Best assembly: Option C.
For a detailed look at R‑values by material and how that maps to your climate and goals, see our guide to R-values.
The Bottom Line: Insulated Shed Wall Assembly Takeaways
- Pick an assembly that matches your shed’s use, budget, and climate: batts for low cost, exterior foam for thermal bridging, double‑stud or panels for best whole‑wall R.
- Prioritize continuous air sealing and a clear vapor/drying strategy to prevent condensation and mold.
- Seal top and bottom plates, penetrations, and window/door openings; flash and tape openings correctly.
- Use mineral wool or exterior foam where moisture is a concern; reserve spray foam for situations where combined air barrier and high R are required and budget allows.
- Provide controlled ventilation or dehumidification for conditioned sheds.
- Consult local building code and manufacturer instructions for fastening, fire protection, and vapor control requirements.
Frequently Asked Questions
Do I need a vapor barrier in my shed?
It depends on climate and assembly. In many cold climates, placing a vapor retarder on the warm interior side helps prevent interior moisture reaching cold sheathing and condensing. In assemblies with exterior continuous insulation, the risk is reduced and an interior vapor barrier may be unnecessary. The right choice depends on insulation type, wall build‑up, and local code—consult manufacturer guidance and local building officials.
What R-value do I need for a shed?
There’s no single R‑value for every shed. Determine R‑value based on your climate and intended use: storage sheds in mild climates can manage with lower R, while conditioned workshops or tiny offices in cold climates benefit from higher whole‑wall R and attention to thermal bridging. Refer to general recommendations from building codes and our guide to R-values for material comparisons.
Can I insulate a shed from the outside?
Yes. Installing continuous rigid foam on the exterior reduces thermal bridging and improves whole‑wall R. Exterior insulation must be fastened and detailed correctly, with taped seams, a compatible WRB, and cladding support. For installation methods and fastening details, see our exterior insulation guide.
Is spray foam worth it for a shed?
Spray polyurethane foam can be worth it if you need high R per inch, an air barrier, and a small assembly thickness. However, it’s more expensive, usually requires professional application, and raises ventilation and off‑gassing considerations. For many DIYers, mineral wool plus good exterior foam or cavity batts with careful sealing delivers better value.
How do I stop condensation in an insulated shed?
Stop condensation by combining air sealing, appropriate insulation, and ventilation. Seal leakage paths (top plates, penetrations, windows), maintain a continuous insulation strategy that keeps interior surfaces warm, and provide controlled ventilation or dehumidification to remove excess moisture. Use moisture‑tolerant materials like mineral wool or exterior foam where needed, and verify performance with a simple inspection for cold spots after heating.