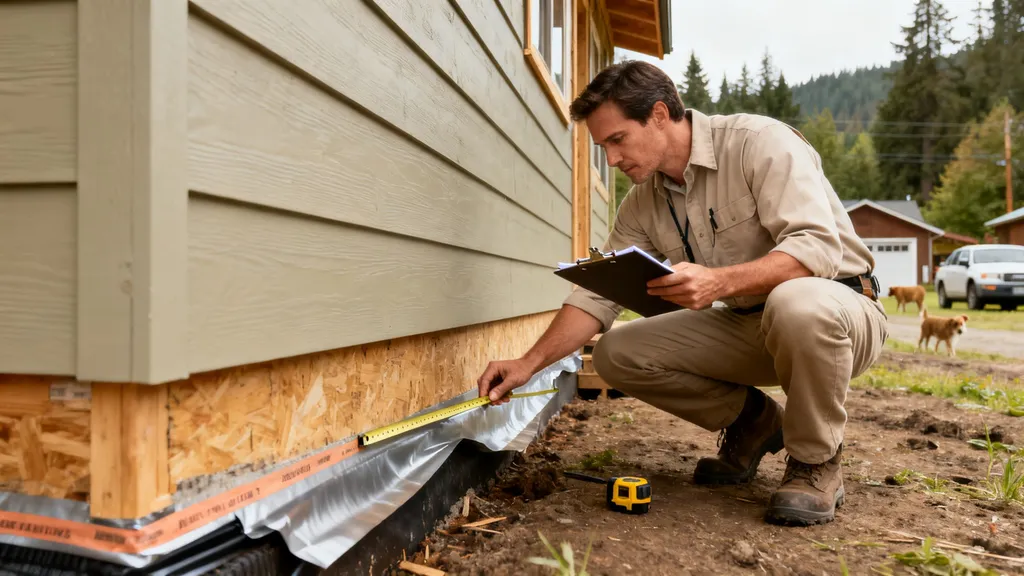
A practical guide for DIY homebuilders on what inspectors check, common fail points, and how to prepare your eco-home to pass inspections.
Passing Building Inspections: What Inspectors Look For
A building inspection is a required checkpoint in any permitted DIY build, and knowing what inspectors look for can keep delays, rework, and unexpected costs to a minimum. This guide explains stage-by-stage what inspectors will verify on a typical self-build, the most common fail points, and concrete steps DIYers can take to prepare an eco-home — from basic framing connections to blower-door airtightness testing. Read on to learn a practical inspection timeline, a ready-to-use checklist, and how to handle specialty inspections for off-grid systems.
TL;DR:
- Prepare documentation and mark key elements ahead of each building inspection to reduce failures and re-inspection delays.
- Run simple checks — tape measures for dimensions, a pressure or visual test for plumbing, basic circuit verification, and a blower-door pre-test — to catch common failures early.
- For energy and passive-house goals, photograph assemblies, label air-barrier transitions, and include manufacturer cut-sheets for special systems.
How Building Inspections Work: Stage-by-stage What Inspectors Look For
Inspectors normally review a build in stages tied to major construction milestones. The inspector enforces compliance with the Authority Having Jurisdiction (AHJ) and applicable codes such as the International Residential Code (IRC) and the National Electrical Code (NEC). Typical stages are:
Common Inspection Stages (foundation, Rough Framing, Systems, Insulation/air Barrier, Final)
- Foundation/footing: Verify footing depth and width to plan, rebar placement and spacing, and correct anchor bolt location. Inspectors will check footing depth relative to frost line in cold climates and whether concrete strength meets the approved design.
- Underground plumbing/electrical: Confirm pipe slope, cleanouts, and electrical conduit routing before backfill. Visual checks and pressure tests are common.
- Rough framing: Inspectors look for proper header sizes, nailing patterns, and framing connectors (straps, hangers). They verify stair rise/run, bedroom egress window size, and load path continuity.
- Rough mechanical, electrical, plumbing (MEP): Confirm box fill, cable stapling, grounding, combustion air, and that HVAC ductwork routing does not violate fire separation.
- Insulation/air barrier: Inspect continuity of the air barrier, insulation depth, and sealing of penetrations. Where codes call for blower-door testing or where buyers target performance standards, inspectors may require test documentation.
- Final: Verify that smoke/CO alarms are installed, exits and guardrails meet code, mechanical systems are commissioned, and exterior drainage prevents water entry.
Who the Inspector Reports to (AHJ) and How Inspections Are Scheduled
Inspectors work for the AHJ — often a city, county, or regional building department. Permit documents list required inspections and the schedule. DIY builders should book inspections per the AHJ’s online portal or phone system and confirm any special rules (e.g., separate solar PV electrical inspection). For a general step-by-step resource, see the Residential Building Inspection guide from ICC. An illustrative inspection timeline might look like: permit issued → footing → foundation → under-slab plumbing/electrical → framing → rough MEP → insulation/air barrier → final. Timelines vary by region and project complexity.
Top Items Inspectors Always Check — a Practical Checklist for DIY Builds
Below is a compact practical checklist DIY builders can use on-site before an inspection. Each bullet lists what inspectors check and a quick remedy you can perform.
- Foundation anchor bolts: Verify anchor bolt spacing and embedment per engineered details; tighten nuts and washers before inspection.
- Footing depth and rebar: Confirm footing depth and rebar tying; measure with a tape and photograph for records.
- Framing connections: Check hanger types and nail counts at critical connections; replace missing hangers and add nails per manufacturer label.
- Header sizing and support: Ensure header spans and jack studs match plans; add blocking or sister studs where undersized.
- Stair dimensions and railings: Measure stair rise/run and tread depth, and ensure guardrail height and baluster spacing meet code.
- Electrical box fill and grounding: Verify box fill calculations, proper screw-in connections, and continuous grounding; secure loose neutrals and document circuits.
- Plumbing slope and pressure: Confirm 1/4" per foot slope on drain lines where required; run a visible pressure test on supply lines.
- Fireblocking and smoke detectors: Confirm fireblocking at top and bottom of concealed spaces and correct smoke and CO alarm placement and interconnection.
- Weatherproofing and flashing: Check that flashing is continuous at roof-wall intersections, window sills, and deck connections; correct gaps in flashing tape or step flashing.
- Insulation depth and air-sealing: Verify insulation R-value and continuous air barrier at service penetrations, rim joists, and transition areas.
- Drainage and grading: Confirm that exterior grade slopes away from foundation and that temporary erosion control is in place.
- Mechanical clearances and combustion air: Verify water heater clearances and combustion air openings where applicable.
Quick DIY fixes:
- Use labeled zip ties and tags to show circuit names on panels.
- Clip and secure loose cables and conduit before the inspector arrives.
- Install temporary plywood covers for open stair areas, then remove after approval where permitted.
- Photograph and print critical details (anchor bolt layouts, header schedules) and place them with the permit folder on site.
Inspectors use tape measures, levels, visual inspections, and sometimes test instruments (e.g., circuit testers). Keep the permit placard visible and the approved plans on site for cross-reference. For an example of how local inspection offices present stage diagrams, consult a municipal site such as New Castle County’s building inspections page.
Common Reasons DIY Homes Fail Inspections (and How to Fix Them Quickly)
Many failures are straightforward to correct if identified early. The most frequent causes include documentation gaps, incorrect installations, air-sealing mistakes, and site drainage issues.
Documentation and Permit-related Failures
Common issue: Missing approved plans, missing engineered details, or no permit placard on site. Fix: Print and post the approved plans and plan set stamp; carry signed engineering supplements to show a change was approved. Re-inspections are typically required once documentation is provided.
Incorrect or Missing Materials and Installations
Common issue: Missing anchor bolts, undersized headers, open electrical grounds. Fix: Install missing hardware to engineered specs, correct header assemblies, and reattach grounding conductors. Example: A DIYer discovered missing sill anchor bolts after pour; they drilled and epoxied bolts to match the engineered spacing, photographed the work, and requested re-inspection. Inspector verification: inspector checks torque and spacing, then signs off.
Airtightness and Insulation Mistakes
Common issue: Gaps at service penetrations, recessed lighting in insulated ceilings, or batts not fully filling cavities. Fix: Add gaskets, caulk, and insulation baffles; for recessed lights use rated airtight housings or cover with fire-rated sealant. Example: A small build failed a blower-door pre-test due to gaps around the basement rim joist; the builder installed gasketed sill seal, taped the sheathing seams, and the follow-up test met the target.
Site Grading, Drainage and Erosion Control Issues
Common issue: Soil sloping toward foundation, missing downspout discharge. Fix: Regrade to achieve 5% slope away from foundation for the first 10 feet where code requires, add splash blocks or drain extensions, and install silt fence if required. Inspectors frequently flag unfinished site drainage as a final inspection punch item.
Consequences: Failing an inspection generally requires corrective work, documented evidence of correction, and a re-inspection. Re-inspection scheduling and fees depend on the AHJ; expect scheduling delays if corrections require permit revisions or third-party engineering.
For guidance on choosing compliant materials that reduce failure risk, see the sustainable materials guide.
Preparing Your DIY Build for a Smooth Inspection: a Pre-inspection Checklist
A focused prep routine the day before and the week before an inspector arrives reduces surprises.
Paperwork and Documentation to Have on Site
- Approved plans and permit card.
- Engineered details and structural calculations.
- Manufacturer cut-sheets for specialized equipment (solar inverters, battery enclosures, HVAC units).
- Any product listings or installation instructions required by the AHJ.
Keep these documents in a folder near the main access point. For permit step-by-step help, review the DIY permit guide.
Site Readiness, Staging, and Clearing the Access Path
- Clear a path for vehicle access to the work area and ensure ladders and scaffolding are safe.
- Expose work areas (don’t cover flashing or anchor bolts before inspection).
- Label key elements with bright tags (e.g., “pressure test done”, “anchor bolts checked”).
Testing and Verification You Can Do Before the Inspector Arrives
- Electrical: Use a plug-in outlet tester for basic polarity and ground checks and a non-contact voltage detector for verifying dead circuits. Label circuit breakers accordingly.
- Plumbing: Conduct visible pressure tests on accessible supply lines and schedule a fixture leak test. Document pressure readings with dated photos.
- Airtightness: Run a DIY blower-door pre-test or use a simple smoke pencil to check common penetration sites. For a full walkthrough on conducting and interpreting blower-door results, see the blower-door testing guide.
- Photographs: Take photos of concealed work (rebar layout, piping under slab, blocking) and store them with your permit folder for quick access.
Municipal inspection offices often provide pre-inspection diagrams and checklists; see an example workflow from a city building department such as San Antonio’s inspection overview.
What Inspectors Look for on Energy and Airtightness Checks (passive-house and Code Priorities)
Energy and airtightness checks are more technical but manageable with preparation. Inspectors focus on air-barrier continuity, correct insulation R-values, and proper ventilation system installation.
Air Barrier Continuity and Common Leak Locations
Inspectors search for continuous seals at framing-to-foundation interfaces, electrical and plumbing penetrations, attics, and at junctions between different assemblies. Common leaks are:
- Rim joists and band joists
- Utility penetrations (gas, electric, ducting)
- Window and door perimeters when flashing/tape is incomplete
To document readiness, photograph taped seams and show labelled penetrations.
Insulation Installation and R-value Verification
Inspectors verify insulation type and installed depth to match approved plans and the code (e.g., IECC). They look for voids, compressed batts, and gaps at corners. Use a measuring rod to show installed depth and a copy of product packaging or cut-sheet to verify R-value.
Ventilation Systems and Mechanical Ventilation Verification
Inspectors check mechanical ventilation (exhaust fans, ERVs/HRVs) for proper installation, correct duct sizes, and termination locations. They may request manufacturer cut-sheets to confirm fan capacities and commissioning records for flow rates.
Windows, Doors and Thermal Bridging
Inspectors verify that fenestration meets labeling, flashing is installed, and thermal-bridge mitigation (insulation or continuous insulation) matches plans. For passive-house targets, industry examples include a target blower-door result under 1.0 ACH50 for new builds; note that local code may set different thresholds. Example targets: Passive House Institute (PHI) standards versus IECC code requirements — they are not the same and both may be enforced separately.
Check out these helpful tips and techniques:
For more on how energy codes are evolving and net-zero requirements, see the net-zero code overview. For step-by-step blower-door procedures and interpretation advice, consult the blower-door testing guide.
Special Inspections and Permits for Off-grid or Alternative Systems
Off-grid systems and alternative materials often require extra scrutiny, separate permits, or specialized inspections.
Solar PV, Batteries and Electrical Disconnect Requirements
Solar PV typically requires a separate electrical inspection and interconnection approval from the utility. Battery energy storage systems have specific separation, ventilation, and labeling rules; inspectors will check for listed enclosures, rapid shutdown provisions, and clear service disconnects. Include inverter and battery cut-sheets with your permit package to speed review.
Septic, Greywater and Rainwater Systems
On-site wastewater systems require health or environmental department approval and often a separate inspection. Rainwater harvesting and reuse rules vary by state; some AHJs require system schematics and backflow prevention details. For regional rules, see the rainwater legal rules overview. If planning off-grid water systems, consult local AHJs early and attach schematics to your permit.
Alternative Materials and Foundations (hempcrete, ICF, Limecrete)
Materials like hempcrete or insulated concrete forms (ICF) may trigger special inspections or require engineered submittals. Provide the AHJ with manufacturer data and a comparison to code-prescribed assemblies. For a practical comparison of these systems, see hempcrete vs ICF comparison. If using unconventional materials, include third-party testing or engineering where possible to avoid surprises.
For off-grid permit examples and regional guidance, review the off-grid permit requirements resource. Where regulatory clarity is limited, early AHJ engagement and detailed shop drawings reduce the likelihood of additional orders or rework. For documentation structure guidance, see the practical reporting advice in the GoAudits building inspection report guide: building inspection report guide.
Comparison: What Typical Building Inspectors Prioritize vs What Passive-house Inspectors Test
| Priority area | Typical building inspection | Passive-house / performance inspection | Why it matters |
|---|---|---|---|
| Structural safety | Verify load paths, connectors, and guardrails | Basic verification only if structural changes affect envelope | Safety is mandatory; structural checks protect occupants |
| Fire and egress | Confirm exits, smoke/CO alarms, fireblocking | May check for airtight fire separations if part of envelope strategy | Fire and egress protect life; codes are prescriptive |
| Airtightness | Visual seal checks; blower-door only if code/permit requires | Quantified blower-door test with airtightness target (ACH50) | Performance testing proves energy targets are met |
| Thermal bridging | Basic insulation continuity checks | Detailed thermal-bridge analysis and third-party verification | Thermal bridges impact comfort and energy use |
| HVAC commissioning | Functional checks, airflow where required | Detailed commissioning and balancing for efficiency targets | Proper commissioning ensures intended performance |
| Energy testing | Insulation/R-values and equipment efficiency label checks | Whole-building testing and modeling verification | Tests confirm the building meets modeled performance |
Where priorities overlap: insulation installation, mechanical functionality, and safe electrical systems. Where they differ: passive-house inspections focus on quantified performance (blower-door numbers, whole-house energy use) while typical building inspectors prioritize minimum safety and code compliance. For builders targeting both, staged verification works well: document assemblies for code inspectors, then run performance tests and third-party verification for passive-house certification. For a retrofit perspective that aligns code inspections with passive-house goals, see the DIY passive-house retrofit.
The Bottom Line
Plan inspections into your schedule, document everything, and test assemblies before the inspector arrives. Run simple checks — electrical testers, plumbing pressure tests, and a pre-test blower-door — photograph concealed work, and consult your AHJ early, especially for off-grid or alternative systems.
- Prepare and post approved plans and product cut-sheets on site.
- Run pre-inspection checks and photograph concealed work.
- Address common fail points (anchor bolts, air-sealing, grounding) before the inspector arrives.
- Expect re-inspections and factor time for corrections into your build schedule.
Frequently Asked Questions
How long does a typical building inspection take?
Inspection duration depends on the stage and project size. A single-stage inspection (for example, a footing or electrical rough) may take 15–45 minutes for a standard single-family build. Complex inspections—such as a full energy or final inspection—can take an hour or more. Expect additional time if the inspector documents issues or requests clarification on engineering details.
Can I request a pre-inspection or walkthrough with the inspector?
Many AHJs allow an informal site visit or pre-application meeting to review plans and identify likely issues. Requesting a pre-inspection walkthrough can reduce common failures; however, policies vary by jurisdiction. Contact your permit office early to ask about pre-inspection options and any required fees.
What should I do if my build fails an inspection?
Read the inspector’s report carefully, correct the listed items, and document repairs with photos and dated notes. Submit evidence if your AHJ accepts it and schedule a re-inspection per the AHJ’s process. In many cases small corrections are straightforward, but structural or engineered issues may require a stamped revision or consultant involvement.
Do energy/performance tests replace code inspections?
No. Energy and performance testing (like blower-door tests) are complementary to code inspections. Code inspections enforce safety and minimum standards; performance tests verify energy targets. Some jurisdictions may require blower-door tests for code compliance, but usually you must satisfy both safety/code requirements and any separate performance standards.
How far in advance should I schedule inspections during a DIY build?
Schedule inspections as soon as permit approvals indicate required stages; many AHJs allow booking several weeks ahead. For busy seasons or large municipalities, book rough inspections at least 1–2 weeks in advance. Always confirm the AHJ’s scheduling window and leave time for potential re-inspection and corrections.