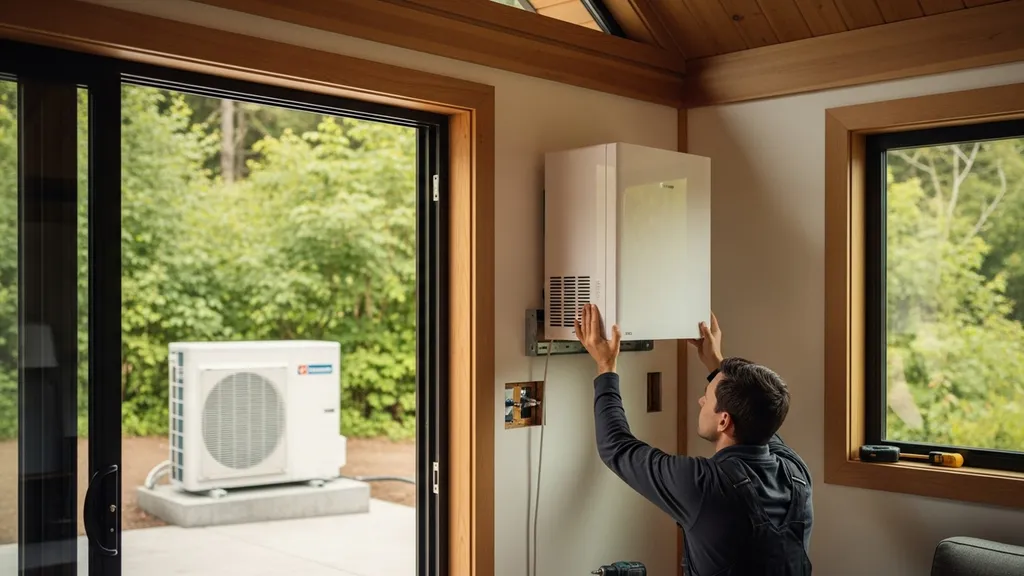
Practical guide to sizing and installing mini split heat pumps for budget-conscious DIYers — load calculation, placement, DIY vs pro, costs, and commissioning.
Mini Split Heat Pumps: Sizing and Installation
Mini split heat pumps are a compact, efficient way to heat and cool individual rooms or whole small homes without ductwork. For budget-conscious DIY homebuilders and self-builders, understanding how a mini split heat pump works, how to size it correctly, and which installation tasks you can reasonably do yourself will save money and improve comfort. This guide covers load-calculation basics, quick sizing rules, single- vs multi-zone tradeoffs, electrical and line-set constraints, what to DIY versus hire a certified technician for, and ballpark costs and operating estimates.
TL;DR:
- Choose size with a Manual J or careful room-by-room calc — typical tight 1,000 ft² homes need ~12,000–18,000 BTU; poorly insulated homes can need 24,000+ BTU.
- DIY the mechanical work (mounting heads, running drain, routing conduit), but hire an EPA 608-certified tech for brazing, evacuation, refrigerant charging, and final commissioning.
- Expect single-zone installed costs roughly $1,500–$4,500; multi-zone systems commonly run $5,000–$12,000+ depending on zones, line lengths, and electrical upgrades.
How Mini Split Heat Pumps Work (basics Every Diyer Should Know)
A mini split heat pump moves heat between indoor heads and an outdoor compressor using a refrigerant loop, reversing direction for heating or cooling. The main parts are the indoor head (air handler), outdoor compressor/condenser, refrigerant line set (two copper lines), and a condensate drain. Mini splits are ductless heat pumps, so they avoid duct losses and are suited to retrofit rooms, tiny homes, or multi-zone setups.
Key performance metrics:
- COP (Coefficient of Performance): Ratio of heat output to electrical input. Typical mini splits have COP in the 2–4 range in heating mode depending on outdoor temperature.
- SEER (Seasonal Energy Efficiency Ratio): Cooling efficiency; many mini splits are in the 16–30+ SEER range.
- HSPF (Heating Seasonal Performance Factor): Seasonal heating efficiency metric for heat pumps.
Variable-speed inverter compressors adjust compressor speed to match load, improving part-load efficiency and reducing short cycling. Cold-climate models are designed to maintain capacity at lower ambient temps; check manufacturer low-ambient specs if winters dip below -5°F to 5°F. The ductless design means indoor heads use variable-speed fans for air distribution; choose head styles to match room air mixing needs.
The ductless market is expanding rapidly — market research projects significant growth in coming years, which helps explain the wide range of available models and features. For a recent industry valuation and growth forecast, see this ductless mini split heat pump market report that summarizes market size and trends.
Sizing Basics for Mini Split Heat Pumps: Load, Rules of Thumb, and Manual J
Sizing matters. Oversizing causes short cycling, poor humidity control, and reduced efficiency. Undersizing means the system struggles on the coldest or hottest days. The correct approach is a room-by-room load calculation (Manual J) for permanent homes. For fast planning, a rule of thumb can help shortlist unit sizes.
Quick steps for a simplified load approach:
- Measure conditioned area and ceiling heights room-by-room.
- Note insulation R-values, window area and orientation, and expected occupancy.
- Use local design temperature (coldest outdoor temp) to size heating capacity.
- Adjust for airtightness and mechanical ventilation losses.
Example ballpark numbers:
- Tight, well-insulated 1,000 ft² home in a temperate climate: ~12,000–18,000 BTU.
- Poorly insulated 1,000 ft² home with single-pane windows: 24,000+ BTU.
- Single room (bedroom) typical: 6,000–12,000 BTU.
Industry best practice is Manual J for year-round comfort and equipment longevity. Manual J accounts for orientation, infiltration, and thermal mass. The Department of Energy and Building America guides emphasize proper tube handling and connections during installation to prevent leaks; see the Building America discussion on ductless mini-split best practices for details on copper tubing preparation and flaring.
Climate, insulation, and airtightness drastically change required heat pump capacity. Improving the building envelope (air sealing, adding insulation) often shrinks system size and upfront cost more than swapping to a larger unit. For practical ways to reduce heat load, consult guides on air leakage points, exterior insulation guide, and attic insulation choices.
Checklist of inputs for a proper load calc:
- Conditioned floor area by room
- Ceiling heights
- Wall, roof, floor R-values
- Window types and orientation
- Local winter design temp
- Number of occupants and internal gains
- Mechanical ventilation rates
- Target indoor setpoints
Use these values when you request quotes or prepare a Manual J from an HVAC contractor.
Quick Sizing Checklist and Key Points for Homeowners
- Measure room area and ceiling height for each space.
- Record insulation R-values for walls, attic, and floors.
- Note window types, orientation, and shading.
- Set target indoor temperatures for heating and cooling.
- Count exterior doors and identify drafty spots.
- Decide how many zones you want (one head per zone is common).
- Check local design temperature for worst-case sizing.
- Save all values before shopping for units.
- Avoid relying only on square-feet × BTU rules.
- Plan for future expansion if adding rooms later.
Research indicates mini splits often save 20–40% energy versus older electric resistance or window units in comparable projects. For an academic comparison of ductless versus ducted systems and measured savings, see the Purdue comparison study at Purdue's research repository.
Selecting Indoor and Outdoor Units: Single-zone vs Multi-zone and Model Tradeoffs
Choosing between a single-zone system (one outdoor unit, one indoor head) and a multi-zone system (one outdoor feeding several indoor heads) depends on layout, budget, and control preferences.
Single-zone pros:
- Lower initial cost for one room or small cabin.
- Simpler electrical and refrigerant runs.
Single-zone cons:
- Less flexibility for whole-house comfort in larger plans.
Multi-zone pros:
- Centralize outdoor footprint while providing independent indoor control.
- Less visual impact than multiple outdoor compressors for several rooms.
Multi-zone cons:
- Higher initial cost and more complex charging/commissioning.
- Outdoor unit matching must account for combined indoor head capacities and diversity.
Mounting options for indoor heads:
- Wall-mounted: most common, good for living rooms and bedrooms.
- Ceiling cassette: better seasonal air distribution for open plans.
- Floor console: suitable for low-wall space or retrofit in tight spots.
Comparison/specs table (example fields to collect when comparing models):
| Feature | Single-zone small | Multi-zone mid | Cold-climate outdoor |
|---|---|---|---|
| Nominal capacity (BTU) | 9,000–12,000 | 18,000–36,000 | 12,000–36,000 |
| SEER / HSPF | 16–22 / 8–10 | 18–24 / 9–11 | 17–20 / 9–11 |
| COP (typical heating) | 2.5–3.5 | 2.8–3.6 | 2.0–3.0 at low temps |
| Indoor sound (dB) | 22–35 dB | 24–40 dB | 25–42 dB |
| Max line length | 50–65 ft | 65–100 ft | 50–80 ft |
| Multi-zone limit | n/a | 4–8 heads | 2–8 heads |
| Warranty basics | 5–10 yrs compressor | 5–10 yrs compressor | 5–10 yrs compressor |
When shortlisting, collect manufacturer specs for nominal capacity, SEER/HSPF/COP, sound levels, max refrigerant line length, and warranty terms. ENERGY STAR lists eligible mini split models; review the ENERGY STAR mini split heat pumps fact sheet to prioritize certified models with documented savings.
Brand examples to look up: Daikin, Mitsubishi, Fujitsu, Bosch. Use these names as starting points for spec hunting rather than endorsements.
Electrical, Placement, and Line-set Considerations for Installation
Electrical requirements vary by capacity but most residential mini splits are single-phase and run on 120V or 240V circuits. Typical breaker sizes:
- 9k–12k BTU single-zone: 15–20A on 120V or 20A on 240V depending on model
- 18k–36k BTU: 20–30A on 240V
Always verify the unit nameplate and electrical diagram for exact breaker and wire size. Install a hardwired disconnect at the outdoor unit per NEC requirements and local code.
Outdoor unit siting:
- Maintain minimum clearances per manufacturer: commonly 12–24 inches behind, 24–36 inches above, and 36 inches in front for unobstructed airflow.
- Avoid placing the condenser near bedroom windows if possible due to sound.
- Use vibration-isolating pads or anti-vibration mounts to reduce transmitted noise.
- For roof vs ground pad tradeoffs, see roofing considerations in our roofing installation tips article and if pouring your own pad, follow practical steps in concrete mixing tips.
Line-set considerations:
- Factory max line lengths typically range from 50–100 ft depending on model and multi-zone complexity; longer runs reduce capacity and may require factory or dealer adjustments to refrigerant charge.
- Elevation change matters; many manufacturers limit elevation differences (outdoor-to-indoor) to ~33–50 ft for warranty compliance.
- Improper refrigerant charge or insufficient vacuuming causes failures and inefficiency.
For manufacturer installation manuals (wiring diagrams, recommended clearances, line-set specs), consult vendor technical documentation such as the Bosch mini split manuals and installation guides.
If combining mini splits with solar or hybrid electrical systems, check the hybrid wiring guide for integration tips and consider panel orientation to avoid mutual shading and heat interactions; see our notes on solar panel cooling tips.
DIY-friendly Installation: What an Experienced Diyer Can Do (and When to Call a Pro)
Homeowners with carpentry and mechanical aptitude can complete many mechanical installation tasks. That said, refrigerant handling, brazing, and vacuum evacuation generally require EPA 608 certification and specialized tools. Industry reviewers and researchers stress hiring certified technicians for all refrigerant work to avoid leaks and ensure warranty compliance; for a discussion of best practices and safe tubing preparation see Building America's guidance cited earlier.
DIY tasks you can attempt:
- Mounting indoor heads to a secure wall plate and ensuring level alignment.
- Drilling the wall penetration for the line-set and passing a sleeve.
- Routing condensate drain, installing a condensate pump if gravity drain isn't available.
- Running low-voltage control cable and conduit for the line-set.
- Installing the outdoor pad and securing the outdoor unit to vibration isolators (concrete pad can be DIY — follow concrete mixing tips).
Tasks to Hire a Certified HVAC Technician For:
- Brazing or flare connections of refrigerant lines, vacuuming the system to proper micron levels, charging the correct refrigerant amount, and leak testing.
- Final commissioning with gauges to verify amp draw and correct inverter setup.
- Complex multi-zone balancing and controls programming.
Tool checklist for DIY mechanical tasks:
- Drill and hole saw sized for line-set
- Level and stud finder
- Tubing bender sleeve or chase for the line-set
- Condensate pump (if required), PVC or PEX drain plumbing
- Silicone sealant, cable conduit, clamps, and fasteners
A review of installation studies suggests installer skill and attention to piping details strongly influence system performance; for more on installer recommendations and measured outcomes, see the ACEEE evaluation of mini-splits in field studies: ACEEE mini-split evaluation paper.
Watch this step-by-step guide on installing a $360 mini split heat pump — complete DIY guide:
Common Installation Mistakes, Commissioning, and Troubleshooting
Frequent Errors That Reduce Performance:
- Incorrect refrigerant charge or skipped vacuum — leads to reduced capacity and compressor damage.
- Poor condensate routing causing backups and indoor leaks.
- Insufficient outdoor clearance restricting heat rejection.
- Oversized equipment causing short cycling and humidity issues.
- Wrong inverter or remote settings that limit low-speed operation.
Commissioning tests you can perform or verify with a technician:
- Delta-T test: Measure supply vs return temperature. For cooling, a 15–20°F delta-T is common depending on airflow and setpoint.
- Amp draw: Compare measured compressor amps to nameplate; significantly higher amps indicate a problem.
- Airflow checks: Verify supply grille flow and that indoor head louvers are set for desired pattern.
- Defrost check: In heating mode, observe defrost cycles at low ambient temperatures and confirm they complete properly.
Troubleshooting Checklist:
- No heat or cool: Check power at outdoor unit and breakers, then verify remote settings and thermostats.
- Weak airflow: Clean filters, check indoor head fan speeds, verify no-blocked returns.
- Water leaks: Inspect condensate path, check pump operation, and clear drain lines.
- Short cycling: Consider undersized/oversized unit; verify thermostat differential and inverter staging.
Document baseline readings (amps, delta-T, and runtime patterns) during the first week and again after seasonal extremes. Ongoing monitoring helps catch gradual performance declines; for long-term tracking methods, see monitoring energy use.
Costs, Incentives, and Operating Expenses for Mini Split Heat Pumps
Installed cost ranges vary widely based on capacity, zoning, and installation complexity:
- Single-zone installed (DIY mechanical + paid HVAC tech for charging): roughly $1,500–$4,500.
- Multi-zone professional install (3–6 heads): commonly $5,000–$12,000+.
Cost drivers: outdoor unit size, number of indoor heads, line-set length, need for electrical panel upgrades, and whether a certified tech is required for refrigerant and commissioning.
Operating cost example:
- If a mini split has a COP of 3.0 and produces 9,000 BTU/h (2.64 kW thermal) while consuming 0.88 kW electrical, at $0.16/kWh the cost per hour of heating = 0.88 kW × $0.16 = $0.14. Compare that to electric resistance at 100% efficiency: 2.64 kW × $0.16 = $0.42/hr. These are simplified hourly estimates but show how COP affects operating expense.
Rebates and tax credits:
- ENERGY STAR, federal tax incentives, and utility rebates often apply to qualifying products. Some programs require certified installers or specific product lists. Use broad directories like DSIRE or your utility's rebate page, and examine ENERGY STAR resources for eligible model lists: ENERGY STAR mini split fact sheet.
If you plan to pair a mini split with solar or batteries, review capital tradeoffs in our hybrid systems cost analysis. For off-grid sizing examples, see the 10 kW and 7 kW solar system guides: 10kW off-grid sizing and 7kW workshop sizing.
The Bottom Line: Practical Recommendations for Sizing and Installing Mini Split Heat Pumps
Do a proper load calculation (Manual J) for permanent homes and prioritize right-sizing over raw capacity. Improve the building envelope first to shrink system size and running costs. DIY the mechanical mounting and routing if you have skills, but hire an EPA 608-certified HVAC technician for brazing, evacuation, refrigerant charging, and final commissioning. Check local rebates and ENERGY STAR listings before purchase.
Recommended next steps:
- Gather room dimensions and insulation values.
- Run a quick room-by-room load checklist (above) and decide zones.
- Shortlist ENERGY STAR or manufacturer-certified models using the specs table.
- Line up a certified technician for refrigerant work and commissioning.
Frequently Asked Questions
Can I install a mini split myself?
Homeowners can complete many mechanical portions of a mini split install: mounting indoor heads, drilling wall penetrations, routing the condensate drain, and running low-voltage wiring. These tasks are within reach for people comfortable with carpentry and basic plumbing.
However, brazing, vacuuming, and charging refrigerant require EPA 608 certification and specialized gauges and vacuum pumps. For safety, legal compliance, warranty preservation, and reliable performance, hire a certified HVAC technician for all refrigerant work and final commissioning.
How do I size a mini split for a 1,200 ft² home?
Sizing depends on insulation, climate, and airtightness. A tight, well-insulated 1,200 ft² home in a temperate area might need roughly 14,000–21,000 BTU. A poorly insulated home of the same size could need 28,000+ BTU. Room-by-room load calcs (Manual J) are the best method for accuracy.
For planning, measure room areas and insulation R-values, note window orientation, and use local design temperatures. Save those values before asking suppliers for quotes or running a Manual J with a contractor.
Do mini splits work in cold climates?
Yes — cold-climate mini split models are designed to maintain heating capacity at lower outdoor temperatures using enhanced compressors and refrigerant controls. Performance varies by model; check the manufacturer's low-ambient specs and COP/HSPF ratings for winter conditions.
In very cold regions, some homeowners combine mini splits with a supplemental heating source or choose models with documented low-temperature capacity. Always consider envelope upgrades first to reduce peak heating demand.
How long do mini splits last?
With proper installation and maintenance, mini split compressors commonly last 12–20 years. Indoor heads and controls may last longer but can need fan motor or electronics repairs over time. Regular filter cleaning and prompt attention to condensate or airflow issues extend life.
Warranty terms vary; check compressor and parts warranties before purchase. Good commissioning reduces premature failures caused by poor refrigerant charge or piping issues.
What maintenance do mini splits need?
Routine maintenance is straightforward: clean or replace indoor filters every 1–3 months, clear outdoor unit debris and vegetation twice a year, inspect condensate drains, and verify no unusual vibration or sounds. Have a qualified technician inspect lines, electrical connections, and refrigerant charge every few years or if performance drops.
Document baseline commissioning readings (amps, delta-T, and runtime) so you can compare later and spot problems early. For guidance on ongoing energy monitoring, see our piece on monitoring energy use.