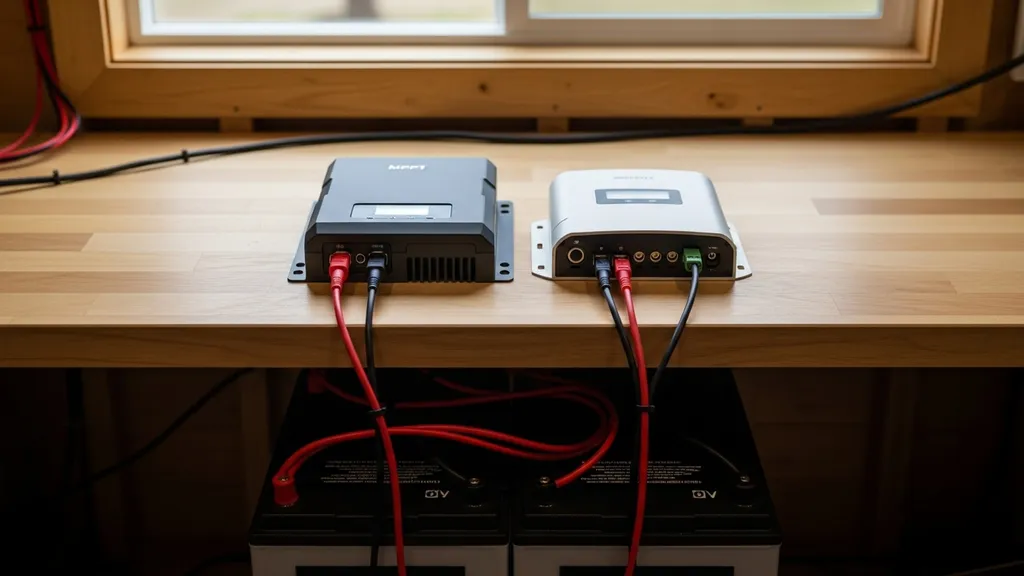
Understand how to size MPPT and PWM solar charge controllers, compare efficiency and cost, and pick the right controller for common off-grid systems.
Solar Charge Controller Sizing: MPPT vs PWM
Choosing the right solar charge controller matters for off-grid reliability, battery life, and how much of your panel array you actually use. This article explains solar charge controller basics, compares MPPT and PWM performance and cost, and walks through worked sizing examples so a budget-conscious DIYer can pick the right controller for a 12V, 24V, or 48V battery bank. Expect clear sizing steps, derating rules, wiring notes, and scenario-based recommendations for sheds, tiny houses, and cabins.
TL;DR:
- MPPT generally harvests 10–30% more energy than PWM for multi-panel or higher-voltage arrays; choose MPPT for 24V/48V systems or arrays with Vmp much higher than battery voltage.
- For a safe controller sizing rule, multiply expected continuous current by 1.25 (a common NEC-style derating); then pick the nearest standard controller rating (30A, 60A, 100A).
- PWM is low-cost and fine for single-panel 12V systems or small lighting loads; MPPT is worth the extra cost for modest-to-large arrays, cold climates, or partial shading.
| Controller type | Conversion efficiency (real-world) | Relative cost | Typical system voltages | How sizing differs | Best for |
|---|---|---|---|---|---|
| MPPT | 92–99% peak, 80–95% typical depending on conditions | Medium–High | 12V, 24V, 48V (supports higher PV VOC) | Size to expected continuous current (Imp×parallel strings), check PV VOC vs controller max voltage | Multi-panel arrays, 24/48V banks, cold climates |
| PWM | ~75–85% effective when Vmp closely matches battery, lower when Vmp >> battery | Low | 12V, sometimes 24V (panels must match battery) | Array Vmp should approximate battery V; size to panel current × parallel strings | Single-panel 12V systems, simple sheds, budget installs |
Solar Charge Controller Sizing: MPPT vs PWM — TL;DR and Quick Comparison
One-sentence Takeaway
An MPPT controller converts higher panel voltage down to battery voltage and extracts significantly more usable energy from multi-panel or higher-voltage arrays; PWM is simpler and cheaper but loses harvest when panel Vmp exceeds battery voltage.
When to Prefer MPPT vs PWM
- Prefer MPPT when using multi-panel strings, running 24V/48V battery banks, or operating in cold climates where panel voltage rises; MPPT recovers extra wattage and improves battery charging.
- Prefer PWM for low-cost 12V single-panel setups, small lighting systems, or when panel Vmp closely matches battery V.
Research studies comparing controller performance under load and no-load conditions provide evidence on relative charging speed and efficiency; for example, comparative lab studies outline differences in charging time and harvested energy between PWM and MPPT strategies (comparative performance analysis).
Solar Charge Controller Sizing: MPPT vs PWM — How MPPT Controllers Work and How to Size Them
MPPT Basics (what MPPT Does and Why It Matters)
MPPT stands for maximum power point tracking. An MPPT controller continuously adjusts input conditions so the solar array operates near its Vmp and Imp where power (P = V × I) is highest. Then it converts that higher PV voltage down to the battery voltage while stepping up current, so a 24V or 48V panel string can efficiently charge a 12V battery bank. That voltage conversion is why MPPT recovers energy that PWM would waste.
Sizing Steps for MPPT: Array Voltage, Battery Voltage, and Current Calculation
- Gather panel specs: Vmp, Imp, and Voc for each module.
- Decide array configuration (series strings produce higher voltage; parallel strings increase current).
- Calculate maximum PV current into the controller: Imp × number of parallel strings. For series strings, current stays at single panel Imp; for parallel strings, currents add.
- Apply a safety margin: multiply the calculated continuous current by 1.25 to allow for continuous duty, temperature effects, and conservative wiring practice (this is a common NEC-style guidance, not a legal instruction).
- Choose controller current rating equal to or above that value. Standard sizes include 30A, 60A, 100A, etc.
- Verify controller can handle array VOC under the coldest expected conditions — cold temperatures increase Voc, so controller max input voltage must exceed cold-weather VOC.
Example: Two 200W panels wired as a 48V string (series) with Imp = 8.8A. If there are two parallel strings, PV current = 8.8A × 2 = 17.6A. Apply 1.25 factor → 22A. Choose a 30A MPPT controller. To check supported array wattage for battery bank conversions: for a 12V battery and 30A controller, recommended max PV wattage ≈ 12V × 30A = 360W; for 24V battery, 24V × 30A = 720W. Manufacturers often publish exact supported PV wattage per battery voltage — verify on datasheets.
Derating and Temperature Factors to Include
- Use Voc at minimum expected temperature to check controller max voltage rating.
- High ambient temps reduce controller current capacity slightly; some installers derate controller current in very hot enclosures.
- Cable voltage drop and fuse sizing can affect usable current; size conductors to keep voltage drop under recommended values.
This video explains the fundamentals:
.Internal readers planning larger off-grid systems can consult the off-grid home sizing guide for how controller selection fits into whole-system design. Also review the installation safety checklist for wiring, fusing, and mounting best practices.
Strengths, Weaknesses, and Best-for Use Cases
- Strengths: better energy harvest from higher-voltage arrays, useful for 24V/48V banks, improved performance in cold or partially shaded conditions, supports larger arrays without oversized conductors.
- Weaknesses: higher upfront cost, slightly more complex electronics (more to troubleshoot), generally larger physical size and heat dissipation needs.
- Best for: mid-size to large off-grid systems, tiny houses using 24V/48V banks, cold-climate installations, systems with mismatched panel-and-battery voltages.
Studies assessing controller charging times find MPPT controllers shorten charging time versus PWM by supplying more current to the battery when array voltage exceeds battery voltage, particularly under variable irradiance conditions (evaluation for Philippine usage).
Solar Charge Controller Sizing: MPPT vs PWM — How PWM Controllers Work and How to Size Them
PWM Basics (what PWM Does and its Electrical Limits)
PWM stands for pulse-width modulation. A PWM controller rapidly switches the connection between panel and battery to regulate charging voltage; it effectively drags the panel voltage down to the battery charging voltage. When Vmp of the panel equals battery voltage, energy transfer is efficient. But when Vmp is significantly higher than battery voltage, the excess voltage is lost and the panel can't deliver its full power.
Sizing Steps for PWM: Matching Panel Voltage to Battery Voltage and Current Calculation
- Select panels whose Vmp is close to the battery bank nominal voltage (e.g., 17–18V Vmp panels for 12V batteries).
- Compute array current: Imp × parallel strings.
- Apply the 1.25 safety margin (Imp × parallel × 1.25) to size the PWM controller's amp rating.
- Verify that array Voc does not exceed the controller's rated input voltage (some PWM controllers accept higher Voc but still require matching Vmp for efficiency).
Example numeric illustration: A 200W 12V nominal panel might have Vmp ≈ 18V and Imp ≈ 11.1A. On a 12V battery, the panel's Vmp will be pulled down to battery charge voltage — so available power is less than rated. If there's a single panel, PWM losses may be modest; with multiple panels wired for higher voltage, PWM loses a larger share of available wattage.
When PWM Sizing Rules Differ From MPPT
- PWM requires deliberate Vmp-to-battery matching; MPPT does not.
- For PWM, adding panels in series to increase voltage is counterproductive unless panels are configured to match battery voltage or the controller supports higher voltage.
- For MPPT, series strings reduce conductor sizes and allow efficient step-down; for PWM, series increases voltage that PWM can't harvest.
For more on small shed setups where PWM often suffices, the shed system options guide is a helpful companion. Panel selection matters; see budget-friendly panel choices in budget solar panel options.
Strengths, Weaknesses, and Best-for Use Cases
- Strengths: low cost, simple electronics, rugged with long service life, minimal setup complexity.
- Weaknesses: lower harvested energy when Vmp > battery V, not suitable for larger arrays or higher-voltage battery banks, less effective in cold where panel Vmp rises.
- Best for: single-panel 12V lighting circuits, small remote sensors, simple RV or shed power where budget is tight.
Industry guides and manufacturer overviews provide practical buying and selection advice for PWM controllers and simple system sizing (Anker SOLIX guide).
Solar Charge Controller Sizing: MPPT vs PWM — Head-to-head Performance and Cost Comparison
Efficiency Comparison Across Voltages and Temperatures
MPPT controllers often provide 10–30% more usable energy than PWM under conditions where array Vmp substantially exceeds battery voltage, or when multiple panels are used in series-parallel arrays. That advantage shrinks for single-panel 12V installations under stable high irradiance. Cold temperatures increase PV Voc and Vmp, widening MPPT's advantage because PWM can't convert extra voltage to current.
Academic and technical analyses discuss controller algorithms and potential efficiency gains; advanced research explores AI-driven MPPT algorithms that can further optimize harvest (towards AI for charge controllers).
Cost vs Lifetime Savings — Payback Scenarios (qualitative)
- Small systems (single 200W panel): PWM purchase price is low; additional energy gained by MPPT may not recover the higher cost within a reasonable timeframe.
- Medium systems (several panels, 24V bank): MPPT typically pays back through higher energy harvest within a few seasons depending on loads and local insolation.
- Large systems (hundreds to thousands of watts): MPPT almost always makes financial sense because each percent of harvest scales with array size.
Tooling can help quantify payback. Use a solar cost calculator to simulate energy gains and payback for your site and loads.
Impact on Battery Charging Profile and Battery Life
Both MPPT and PWM controllers provide multi-stage charging profiles (bulk, absorption, float) on modern units; however MPPT's higher available charging current often shortens bulk charging time and reduces deep discharge cycles frequency, which can benefit battery lifespan. Battery chemistry matters: lead-acid and LiFePO4 have different charge voltage and current recommendations — ensure the controller supports the battery type and configurable charge parameters.
For troubleshooting and battery-specific issues that affect controller choice, see battery troubleshooting tips.
Quick comparison bullets:
- Upfront cost: PWM low, MPPT medium–high.
- Complexity: PWM simple, MPPT more complex (menus, settings).
- Ideal system size: PWM < ~500W on 12V; MPPT for > ~500W or 24/48V systems.
- Expected extra energy with MPPT: 10–30% typical in multi-panel or cold conditions.
Large tiny-house examples help ground these numbers — see the 7kW tiny-house plan and the 10kW shed guide for scenarios where MPPT is attractive. For system-level cost comparisons by dwelling size, consult solar costs by house size.
Solar Charge Controller Sizing: MPPT vs PWM — Worked Sizing Examples for Common DIY Systems
Example 1: Small 12V Camping/shed System (single Panel)
System: 12V battery, one 200W panel (Vmp 18V, Imp 11.1A, Voc 22V).
- PWM approach: Panel Vmp (18V) is higher than battery nominal (12V), so PWM will pull Vmp down to battery charge voltage. Expected current to battery ~ Imp but effective power is reduced. Size controller for max current × 1.25 → 11.1A × 1.25 = 13.9A → choose a 20A PWM.
- MPPT approach: MPPT can convert panel Vmp to battery voltage and increase available current. Calculate PV current into controller = Imp × parallel strings = 11.1A. Apply 1.25 → 13.9A → choose a 20A MPPT (many MPPT units start at 20A). MPPT will harvest more usable wattage, often giving 10–20% extra energy vs PWM for this single-panel case depending on conditions.
For starter systems, compare with the 2kW shed starter.
Example 2: 24V Tiny-house System (modest Array)
System: 24V battery bank, array = 4 × 300W panels wired as 2 series strings of 2 panels (each panel Imp = 9A, Vmp = 32V).
- PV current: Imp × parallel strings = 9A × 2 = 18A.
- Apply 1.25 margin → 22.5A. Choose a 30A MPPT rated for at least the array VOC (each string Voc 2×Voc_panel; check cold-weather Voc).
- Wattage check: At 24V battery, controller wattage capacity = 24V × 30A = 720W. Array nominal = 4 × 300W = 1200W. Many MPPT controllers accept arrays with total wattage higher than battery-watt rating because step-down conversion increases input wattage; consult controller datasheet. If controller datasheet caps PV wattage at e.g., 1000W for 24V, pick compliant unit or reconfigure.
This example shows MPPT enables series strings and reduces conductor sizing while safely converting higher panel voltage.
Example 3: Off-grid Cabin Battery Bank (higher Wattage Array)
System: 48V battery bank, array = 12 × 400W panels as 3 strings of 4 panels (Imp = 10A, Vmp = 32V each).
- String Vmp = 4 × 32V = 128V; Voc per string may be higher — check cold Voc.
- PV current = 10A × 3 = 30A. Apply 1.25 → 37.5A → choose a 40A or 50A MPPT rated for > cold Voc per string.
- Controller wattage at battery side = 48V × 40A = 1,920W; array nominal = 12 × 400W = 4,800W. Many MPPTs are designed with higher PV input wattage capability; verify datasheet limits for PV array size vs battery voltage before final selection.
For full system examples that include wiring, inverter sizing, and charge controller selection, see the 3kW cabin sizing and 3kW tiny-house plan. Practical buying guides also outline how controller PV wattage limits change with battery voltage (portable buying guide).
Quick Checklist to Finalize Your Controller Choice
- Confirm battery chemistry and required charge profile (lead-acid vs LiFePO4).
- Sum Imp across parallel strings and apply 1.25 margin to get minimum controller amp rating.
- Verify controller input voltage rating > array cold Voc.
- Check controller PV wattage limits at your battery voltage per datasheet.
- Ensure adequate breaker/fuse protection and conductor sizing per installation safety guidance.
Solar Charge Controller Sizing: MPPT vs PWM — Which Should You Choose? Scenario-based Recommendations
Budget DIY and Tiny Setups
- Recommendation: Use PWM for single-panel 12V lighting or occasional-use shed power where upfront cost is the primary constraint and panels are matched to battery voltage.
- Rationale: PWM keeps costs low and simplifies wiring; energy loss is acceptable for minimal loads.
Mid-size Off-grid Homes and Cabins
- Recommendation: Use MPPT for 24V or 48V banks and multi-panel arrays. Choose controller rated ≥ 1.25× expected continuous current; consider models with configurable charge settings for lead-acid or LiFePO4.
- Rationale: MPPT harvest increases with array size; investment typically repays through reduced generator runtime and faster charging.
High-efficiency or Cold-climate Systems
- Recommendation: MPPT is strongly preferred. MPPT performs better in cold conditions and partial shade and supports higher-voltage strings that reduce conductor costs.
- Rationale: Cold increases Voc and Vmp, which MPPT converts into additional current. For cabins in cold regions, the increased harvest can be significant.
When to Oversize a Controller and by How Much
- Oversize when summertime peaks or extreme cold Voc could push currents higher; a common rule is 1.25× expected continuous current. Oversizing by one standard size (e.g., choosing 60A instead of exactly 50A) provides headroom for future array expansion and cooling margins.
- Consequences of undersizing: controller may overheat, enter current limiting or shut down, or degrade prematurely.
For broader system tuning and hybrid configurations (solar + generator or wind), see the hybrid systems guide to understand how extra generation sources affect controller choice (hybrid systems guide). For workshop- and garage-scale systems where MPPT frequently pays off, review the 5kW workshop guide.
The Bottom Line
For small single-panel 12V installs on a strict budget, a PWM controller is a practical choice. For multi-panel arrays, 24V/48V battery banks, cold climates, or systems where every kilowatt-hour counts, invest in an MPPT solar charge controller sized at 1.25× expected continuous current and verified against PV Voc and datasheet PV-watt limits. Proper sizing protects the controller and maximizes battery charging.
Frequently Asked Questions
Can I mix MPPT and PWM controllers on the same system?
Mixing MPPT and PWM controllers is possible but requires careful DC bus design. For example, different controllers may connect to separate battery banks or to the same bus with proper isolation and matched charging setpoints. Mismatched charge algorithms can cause unwanted current flows or unequal charging if controllers act on the same battery without coordination.
When combining controllers, verify battery chemistry settings, use correct fuses or isolators, and consult product manuals. For complex setups, consult a qualified installer or electrician to confirm safe wiring and code compliance.
How much bigger should my controller be than my expected current?
The common conservative rule is to size the controller at least 1.25 times the expected continuous PV current (Imp × number of parallel strings × 1.25). This margin accounts for continuous duty, high-irradiance events, and temperature-related increases in current. Choose the nearest higher standard controller size (30A, 40A, 60A, etc.).
Do MPPT controllers extend battery life?
MPPT controllers can support healthier battery cycles by delivering higher charging current during bulk stage and reducing time spent at low state of charge. Shorter deep-discharge periods and correct charge profiles can reduce battery stress, which may prolong life. However, battery lifespan depends on chemistry, depth of discharge, temperature control, and correct charging algorithm.
Always configure the controller for the specific battery type (sealed lead-acid, flooded, LiFePO4) and follow manufacturer recommendations.
Is a 48V battery bank always better for efficiency?
A 48V bank reduces current for the same power, which lowers conductor sizes and voltage drop, improving system efficiency for larger arrays. But 48V requires compatible inverter, battery, and controller choices and may increase component costs. For small systems, the extra complexity and cost may not be justified; for multi-kilowatt setups, 48V often makes sense.
How do temperature and shading change sizing choices?
Cold temperatures raise panel Voc and Vmp. Controllers must handle the increased Voc, so use cold-weather Voc when checking controller input voltage rating. Shading reduces array current and can create mismatch losses; MPPT can mitigate some shading effects by optimizing at panel-string level, but string design and microinverters or power optimizers may perform better for heavily shaded arrays.
When planning, model worst-case cold Voc and consider partial-shade scenarios to decide between MPPT and PWM and to size the controller safely.