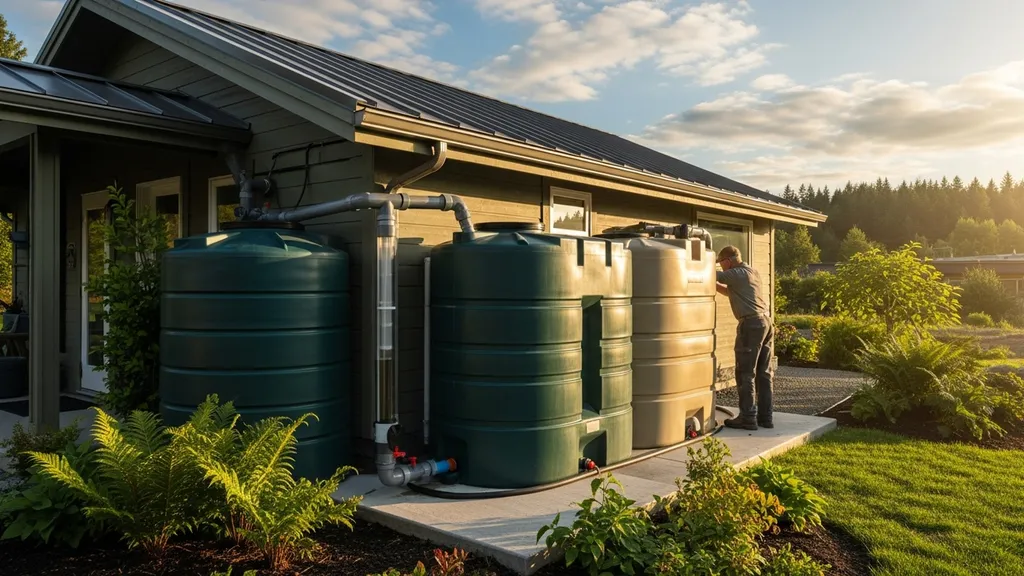
Practical guide to designing, sizing, and maintaining rainwater harvesting systems for DIY, off-grid, and eco-home projects.
Rainwater Harvesting Systems: Collection and Storage
Rainwater harvesting systems capture roof runoff and store it for later use—reducing reliance on mains water, lowering bills, and improving resilience for off-grid or eco-home projects. This guide on rainwater harvesting explains how to size catchment and tanks, choose filtration and pumps, and keep a system reliable through seasons. Readers will learn practical calculations, material pros and cons, code and health considerations, and clear maintenance steps for DIY installation.
TL;DR:
- Match tank volume to monthly capture and demand: a 100 m² roof with 25 mm rain at 85% efficiency yields ~2,125 litres per storm.
- Use a simple treatment train (screen → first-flush diverter → sediment filter → carbon/UV) for most non-potable uses; add testing and NSF/ANSI-certified components for potable supply.
- Start with a gravity-fed or small aboveground tank and add a DC solar pump later if you expect household indoor uses; always check local permits before plumbing to fixtures.
How Rainwater Harvesting Works: Catchment, Conveyance, and Storage
Rainwater harvesting collects runoff from a catchment (usually a roof), conveys it through gutters and downspouts, and stores it in tanks or cisterns. Three simple definitions to keep handy:
- Catchment area: The horizontal area that sheds water (usually roof plan area).
- Runoff coefficient: The fraction of rainfall that becomes usable runoff (roof material and slope matter).
- Yield: Volume captured = Roof area × Rainfall depth × Runoff coefficient.
Example formula and worked example:
- Roof area = 100 m²; rainfall event = 25 mm (0.025 m); runoff coefficient = 0.85 (metal roof)
- Yield = 100 m² × 0.025 m × 0.85 = 2.125 m³ → ~2,125 litres
Common roof materials and effects:
- Metal (standing seam): High runoff coefficient (0.85–0.95), low contamination. Good for potable systems.
- Tile (clay/concrete): Moderate runoff (0.75–0.85), can trap dust and granules—needs more robust pre-filtration.
- Asphalt shingles: Lower coefficient (0.60–0.80) and more organic and chemical particulates; treat cautiously for potable use.
Typical contaminants from roofs include leaves, pollen, bird droppings, and roofing particulates. A simple screen and a first-flush diverter remove most solids and the first wash-off. For a primer on how catchment geometry and runoff coefficients are measured, see the Energy Department's rainwater harvesting tool and guidance. For basic collection methods and background, consult our water collection basics.
Key points and quick tips:
- Design gutters to handle peak rainfall intensity for your area.
- Keep catchment material clean—regular sweeping or roof washing reduces contamination loads.
- Use leaf screens and downspout strainers to reduce maintenance.
Catchment Surfaces: Roofs, Materials, and Yield
Choose roofing that balances budget, durability, and water quality. Metal roofs are best for clean capture; tiled roofs need tighter pre-filters. Calculate annual capture by multiplying average monthly rainfall by roof area and the runoff coefficient, then compare against demand.
Conveyance: Gutters, Downspouts, Screens
Gutter capacity relies on projected rainfall intensity (e.g., 100-year 5‑minute peak). For DIY systems, standard K-style gutters sized per manufacturer charts are adequate for small homes. Add mesh or perforated gutter guards to keep out leaves. Use 2" (50 mm) downspouts for high-flow roofs; smaller roofs can use 1½" downspouts.
Basic System Flow: First-flush, Settling, and Inlet Plumbing
A typical flow:
- Rooftop → gutter screen → first-flush diverter (diverts initial 10–30 litres for small systems) → tank inlet with mesh strainer → inlet baffle to reduce turbulence → settling zone (or pre-sediment tank) → outlet plumbing.
Install accessible inspection points and a sediment drain at the lowest point for periodic flushing.
Designing a Collection System for a DIY Eco Home (sizing and Placement)
Good design matches realistic capture to likely uses. Start by estimating monthly water demand, then size storage to cover dry months and peak usage.
How to Calculate Expected Yield and Match to Household Demand
Step 1: Gather local rainfall data—monthly averages from your meteorological service or local climate station. Step 2: Compute monthly capture per roof section: Roof area (m²) × monthly rainfall (m) × runoff coefficient. Step 3: Estimate monthly demand by end use:
- Toilet flushing: 6–12 L/person/day
- Laundry: 50–100 L/load (modern efficient washers use 40–60 L/load)
- Irrigation: highly variable—lawns vs vegetable beds differ hugely
Sample calculations:
- Tiny home (1 person): daily non-potable demand ~50 L → monthly ~1,500 L. A 50 m² roof with 50 mm monthly rain and 0.85 coefficient yields ~2,125 L/month—enough for basic non-potable use.
- Small family home (4 people): non-potable uses (toilets, laundry, irrigation) ~6,000–10,000 L/month. A 150 m² roof with 80 mm monthly rain at 0.85 yields ~10,200 L/month—sufficient in some climates, but store extra for dry months.
For rainfall data and sizing checklists, the Springfield homeowner booklet is a helpful practical reference: A homeowner's guide to rainwater harvesting.
Use our water-efficient plumbing guide to refine demand estimates and the DIY smart irrigation post for irrigation load planning. Envelope improvements (see our passive-house retrofit tips) lower hot-water and space-heating demands and can change water-use timing and quantity.
Gutter and Downspout Sizing, Placement, and Debris Control
Place gutters close to roof edges and slope them toward downspouts at 1:200 (0.5%) minimum. Use gutter guards and mesh with 2–3 mm openings to stop larger debris while allowing flow. Consider install of leaf traps at downspouts and a pre-tank strainer with 1–2 mm perforations.
Before you install, map out gravity-fed routes: tank on higher ground reduces pump needs. For low-head gravity feed, aim for tank above the supply point by 1–2 m to provide usable pressure for simple outdoor taps.
Access, Maintenance Paths, and Mounting Points for Tanks
Locate tanks near demand points to limit pipe runs. Provide a solid base—compacted gravel or a concrete pad sized for the tank footprint with at least 75–100 mm of concrete thickness for large tanks. Leave 0.6–1 m clearance for inspection and maintenance. Include manholes or inspection ports sized for your expected maintenance tasks.
Watch this step-by-step guide on installing a rainwater harvesting system - DIY:
Storage Options: Tanks, Cisterns, and Underground Solutions
Choose storage by budget, durability, site constraints, and intended use. Below is a compact comparison table with typical options.
| Material / Type | Typical capacity range | Relative cost | Lifespan | Pros | Cons |
|---|---|---|---|---|---|
| Aboveground polyethylene (rotationally moulded) | 200–5,000 L | Low–medium | 10–25 years | Lightweight, easy install, UV-stabilized options | Can degrade in sun if cheap, limited sizes |
| Aboveground metal (galvanized/steel) | 1,000–50,000 L | Medium | 20–40 years | Strong, recyclable, wide sizes | Requires lining for potable, corrosion risk |
| Concrete/ferrocement cistern | 5,000–100,000+ L | Medium–high | 50+ years | Durable, buried/above options, thermal mass | Labour-intensive, needs good formwork |
| Modular polyethylene/bladder cisterns | 1,000–30,000 L | Medium | 10–20 years | Flexible footprint, quick install | Risk of puncture, limited lifespan |
| Buried plastic/GRP tanks | 1,000–50,000 L | Medium–high | 25–50 years | Space-saving, frost-protected | Expensive install, venting and access needed |
Practical siting notes:
- Place tanks close to demand to reduce friction loss. If possible, site on higher ground to allow gravity feed.
- Heavy concrete or full tanks require engineered foundations—see our advanced wall framing and foundations.
- Secure tanks against buoyant uplift when groundwater is high—use deadman anchors or concrete pads.
Buried tank considerations:
- Bury below frost depth for cold climates where possible. If not, insulate exposed piping and provide frost-proof vents.
- Provide access risers for inspection and pumping. Vents should be screened against insects and routed above expected flood lines.
For large or alternative storage ideas used in regenerative builds, see earthship water ideas and material trade-offs in our sustainable material options. The Texas A&M rainwater basics manual is also a useful technical reference on cistern options: Rainwater basics.
Sizing Guidelines and When to Oversize
Rule of thumb: size tanks to hold 1–3 months of average demand if your climate has long dry periods. Oversize when:
- You plan to use water for potable supply and want buffer for contamination events.
- Your site has long seasonal dry spells.
- Water is scarce or expensive.
If budget limits storage, stage the system: start with a set of 200–1,000 L modular tanks and add larger concrete or cistern storage later.
Filtration and Treatment: Keeping Stored Rainwater Safe for its Intended Use
Match treatment to end use. For irrigation, screens and sediment filters may suffice. For potable use, follow strict multi-stage treatment, testing, and use certified components.
Typical treatment train:
- Pre-filtration / screen: 1–5 mm gutter/downspout screens remove large debris.
- First-flush diverter: Diverts initial runoff (10–50 L depending on roof size) to remove most contaminants from the first wash-off.
- Sediment filtration: 25–5 µm cartridge or sand separator to remove fine particles.
- Activated carbon: Reduces taste and organics for non-potable and some potable pre-treatment.
- Microfiltration / ultrafiltration: 0.1–1 µm membranes for turbidity and bacteria reduction before disinfection.
- Disinfection (UV / chlorine): Use UV for chemical-free inactivation of bacteria and viruses (treatment efficacy depends on turbidity and pre-filtering). Chlorination provides residual protection in storage but requires careful dosing and monitoring.
Follow manufacturer guidance and standards such as NSF/ANSI 61 for potable system components. For practical, beginner-friendly treatment guidance see RainHarvesting's beginner guide: Rainwater harvesting a beginners guide.
Notes on UV and disinfection:
- UV systems can provide high log reductions for bacteria and viruses when water is clear (low turbidity). They do not offer residual protection—consider a small chlorine residual or point-of-use filter if storage is long-term.
- Chlorination provides residual protection but requires correct dosing and contact time.
Water testing and indicators:
- Test for coliform/E. coli at installation and at least annually when used for potable supply; test more often if there are system changes or after heavy storms.
- Watch for visual signs: increased turbidity, surface scum, or unusual taste/odour—these indicate maintenance or disinfection is needed.
For cross-discipline filtration maintenance principles, our smart HVAC filtration article has useful parallels on routine filter replacement schedules.
Pumps, Pressure, and Distribution for Off-grid Systems
Selecting pumps depends on tank location (aboveground vs buried), required flow rate, and vertical lift (head). Off-grid power integration influences pump type choices.
Pump Types: Submersible, Centrifugal, and Dc/solar-driven
- Submersible pumps: Sit inside the tank; good for deeper installations and quiet operation. Examples: Grundfos SP series.
- Surface/centrifugal pumps: Mounted above ground; easier to service. Common for shallow lift applications.
- DC/solar-driven pumps: Direct-drive DC pumps (e.g., Grundfos SQFlex) run from PV arrays and are efficient for remote sites. Battery-backed options allow pumping at night.
Pump brand examples for reference: Grundfos SQFlex (solar-capable), DAB E.sybox (inverter-integrated), Flotec shallow well pumps (budget surface options). These are examples; choose based on flow-head curves, local availability, and warranty.
Sizing Pumps and Pressure Tanks for Steady Delivery
Sizing workflow:
- Determine required flow (L/min). Example: household peak simultaneous demand ~15–25 L/min for showers and a laundry cycle.
- Calculate total dynamic head: static lift (vertical difference) + friction loss (pipe length and fittings) + pressure required at taps (kPa or m of head; 1 m ≈ 9.8 kPa).
- Consult pump curves to pick a unit that delivers required flow at the calculated head.
Use a pressure tank (e.g., 18–24 L bladder tank) to reduce pump cycling. Set pressure switch to cut-in/out appropriate to your fixtures—typical settings: cut-in 30–40 psi, cut-out 50–60 psi for domestic systems. Systems using gravity feed may need no pump if head and flow suffice.
Integration with Off-grid Power: Backup and Controls
For solar-integrated pumping, options include:
- Direct PV-driven pumps (no batteries) for daytime-only pumping to elevated storage.
- DC pumps with battery backup for constant availability.
- Inverter-driven AC pumps with smart controllers to run from a battery bank and generator as needed.
Automated controls: use float switches to prevent dry-run, and a smart controller or relay to only run pumps when demand or tank levels require. For automation ideas, see our posts on off-grid water systems guide and connecting smart water systems.
For design guidance and common pump troubleshooting, review practical resources such as Rainwater Management's technical articles: Rainwater harvesting.
Maintenance, Winterizing, and Troubleshooting Common Problems
Planned maintenance keeps systems safe and reliable. Create a simple schedule and follow it.
Seasonal Maintenance Checklist (monthly, Annual Tasks)
Monthly:
- Inspect gutter guards and clean screens.
- Check first-flush diverter and empty collection chamber.
- Verify pump operation and examine seals.
Annually:
- Drain and inspect tank interior (if accessible) and clean sediment sump.
- Replace sediment and carbon filters per manufacturer intervals.
- Test water quality (coliform/E. coli) if used for potable or indoor non-potable purposes.
Other periodic tasks:
- Check vents and overflow screens.
- Lubricate pump fittings and check electrical connections.
Winterizing Tanks and Pipes in Cold Climates
If freezing is possible:
- Bury or insulate exposed piping down to frost depth.
- Use heat-traced hoses or small recirculation loops for critical lines.
- Install frost-proof hydrants when feasible.
- For aboveground tanks, locate on a sheltered pad and optionally insulate the tank jacket; full drainage of exposed lines reduces freeze risk.
See Tank Depot’s seasonal care guidance for specific products and winter prep tips: The 2026 guide to rainwater harvesting in the usa laws benefits and expert design.
Troubleshooting: Algae, Odors, Leaks, and Low Pressure
- Algae or green water: Cover tanks or use opaque tanks; add shade or a floating biological cover. Clean and disinfect if growth persists.
- Odors: Often caused by anaerobic zones—clean sediment and check vents for blockage. Consider adding aeration or a small chlorine dose to disinfect.
- Leaks: Identify seam or fitting leaks; tighten fittings or replace seals. For cracked polyethylene, repair kits exist for small damage; larger failures often require tank replacement.
- Low pressure: Check for clogged strainers, pump suction issues, or blocked inlet screens. Verify pump head and electrical supply.
Permits, Codes, Health Considerations, and When Potable Use is Allowed
Regulations vary by jurisdiction. Always check local building and health departments before connecting rainwater to indoor fixtures.
Typical Permit Triggers and Who to Contact Locally
Permit triggers may include:
- Plumbing connections to potable fixtures.
- Large aboveground or buried tanks affecting structure or load on property.
- Overflow routing into public storm drains.
Contact your municipal building department and local health unit early in the project to understand requirements and inspection points. For siting in flood-prone areas, consult our flood-resistant building tips.
Cross-connection Control and Backflow Prevention
Protect the municipal supply by ensuring no direct cross-connection. Install approved backflow prevention devices and label non-potable supply lines clearly. Some jurisdictions require an air gap or reduced pressure zone (RPZ) backflow preventer if rainwater connects to any part of the potable system.
Health Risks and Circumstances That Require Municipal Water
Rainwater can be safe for non-potable uses with correct filtration and maintenance. Potable use requires certified treatment, regular testing, and local approval. In areas where codes mandate municipal water for certain fixtures (commercial kitchens, medical facilities, etc.), rainwater cannot replace those supplies.
When in doubt, consult local public health guidance and your municipal code—this reduces risk and will prevent costly rework.
The Bottom Line
Rainwater harvesting can cut water bills and increase resilience, but success depends on matching capture to realistic demand, using a simple first-flush and pre-filtration, and planning for maintenance and winter conditions. Start with a small, well-sited system and expand storage and treatment as needs grow; check local permits before plumbing potable fixtures and budget for testing and periodic filter replacement. For cost planning and common budgeting traps, see our regional cost guide and the eco-home budgeting FAQ.
Frequently Asked Questions
Can I use rainwater for drinking?
Short answer: maybe, but only with proper treatment, testing, and local approval. For potable use you need a multi-stage system—screening, first-flush, sediment filtration, carbon, microfiltration or ultrafiltration, and a validated disinfection step such as UV or chlorination. Components for potable systems should meet standards like NSF/ANSI 61, and periodic bacteriological testing (coliform/E. coli) is required. Contact your local health unit to confirm approval requirements and acceptable test intervals.
How big should my storage tank be?
Size tanks by comparing capture (roof area × rainfall × runoff coefficient) with household demand. A practical approach is to provide one to three months of average non-potable demand if space and budget allow. For tiny homes, 500–2,000 L may suffice for basic non-potable needs; for family homes, 5,000–20,000 L is common depending on climate and irrigation load. Start with a smaller aboveground tank and add capacity later if needed.
Do I need a permit to install a cistern?
That depends on local rules. Many jurisdictions require permits for large tanks, connections to plumbing, or buried installations. Typical concerns include structural support, overflow routing, and backflow prevention. Contact your municipal building department and health unit before installation to learn permit triggers and inspection requirements.
How often should I clean my system?
Inspect screens and gutters monthly during the leaf season and empty first-flush chambers after heavy storms. Replace sediment and carbon filters per manufacturer recommendations (often every 6–12 months). Perform a tank clean and water test annually if the water is used for potable supply; non-potable systems should still follow an annual inspection and cleaning schedule to avoid buildup and odors.
Will rainwater damage my roofing or gutters?
Properly designed rainwater systems do not damage roofs or gutters. Choose compatible materials (metal roofs pair well with polyethylene tanks), keep gutters clean to avoid standing water, and ensure flashings and fasteners are intact. Avoid storing tanks directly against roof overhangs that might trap moisture; provide clearance for inspection and maintenance. Regular inspection prevents corrosion or rot caused by blocked gutters or misdirected overflow.