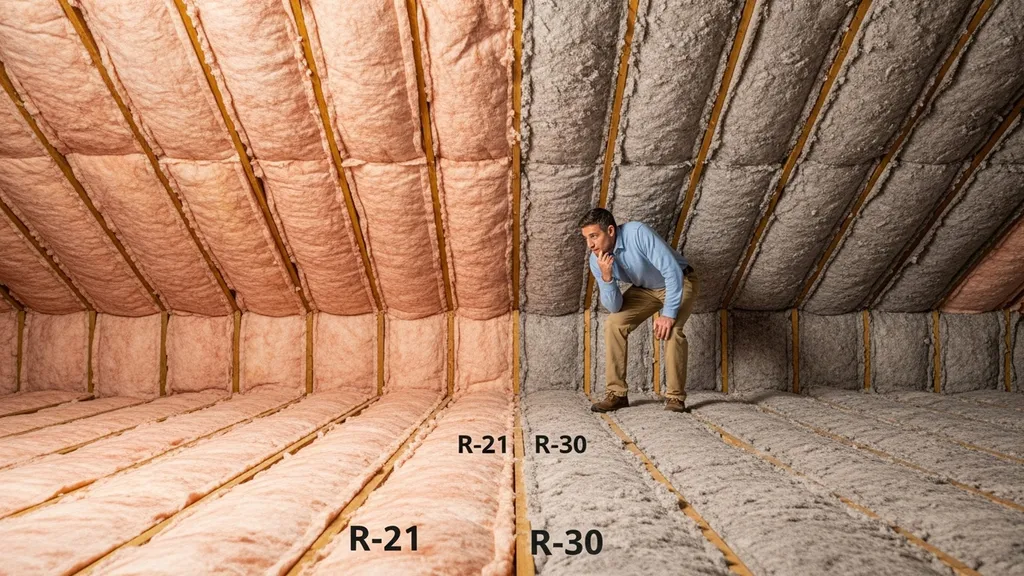
Compare R-21 and R-30 insulation options, costs, and when the upgrade makes sense for different climates and DIY projects.
R-21 vs R-30 Insulation: Which Do You Need?
If you’re deciding whether to stop at R-21 or push to R-30, this article answers that exact question for DIY builders and self-builders. The comparison covers what assemblies commonly hit R-21 and R-30, which materials achieve those R-values, installation trade-offs, and a straightforward way to estimate incremental cost and payback. Readers will learn when R-21 is sufficient, when R-30 is a sensible upgrade, and how air sealing and assembly details change the outcome.
TL;DR:
- R-30 provides about 43% more thermal resistance than R-21 (R‑30 ÷ R‑21 ≈ 1.43), making it the better choice for cold-climate attics and where cavity depth allows.
- If your project has shallow cavities, choose exterior continuous insulation or spray foam to meet R-30 without compressing batts; use an insulation savings calculator to compare payback.
- R-21 is often enough for 2x6 wall cavities in mild climates or for budget retrofits when paired with robust air sealing and thermal breaks.
R-21 vs R-30 Insulation: Quick Overview and Why This Comparison Matters
What Readers Will Learn
This piece compares R-21 and R-30 by material, depth, installation difficulty, and likely use cases. It explains how effective R-value depends on correct installation, air sealing, and thermal bridging. The aim is to give clear next steps: whether to spend more on material and labor to reach R-30 or to optimize other measures when R-21 makes sense.
A One-paragraph TL;DR
R-21 is the common target for 2x6 stud walls and some shallow attic bays; it’s lower cost and easier to install for standard cavities. R-30 is the usual target for attic flat-ceiling insulation in many climate zones and for higher-performance walls when combined with continuous exterior foam. Industry guidance shows climate and the assembly type should drive your choice; for a quick reference on recommended home insulation levels by location, see the Department of Energy guidance on recommended home insulation R-values and where they’re cost-effective (Energy star recommended r-values).
R-21 vs R-30 Insulation: Comparison Table (quick Specs at a Glance)
| Attribute | R-21 | R-30 |
|---|---|---|
| Typical uses | 2x6 wall cavities, shallow attic bays | Attic flat ceilings, deep roof bays, high-performance walls with CI |
| Typical materials that meet value | Fiberglass batts, mineral wool batts, dense-packed cellulose | Blown-in cellulose/fiberglass, thicker batts, spray foam, exterior foam board + thinner cavity |
| Approx. depth required (typical) | ~6 in cavity for common batts (varies by material and R/inch) | ~9–10 in for typical batt products, less if using high-R foam or spray foam |
| Installation difficulty | Low–medium for batts; medium for dense-pack | Medium–high for deep installs; higher if using spray foam or exterior CI |
| DIY suitability | High for batts; medium for cellulose dense-pack with rental blower | Medium for blown-in attic work; low for closed-cell spray-foam (requires pro) |
| Relative cost per ft² (material + labor) | Lower | Higher (incremental cost varies by method) |
| Best uses | Standard 2x6 walls, budget retrofits | Cold-climate attics, conversions, assemblies needing long-term performance |
How to read this table: R/inch varies by material and manufacturer; thickness numbers above are approximate. Performance depends on avoiding compression, proper ventilation when required, and good air sealing. For more precise material and cost planning, use the insulation savings calculator or the shed insulation sample tool to model area × target R-value.
(See technical product datasheets or manufacturer specs for exact R-per-inch values and recommended installation depths. The Insulation Institute provides product-specific guidance and thickness examples in their technical literature, including batt and cathedral ceiling product notes (PDF) for R-30 batts: https://insulationinstitute.org/wp-content/uploads/2016/01/BI473.pdf.)
R-21 Insulation: What It Is, Where It's Commonly Used, and When It’s Enough
Overview of R-21 Targets and Common Assemblies
R-21 is a common target for 2x6 stud wall cavities using full-depth batts, and for shallow attic rafter bays in some retrofit situations. The Department of Energy’s insulation overview explains how to choose insulation based on location in the home and climate, and why assembly details matter for performance (DOE insulation guide). In new wood-frame construction, a 2x6 wall with properly installed R-21 batts can meet many local code minima for walls in moderate climates.
Strengths of Choosing R-21
- Lower material cost per square foot compared with deeper cavity insulation or exterior foam.
- Easier DIY installation for standard stud and joist cavities using batts.
- Faster retrofit option when budget or access limits depth increases.
Weaknesses and Limits of R-21
- Less margin for air leaks and thermal bridging; in cold climates the extra R to R-30 often yields larger comfort and energy benefits.
- Compressing higher-R batts into smaller cavities reduces R-value — avoid trying to squeeze R-30 into a 2x6 cavity.
- For high-performance builds (Passive House level or near-net-zero targets) R-21 alone is usually insufficient without significant air sealing and continuous insulation strategies.
Best-for Scenarios (use Cases)
- Budget-conscious wall retrofit: R-21 batts in 2x6 walls when paired with careful air sealing.
- Mild climates: Locations with modest heating loads where incremental payback for R-30 is slow.
- Small structures: Sheds, cabins, or mobile home upgrades where cavity depth or cost constrains thicker installations — see shed insulation options for examples and sizing.
R-21 Insulation: Common Materials That Achieve R-21 and Practical Tips
Fiberglass and Mineral Wool Batts — Installation Tips
Fiberglass and mineral wool batts are the most common way to achieve R-21 in a 2x6 cavity. Typical R-per-inch ranges vary by product; common manufacturer specs put fiberglas batts in a general range and mineral wool slightly higher. When installing:
- Fit batts to full cavity depth without compressing.
- Cut around electrical boxes and pipes; avoid gaps at top plates.
- Maintain an air barrier and keep insulation clear of recessed fixtures unless rated for contact.
Dense-packed Cellulose in 2x6 Walls — Pros and Cons
Dense-packed cellulose can reach R-21 in a 2x6 wall while providing good air-sealing characteristics when properly installed. Pros: good thermal mass, recycled fiber content, and sound control. Cons: requires a blower and experienced installer for consistent density; risk of settling if not installed per spec.
When Foam Board or Sprayed Foam is Used to Reach R-21 in Retrofit Situations
Thin exterior foam or a layer of spray foam can bring assemblies to R-21 or better where cavities are shallow. Closed-cell spray foam provides both R-value and air/moisture control, but typically costs more and is often handled by professionals. For product comparisons between spray foam and cellulose, see our spray foam vs cellulose breakdown.
Practical dos-and-don’ts for DIYers:
- Do: Keep batts full-thickness and avoid compressing around wiring.
- Do: Air-seal top plates, rim joists, and penetrations before insulating.
- Don't: Rely on insulation alone to stop drafts — combine with sealing.
- Don't: Use non-rated foam board in interior vapor-sensitive assemblies without review.
For small, unconventional structures or thin-wall systems, see our mobile home guidance in mobile home insulation tips.
(Definitions and R-value layering rules: R-values are additive for layers of materials, per standard definitions and building-science summaries: https://en.wikipedia.org/wiki/R-value_(insulation).)
R-30 Insulation: What It Is, Where the Upgrade Pays Off
Overview of R-30 Target Assemblies
R-30 is a common target for attic flat-ceiling insulation and for roofs where deeper cavities exist. Many codes and energy programs list R-30 or higher for ceilings in colder climate zones; California’s energy code shows ceiling insulation requirements that reference R-30/R-38 tiers in prescriptive tables (see 2019 code excerpt: https://www.energy.ca.gov/sites/default/files/2020-09/2019%20Insulation%20and%20QII%20Requirements_v3_ADA.pdf). For walls, R-30 typically requires deeper cavities, more effective exterior continuous insulation, or spray-foam solutions.
Strengths of Choosing R-30
- Lower heat loss through the roof or ceiling, improving winter comfort and reducing run time for heating systems.
- More tolerant of small installation imperfections; the extra R-value provides margin.
- Often delivers better payback in climate zones with longer heating seasons.
Weaknesses and Trade-offs
- Higher upfront material and labor costs, especially if cavity depth must be increased or spray foam is used.
- If batts are compressed to fit, effective R-value drops — avoid improper compression.
- May necessitate changes to roof or eave details to maintain ventilation and control condensation risk if adding bulk insulation.
Best-for Scenarios (use Cases)
- Cold-climate attics: Where heating loads are large and payback is reasonable.
- Attic conversions and habitable roof spaces: Where deeper insulation improves year-round comfort.
- High-performance retrofits: Use R-30 plus exterior continuous insulation for a whole-assembly performance boost — see our guide on exterior roof insulation for passive-house performance.
Always confirm local code and prescriptive values for your climate zone; the IECC and state codes govern minimums for many jurisdictions.
R-30 Insulation: Materials and Installation Approaches That Achieve R-30
Blown-in Cellulose and Fiberglass for Attics
Blown-in cellulose or fiberglass is the typical DIY-friendly route to R-30 in attics. Cellulose tends to achieve higher R/inch than fiberglass and fills irregular cavities well when dense-packed. For attic flat ceilings, installers often build up 9–12 inches of blown-in material to reach R-30 or R-38 targets. See our best [attic insulation options](/blog/best-insulation-for-attic-materials-and-r-values) for detailed pros and cons.
Spray Foam (open- and Closed-cell) Approaches
Spray foam achieves high R/inch and provides air sealing. Closed-cell spray foam offers R-values around R‑6–R‑7 per inch and acts as a vapor retarder in some assemblies; open-cell foam is lower R/inch and more vapor-open. Because spray foam installation requires equipment and experience for safe, effective results, it is commonly a contractor-applied material. For a direct comparison between spray foam and cellulose pros and cons, see our spray foam vs cellulose breakdown.
Exterior Continuous Insulation + Thinner Cavities (polyiso, XPS, EPS)
When cavity depth is limited, exterior rigid foam board (polyiso, XPS, EPS) can add continuous R-value without altering interior framing. Polyiso offers higher R/inch at moderate temperatures; each board type has trade-offs in cost, moisture performance, and compressive strength. For product-level guidance, consult our polyiso and foam board comparison.
Retrofit Strategies When Cavity Depth is Limited
Common retrofit strategies include:
- Add exterior foam and new siding to increase whole-wall R-value.
- Use a combination of cavity insulation plus thin exterior foam to control thermal bridging.
- Insulate from the exterior of the roof deck in re-roofs to avoid compressing attic insulation.
Codes like the IECC provide prescriptive envelope requirements and detail options where alternative assemblies are used; see Chapter 4 for thermal envelope rules (IECC 2018): https://codes.iccsafe.org/content/iecc2018/chapter-4-re-residential-energy-efficiency
R-21 vs R-30 Insulation: Costs, Payback, and Energy Savings to Expect
How to Estimate Incremental Cost to Go From R-21 to R-30
Rather than inventing national prices, use this simple worksheet:
- Measure the area (A) to upgrade in square feet.
- Estimate material & installation cost per ft² for R-21 (C21) and R-30 (C30) from local suppliers or RSMeans; incremental cost = A × (C30 − C21).
- Estimate annual heating savings: approximate heat loss reduction scales with delta-R efficiency and heating degree days; for a first-pass, calculate the fractional R change: (R30 − R21)/R30 and apply to annual heating load estimate.
- Annual payback = incremental cost ÷ estimated annual savings.
This method is approximate; the insulation savings calculator on this site automates these steps and accounts for local energy rates. For a realistic plan, collect local quotes for materials and labor.
Simple Payback Scenarios (by Climate Zone)
- In colder zones with high heating degree days, the incremental savings from R-21 → R-30 are larger and payback is shorter.
- In milder climates, incremental savings shrink and payback often exceeds the useful life of the material.
- For attics specifically, adding from R-21 to R-30 yields more value when the roof assembly is otherwise air-tight and when heating energy is a significant portion of annual energy use.
Because airtightness and thermal bridging strongly influence energy use, prioritize air-sealing measures that cost little (caulking, gaskets, insulating rim joists) before or alongside R-value increases. See our guides on how to air seal your house and common leakage points in assemblies: /blog/common-air-leakage-points-builders-miss.
When Higher R-value Gives Diminishing Returns
Diminishing returns occur when the incremental cost per saved BTU rises faster than the value of the saved energy. That threshold depends on energy prices, heating system efficiency, and climate. Practically, if incremental payback is longer than the expected time you’ll occupy the building or longer than typical upgrade lifespans (~15–25 years), it may make sense to improve air sealing or add targeted continuous insulation instead.
R-21 vs R-30 Insulation: Installation & Air-sealing Considerations (youtube Embed Here)
Why Air Sealing Changes the Math Between R-21 and R-30
Air movement through or around insulation can drop effective thermal resistance significantly. A well-sealed R-21 assembly may outperform a poorly sealed R-30 assembly. The Department of Energy emphasizes the role of both insulation and air sealing in saving energy; see the DOE insulation overview for details: https://www.energy.gov/energysaver/insulation.
Installation Pitfalls That Reduce Effective R-value
- Compression of batts in narrow cavities.
- Gaps at top plates, around chimneys, and at penetrations.
- Poor rim-joist treatment causing convective loops.
- Blocking or baffles missing at eaves leading to insulation into vents.
DIY vs Professional Installation Checklist
- DIY suitable: Installing R-21 batts in standard cavities; blown-in attic fiberglass/cellulose with rental blower (for experienced DIYers).
- Hire a pro: Closed-cell spray foam, complex exterior continuous insulation installs, deep-density cellulose in tall cavities.
- Safety: Use PPE for cellulose and fiberglass; follow local codes for ventilation and fire barriers.
What viewers will learn from the demo video below: how blown-in cellulose and batt installs differ in coverage and depth, how air-sealing steps are staged, and why workmanship matters for reaching labeled R-values.
Watch this step-by-step guide on installing ceiling insulation in a basement or crawlspace & why you should. r30, r21, r19, r13.:
For step-by-step air-sealing procedures, see how to air seal your house and for examples of common leak locations consult common leakage points.
R-21 vs R-30 Insulation: Which Should You Choose? Scenario-based Recommendations
If You Live in a Cold Climate (recommendation Flow)
- Check local code and heating degree days for your location.
- If you have a standard attic and the cavity depth allows, choose R-30 (or R-38 for very cold zones) for the attic ceiling. Use the insulation savings calculator to confirm payback.
- Prioritize air sealing before adding bulk insulation; sealing often reduces required incremental R for similar comfort gains.
If You Live in a Mild or Warm Climate
- R-21 may be adequate for walls; for attics consider focusing on radiant control and ventilation plus a moderate increase in R-value only if cooling demand justifies the expense.
- In hot-humid climates, control moisture and ventilation carefully if adding insulation; assembly design matters.
If You’re Working on a Limited Budget with a DIY Focus
- Choose R-21 batts for 2x6 walls and seal aggressively at plates and penetrations.
- For attics, blown-in fiberglass or cellulose to R-30 can be a good DIY project with rental equipment; dense-pack or spray foam is better left to pros.
If You’re Finishing an Attic or Converting a Roof Space
- For habitable roof spaces, avoid only insulating above the ceiling deck; insulate the roof plane or use a combination of interior insulation plus exterior continuous insulation to control condensation and vapor movement. Our small-cabin guide illustrates practical choices when building a compact, well-insulated dwelling: building a small cabin.
Decision tree hint: Is your climate zone roughly 5 or colder? If yes, prioritize R-30 for attic ceilings or equivalent assembly gains via exterior continuous insulation. If not, balance R-21 with top-tier air sealing and targeted CI.
The Bottom Line
R-30 delivers materially higher thermal resistance than R-21 and is usually worth the extra cost for cold-climate attics and high-performance builds. For budget projects or where cavity depth is limited, R-21 combined with disciplined air sealing and selective continuous insulation can be a practical, cost-effective choice. Consider assembly details, local climate, and airtightness before upgrading.
Frequently Asked Questions
Is R-30 twice as good as R-15 (and how does R-21 fit in)?
R-value is a linear measure of thermal resistance: R-30 is not twice R-15, it's double the R-value number but the heat flow reduction is proportional to the reciprocal of R. In simple terms, R-30 will cut conductive heat loss roughly in half compared with R-15 in the same assembly, but real-world gains depend on air sealing and thermal bridges. R-21 sits between R-15 and R-30; its effectiveness depends on where it’s used (wall vs attic) and the assembly details.
Can I compress R-30 batts into a 2x6 wall cavity?
Compressing a batt reduces its R-value; manufacturers rate batts at full thickness. Trying to stuff an R-30 batt into a 2x6 cavity will lower the installed R and often creates gaps. If you need higher R in a shallow cavity, consider exterior continuous foam, closed-cell spray foam, or hollow-fill solutions designed for retrofit applications.
Will adding attic insulation cause moisture problems?
Moisture risk depends on vapor profiles, ventilation, and how the insulation is installed. Adding insulation to the attic floor generally reduces heat transfer and can lower condensation risk in the conditioned space below. But for insulated roof assemblies or when changing venting strategy, evaluate vapor control and ventilation to avoid trapping moisture. Consult prescriptive guidance for your climate and follow manufacturer and code recommendations.
If you’re unsure, sealing air leaks and addressing ventilation before adding insulation reduces the chance of moisture issues.
How do I know if my house needs more insulation?
Start with an energy bill review and a simple home audit: feel for drafts, check ceiling insulation depth, and inspect rim joists and attic access. Use a blower-door test or hire an energy auditor to quantify air leakage and thermal imaging to find cold spots. For a quick financial check, run your numbers through the insulation savings calculator to estimate payback for upgrading from R-21 to R-30.