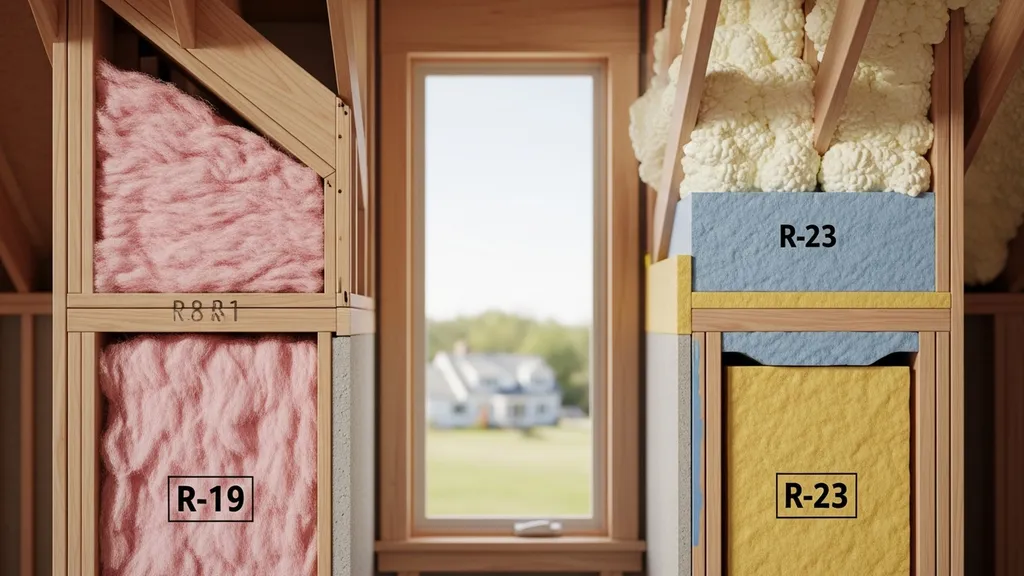
Practical guide to choosing between R-19 and R-23 insulation — materials, performance, space trade-offs, and DIY-friendly recommendations.
R-19 vs R-23 Insulation: Which Do You Need?
Choosing between R-19 and R-23 insulation often comes down to one practical question: will the extra R-value meaningfully reduce energy use, cost more than it saves, or force framing and finishing changes? This guide compares R-19 and R-23 for common DIY projects—2x6 walls, attic knee-walls, rim joists and tiny cabins—and explains how materials, cavity depth, air sealing, and thermal bridging change the outcome. Expect clear, actionable recommendations and links to government and industry guidance so decisions are evidence-based and suitable for self-build projects.
TL;DR:
- R-23 delivers about 21% higher nominal thermal resistance than R-19 (R-23 ≈ 21% more R-value), but real gains depend on air sealing and thermal bridges.
- For standard 2x6 cavities, R-19 fiberglass or mineral wool batts are the lowest-cost, easiest DIY option; reach R-23 by using high-density batts, thicker framing, exterior rigid foam, or closed-cell spray foam.
- Prioritize air sealing and continuous exterior insulation when pursuing high performance—often they save more energy per dollar than moving from R-19 to R-23.
R-19 vs R-23 Insulation: Quick Overview and TL;DR
TL;DR — the Short Answer
R-19 is the common nominal fill for standard 2x6 cavities and attic kneewalls; it’s inexpensive and DIY-friendly. R-23 is a higher target used where added thermal resistance matters (cold climates, passive-house targets), and it’s usually achieved with denser batts, thicker cavities, hybrid exterior foam plus batt, or spray foam. R-23’s nominal improvement is roughly 21% over R-19, but installed performance depends heavily on installation quality, air-sealing, and the presence of thermal bridges.
According to the U.S. government’s energy-efficiency guidance, R-value measures insulation’s resistance to heat flow and recommended R-values vary by climate and assembly type; consult the Department of Energy/Energy Star tables when planning insulation levels: Recommended home insulation R–values.
| R-value | Typical material examples | Typical cavity / installed thickness | Common uses | Relative cost | Quick pros / cons |
|---|---|---|---|---|---|
| R-19 | Standard fiberglass batts, mineral wool batts, loose-fill cellulose (retrofit) | ~5.5" (standard 2x6 cavity) | 2x6 walls, attic kneewalls, floors | Low | + Cheap, available; - Lower thermal resistance in cold climates |
| R-23 | High-density fiberglass/mineral wool, thicker cavity (2x8), 1" polyiso + batt hybrid, closed-cell spray foam | 6.5"–8"+ (or hybrid assemblies) | Cold-climate walls, high-performance builds | Medium–High | + Better thermal resistance; - Higher cost, may need thicker framing or exterior foam |
| R-23 (spray foam) | Closed-cell spray foam | ~3.5" (high R/inch) | Where wall depth limited (tiny homes) | High | + High R/inch and air barrier; - Cost and embodied carbon concerns |
R-19 vs R-23 Insulation: What R-19 Means (common Materials and Uses)
Definition and Typical Installations (2x6 Wall Batt, Attic Knee-wall, Floor)
R-19 is the nominal insulation rating frequently supplied for 2x6 wood-stud cavities. In practice that means batts roughly 5.5 inches thick. Common materials delivering R-19 in that thickness are standard fiberglass batts and mineral wool batts designed for 2x6 cavities. In retrofit attic work, R-19-equivalent loose-fill can be used in kneewalls or between rafters but usually isn’t deep enough for attic flat areas in colder climates.
Installation note: compressing a batt to fit a narrower space reduces its R-value. For example, stuffing a 2x6 R-19 batt into a 2x4 cavity will lower its nominal performance. The California energy code and industry guidance emphasize correct fit and full cavity contact to achieve labeled R-values; see the 2019 insulation installation requirements for typical mandates and inspection notes: 2019 Energy Code insulation requirements.
Strengths of R-19 Options
- Low cost and wide availability from big-box stores and local suppliers.
- Batts are DIY-friendly—cut to fit, friction-fit between studs, or used with netting in floors.
- Mineral wool alternatives add better acoustic control and fire resistance.
- Works well in moderate climates where building code minimums for walls are satisfied with a 2x6 cavity fill.
Weaknesses and Common Pitfalls
- Thermal performance is limited in very cold climates; higher heating loads will persist.
- Installation errors reduce performance: gaps, voids, compression, and poor edge sealing.
- Vapor and moisture control must be planned—unfaced batts without a proper vapor or air barrier can allow convective moisture transport through the assembly.
- Does not address thermal bridging through studs; nominal R-19 assumes perfect cavity performance, which doesn’t reflect framed wall effective R.
Best-for: Common DIY Scenarios
- Budget retrofits where adding depth or exterior insulation is impractical.
- Attic kneewalls and finished basements in mild-to-moderate climates.
- Projects prioritizing low upfront cost and simple installation techniques.
- For deeper guidance on attic depths and options when using R-19 in attics, read the attic insulation guide and the best attic insulation options.
R-19 vs R-23 Insulation: What R-23 Means (how Builders Achieve Higher R-values)
Ways to Achieve R-23: Compressed High-density Batts, Thicker Cavities, Exterior Foam + Batt, Closed-cell Spray Foam
R-23 is achieved in several practical ways for walls and knee-walls:
- High-density (compressed) batts labeled R-23 for 2x6 cavities: manufacturers compress more fiber into the same thickness to raise R per cavity.
- Increase cavity depth: framing with 2x8 or 2x10 studs provides more depth for thicker batt insulation or a higher-R mid-fill.
- Hybrid approach: add continuous exterior rigid foam (polyiso, EPS, XPS) of 1–1.5 inches to the sheathing and then fill the 2x6 cavity with R-19 batt—the combined assembly can meet or exceed R-23 overall and reduces thermal bridging.
- Closed-cell spray polyurethane foam (ccSPF): with an R-value of roughly R-6 per inch, 3.5 inches in a 2x4 or partial-fill in a 2x6 can approach R-23 while also creating an air and vapor control layer.
A useful industry discussion about fibrous insulation selection and performance appears in the Insulation Institute’s guidance on fiberglass product selection: Guide to selecting fiber glass products.
Strengths of R-23 Assemblies
- Reduced heat loss in cold climates or where higher energy-efficiency targets exist (net-zero, passive-house).
- Exterior continuous insulation options improve whole-wall effective R by cutting thermal bridging through studs.
- Closed-cell spray foam combines insulation with air-sealing and moisture control in one step, useful where wall depth is constrained.
Weaknesses and Installation Considerations
- Higher material costs and possible need to widen framing, which increases lumber use, trim changes, and window/door jamb adjustments.
- Exterior foam requires careful detailing at windows, doors, and roof-wall transitions to maintain drainage and avoid moisture traps.
- Spray foam requires professional equipment and training for safe, effective installation; off-gassing and correct cure are important considerations.
- High-density batts can be harder to compress and fit cleanly; they require precision cutting to avoid gaps.
Watch this step-by-step guide on installing ceiling insulation in a basement or crawlspace & why you should. r30, r21, r19, r13.:
.For step-by-step strategies on exterior foam hybrids and cold-climate design, see the hybrid exterior foam guide and the climate-specific advice in building in climate zone 7. If evaluating spray foam vs cellulose from an environmental or performance perspective, review the spray foam vs cellulose comparison.
R-19 vs R-23 Insulation: Cost, Performance, and Space Trade-offs
Thermal Performance Per Inch and Real-world Heat Loss
Typical R per inch ranges (industry averages):
- Fiberglass batts: roughly R-2.5 to R-3.5 per inch depending on density and product.
- Mineral wool: R-3.0 to R-3.3 per inch.
- Closed-cell spray foam: R-6.0 to R-7.0 per inch.
- Polyiso rigid foam: about R-6 per inch at moderate temperatures (reduced at very low temperatures).
These per-inch numbers mean R-23 can be achieved by either denser batts in the same cavity or by adding continuous exterior foam to a standard batt fill. But a nominal R-value doesn't capture the whole-wall performance. Thermal bridging through studs can reduce effective wall R by 10–30% depending on stud spacing and material. Also, installation gaps and compression can shave off R by 5–20%. So, two assemblies labeled R-23 might perform differently once built.
Installed Cost Considerations (materials + Labor + Waste)
Upgrading from R-19 to R-23 is rarely a pure material swap. Expect additional costs from:
- Thicker framing or deeper rough openings.
- Exterior foam board, adhesive, fasteners, and modified cladding details.
- Labor for careful air-sealing and fenestration flashing.
- Potential trimming and finishing changes at interior casings.
Recent buyer guides summarize cost and R comparisons across materials and help quantify value per installed R: Insulation buyer guide and R-value chart (2025–2026).
When budgeting, include waste (batts cut-offs), tooling, and inspection (quality-insulation installation programs or QII where applicable). Review the hidden costs checklist to avoid surprises when changing wall depth or assembly type: 10 hidden costs in DIY eco home building.
Impact on Assembly Details: Studs, Sheathing, and Thermal Bridging
- Increasing cavity depth or adding continuous insulation changes window and door flashing details and may require longer fasteners, modified sills, and thicker trim.
- Continuous exterior insulation reduces stud thermal bridging and often delivers greater effective R than simply increasing cavity R.
- For passive-house or near-net-zero builds, combining dense cavity fill with exterior foam is a common specification.
For data-driven comparisons on continuous exterior insulation performance in roof and wall assemblies, see: Exterior roof insulation passive house performance.
Environmental and Embodied-carbon Notes
Materials differ in embodied carbon and long-term environmental impact. Cellulose and mineral wool have lower embodied energy than closed-cell spray foam, which contains petrochemicals and has higher global warming potential unless low-GWP formulations are used. For detailed environmental comparisons, consult the spray foam vs cellulose material discussion in the linked guide: spray-foam vs cellulose insulation.
R-19 vs R-23 Insulation: Installation and Air-sealing Tips for DIY Builders
Key Tools and Common Mistakes When Installing Batts and Rigid Foam
Must-have tools for DIY batt, loose-fill, and foam board work are listed in the site's tool guide; a few essentials include a durable utility knife with a long blade, cutting straightedge, measuring tape, safety respirator, goggles, gloves, and insulation supports for horizontal applications. See insulation installation tools for a full list.
Common mistakes:
- Compressing batts in the cavity or stapling kraft-faced batts in a way that gaps occur.
- Leaving gaps around plumbing, electrical boxes, and headers—these create convective bypass.
- Poorly taped or unsealed foam board joints when using exterior rigid insulation.
- Skipping a continuous air barrier strategy—air leaks move far more heat than small R-increases.
Air-sealing Basics That Matter More Than Incremental R-value
There’s a simple ordering: reduce air leakage first, then add insulation. Air-sealing targets include sill plates, top plates, floor-to-wall junctions, attic penetrations, and service penetrations. Use low-expansion foam for small gaps and canned spray foam for larger voids; tape and seal foam board seams with compatible tape and liquid flashing where required.
For a primer on materials and techniques, visit the air-sealing essentials page: air-sealing tools and materials. After completing air sealing and insulation work, a blower door test will reveal the real airtightness level—see the basics at blower-door testing passive house airtightness.
When to Call a Pro (spray Foam, Complex Assemblies, Moisture Risk)
Call a licensed spray-foam contractor when planning closed-cell spray foam—proper proportioning, temperature control, and ventilation during installation require professional equipment. Also consider professional help if your retrofit touches existing moisture problems, poor drainage, or if the assembly will enclose leak-prone elements. If pursuing very low airtightness targets for high-performance standards, certified installers and third-party verification are recommended.
R-19 vs R-23 Insulation: Which Should You Choose? Scenario-based Recommendations
Budget Retrofit (attic or Existing 2x6 Walls)
Choose R-19 batts or dense loose-fill in attic kneewalls and existing 2x6 walls when budget is tight and framing changes are impractical. Focus money on air sealing, attic floor depth, and ventilation. If attic flat areas need more R, add blown cellulose or fiberglass to reach recommended attic depths per climate (see attic insulation guide).
New Build on a Budget in a Moderate Climate
For new builds in moderate climates, R-19 in 2x6 walls with careful air sealing is acceptable. Add 1" exterior foam if budget allows to reduce thermal bridging and improve whole-wall performance without widening the framing.
Cold-climate New Build or High-performance Target (net-zero/passive House)
In cold climates or when targeting net-zero or passive-house levels, aim for R-23 or higher in wall assemblies. Hybrid assemblies—standard cavity fill plus continuous exterior insulation—are an effective strategy. For full retrofit strategies aligned with passive-house workflows, see the passive house retrofit steps.
Tiny Homes, Cabins, and Off-grid Houses
Tiny cabins and off-grid builds often have strict space constraints. Closed-cell spray foam is useful where wall depth is limited because of its high R per inch and air-sealing properties. For small structures with simple details, R-19 may suffice if paired with very good air sealing and mechanical ventilation sized to the building load. For cabin-specific roof and wall methods, consult cabin roof insulation best methods and materials and small-structure R guidance at best insulation for shed materials and r-values.
Short checklist to decide:
- Budget: plan for material + framing + finishing impacts.
- Climate: colder zones favor R-23 or hybrid CI strategies.
- Wall depth: limited depth favors spray foam or exterior foam hybrid.
- Moisture strategy: ensure vapor management and drainage plane are detailed.
- Ventilation: pair insulation upgrades with mechanical ventilation and controls.
The Bottom Line
R-23 provides a measurable improvement over R-19 (about 21% higher nominal R-value), but whether that improvement is worth the cost depends on climate, wall depth, and your commitment to air sealing and continuous insulation. For many DIY projects in moderate climates, R-19 plus tight air sealing and selective exterior insulation is the best value; for cold-climate, passive-house, or tiny-building scenarios where wall depth or energy targets matter, aim for R-23 via hybrid assemblies or spray foam.
Frequently Asked Questions
Is R-23 worth it over R-19?
It depends on climate, goals, and installation quality. R-23 yields about 21% more nominal resistance than R-19, which translates to lower heat loss in cold climates. However, the cost-effectiveness depends on whether you must change framing or add exterior insulation to achieve that R. Often, sealing air leaks and adding continuous exterior insulation delivers more energy savings per dollar than a small cavity R increase.
Can I compress R-23 to fit a 2x6 cavity?
Compressing a thicker batt into a smaller cavity reduces its effective R-value. Manufacturers rate products for a specific cavity depth—compressing them voids that label. Use a high-density batt specifically rated R-23 for a 2x6 cavity, or choose a hybrid approach (exterior foam + batt) to avoid compression.
Does spray foam with lower nominal R still perform better?
Closed-cell spray foam offers higher R per inch and serves as an air barrier and partial vapor retarder, so in assemblies where air leakage is the dominant loss, spray foam can outperform fibrous insulation even if the nominal R numbers are similar. That said, spray foam is more expensive and has environmental trade-offs; consider hybrid strategies where appropriate and consult material comparisons like the spray-foam vs cellulose guide.
How does climate zone affect the choice between R-19 and R-23?
Climate is a primary driver. In mild climates, R-19 in 2x6 walls with good air sealing may meet comfort and code requirements. In cold climates (IECC climate zones 6–8), higher wall R and continuous exterior insulation reduce heating loads substantially. Use Energy Star or local code tables to match recommended R-values to your zone and building type: Recommended home insulation R–values.
Will choosing higher R-value reduce my heating bills proportionally?
Savings are not strictly proportional. Doubling wall R does not halve heating bills because walls are one of multiple heat-loss paths (including windows, air leaks, and roof). The actual savings depend on climate, heating system efficiency, and the building’s overall envelope performance. Often, sealing air leaks and upgrading insulation where it’s cheapest to add R yields the best returns.