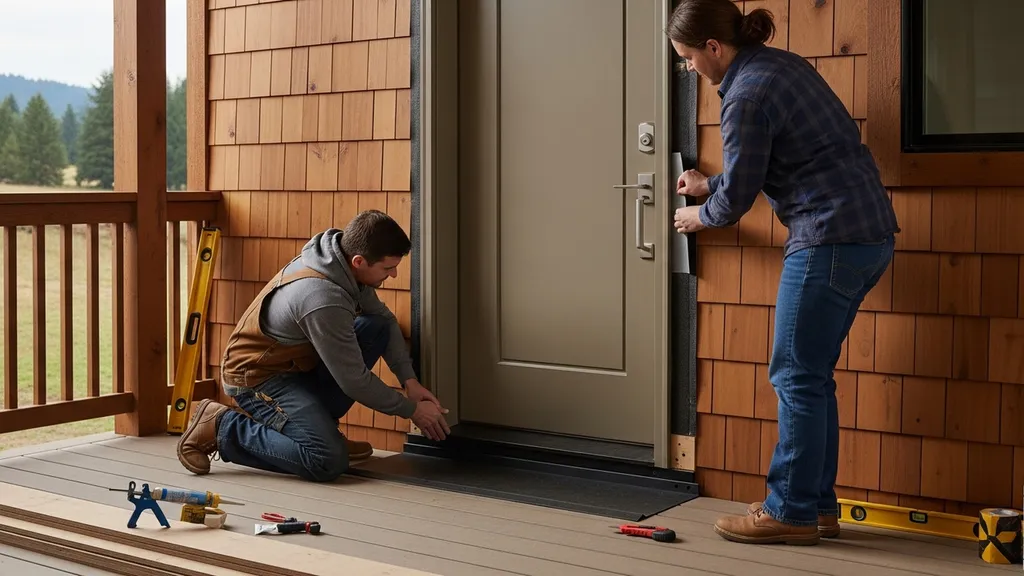
How to choose energy efficient doors for DIY and self-builders—metrics, materials, installation tips, and budget retrofit options.
Energy Efficient Doors: Selection Guide
Energy efficient doors make a measurable difference to comfort, drafts, and heating bills—especially for budget-conscious DIYers and self-builders. This guide on energy efficient doors explains the key performance numbers you'll see on spec sheets, how door materials and glazing affect heat loss, and which retrofit or install choices give the best bang for your buck. Read on to learn how to match door type, U-factor, and airtight details to your climate and project goals.
TL;DR:
- Prioritize airtight installation and a U-factor under ~0.35 in cold climates to reduce heating demand by an estimated 5–15% annually on typical small homes.
- Choose doors with insulated cores, thermal breaks in frames, and low-emissivity glazing for glazed units; use storm or secondary doors for lower-cost retrofits.
- Invest in correct flashing, sill pans, and continuous air-barrier integration—these installation details often save more energy than upgrading to an expensive door.
Why Energy Efficient Doors Matter for DIY and Self-builders
A cold draft at the entry is more than annoying—it signals uncontrolled air movement and places extra load on heating systems. Energy efficient doors reduce heat loss through conduction and infiltration, improving comfort and lowering energy bills. Studies and government guides show that fenestration and doors can account for a meaningful share of envelope heat loss, so door choices matter when you’re designing a tight, efficient building enclosure. See the Department of Energy's guide to purchasing efficient residential doors and windows for federal acquisition-level guidance: Purchasing energy-efficient residential windows, doors, and skylights.
There are trade-offs: a higher-performance door costs more up front but reduces operating cost over time. Standards and certification schemes — ENERGY STAR, PHIUS, and ASHRAE performance tables — help set targets for U-factor and air leakage. If you’re targeting passive-house-level performance, door selection must pair with airtightness strategies and well-insulated walls and roofs; our article on complete passive-house airtightness explains those integration steps in depth. For DIYers on a budget, retrofit options like storm doors and secondary glazing can capture much of the benefit at a fraction of the cost.
Key Performance Metrics: U-factor, R-value, SHGC, and Air Leakage
Understanding test numbers makes buying simpler. Here are the primary metrics you'll see.
What Each Metric Means for Doors
- U-factor: Measures heat transfer (Btu/hr·ft²·°F). Lower is better. It’s the most direct indicator of how well a door resists heat flow. For many residential exterior doors, U-factors typically fall between about 0.20 and 0.45 depending on glazing and core type.
- R-value: The inverse of U-factor (R = 1/U). Manufacturers sometimes list R-value equivalents for insulated door cores; use it as a quick comparison when U-factor isn’t shown.
- SHGC (solar heat gain coefficient): Fraction of solar radiation admitted through glazing. Important for glazed doors and sidelights—higher SHGC can be desirable in cold climates with passive solar gains, but problematic in hot climates.
- Air leakage: Usually reported as cfm/ft² (cubic feet per minute per square foot) or as an NFRC air infiltration rating at a test pressure. Lower air leakage reduces drafts and uncontrolled heat loss.
For a visual demonstration, check out this video on exterior door investment: what features to look for:
.Which Metrics Matter Most by Climate and Orientation
- Cold climates: Prioritize low U-factor and low air leakage. Aim for U-factors ≤ 0.35 for main entries, and as low as 0.20–0.25 for glazed units if passive solar gains aren’t needed.
- Hot climates: Focus on lower SHGC on sun-exposed doors and choose coatings (low-e) that reduce solar gain.
- Mixed climates: Balance U-factor and SHGC—double- or triple-pane glazing with selective low-e coatings offers useful year-round performance.
- Orientation: South-facing glazed doors in cold climates can deliver net energy gains when SHGC is moderate to high; east/west exposures require solar control.
For a technical walkthrough on reading manufacturer spec sheets and common ranges, see this industry guide from Infinity by Marvin: Guide to energy efficient doors.
Door Materials and Construction: Frames, Cores, Glazing and Thermal Breaks
Door thermal behavior depends on both materials and construction details. Knowing what to look for on spec sheets will prevent surprises.
Frame Materials: Wood, Fiberglass, Steel, Composite
- Wood frames: Good natural insulator and repairable. Prone to movement in wet climates unless properly sealed and finished.
- Fiberglass: Low maintenance and dimensionally stable; can simulate wood grain. Often an economical route to a well-insulated door when paired with an insulated core.
- Steel: Strong and affordable; without a thermal break, steel frames conduct heat readily. Choose thermally broken steel or a steel door with foam core to avoid thermal bridging.
- Composite/clad: Exterior claddings (aluminum, fiberglass) over wood or engineered cores can combine durability and thermal performance.
Insulated Cores, Thermal Breaks, and Thresholds
- Insulated door cores: Use closed-cell polyurethane or polyisocyanurate cores for higher R-values. Hollow-core doors are cheap but poor thermal performers.
- Thermal breaks: A thermal break in the frame interrupts conductive pathways. Check manufacturer details for thermal break specifications—this is essential with metal frames.
- Thresholds: Adjustable thresholds and insulated sill pans reduce bottom leakage. A proper sill pan and a continuous air barrier through the threshold are critical for durability and performance.
For practical guidance on material selection and environmentally preferable options, consult our sustainable materials guide and government recommendations from NYSERDA on sealing and thresholds: Energy-Saving home improvement ideas.
Glazing Options for Doors and Sidelights
- Double vs triple glazing: Triple glazing reduces U-factor but adds weight and cost. For large sidelights or doors with high glazing area, low-e coatings and warm-edge spacers become the deciding factor.
- Low-e coatings: Control infrared exchange without blocking visible light; critical in mixed climates.
- Warm-edge spacers and IGU seal quality: These reduce edge heat loss and condensation risk.
See our triple-pane comparison for how glazing choices translate to cost and performance trade-offs.
Types of Energy Efficient Doors and When to Choose Them
Different door types serve different purposes in an efficient envelope.
Insulated Entry Doors (solid vs Glazed)
- Solid insulated doors: Best for primary entries when privacy and thermal resistance matter. A foam-insulated core in a fiberglass or clad-wood door typically outperforms hollow steel.
- Glazed entry doors: Provide daylight and a welcoming entrance but raise U-factor and SHGC considerations. Use high-performance IGUs with low-e coatings and thermally broken frames if glazing area is significant.
Sliding and Patio Doors — Improving Performance
Sliding and large patio doors often have lower thermal performance due to larger glass area and older frame designs. For better results:
- Choose thermally broken frames and multi-pane IGUs.
- Consider lift-and-slide hardware that compresses seals more effectively.
- For tight budgets, replace old single-pane sliders with modern dual-pane sliding doors with low-e glass.
For glazing comparisons across fenestration products, see our window and door comparisons.
Storm Doors, Secondary Glazing, and Retrofit Inserts
- Storm doors: Low-cost retrofit; they add an insulating air layer and reduce infiltration. They work well in moderate climates and for preserving original historical doors.
- Secondary glazing inserts: Interior glazed panels that attach to the existing frame; these can approach the performance of a new IGU at lower cost.
- When to replace vs retrofit: If the existing door is structurally sound but leaky and single-glazed, a storm door or secondary glazing typically offers the best ROI. Replace the whole assembly when the frame is rotted or the build plan requires a new opening.
The U.S. Department of Energy outlines performance and selection heuristics for choosing door types: Purchasing energy-efficient residential windows, doors, and skylights.
Practical Selection Checklist for Buyers and DIY Installers
Use this checklist at point-of-sale and on the job.
- Measure existing opening: Measure height, width, and plumbness at three points; check sill condition and floor level. If resizing, see our how to build a shed guide for sizing tips that apply to new openings.
- Set performance targets: For cold climates target U-factor ≤ 0.35 and air leakage as low as the product offers (look for NFRC or manufacturer test data). ENERGY STAR climate-zone recommendations are a useful baseline: ENERGY STAR windows, doors & skylights.
- Specify frame and core: Ask for insulated door cores (polyiso or PU foam), thermal break details for metal frames, and manufacturer data on air leakage.
- Plan for flashing and sill pan: Budget time and materials for a sill pan and proper jamb flashing to integrate with the weather-resistive barrier.
- Check hardware: Use adjustable thresholds, multi-point locks for glazed doors, and hinge types that allow for future shimming.
- Budget and warranty: Expect installed costs for exterior entry doors in these ranges: Budget $400–$900, Mid-range $900–$2,000, High-performance $2,000–$6,000. Warranties vary; read exclusions carefully.
Key points:
- Measure at three vertical points and three horizontal points.
- Request NFRC or manufacturer U-factor and air leakage ratings before purchase.
- Prioritize a thermal break in metal frames and an insulated core in the door slab.
- Allow the install budget for flashing, sill pan, and air-barrier tie-ins.
For framing and hanging tips relevant to sizing and rough openings, see our door framing tips and sizing and fit tips. If you build in cold climates, pair door choices with wall insulation priorities from our off-grid cold-climate insulation guide.
Installation and Airtightness Tips to Maximize Door Performance
Door performance is as much about installation as product specs. A leaky, ill-fitted door will negate a low U-factor.
Flashing, Sill Pans, and Integrating the Air Barrier
- Install a continuous sill pan beneath the threshold and flash from the sill up the jambs in a shingle-lapped sequence to the WRB. Tie the jamb flashing into the house WRB before installing trim.
- Seal the exterior-to-interior interface with backer rod and a compatible low-modulus sealant; avoid trapping water against wood jambs.
- Connect the door frame to your continuous air barrier. Our air barrier guidance shows techniques to ensure airtight transitions between wall and frame.
Shimming, Insulation Around the Frame, and Trim Details
- Use non-compressible shims at hinge locations and insulating shim pads where necessary to maintain alignment without compressing thermal breaks.
- Fill gaps between the frame and rough opening with low-expansion foam or mineral wool depending on the wall assembly; avoid high-expansion foam that distorts frames.
- For advanced assemblies such as Larsen truss walls, follow specific sealing details at the jamb: see Larsen truss details.
Common DIY Mistakes and How to Avoid Them
- Mistake: Installing a door without a sill pan. Result: rot and leakage. Fix: always fit a sill pan before the door.
- Mistake: Overfilling gaps with high-expansion foam. Result: distorted frame or stressed seals. Fix: use low-expansion PU foam and backer rod where needed.
- Mistake: Skipping a door air-leak test. Result: undetected infiltration. Fix: perform a quick blower-door test or at least a smoke pencil check around seals after installation.
For a vendor-focused installation checklist and sequence, consider this technical guide from 21 Degrees: Installation guide: energy efficient windows and doors - 21 degrees. For common field errors and correction strategies, GBD Magazine provides a practical summary as well: A Guide to Energy-Efficient Doors in 2025.
Comparing Popular Models: Performance Table and Cost Ranges
How to Read Spec Sheets and Compare Apples-to-apples
When comparing spec sheets, ensure you're comparing the same test conditions: U-factor at standard reference conditions, air leakage at the same test pressure, and SHGC for the same glazing area. Watch for disclaimers: "door slab only" vs "assembly" (frame + hardware + threshold). Assembly values give the real-world performance.
Sample Comparison Table: Budget, Mid-range, High-performance
| Model category | Frame material | Core type | Typical U-factor | SHGC (glazed) | Air leakage | Installed cost range | Best-use case |
|---|---|---|---|---|---|---|---|
| Budget entry | Steel or basic fiberglass | Hollow or thin foam | 0.40–0.60 | 0.50 (if single glazed) | 0.30–0.50 cfm/ft² | $400–$900 | Short-term retrofit, rental cabins |
| Mid-range value | Fiberglass or clad wood | PU foam core | 0.28–0.40 | 0.30–0.45 | 0.15–0.30 cfm/ft² | $900–$2,000 | Primary entry for most homes |
| High-performance | Wood-clad or thermally broken metal | Dense PU or polyiso core, insulated IGU | 0.18–0.30 | 0.20–0.35 | 0.08–0.20 cfm/ft² | $2,000–$6,000 | Passive-house or cold-climate homes |
These categories are examples for comparison only; check actual NFRC or manufacturer data for exact numbers. For an example of table presentation with fenestration products, see our performance tables and cost-versus-performance discussion in our triple-pane comparison.
When a Premium Door Pays Back
Simple payback depends on climate, use, and energy prices. In cold climates with high heating loads, upgrading a leaky entry to a high-performance door and sealing installation can reduce annual heating use enough to recover extra cost in 5–15 years. In moderate climates, a mid-range door plus airtight installation often gives the best return.
Maintenance, Upgrades, and Retrofit Options to Extend Performance
Good maintenance preserves performance and extends service life—important for budget-conscious DIYers.
Weatherstripping Types and When to Replace Them
- Compression and V-strip: Common at jambs and head; replace when visibly compressed or brittle.
- Door sweeps and thresholds: Replace worn sweeps and adjust thresholds for contact. If water pooling is present, address drainage before replacing sweeps.
- Brush seals: Useful on sliding doors where contact-type seals are impractical.
Check seals annually, and replace weatherstripping typically every 5–10 years depending on exposure.
Retrofit Inserts, Storm Doors, and Secondary Glazing
- Storm doors: A low-cost way to cut infiltration and add a sacrificial weather layer.
- Interior glaze inserts: Improve U-factor on historic doors without changing exterior appearance.
- When to upgrade: Replace weatherstripping first; then add a storm or secondary glazing if drafts persist. Only replace the whole door when structural damage or frame rot is present.
For small builds and tiny houses, see our tiny-house upgrades for targeted retrofit ideas. For whole-house thermal improvements that complement door upgrades, our attic insulation tips outline synergistic measures.
Seasonal Checks and Longevity Tips
- Inspect thresholds and seals before winter and summer.
- Repaint or reseal wood doors and check for swelling that prevents proper sealing.
- For condensation on glazed doors, verify IGU seal integrity; persistent condensation usually means replacing the unit or adding a storm/secondary layer.
If diagnostics are ambiguous—excess moisture inside a sealed IGU or structural rot—bring in a pro for assessment.
The Bottom Line
Prioritize airtightness and correct installation over chasing the highest-priced door; select a door material and insulated core that match your climate and budget, and use storm doors or secondary glazing for cost-effective retrofits. For sustainable material choices, consult our sustainable materials guide and verify targets with ENERGY STAR or PHIUS before purchase.
Frequently Asked Questions
Are insulated doors worth the extra cost?
Yes in most cold and mixed climates. Insulated doors with foam cores and good frame thermal breaks reduce conductive heat loss and are less likely to allow uncomfortable surface temperatures and drafts. The upfront premium for a mid-range or high-performance door often pays back over several years through lower heating bills, improved comfort, and reduced condensation risk on interior surfaces.
If you’re on a tight budget, start with improved weatherstripping and a storm door—these low-cost retrofits can capture much of the benefit quickly.
How do I measure my door's u-factor and air leakage?
U-factor is a laboratory metric and is normally provided on NFRC or manufacturer spec sheets for an assembly. You can’t accurately measure U-factor at home without specialized equipment; instead rely on certified ratings. For air leakage, manufacturers sometimes list a cfm/ft² value for assemblies. In the field, use a blower door test to measure whole-house leakage or a smoke pencil to detect local leaks around a door.
For how door performance contributes to whole-house scores see our [HERS rating basics](/blog/hers-rating-home-energy-score-explained).
Can I improve an existing door without replacing it?
Yes. Replace worn weatherstripping, fit or adjust an improved threshold and sweep, add a storm door or interior secondary glazing, and seal gaps with backer rod and appropriate sealant. These measures often deliver most of the comfort and energy benefits of a full replacement at far lower cost.
Also inspect and repair flashing and sill pans to stop water ingress before adding new seals or trims.
What door features matter most in cold climates?
In cold climates focus on low U-factor, low air leakage, an insulated core, and a thermally broken frame. Durable thresholds with adjustable compression and a proper sill pan are essential to prevent cold drafts and to protect the assembly from moisture. Glazing should have low-e coatings and multiple panes if you have large sidelights or glazed entries.
Pair your door upgrade with wall and attic insulation improvements for the best overall reduction in heating demand; our attic insulation tips cover complementary measures.
Do storm doors reduce condensation on the main door?
Storm doors can reduce interior condensation by creating a tempering buffer zone and cutting infiltration. The trapped air layer moderates temperature swings on the primary door surface. That said, if the main unit’s IGU is failing, condensation may persist; a storm door helps but doesn’t replace a failed insulating glass unit.
For historical doors where replacement is undesirable, a storm door or interior secondary glazing is often the most practical solution.