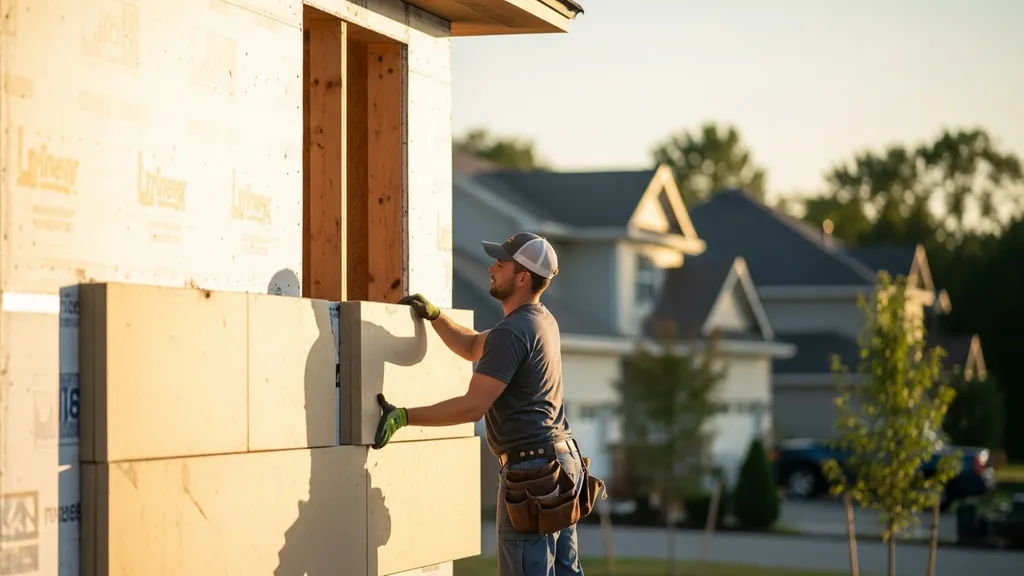
Discover the importance of continuous insulation for energy efficiency in sustainable homebuilding.
Continuous Insulation: Why IT Matters for Efficiency
Continuous insulation is a layer of thermal insulation that runs uninterrupted across a building’s exterior, covering framing members and reducing heat loss at thermal bridges. For DIY builders aiming for lower energy bills and tighter, more durable envelopes, continuous insulation (CI) can cut whole-wall heat transfer, improve comfort, and simplify air- and moisture-control strategies. This guide explains what continuous insulation is, why it improves energy performance, which materials work best, how to install it on a budget, and how CI compares with traditional cavity-only approaches.
TL;DR:
- Continuous insulation can reduce whole-wall thermal bridging by up to 30% when added outside the sheathing, improving comfort and lowering heating loads.
- Use rigid foam or mineral wool for exterior CI depending on moisture risk; pair CI with a continuous air barrier and sealed joints for best results.
- Install CI on the exterior sheathing for new builds and on the outside of retrofit walls when possible; follow manufacturer details and the NREL and PNNL guides for flashing and moisture control.
Understanding Continuous Insulation
Definition and Basics
Continuous insulation (CI) is an unbroken layer of insulating material placed on the outside, inside, or within the assembly so that it minimizes heat flow across framing members. The concept is simple: rather than relying only on cavity insulation between studs, CI covers studs, plates, and headers so the whole wall performs closer to the rated R-value. The approach is recognized in building standards such as ANSI/ASHRAE/IES Standard 90.1 and is commonly used to meet tighter energy codes and Passive House targets. For a practical overview of CI on exterior walls, see this continuous exterior insulation guide that explains the basic options and performance outcomes.
CI also interacts with the assembly’s air barrier and vapor control strategy. For cold climates, placing CI outside the structural sheathing keeps the sheathing warmer and reduces condensation risk; in mixed or warm climates, strategies differ. Industry studies on continuous rigid insulation detail how CI supports whole-wall thermal performance and durability when installed with proper flashing and drainage.
How It Differs From Traditional Insulation
Traditional wall assemblies typically rely on cavity insulation—fiberglass batts, blown cellulose, or spray foam—installed between studs. That leaves studs as thermal bridges where heat bypasses batts. CI addresses that by forming a continuous thermal layer over or outside the framing. The result is more uniform wall performance and often a lower required R-value for the same energy outcome.
Key differences:
- Whole-wall R-value: CI increases effective whole-wall R-value by reducing stud-frame heat loss.
- Thermal bridging: CI interrupts metal and wood studs that otherwise conduct heat.
- Air control: CI makes continuous air-barrier detailing simpler when the CI substrate doubles as structural sheathing or is paired with a separate membrane.
- Retrofit workability: Exterior CI can be added to existing cladding in many retrofits, providing a practical path to upgrade older homes.
For builders aiming for Passive House principles, continuous insulation aligns well with the need for predictable, repeatable thermal performance; see our article on passive house performance for how exterior insulation supports those standards.
Benefits of Continuous Insulation for Energy Efficiency
Improved Thermal Performance
Continuous insulation improves the effective R-value of exterior walls by covering studs and other framing elements that would otherwise act as heat highways. When comparing center-of-stud R-values with whole-wall performance, studies and industry guidance show CI can move a wall assembly from marginal performance to one that meets stricter code or Passive House targets. The key is reducing temperature differentials across the wall and keeping sheathing within safe dew-point ranges.
Practically, adding 1–2 inches of exterior rigid CI (polyiso or XPS) can raise whole-wall performance substantially in 2x6 framing. For example, a wall with R-21 cavity insulation plus 1-inch polyiso outside will perform closer to R-25 whole-wall than the same cavity insulation alone.
Reduction in Thermal Bridging
Thermal bridging through studs, headers, and plates raises heat loss and creates cold spots where condensation and mold risk rise. CI limits those bridges by placing a continuous thermal break on the exterior side of the structure. Government and research guidelines emphasize CI for thermal bridging mitigation; see the PNNL guide on continuous rigid insulation sheathing for details on how exterior CI reduces bridging and supports thermal protection.
Thermal-bridge reduction also lowers peak loads and can allow smaller mechanical systems, which is useful for DIY net-zero or off-grid projects.
Enhanced Moisture Control
CI keeps the structural sheathing and framing warmer in cold climates, reducing condensation risk on the sheathing’s interior face. When paired with appropriate drainage planes, flashings, and a ventilated cladding gap, CI helps direct bulk water away from the assembly. The best practice is to design for a continuous drainage plane and to follow manufacturer details for fastener patterns and tape/joint sealing.
For sealing at doors and windows—another critical part of air and moisture control—review practical tips in our door weatherstripping tips article to ensure CI and fenestrations work together.
Key points:
- CI raises whole-wall R-value and reduces cold spots.
- Exterior CI reduces condensation risk when detailed with a drainage plane.
- CI can allow downsizing HVAC loads in well-sealed homes.
Materials Used in Continuous Insulation
Common Insulation Materials
Several materials are used for continuous insulation; each has trade-offs in cost, moisture behavior, compressive strength, and fire performance.
- Polyisocyanurate (polyiso): High R-value per inch (R-6.0–R-6.5 nominal) and widely available as rigid board. Best in above-grade walls in temperate climates. Use with careful detailing in cold climates because the R-value can drop at low temperatures.
- Extruded polystyrene (XPS): Moderate R-value (R-5 per inch), good moisture resistance, common for below-grade and some exterior applications.
- Expanded polystyrene (EPS): Lower cost and lower R-value (R-3.5–R-4 per inch), but available in higher density. Economical choice for many retrofits.
- Mineral wool (stone wool, Rockwool): Noncombustible, vapor-permeable, and durable; typically lower R/inch than polyiso but better fire and moisture performance. See vendor quick guides for installation options with mineral wool and other CI products.
- Wood fiberboard: Breathable, sustainable option with good hygrothermal properties. Often thicker to reach target R-values.
- Spray foam (continuous exterior layer): Closed-cell spray foam can function as CI and air barrier, but cost and specialized application limit DIY use.
- Natural fiber boards and dense-packed cellulose (for specialized CI): Used in some sustainable builds; see our natural fiber insulation guide for product selection.
For small footprints such as tiny houses, see tiny house materials for recommendations that balance weight, thickness, and R-value.
Choosing the Right Material
Decision factors:
- Climate: Cold climates favor mineral wool or thicker CI to keep sheathing warm. Warm-humid climates may prefer vapor-permeable CI like wood fiber.
- Moisture exposure: Where water intrusion risk is higher, choose moisture-tolerant materials (XPS or mineral wool) and robust drainage detailing.
- Fire and code: Check local code and fire-resistance requirements—mineral wool is noncombustible, while some foam boards need ignition barriers.
- Budget and thickness: Foams give high R/inch, which matters when cladding depth is limited. Wood fiber and mineral wool may require greater thickness to meet the same R-value.
- Sustainability goals: Use reclaimed materials, wood fiber, or mineral wool when minimizing embodied carbon is a priority; see our sustainable building materials article for product comparisons.
For more on how polyiso compares with mineral wool in application, review our piece on polyiso insulation methods and the rockwool vs fiberglass comparison.
Installation Methods and Best Practices
Step-by-step Installation Guide
The following sequence is a practical exterior-CI installation workflow for a wood-frame wall. This approach matches NREL guidance on using exterior rigid insulation and maintaining drainage and flashing continuity.
- Prepare the substrate: Inspect sheathing for damage and repair any gaps. Install a continuous weather-resistive barrier (WRB) over the sheathing if required by assembly design.
- Flash openings: Install sill flashings and through-wall flashings at window and door sills. Integrate WRB into flashing details so water sheds to the exterior.
- Fasten insulation board: Attach rigid CI (polyiso, XPS, EPS, or mineral wool boards) with approved fasteners or adhesive per manufacturer instructions. Stagger joints to minimize continuous gaps.
- Seal joints and penetrations: Tape or seal board seams with compatible tape or liquid-applied membranes. Use compatible sealants around penetrations and fastener heads.
- Install furring strips or rainscreen: If needed for a ventilated cladding gap, fasten furring through the CI with long screws to structural framing, or use a sub-framing system. Ensure fastener thermal bridging is minimized by using thermally broken fasteners where possible.
- Finish cladding: Install cladding per manufacturer detail, maintaining drainage paths and weep ventilation as appropriate.
- Detail windows and doors: Bring WRB and CI details into window and door flashings; avoid leaving an insulated cap that blocks drainage.
For step-by-step visuals and product-specific details, the continuous insulation quick guides provide downloadable installation checklists. Also consult our guide to wall sheathing for complementary sheathing techniques.
Before starting, check local code for CI requirements and fastening patterns. The NREL guideline contains details on thick layers of exterior rigid insulation and common fastening strategies.
For a visual demonstration, check out this video on continuous exterior insulation and how it benefits your:
The linked video search demonstrates real installations, flashing details, and common sequences so readers can visualize board placement, joint sealing, and rain-screening.
Common Mistakes to Avoid
- Skipping joint sealing: Unsealed seams negate the air-barrier performance of CI.
- Ignoring fastener thermal bridging: Overlooking long thermal-conductive screw patterns reduces CI benefit; use appropriate fastener types and patterns.
- Poor flashing integration: Failing to integrate CI with window and door flashings causes water intrusion and trapped moisture.
- Wrong material for climate: Using low-perm foam in wet climates without a proper drainage plane can create drying problems.
- Overlooking mechanical penetrations: HVAC and plumbing penetrations must be sealed and detailed through the CI layer.
For DIY techniques and trade-specific tips, see our DIY insulation techniques piece and the wall assembly framing guide for framing considerations when adding exterior CI.
Continuous Insulation Vs. Traditional Insulation
Performance Comparison
Continuous insulation improves whole-wall performance by covering studs and structural elements, while traditional cavity insulation leaves those elements exposed. Below is a concise comparison table showing typical differences for common options.
| Assembly type | Typical materials | Whole-wall performance notes |
|---|---|---|
| Continuous exterior foam | Polyiso, XPS, EPS | High effective R-value per inch; reduces stud bridging; requires careful flashing |
| Continuous mineral wool | Stone wool boards | Noncombustible, vapor-permeable; good hygrothermal performance |
| Cavity-only insulation | Fiberglass batts, cellulose | Lower whole-wall R due to stud bridging; easier DIY install but less predictable |
| Interior spray foam | Closed-cell spray foam | High R and air-sealing when installed correctly; cost and specialized installation limit DIY |
Cost Analysis
Upfront cost per square foot varies widely: EPS and fiberglass-based assemblies are lower cost; polyiso and mineral wool BI products are mid-range; spray foam and high-density exterior systems cost more. However, CI often enables smaller mechanical systems and lower operating bills, so lifecycle costs can favor CI.
For specific R-value and cost comparisons, consult this insulation cost comparison guide to match R-targets with budget and climate. Additionally, manufacturer summaries of CI code requirements provide guidance on where CI is required and the R-value thresholds that influence choice.
When estimating costs, include:
- Material cost per board foot
- Fasteners and specialty screws
- Labor or subcontractor rates for furring and cladding attachment
- Weatherproofing and flashing materials
A simple rule: plan for 10–25% higher material-plus-labor cost compared with cavity-only retrofits, but expect better energy savings and durability that can offset that over time.
Case Studies: Successful Continuous Insulation Projects
Case examples from industry guides demonstrate practical outcomes and detailing approaches used in both new construction and retrofit projects.
- Research and measure guidelines compiled by NREL and PNNL show assemblies that keep sheathing temperatures above dew point during cold periods, lowering moisture risk and preserving structural materials—especially when CI is combined with balanced ventilation and controlled vapor profiles.
Homeowners and small builders have reported better comfort and fewer cold-wall complaints after adding CI and completing airtightness upgrades. Public agency guides provide the technical evidence: PNNL’s continuous rigid insulation sheathing resource explains the performance mechanisms and installation strategies that make these results repeatable.
When evaluating case studies, look for measured outcomes (airtightness, energy use before/after, occupant comfort) rather than marketing claims. Documents and quick guides from manufacturers and research labs provide the kind of measured details helpful for DIY planning.
The Bottom Line
Continuous insulation is a practical, proven way to improve whole-wall performance, reduce thermal bridging, and protect assemblies from moisture risks when detailed correctly. For budget-conscious DIY builders aiming for energy-efficient homes and adherence to passive house principles, adding CI—paired with a continuous air barrier and proper flashing—often yields better long-term value than cavity-only approaches.
Frequently Asked Questions
What is continuous insulation and why use it?
Continuous insulation is an uninterrupted layer of thermal insulation across building assemblies that covers studs and structural elements to reduce heat flow through thermal bridges. It improves whole-wall thermal performance, helps keep sheathing warmer in cold climates, and simplifies continuous air-barrier detailing when correctly combined with flashing and drainage planes. Standards such as ANSI/ASHRAE/IES Standard 90.1 reference CI as an effective way to meet energy targets.
Which materials work best for exterior continuous insulation?
Common options include polyiso, XPS, EPS, mineral wool (stone wool), and wood fiberboard. Polyiso gives the highest R-value per inch, while mineral wool offers noncombustible performance and vapor permeability. Wood fiberboard is a more breathable, lower-embodied-carbon choice. The right choice depends on climate, moisture exposure, fire and code requirements, and budget—consult product datasheets and the continuous insulation quick guides for details.
Can I add continuous insulation myself on a retrofit?
Yes—exterior CI is a feasible DIY retrofit in many cases, especially when using board insulation and adhesive or screw fastening. Key tasks include ensuring a continuous WRB, integrating flashings around windows and doors, sealing joints, and installing a rainscreen if required. Review detailed installation guidance such as the NREL measure guideline for exterior rigid insulation to plan flashing and fastening.
If structural modifications or complicated flashing conditions are present, consult a licensed contractor or building scientist to avoid moisture problems.
How does continuous insulation affect HVAC sizing?
By reducing heat loss through thermal bridging and improving whole-wall R-value, continuous insulation lowers peak heating and cooling loads. That often allows for smaller mechanical systems, which cuts upfront equipment cost. However, accurate sizing should be based on a heat-loss calculation that reflects whole-wall performance and airtightness, not just nominal cavity R-values.
What are the common installation errors to avoid?
Frequent mistakes include failing to seal board joints, poor integration of CI with window and door flashings, using an inappropriate material for the climate, and neglecting long fasteners’ impact on thermal bridging. Follow manufacturer details, use compatible tapes and sealants, and follow best-practice guides such as those from PNNL and NREL to avoid these pitfalls in the PNNL and NREL guidance cited above.