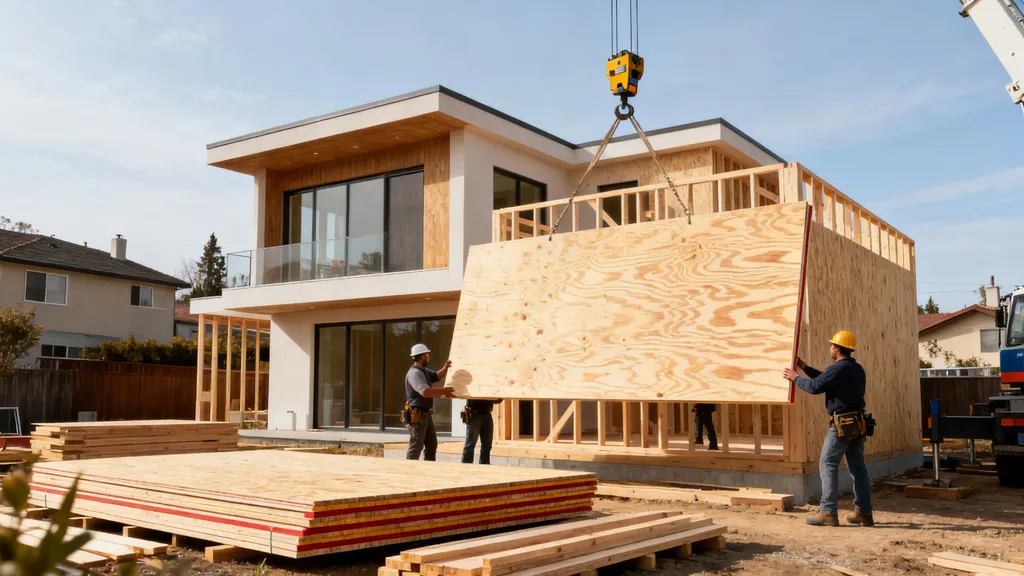
An approachable guide to CLT cross laminated timber — what it is, how it's made, structural and sustainability pros, costs, and DIY considerations.
Cross Laminated Timber (CLT): Modern Mass Timber
Cross-laminated timber is an engineered wood panel system that is gaining traction for faster, lower-carbon construction. This guide on CLT cross laminated timber explains what the panels are, how they’re made and engineered, where they work structurally, and the practical cost and on-site considerations a budget-conscious DIY or self-builder needs to decide whether CLT fits their project. Readers will get concrete specs, sourcing tips, erection checklists, and links to standards and manufacturer resources.
TL;DR:
- CLT cross laminated timber panels are prefabricated, multi-layered solid wood panels that cut build time and embodied carbon compared with concrete and steel.
- For DIY and self-builds, CLT is attractive for panelized homes and cabins but requires early engineering, careful foundation tolerances, and planning for transport and cranage.
- Start by talking to local suppliers, review product standards and EPDs, and order CNC-cut panels and connection details before site delivery.
What is CLT (cross-laminated Timber) and Why It Matters
Definition and Basic Construction of CLT
CLT (cross-laminated timber) is a solid engineered wood product made from kiln-dried boards, called lamellae, bonded together in alternating grain directions to form large, rigid panels. Typical panels have three to seven layers (and sometimes more) of lamellae; a common domestic panel thicknesses range from about 60 mm (3-layer) up to 300 mm or more for specialized uses. Standard panel widths are often 2.4 m to 3.6 m, with lengths commonly produced to match building dimensions and long spans. Softwood species such as spruce, pine, and fir are most common.
Compared with glulam and LVL, CLT behaves like a plate: it transfers loads in two directions and can act as floor diaphragms, loadbearing walls, and roof elements. Its dimensional stability and large prefabricated panels make it well-suited to panelized construction and rapid on-site assembly.
Research shows CLT buildings can have lower embodied energy than comparable concrete structures and offer in-service carbon storage because the wood contains sequestered carbon; see an overview of these findings in the North Carolina research summary on CLT benefits here.
How CLT Fits Into Modern Mass Timber Trends
Mass timber refers to a group of engineered wood products designed for structural use at scale. CLT is a central mass timber product because of its panel geometry and prefabrication-friendly production. Builders use CLT for single-family homes, multi-storey residential buildings (commonly two to six storeys), commercial fit-outs, and modular units such as tiny houses. Prefab accuracy reduces on-site waste and trade hours, which can lower labor costs for self-builders who coordinate panel delivery and erection.
How CLT is Made and Engineered
Manufacturing Steps: Drying, Lamella Selection, Adhesive Application, Pressing
The manufacturing workflow for CLT starts with kiln-drying and grading lumber to the required moisture content and strength class. Boards are finger-jointed to create long lamellae when needed. Layers are arranged with grain directions alternating—typically crosswise every other layer—to create balanced mechanical behavior. A structural adhesive is applied to the lamella surfaces, then the stack is pressed under pressure and cured. After curing the panel is machined to precise tolerances, trimmed to finished edges, and CNC-cut for service penetrations, window and door openings, and connection details.
Adhesives commonly used include melamine-urea-formaldehyde and polyurethane systems; adhesive choice affects moisture resistance, formaldehyde emissions, and fire/structural performance, so review product data sheets. Factory quality control includes dimensional checks, strength testing of sample lamellae, and verification of glue-line integrity.
Panel Grading, Tolerances, and Finish Options
CLT is supplied to product standards that specify strength classes, allowable tolerances, and permitted uses. Typical production tolerances for panel thickness and flatness are in the millimeter range; manufacturers usually state exact tolerances for each product line. Panels can be delivered with raw sawn faces, sanded faces, or pre-finished surfaces. CNC detailing in the factory reduces on-site cutting and speeds erection; request shop drawings and CNC files early in procurement.
Standards and Certification to Look For
Industry organizations and research centers publish guidance and test data. Builders should look for CLT products certified to applicable regional standards and manufacturer quality systems. In North America and Europe, organizations such as APA/WoodWorks and research institutions publish technical guides and best-practice documents; see recent work on CLT for seismic and shear performance by the U.S. Forest Service here. Ask suppliers for product certification, third-party verification, and factory QA documentation. That proof helps when submitting plans for permitting and ensures the delivered panels match engineered specifications.
For a visual demonstration, check out this video on complete production line for cross laminated timber clt:
Structural Performance and Common Design Uses for CLT
Load-bearing Walls, Floors, Roofs, and Long-span Possibilities
CLT panels provide both vertical load-bearing capacity and lateral stiffness. Floors act as diaphragms; walls provide shear resistance. Panel thickness and lay-up determine span and load capacity—floor panels in residential buildings commonly range 100–200 mm thick depending on spans and live loads. CLT can achieve long spans compared with light-frame construction, especially when used with engineered openings and ribbed or sandwich panels. Applications include single-family houses, multi-storey timber frames up to six storeys, cabins, and prefabricated modules.
Connections and Fastenings: Screws, Dowels, Steel Brackets
Connections are the design-critical part of CLT systems. Common approaches for small-scale projects:
- Through-bolts or screwed connections for high-capacity wall-to-foundation anchors.
- Self-tapping screws and timber-to-timber screws for panel-to-panel joins and floor assemblies.
- Steel brackets, hold-downs, and concealed metal plates for moment or uplift resistance.
- Dowel-laminated or hardwood dowel systems for concealed connections in high-finish interiors.
For DIY projects, self-drilling screws and pre-engineered bracket systems make on-site assembly simpler; always follow engineer-specified fastener spacing and embedment depths.
Quick Comparison Table: CLT vs Concrete vs Steel (strength, Weight, Speed)
| Material | Typical density | Fire approach | Erection speed | Embodied carbon trend |
|---|---|---|---|---|
| CLT (typical panels) | 350–600 kg/m3 (wood species dependent) | Design by char rate, sacrificial char layer | Fast (panelized, less wet trades) | Generally lower than concrete, stores biogenic carbon |
| Concrete (cast-in-place) | 2,300 kg/m3 | Non-combustible, needs passive protection for rebar | Slower (formwork, curing) | Higher embodied carbon per m3 |
| Structural steel | 7,800 kg/m3 | Non-combustible; requires fireproofing for user exposure | Fast for frame erection but needs cladding | High embodied carbon, recyclable |
Numbers are typical ranges; always check manufacturer and engineering data for project-specific comparisons. For residential spans and multi-level diaphragm action, CLT often matches or exceeds the speed benefits of steel and concrete because of factory precision and minimal on-site formwork.
Thermal, Acoustic, and Fire Performance for CLT Buildings
Thermal Behavior and Integrating Insulation
CLT offers thermal mass and airtight panel seams when detailed correctly, but panels themselves do not usually meet high R-value requirements without added insulation. Common assemblies:
- CLT wall with exterior continuous insulation (rigid mineral wool, polyiso, or wood-fiber boards) and a rainscreen cladding.
- CLT with a ventilated cavity and insulation on the exterior face to minimize thermal bridging.
- Sandwich CLT panels with factory-bonded insulation layers for panelized builds.
Maintain careful air-barrier continuity at panel joints and service penetrations. For strategies on adding continuous exterior insulation and achieving high-performance envelopes, see the guide on continuous insulation strategies.
Airtightness: Seal panel joints with gaskets or specialized sealants and use taped membranes or integrated sheathing systems at penetrations.
Acoustic Considerations for Multi-level Homes
Mass is your friend for sound control. To reduce airborne transmission, add resilient layers such as floating floors, acoustic underlayments, or resilient channel for ceilings. Impact noise often requires floating floor solutions with elastic pads or split-slab assemblies. For small multi-level dwellings, a CLT floor with a floating floor topping and adequate insulation can meet common acoustic targets; verify performance with test data or acoustic engineering input.
Fire Performance Strategies and Passive Protection
CLT’s fire behavior is managed through natural charring: exposed CLT chars at a predictable rate, protecting inner layers. Design for required fire-resistance ratings by either leaving sacrificial exposed faces of a specific thickness or concealing panels with non-combustible finishes such as gypsum or intumescent coatings where code requires. Building codes take a performance-based approach for mass timber; always consult a structural engineer and local authority having jurisdiction for required ratings. University research summarizing CLT fire performance and benefits is practical reading—see the NC State overview of CLT benefits here. Passive House compatibility is feasible when airtightness and continuous insulation are addressed; discuss specifics with a PH consultant if pursuing a certification path.
Costs, Sourcing, and Sustainability Considerations
Primary Cost Drivers (manufacture, Transport, Cranage, Connections)
Major cost factors for CLT builds:
- Panel production cost per m²: dependent on species, thickness, and factory volume.
- Transport and logistics: large panels are bulky; distance from mill can add substantially to cost.
- On-site cranage and rigging: even small houses often need a crane or articulated lifting equipment.
- Connection hardware and specialist labor for structural fastening and sealing.
- Secondary trades: finishing, cladding, and MEP work remain significant costs.
That said, reduced framing time and lower waste can offset some of these costs compared with stick-frame trades. Regional variation is high—get local quotes and include transport and lifting in budget comparisons.
Sourcing Options for Budget DIY Builders
Budget-minded options:
- Contact local CLT mills or regional panel suppliers for competitive transport pricing.
- Consider smaller regional fabricators who can supply smaller panels or modular kits suitable for tiny houses.
- Explore reclaimed or secondhand timbers for non-structural panels or finishes on small projects.
- Compare ordering full panelized wall kits with CNC cut openings versus raw panels; kits reduce on-site labor but raise upfront cost.
For practical tips on finding local sources and lowering transport costs, review the guide on sourcing local materials. When budgeting, compare CLT to other systems using a green-build cost baseline; our green home cost guide can help place CLT costs in context.
Lifecycle Impacts and Certifications to Check
Look for chain-of-custody certifications such as FSC if forest origin matters to you. Request Environmental Product Declarations (EPDs) to compare embodied carbon and energy across suppliers. Trade association technical pages and university reports provide lifecycle comparisons and data that show CLT tends to have lower embodied carbon than concrete alternatives on a per-square-meter basis—verify claims with each supplier’s documentation. The APA’s technical overview of CLT gives practical performance expectations and is a useful manufacturer-facing resource (APA CLT overview).
Practical Considerations for DIY and Self-builders
Foundations, Tolerances, and Interface Details
A flat, accurate foundation is essential. CLT panels have tight factory tolerances; foundation levelness and anchor positions must match the panel drawings. Common foundation choices include slab-on-grade and pier systems; CLT walls are also compatible with insulated concrete form systems—see our ICF discussion for compatibility notes ICF foundation options. Work with the engineer to set anchor bolt locations and tolerances, and verify dimensions before panel manufacture.
On-site Handling, Storage, and Erection Tips
Plan delivery to coincide closely with erection to minimize on-site storage. Protect panels from moisture with breathable covers and raised supports to avoid staining and swelling. For small builds where a large crane is cost-prohibitive, look at smaller mobile cranes or temporary gantry systems; panels can be assembled with lifting frames and teamwork if handled cautiously. Schedule trades so that sealing and interior finishes begin soon after panel erection to preserve panel integrity.
For airtightness sealing methods and best practices, consult the air barrier installation guide. Also, coordinate MEP penetrations with the manufacturer’s CNC files to avoid cutting on site.
Common Pitfalls and How to Avoid Them
- Mismatch between foundation anchors and panel openings: Avoid by verifying shop drawings and performing a setting-out check on-site before fabrication.
- Weather exposure during storage: Avoid by planning tighter delivery windows and using breathable protective covers.
- Underestimating cranage or access constraints: Run a site logistics plan and get lifting quotes from multiple local companies.
- Insufficient early engineering: Engage a structural engineer early so connections, fire ratings, and deflection criteria are baked into panel design.
For inspection expectations related to panelized timber, review tips on passing inspections.
Key Points Checklist and Assembly Details for Builders
Short Checklist: Design Through Erection (7 Items)
- Confirm structural engineering: Obtain stamped drawings that include panel layouts and connection schedules.
- Verify foundation and anchors: Check flatness and bolt locations before panel fabrication.
- Order panelized drawings/CNC files: Request IFC (issued for construction) files and review cutouts and tolerances.
- Arrange cranage and storage: Book lifting equipment and protect storage areas.
- Install continuous air barrier and seals: Plan gasket and tape locations for airtightness.
- Coordinate MEP penetrations: Submit mechanical, electrical, and plumbing chase drawings for factory routing where possible.
- Protect panels and finish quickly: Limit weather exposure and begin finishes shortly after erection.
Panel Cutting, Service Penetrations, and Airtightness Details
Factory CNC cutting reduces on-site work and ensures tight joints. Typical advice:
- Mark service penetrations on shop drawings; small changes late in the process can be costly.
- Use factory-supplied gaskets, closed-cell foam strips, or elastomeric seals in vertical and horizontal panel joints for airtightness.
- For window and door openings, allow manufacturer tolerance blocks and follow recommended sealant and flange details specified in the window product literature, especially for high-performance passive-house windows.
Example fastener table (illustrative)
| Fastener type | Typical use | Example spacing (illustrative) |
|---|---|---|
| Timber screw (self-tapping) | Panel-to-panel joins | 150–300 mm |
| Through-bolt (grade 8.8) | Structural anchors to foundations | As specified by engineer |
| Concealed plate connector | Moment/hidden connections | Per connector manufacturer |
| Dowel systems | Aesthetic, concealed joins | Manufacturer guidance |
These are example ranges; follow engineered fastening schedules for your project.
The Bottom Line
CLT cross laminated timber offers a prefabricated, lower‑carbon framing option that speeds on-site assembly and reduces wet trades, making it attractive for many self-builds and panelized homes. Trade-offs include higher transport and cranage costs and the need for early engineering and tight foundation tolerances. Next steps: contact local CLT suppliers for samples and EPDs, engage a structural engineer, and request shop drawings before committing to delivery dates.
Frequently Asked Questions
How durable is CLT and what maintenance does it need?
CLT panels are durable when kept dry and detailed correctly. Exterior cladding and proper roof overhangs prevent direct exposure to rainfall. Interior finishes protect exposed faces. Periodic inspections for sealant condition at panel joints, roof flashing, and cladding attachments are recommended. If panels get wet during construction, dry them promptly and document any discoloration for the supplier to assess.
How do CLT costs compare to stick-frame or concrete builds?
Costs vary widely by region. CLT often reduces on-site labor and build time compared with stick-frame and concrete, but higher panel fabrication and transport can offset those savings. For small projects, cranage and minimum order sizes can make CLT relatively expensive unless you use panel kits sized for the project. Use local quotes and include transport, crane hire, and connection hardware in comparisons; consult the green home cost guide for budgeting context.
Are there special code or fire safety concerns with CLT?
Building codes treat mass timber with specific provisions for fire performance, often allowing exposed char design or requiring protected assemblies to meet fire-resistance ratings. Codes and acceptability vary by jurisdiction. Consult a structural engineer and your local authority having jurisdiction early to confirm required ratings and documentation. Research and standards from technical bodies and universities can guide design choices, but local approval is mandatory.
Can a DIYer build a small home with CLT panels?
CLT can be DIY-friendly for small homes if the project uses smaller panel kits, has access to appropriate lifting methods, and secures engineered drawings. The advantage is less on-site framing and faster enclosure. That said, you’ll still need to manage foundations, cranage, airtightness, and MEP coordination. Early supplier engagement for CNC-cut openings and a clear erection plan reduce risk.
What are typical lead times for CLT panels?
Lead times depend on factory capacity, panel complexity, and transport. Typical ranges are a few weeks to several months. Complex projects with many CNC cuts and bespoke finishes take longer. Confirm current lead times with suppliers at the start of design and factor them into your construction schedule to avoid site delays.