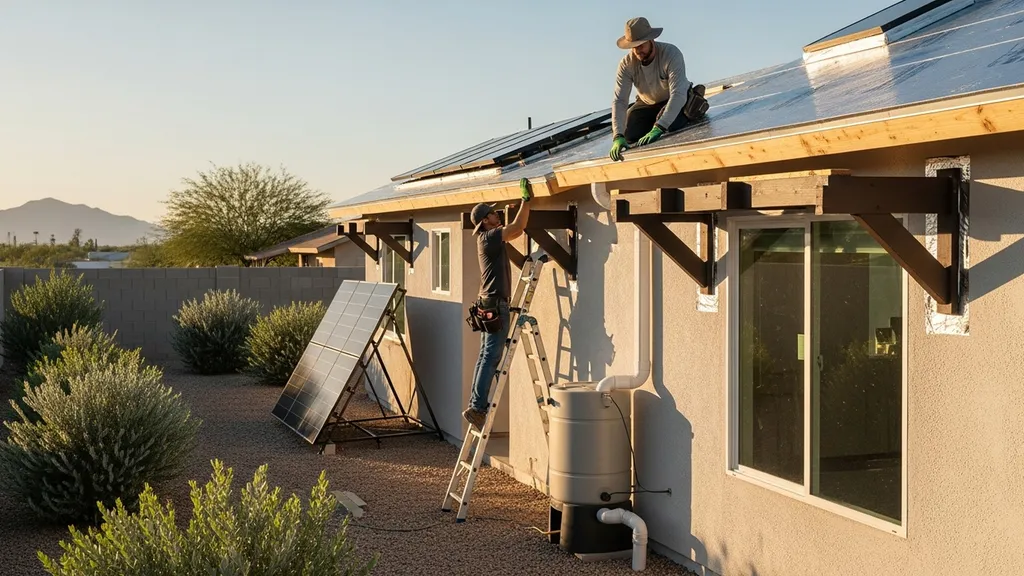
Practical design strategies for self-builders in hot-dry (Climate Zone 2): passive cooling, envelope choices, water harvesting, off-grid sizing, and DIY cost-saving tips.
Building in Climate Zone 2: Hot Dry Design
Designing a comfortable, low-energy home in climate zone 2 means solving two opposite problems at once: intense daytime heat and very dry conditions. This guide on climate zone 2 explains which passive and active strategies reduce cooling demand, how to size modest off-grid solar and water systems, and which envelope choices pay back fastest for budget-conscious self-builders. Readers will find concrete R-value targets, insulation and cladding options, rainwater sizing examples, and step-by-step DIY priorities tailored to hot-dry sites.
TL;DR:
- Prioritize orientation and shading to cut solar gain by 40–60%, use continuous exterior insulation at R-6 to R-10 per inch equivalent where practical.
- Use night flushing with well-placed thermal mass and reflective roofing; consider evaporative cooling when average humidity is under 40% and water availability allows.
- Capture roof runoff with a sized tank (example: 1,000–3,000 gallons for modest demand), and size PV by expected summer kWh/day (see 1 kW, 5 kW, 7 kW guides).
Understanding Climate Zone 2: Hot‑dry Characteristics
Climate zone 2 in IECC terms covers hot-dry and hot-humid subzones; here we focus on the hot‑dry variant seen in the U.S. Southwest. Typical characteristics are daytime highs often above 95°F (35°C) in summer, relative humidity usually below 40%, large diurnal swings (20–30°F or 11–17°C), and low annual precipitation. Cooling degree days (CDD) are high, which means cooling loads dominate annual energy use. That matters for both passive design and off‑grid sizing.
Researchers and agencies recommend checking local metrics before design. The Department of Energy's Building America climate-specific guidance includes climate maps and county lookup that help translate zone-level advice into local design numbers. For quickly confirming whether a parcel falls in zone 2, use the site's climate lookup tool to get county or ZIP-level data: check your local climate zone. For permit work and local compliance, consult the overview of climate codes to match IECC/Title 24 details.
Implications for building choices:
- Thermal mass helps when you can flush at night; without night ventilation, mass can trap heat.
- Airtightness reduces uncontrolled hot air infiltration but requires planned ventilation to maintain indoor air quality.
- Water scarcity shifts priorities toward efficient fixtures and storage rather than water-intensive cooling strategies.
Site Planning and Orientation for Hot‑dry Building
Careful siting avoids a lot of cooling need. Aim to place the long axis of the building east‑west so the largest glazed areas face north and south; this reduces direct west‑facing late-afternoon solar gain. Where the program requires west glazing, plan deep shading or vertical fins. Roof pitch should balance rain capture (low in hot-dry areas) with PV tilt optimization — a moderate pitch 10°–20° is common for summer-weighted solar production.
Microclimate moves the needle. Planting deciduous shade on west and south exposures provides seasonal control, and paved areas should be minimized to reduce reflected heat. Locate outdoor living and entries on the east or north sides where morning sun is milder. If prevailing evening breezes exist, orient operable openings to encourage cross-ventilation; place lower inlets on the cool side and higher outlets on the hot side to promote stack effect at night.
For PV and passive solar use, ensure array locations are free from shading by trees, chimneys, or nearby structures during summer peak sun hours. Use the yourhome.gov.au design for climate guidance for climate-appropriate passive-solar principles that work in similar warm climates. When siting tanks and cisterns, keep roof catchment close with short conveyance runs to reduce first-flush losses and simplify pump layout.
Practical overhang sizing example:
- For a south window at 6ft high and latitude ~33°N, an overhang depth equal to 0.5 × window height will shade high summer sun while letting low winter sun through. Adjust with sun-path diagrams or a simple online sun angle tool.
Envelope Strategies: Insulation, Airtightness, and Assemblies for Heat Control
Envelope choices in hot‑dry climates focus on reducing heat flow during the day and allowing night cooling. Exterior continuous insulation (CI) is highly effective because it reduces thermal bridging and keeps structural mass cooler. Typical target R-values (whole assembly) for walls and roofs should meet or exceed local code; for many zone‑2 projects practical targets are R-20 to R-30 walls and R-40 to R-60 roofs, depending on roof type and budget.
Compare common insulation options:
| Insulation | R-value per inch | Pros | Cons |
|---|---|---|---|
| Fiberglass batt | 3.1–3.7 | Low cost, DIY friendly | Gaps/settling reduce performance |
| Cellulose | 3.2–3.8 | Good for cavities, recycled content | Needs blower, moisture caution |
| Polyiso (rigid) | 6.0–6.5 | High R/in, good for exterior CI | Loses some performance at high temps |
| Mineral wool | 3.0–4.3 | Fire resistant, water tolerant | Higher cost, heavier |
| Closed-cell spray foam | 6.0–7.0 | Air barrier + insulation | Expensive, vapor-retarding |
For roofs, exterior foam over sheathing keeps attic and truss space cooler and reduces duct losses. See the step-by-step for how to install exterior foam on roofs. For airtightness work, use continuous membranes and taped seams; the site's guide on how to install airtight membranes shows best practices for avoiding moisture traps in hot-dry assemblies.
Vapor strategy: In hot‑dry climates the vapor drive is typically from interior to exterior when indoor humidity is higher, so a vapor-impermeable layer on the interior can trap moisture in limited cases. Use permeable exterior assemblies and avoid double vapor barriers. Good ventilation design paired with air barriers prevents humidity buildup.
Airtightness targets: Aim for 3 ACH50 or lower for energy-efficient builds—lower if you plan mechanical ventilation. That said, mechanical ventilation must be sized and filtered to maintain IAQ.
Cooling and Passive Strategies for Comfort Without High Energy Use
Passive cooling should be the priority because active cooling runs all summer. Start by minimizing solar gain: use low-SHGC glazing on west and east facades (SHGC ≤ 0.25) and moderate SHGC on south where properly shaded. Reflective roofing or cool‑roof coatings reduce roof surface temperature by 10–30°F compared to dark finishes.
Night flushing shifts stored heat out of the building: open low inlets and high outlets after sunset when outdoor air is several degrees cooler than the interior. This method works well with thermal mass such as concrete or tile floors. A simple rule-of-thumb for thermal mass: provide 6–12 lbs of mass per square foot of floor area for effective night cooling in many designs; heavier mass helps when night temperatures drop significantly.
Evaporative cooling (swamp coolers) is a low-energy active option in dry climates. Considerations:
- Works best when relative humidity <40%.
- Uses water — typical direct evaporative units use 2–6 gallons/day per 1,000 ft² of conditioned area under light cooling loads; higher use under heavy loads.
- Offers high COP compared with traditional AC in low humidity.
When mechanical ventilation is needed for airtight homes, balanced systems (HRV or ERV) are preferred. See the site's summary of balanced ventilation options and the detailed HRV vs ERV comparison to decide which suits your humidity profile.
Practical material choices:
- Use light-colored, high-solar-reflectance roofing with a radiant barrier in the attic if a large ventilated attic exists.
- Build fixed overhangs sized to shade summer sun; add operable shading (awnings, screens) on windy or variable sites.
Watch this step-by-step guide on designing climate-responsive facades:
Water and Moisture Management in Arid Sites
Arid sites require careful water planning. Rainwater harvesting is still viable: even modest annual rainfall can be useful if storage and demand line up. Use this sizing method: Storage needed (gallons) = Annual demand (gallons) × fraction to be supplied by rain / (Roof catchment area (ft²) × Annual rainfall (in) × 0.623). Example: A 1,000 ft² roof, 8 in/year rainfall, and 50% supply target gives ~1,000 × 8 × 0.623 × 0.5 = 2,492 gallons. Design for first-flush diversion and filtration if water will be used for potable services.
Greywater reuse options are pragmatic: laundry-to-landscape systems and simple diverters for shower greywater can irrigate trees or shrubs after basic filtration. For potable reuse, meet local regulations and use multi-stage treatment (sediment, disinfection, and UV or chlorination). For fixture strategies and pipeline layout that cut demand, consult the site's water-efficient plumbing design guide. For broader off-grid water and moisture topics, see the comprehensive water and moisture guide.
Slab and foundation considerations: Insulate slab edges to reduce heat flow into the ground and limit edge-related cracking; follow the site's insulated slab edge details for construction techniques. In dry soils, shrink-swell can cause movement; use soils engineering on larger builds, and consider monolithic slabs with turned-down footings for small self-builds.
Moisture around foundations is usually less of a risk than in humid climates, but capillary rise and occasional storm runoff can create localized problems. Grade the site away from the foundation and use simple perimeter drainage where needed.
Off‑grid Power, HVAC Sizing, and Solar for Hot‑dry Homes
Cooling drives off-grid sizing in hot-dry climates. Start with a basic load estimate: list appliances, lighting, and an estimated cooling load in kWh/day. Small builds without central AC might use 5–15 kWh/day; a modest cottage with window AC units or a small ducted mini‑split could range 20–40 kWh/day in summer. For tiny houses, night-flushing and evaporative cooling can keep energy use under 5–10 kWh/day.
Use the site's PV sizing guides as directional examples:
- 1 kW system: see the 1 kW off-grid sizing guide for tiny cabins.
- 5 kW system: see the 5 kW tiny house solar guide for mid-size off-grid cottages.
- 7 kW system: see the 7 kW cabin solar sizing for small family homes.
Compact comparison table — typical system scenarios:
| Scenario | Daily use (kWh/day) | PV array (kW) | Battery usable (kWh) |
|---|---|---|---|
| Tiny cabin, passive cooling | 3–8 | 1–2 | 2–6 |
| Small cottage with mini‑split | 12–25 | 3–6 | 6–15 |
| Small family net‑zero aim | 25–45 | 6–9 | 15–30 |
Tilt and shading: Tilt panels slightly lower than winter-optimized tilt for summer-weighted production; set arrays to avoid shading in late afternoon. For component selection, compare lithium iron phosphate batteries vs lead-acid for lifecycle and depth-of-discharge differences. For common off-grid reliability problems and mitigation techniques, consult common off-grid heating issues because many issues overlap between heating and cooling seasons.
Load-shifting and backup: Shift high-consumption tasks to morning and evening when PV produces the most relative to demand. Consider a small generator or hybrid inverter as backup during extended cloudy stretches. Use efficient HVAC equipment (mini‑split heat pumps with high SEER and good part-load performance) instead of oversized window units where possible.
Materials, Finishes, and Details That Last in Hot‑dry Conditions
Choose cladding and finishes that resist UV, thermal expansion, and low moisture. Durable choices include fiber cement, stucco with a proper drainage plane over CI, and metal panels with thermal breaks. Consult the ultimate sustainable materials guide for eco-friendly variants and sourcing tips.
Window choices matter: use double-glazed units with low-e coatings tuned for low SHGC on east/west exposures. Frame materials such as thermally broken aluminum, fiberglass, or vinyl each have trade-offs: fiberglass has low expansion, vinyl is economical, and thermally broken aluminum is slim but costlier. Seal details should include high-quality weatherstripping and a continuous drainage sill for exterior water management.
Comparison table — common cladding options for hot-dry sites:
| Cladding | Heat durability | Maintenance | DIY difficulty |
|---|---|---|---|
| Fiber cement | High | Low | Moderate |
| Stucco over CI | High | Moderate | High (skill needed) |
| Metal panels | High, reflective | Low | Moderate |
| Wood siding | Moderate | High (painting) | Moderate |
Foundations and slabs: In expansive soils, design for movement with reinforced footings or floating slabs; for compact builds, insulated slab edges reduce thermal losses and help protect slab edges from temperature-related cracking. Follow the insulated slab edge guidance in the site's technical detail for construction sequencing and materials.
Small details save money: use UV-resistant fasteners, breathable paints, and stainless steel for exposed hardware. Choose light exterior colors to reduce surface heat and apply cool-roof coatings to metal or asphalt roofs where full replacement isn't feasible.
Practical DIY Sequence and Cost‑saving Tactics for Self‑builders
A phased approach keeps cashflow manageable and lets you add systems over time. Recommended sequence:
- Site prep and foundation with slab edge insulation.
- Envelope shell with continuous exterior insulation and airtight membrane.
- High-performance windows with shading features.
- Mechanical rough‑ins and PV conduit/array foundation.
- Finishes and water system installation, PV, and battery final hookup.
Priorities are envelope and shading first; the HVAC and PV can be phased. For a net-zero trajectory, consult the site's how to build a net-zero home as a roadmap.
DIY vs pro tasks:
- Good for DIY: framing, installing batt or blown-in insulation (with training), mounting rainwater tanks, building shade structures, installing overhang brackets.
- Hire pros: structural roof modifications, final electrical tie-in for PV and grid-tied inverters, complicated plumbing for potable rainwater treatment, and major HVAC ductwork.
Cost-saving tactics:
- Reuse materials like reclaimed timber for shading structures.
- Phase PV: start with a small off-grid-capable inverter and add panels/batteries later.
- Use local materials where practical to save transportation costs and support durability in local conditions.
Permitting and inspections: Owner-builder permits often require clear phasing on plans; check local building departments early. Small design changes at permit time can add large delays, so lock down orientation and envelope strategy before final drawings.
Quick Design Checklist — Key Points for Climate Zone 2
- Orient long axis east‑west and minimize west glazing unless shaded.
- Target wall R-values equivalent to R-20 to R-30 and roof R-40 to R-60 where feasible.
- Use continuous exterior insulation to reduce thermal bridging.
- Design south overhangs sized to block high summer sun.
- Specify low-SHGC glazing for east/west and moderate SHGC for shaded south.
- Prioritize night flushing and provide operable high and low openings.
- Size rainwater storage using roof area × rainfall × 0.623; plan at least 1,000 gallons for small cabins.
- Place PV arrays unshaded and tilt for summer-weighted production.
- Pick durable claddings (fiber cement, stucco over CI, or metal) and light roof colors.
- Insulate slab edge and design for soil movement in arid conditions.
- Choose evaporative cooling only when average humidity supports it and water supply exists.
- Plan phased PV/battery installations and keep wiring/conduit accessible for future expansion.
Materials and systems spec checklist:
- Wall CI: continuous rigid foam or mineral wool equivalent, R-6 to R-10 per inch where used.
- Roof: exterior insulation recommended; see install exterior foam on roofs.
- Glazing: U-factor ≤ 0.35, SHGC ≤ 0.25 for east/west.
- Ventilation: balanced ventilation considered if airtightness <3 ACH50; see balanced ventilation options.
The Bottom Line
Passive measures—orientation, shading, continuous insulation, reflective roofing, and night flushing—deliver the largest comfort gains per dollar in climate zone 2. Add efficient active systems (evaporative cooling where humidity permits, high-efficiency mini‑splits, and modest PV) to cover remaining loads. Water conservation and carefully sized storage are essential in arid settings; integrate rainwater and greywater strategies early in design.
Frequently Asked Questions
What are ideal R-values for walls and roofs in climate zone 2?
For many hot‑dry projects, aim for wall assemblies equivalent to R-20 to R-30 and roof assemblies in the R-40 to R-60 range where budget allows. These are whole-assembly targets that include continuous exterior insulation to reduce thermal bridging. Local code may set minimums, and performance targets should be adjusted based on your planned cooling strategy and occupancy patterns. See the envelope section for insulation types and installation links.
Is thermal mass useful in a hot‑dry climate?
Yes, when paired with night flushing. Thermal mass such as concrete or tile floors stores heat during the day and releases it at night; this lowers peak indoor temperatures if outdoor nights are significantly cooler. If night cooling is not possible—say the site has warm evenings or poor ventilation—mass can store unwanted heat and reduce comfort.
Should I use evaporative cooling instead of air conditioning?
Evaporative cooling is effective and energy‑efficient in dry climates with average relative humidity below about 40%. It uses much less electricity than a vapor-compression AC but consumes water. If water supply is limited, high-efficiency mini‑split heat pumps are a better choice despite higher energy use. Evaluate local humidity, water availability, and desired indoor humidity before choosing.
How much rainwater storage will I need for a small off‑grid cabin?
Storage depends on roof area, annual rainfall, and your target coverage. A simple calculation is Roof Area × Annual Rainfall (inches) × 0.623 = annual gallons captured. For a 1,000 ft² roof with 8 in/year rain and a 50% supply target, expect around 2,500 gallons of storage. For potable use, include treatment stages and meet local regulations.
Is airtightness necessary in hot‑dry builds?
Airtightness reduces uncontrolled heat gain and improves HVAC efficiency, so it's recommended for energy-efficient homes. However, airtight homes require planned ventilation for indoor air quality. Targets around 3 ACH50 or lower are common; pair airtight construction with balanced ventilation or controlled natural ventilation strategies described in the ventilation section.