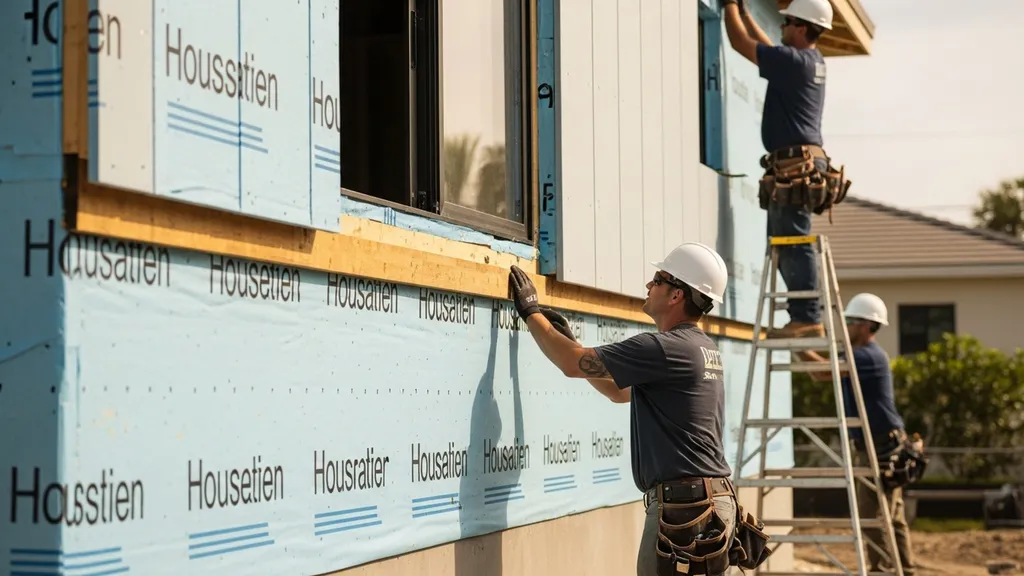
Practical strategies for designing and building low-energy, moisture-resistant homes in hot, humid Climate Zone 1.
Building in Climate Zone 1: Hot Humid Design
Building in Climate Zone 1 demands specific choices to manage heat, high relative humidity, and heavy precipitation while keeping cooling energy and moisture problems under control. This guide explains practical, low-cost design and construction strategies for climate zone 1 DIY builds: how to orient a lot, detail walls and roofs to shed water and dry, pick ventilation and dehumidification approaches, and choose materials that resist mold and corrosion. Readers will learn measurable targets (target R-values, ventilation rates, grading slope) and step-by-step detailing recommendations to reduce cooling loads and moisture risk in hot-humid climates.
TL;DR:
- Focus on drainage and exterior drying: grade 5% away for first 10 ft, use rainscreens and continuous exterior insulation to keep assemblies dry.
- Control humidity with balanced ventilation and whole-house dehumidification: design for 40–50% indoor RH and plan ~0.35 ACH50 air tightness with controlled ventilation.
- Prioritize passive shading, ventilated attics, and right-sized variable-speed minisplits to cut cooling load by 15–35% vs an unshaded baseline.
Understanding Climate Zone 1: Hot-humid Climate Characteristics
Climate Zone 1 (the U.S. tropical/hot-humid band) includes areas such as the Florida Keys, Puerto Rico, Hawaii and other tropical territories. Typical summer highs commonly range from the mid-80s to mid-90s °F, monthly mean relative humidity frequently exceeds 70%, and annual rainfall can be 40 inches or more depending on location. For authoritative mapping and county-level climate data see the Department of Energy’s climate-specific guidance (Building america climate-specific guidance).
Primary performance challenges in hot-humid climates are moisture drive and condensation risk, mold growth, and corrosion of metal components. Two physics points matter: warm, moist outdoor air drives inward through leaks and assemblies, and wet materials need a path to dry outward. Bi-directional vapor flow can occur where assemblies heat unevenly; that means assemblies must be designed to dry, usually to the exterior. Energy goals — reducing cooling loads and maintaining comfort — must be balanced with moisture control so that airtightness and insulation do not trap moisture.
Design priorities for climate zone 1 are straightforward: keep water out, allow assemblies to dry to the exterior, reduce solar gains with shading and reflective roofing, and provide controlled, dehumidified ventilation. Before finalizing plans, builders should find your climate zone and consult local requirements via the site’s climate code basics. Those checks inform insulation levels, permitted vapor retarder strategies, and code-mandated ventilation.
Site Planning and Orientation for Hot-humid Builds
Good results start before the foundation. Solar orientation, eaves, landscaping and grading combine to reduce cooling loads and prevent standing moisture.
Solar orientation and shading
- Orient long facades north–south where possible to minimize east-west solar exposure on large glazing areas.
- Use generous eaves and porches: 2–3 ft overhangs for single-story glazing reduces direct midday sun; deep porches on south and west facades cut afternoon loads.
- Choose high-reflectance roof colors or cool roofing membranes to reduce solar absorption.
Vegetation, Wind, and Natural Ventilation
- Plant canopy trees to shade west walls and lower afternoon solar gain; maintain at least 10–15 ft distance from foundations to reduce evaporative moisture right next to the building.
- Align openings and porches to prevailing breezes if natural ventilation is part of the plan; in very humid areas, natural ventilation helps briefly at night but can raise indoor humidity if external air is saturated.
- Use landscaping to funnel breezes through outdoor living areas and away from wet zones.
Grading, drainage, and reducing standing moisture
- Grade the site at a minimum slope of 5% away from the building for the first 10 ft; include swales, French drains, or perimeter drains where natural slope is low.
- Provide continuous gutters and downspouts discharging at least 10 ft away or to surface drains; keep splash blocks and impermeable surfaces away from foundation perimeters.
- For tight lots, consider elevated porches, raised floors, or engineered drainage layers under slabs to keep moisture out of living space.
Site planning affects both immediate comfort and long-term durability. PNNL’s county climate data can help with wind patterns and rainfall intensity that influence drainage design (Guide to determining climate zone by county).
Envelope Design: Walls, Roofs, and Foundations for Heat & Moisture
An envelope for climate zone 1 must limit air leakage, reduce solar heat gain, and allow assemblies to dry outward. Continuous exterior insulation (CI) combined with a ventilated rainscreen and a sealed air barrier is a strong baseline for many DIY builds.
Roof Assemblies
- Ventilated attic with ceiling insulation: traditional, effective for DIYers. Install R-30 to R-38 ceiling insulation (attic batt or blown cellulose) and provide 1–2 inches of intake and exhaust ventilation with baffles to prevent insulation blocking.
- Unvented conditioned attic (sealed roof): use continuous exterior insulation or sealed spray foam on roof deck; this reduces attic duct losses but requires careful condensation control. See exterior foam roof insulation guidance for detailing (exterior foam roof insulation).
Wall Assemblies
- Best practice: wood-frame wall with exterior continuous insulation + rainscreen gap + breathable WRB. Exterior CI shifts the condensation plane outward, improving drying potential.
- Vapor-permeable WRBs and permeable cladding let assemblies dry to the exterior; avoid interior polyethylene vapor barriers that trap moisture in many hot-humid assemblies.
- Air barrier continuity: tape or sealed membrane at sheathing, window, and door penetrations is essential.
Foundation Options
- Slab-on-grade: provide slab-edge insulation where thermal bridging matters — consult insulated slab edge tips for options.
- Raised floors or conditioned crawlspaces: conditioned crawlspaces with sealed vapor barriers and dehumidification work well if ducts pass through them; unconditioned vented crawlspaces are often problematic because humid air enters and wets subfloor assemblies.
Comparison/specs table of recommended assemblies
| Assembly | Typical R-values (effective) | Vapor control approach | Moisture risk rating | Pros / Cons for DIYers |
|---|---|---|---|---|
| Ventilated attic + exterior CI walls | Roof R-38, walls R-13 + CI R-5–R-7 | Exterior WRB, permeable cladding, no interior vapor barrier | Low | Familiar techniques, good drying, moderate cost |
| Sealed roof (conditioned attic) | Roof deck CI R-10–R-15, ceiling R-19 | Sealed membrane on roof deck, interior air barrier | Medium | Reduces HVAC duct losses, requires tight work and careful detailing |
| Wood-frame wall with exterior foam + rainscreen | Walls R-13 cavity + CI R-5–R-10 | Permeable WRB, 3/8"–3/4" rainscreen gap | Low | Strong moisture control, slightly higher material cost |
| Raised floor over ventilated crawl | Floor R-19, crawl sealed + vapor barrier | Crawl sealed with vapor barrier and dehumidification | Medium | Easier with elevated lots, needs crawl moisture management |
| SIPs or insulated panels | Whole-wall R-20–R-30 | Exterior WRB and proper flashing, no interior poly | Medium | Fast assembly, but watch service penetrations and corrosion |
Use the site’s R-value guidance when choosing insulation levels (R-value insulation tradeoffs, wall R-value guidance). A short envelope checklist:
- Continuous air barrier (taped sheathing or membrane)
- Rainscreen gap behind cladding
- Continuous exterior insulation where possible
- Detail flashings and window openings for total water control
- Design assemblies to dry to the exterior
Moisture Control and Vapor Management Strategies
Moisture control in hot-humid climates means controlling both bulk water and vapor. The guiding principle: prevent liquid water entry and provide drying paths for any moisture that does get into the wall or roof.
Understanding Vapor Drive and Drying Potential
- Vapor drive in hot-humid climates is mostly inward; warm, moist air moves into cooler wall cavities. Assemblies must avoid trapping that moisture between impermeable layers.
- Smart vapor retarders (variable-perm membranes) on the interior can be useful when the wall can dry outward and the interior is conditioned; avoid fixed polyethylene sheeting on the interior in most cases.
Air Barriers, Flashing, and Leak-free Detailing
- Air leakage carries the largest moisture load. Continuous air barriers using taped sheathing or dedicated membranes reduce moisture transport dramatically; see the step-by-step airtight membrane installation.
- Flashing sequence at windows: WRB lapped shingle-fashion over sill flashing, then side flashing, then head flashing. Tape laps and use compatible sealants at transitions.
- Rainscreens separate cladding from the WRB with an air gap (3/8"–3/4"), allowing capillary breaks and ventilation behind the cladding.
Crawlspace and Slab Moisture Strategies
- For crawlspaces, the preferred approach in climate zone 1 is a sealed (conditioned) crawlspace with a continuous ground vapor barrier, insulated walls or piers as appropriate, and mechanical dehumidification when needed. For existing damp crawlspaces see crawl space moisture fixes.
- For slabs, protect edges with insulation and maintain surface slopes and grade drainage. Use capillary breaks under slabs in high water-table areas.
Measured targets and testing
- Indoor relative humidity target: keep average occupied RH below 60% and ideally between 40–50% to limit mold growth and occupant discomfort.
- Test-and-verify: use hygrometers in multiple rooms, and a moisture meter for sheathing and framing checks if suspect. Assemblies with exterior continuous insulation shift drying potential substantially — plan for exterior drying paths and verify assemblies after heavy storms.
Research on local vapor behavior varies, so builders should perform moisture checks during the first year of occupancy and adjust dehumidification and ventilation strategies accordingly.
Ventilation, Dehumidification, and Indoor Air Quality
Balanced ventilation with moisture control is a high-impact intervention in hot-humid climates. An appropriately specified ventilation and dehumidification system maintains IAQ without bringing in excess outdoor moisture.
Balanced ventilation and enthalpy/energy recovery
- Balanced systems supply and exhaust equal airflow with heat and/or moisture exchange. In hot-humid climates, an enthalpy exchanger that transfers moisture can reduce load on dehumidifiers; however, performance depends on local humidity and system efficiency.
- Industry guidance and balanced-system design are covered in the balanced ventilation guide and the tradeoffs between ERVs and HRVs are summarized in the HRV vs ERV comparison.
- Typical ventilation sizing: ASHRAE 62.2 gives a rule of thumb of 0.35 ACH or a formula based on occupants and floor area. For practical design, plan ~7.5–10 CFM per person for continuous ventilation plus intermittent spot ventilation for kitchens and baths.
Active Dehumidification Strategies
- Whole-house dehumidifiers (ducted or standalone) sized by pints/day are often necessary. Rule-of-thumb sizing: 1–2 pints per day per 1000 ft² for moderate moisture loads, but in very humid coastal areas plan 20–30 pints/day for tight, occupied homes or size using moisture load calculations.
- Point dehumidifiers in bathrooms and closets help but don’t replace whole-house approaches in tight, high-occupancy homes.
- For balanced ventilation + dehumidification, control strategy matters: use humidity sensors to modulate supply/exhaust and coordinate with the HVAC to avoid over-ventilation when outdoor air is very moist.
IAQ testing and thresholds
- Monitor relative humidity (target 40–50%), CO2 (comfort target <1,000 ppm), and volatile organic compounds as needed. DIY monitoring methods are described in the DIY air-quality tests.
- Regularly check ventilation performance and filter pressure drops; replace filters per manufacturer intervals (often 3–6 months for standard filters).
The short video above demonstrates placement of balanced ventilation equipment, duct runs, and how a dehumidifier integrates with an ERV/enthalpy system in a hot-humid house. It helps visualize locations and control wiring that DIYers might install or inspect.
Cooling Load Reduction: Passive Strategies and Low-energy HVAC Options
Reducing cooling load reduces both energy bills and dehumidification duty. Passive strategies are low-cost and effective when combined with right-sized mechanical systems.
Passive Cooling Tactics
- Shading: fixed overhangs, operable louvers, and deciduous trees reduce solar gains. Example: shading that cuts peak solar load on west glazing by 70% can reduce peak cooling demand by 10–20%.
- Night purge: where evening outdoor temps and humidity drop, use night ventilation to purge thermal mass. In many Zone 1 sites humidity remains high at night — check local data before relying on night purge.
- Thermal mass: interior thermal mass (concrete floors, dense masonry) helps moderate daytime swings if paired with night purge or continuous cooling.
Efficient AC options
- Mini-splits (ductless or multi-split) with variable-speed compressors perform well. Avoid oversizing; use Manual J load calculations or conservative sizing tables. Variable-speed units hold temperature and reduce short cycles, improving latent removal.
- Controls: use thermostats with humidity set-points and demand-controlled ventilation logic. Combine with a whole-house dehumidifier if space humidity consistently exceeds targets.
Off-grid and net-zero integration
- For off-grid builds, factor cooling and dehumidification into solar and battery sizing. See net-zero home basics and the solar sizing basics for estimating array and battery needs.
- Water-efficient fixtures reduce latent loads from occupant activities; consult the water-efficient plumbing design guidance to lower mechanical requirements.
Worked example (approximate):
- Baseline unshaded single-story with R-13 walls and R-19 attic requires X BTU (assume a 2,000 ft² house for scaling).
- Add 2 ft overhangs + R-5 exterior CI + ventilated attic reduces solar and conduction loads; conservative estimate: 20–30% reduction in peak sensible load, and 10–20% reduction in latent load needing dehumidification. Exact values depend on glazing area and orientation.
For practical DIYers, shading, reflective roofing, and ventilated attics deliver the biggest savings per dollar before upgrading HVAC.
Material Choices and Durable Finishes for Hot-humid Homes
Choose materials that handle repeated wetting, dry quickly, and resist corrosion. Durability reduces maintenance and mold risk.
Exterior Cladding, Sheathing, and Fasteners
- Cladding options: fiber-cement siding, cement-board panels, and open-joint rainscreen systems shed water and tolerate wetting. Avoid trapping moisture behind non-breathable veneers.
- Sheathing: favor plywood or treated sheathing in high-exposure areas; compare sheathing options in the plywood vs OSB moisture resistance guide.
- Fasteners and flashings: use stainless or hot-dip galvanized fasteners in coastal exposures. Metal flashing should be corrosion-resistant and installed with slope to drain.
Insulation Materials
- Fiberglass and cellulose perform adequately if kept dry and protected by proper WRB and cladding. Closed-cell spray foam holds moisture differently and can complicate drying paths; evaluate drying potential before choosing foam.
- Exterior continuous insulation should be permeable or balanced with permeable WRB to allow drying to the exterior.
Interior Finishes
- Use mold-resistant gypsum in high-humidity rooms, moisture-tolerant paints, and elevated trim details to keep finish materials dry after incidental wetting.
- Seal and grout wet areas properly; provide mechanical drying (exhaust fans, dehumidifiers) for high-use bathrooms and laundry rooms.
For broader sustainable-materials context see the sustainable materials guide. Prioritize materials that reduce maintenance and do not hide moisture problems.
Key Design Takeaways (quick Checklist)
- Confirm local climate data: use the climate lookup to verify you’re in Climate Zone 1 and pull design temperatures.
- Prioritize drainage: slope 5% away for first 10 ft, continuous gutters, and direct downspouts away from the foundation.
- Use a rainscreen: provide a ventilated gap behind cladding for exterior drying.
- Continuous exterior insulation: shift condensation risk outward, increase whole-wall R-value.
- Continuous air barrier: taped sheathing or membrane to limit humid air infiltration.
- Balanced ventilation + dehumidification plan: design for 40–50% RH and provide whole-house dehumidification where needed.
- Avoid interior polyethylene: do not create impermeable interior barriers that stop drying to the exterior.
- Use corrosion-resistant fasteners and coated flashings in coastal or high-salt areas.
- Right-size HVAC: Manual J or equivalent load calculation; prefer variable-speed equipment and humidity controls.
- Inspect and test: hygrometers in multiple rooms, annual flashing checks, biannual HVAC and dehumidifier maintenance.
Common DIY Pitfalls to Avoid
- Relying solely on natural ventilation without dehumidification in persistently humid areas.
- Installing vapor-impermeable interior films that trap moisture.
- Skipping continuous air sealing at windows and penetrations.
- Oversizing cooling equipment (short cycles reduce latent removal).
Short Materials and Systems Cheat-sheet
- Cladding: fiber-cement over rainscreen.
- Wall: 2x6 cavity R-19 + CI R-5 + permeable WRB.
- Roof: ventilated attic R-38 or sealed roof with exterior foam per detail.
- Ventilation: balanced system with humidity control and whole-house dehumidifier when needed.
The Bottom Line
Climate zone 1 design must address moisture first: prevent bulk water entry, enable exterior drying, and control humid indoor air with balanced ventilation plus dehumidification. The highest-impact interventions are good site drainage, a continuous air barrier with rainscreen cladding, and a ventilation/dehumidification strategy sized to keep indoor RH in the 40–50% band. Confirm your local Climate Zone 1 data, draft envelope and ventilation plans, and consult local code and inspectors early.
Video: How to Design a House in Hot & Humid Climate
For a visual walkthrough of these concepts, check out this helpful video:
Frequently Asked Questions
Can I use interior polyethylene vapor barriers in hot-humid climates?
The short answer is generally no. In climate zone 1, interior polyethylene can trap moisture in wall cavities because the vapor drive is typically from outdoors inward; that stops assemblies from drying to the exterior and increases mold risk. Instead, use a smart vapor retarder or rely on a permeable interior finish when the wall design allows exterior drying.
Should I use ERV or HRV in climate zone 1?
In very humid climates, standard ERVs that transfer moisture can sometimes introduce humidity from exhausted air, depending on climate and unit efficiency. An enthalpy exchanger or a high-performance ERV tuned for humid climates can reduce cooling loads, but many builders pair balanced ventilation with a dehumidifier. See the HRV vs ERV comparison and the balanced ventilation guide for system selection guidance.
How do I size dehumidification for a whole house?
Dehumidifier sizing depends on house tightness, occupant load, and outdoor humidity. A practical rule of thumb is 10–30 pints per day for typical 1,000–2,500 ft² homes in humid coastal areas; tighter homes with high occupancy or wet activities need more. For accuracy, calculate indoor moisture generation and choose a unit or ducted solution that handles peak loads, and use humidity sensors to control operation.
What's the best wall assembly for DIYers in zone 1?
A wood-frame wall with cavity insulation plus continuous exterior insulation and a ventilated rainscreen is an excellent balance of performance and DIY feasibility. It provides exterior drying, reduces thermal bridging, and uses familiar framing techniques. Combine that with a permeable WRB and continuous air sealing for best results.
How often should I inspect and maintain ventilation and cladding?
Inspect cladding flashings and sealants annually, and check gutters/downspouts after heavy storms. For ventilation and dehumidification, replace filters every 3–6 months, inspect ducts and condensate drains annually, and test performance (hygrometers, airflow) during warm months to ensure systems maintain RH targets.