Practical guidance for DIYers building in climate zone 4 (mixed-dry): insulation, moisture control, assemblies, and cost-smart system choices.
Building in Climate Zone 4: Mixed Dry Design
Building in climate zone 4 matters for DIY homebuilders because it defines how to balance insulation, moisture control, and ventilation for a reliable, energy-efficient house. This guide focuses on climate zone 4 (mixed-dry) and shows practical assemblies, insulation targets, and moisture-management tactics that reduce risk and operating costs. Readers will learn specific wall and roof assemblies, foundation details, system pairings (heat pumps, ERV/HRV), and cost-smart DIY options designed for moderate heating loads and warm summers.
TL;DR:
- Aim for wall assemblies with an effective whole-wall R of about R-20 to R-30 and attic insulation around R-50 to R-60; continuous exterior insulation of R-5 to R-15 prevents thermal bridging.
- Prioritize bulk water control first, then an airtight thermal envelope, and add mechanical ventilation (ERV or HRV) to manage indoor humidity and pollutant loads.
- Choose assemblies that dry to the exterior, avoid interior vapor-impermeable barriers, and select an ERV for most mixed-dry projects unless local humidity data or sources say otherwise.
Why 'mixed Dry' Matters: Understanding Climate Zone 4 for DIY Builders
Climate zone 4 (mixed-dry in the IECC/ASHRAE framework) sits between colder inland zones and warmer arid regions. In plain terms, mixed-dry areas have moderate winters, warm to hot summers, and generally low-to-moderate annual precipitation. Heating degree days are moderate compared with cold climates; cooling degree days can be significant depending on location. That means a home needs enough insulation to reduce heating bills but also strategies to prevent summer moisture and overheating.
Seasonal patterns matter: spring and fall shoulder seasons can drive condensation risk when warm, humid outside air meets cool interior assemblies. Freeze-thaw cycles are possible but less intense than in Zone 6. Bulk water — roof leaks, poorly drained cladding, or failing flashing — is the most common source of long-term failure in these climates. Design and detailing should prioritize shedding water first, then controlling vapor and air movement, and finally adding thermal resistance.
Examples of mixed-dry locations include transition areas in the interior Pacific Northwest, some lower-elevation parts of the Midwest, and semi-arid interior regions of the Southwest. For precise mapping by county or ZIP code, consult the Department of Energy's Building America climate-specific guidance. Compare how zone 4 differs from neighboring climates — for directional design contrasts, see this comparison for building in zone 3.
Design Goals for Zone 4: Durability, Moisture Management, and Energy Efficiency
Design goals should be concrete: stop bulk water, create an airtight continuous thermal envelope, and provide mechanical ventilation with energy recovery. Practical performance targets for many DIY-driven builds in climate zone 4 include:
- Whole-wall effective R: aim R-20 to R-30
- Attic insulation: R-50 to R-60
- Airtightness: work toward 1.0–2.0 ACH50 for retrofit or new DIY builds (Passive House target is 0.6 ACH50 but requires specialized testing and techniques)
- Ventilation: balanced mechanical ventilation with heat or energy recovery
Prioritizing the building envelope means focusing on continuity: continuous exterior insulation where feasible, sealed sheathing, and taped or gasketed window and door transitions. Passive House principles — airtight shell, high-performance windows, mechanical ventilation — are compatible with zone 4 goals, but budget-conscious builders may stage upgrades: start with air-sealing and attic insulation, then add continuous exterior insulation later.
Key points for decision-making:
- Bulk water control: roof and grade drainage take precedence.
- Air and vapor control: use a continuous air barrier; avoid interior vapor-impermeable layers that trap moisture.
- Cost trade-offs: airtightness and targeted insulation often return faster comfort and cost benefits than simply adding thicker cavity insulation.
For a contrast in design emphasis in colder regions, review the cold climate reference guide which helps frame how much less extreme zone 4 heating demands are compared with Zone 6.
Insulation and Wall Assemblies Suited to Mixed-dry Zone 4
Wall assemblies for mixed-dry climates should deliver thermal continuity, allow drying to the exterior, and resist moisture. Here are common practical assemblies:
- 2x6 cavity + continuous exterior rigid:
- Structure: 2x6 studs with mineral wool or dense-packed cellulose in cavity plus 1–2 in. polyiso or XPS outside.
- Benefit: Reduces thermal bridging, good DIY fit for retrofit projects.
- Vapor profile: Exterior insulation moves dew point outward; avoid interior vapor barriers.
- Double-stud or advanced-framed wall with dense-packed cellulose:
- Structure: Two stud walls or offset studs with a thick cavity filled with cellulose (R-3.5–R-3.8 per inch).
- Benefit: Excellent thermal and acoustic performance; low-cost materials.
- Caveat: Larger wall thickness requires careful exterior drainage and rainscreen.
- Exterior-insulated sheathing or Larsen truss:
- Structure: Standard sheathing with continuous rigid insulation, or use a Larsen truss option to create a deep cavity for exterior insulation or service runs.
- Benefit: Thick continuous insulation possible, passive-house compatible details easier to achieve.
- Good for high-performance retrofits and new builds.
- ICF or hempcrete hybrids:
- Structure: Insulated concrete forms (ICF) provide continuous insulation and mass; hempcrete offers breathable, moisture-buffering walls.
- Benefit: High moisture resilience and thermal mass in certain assemblies.
- See comparison: hempcrete vs ICF for hygrothermal behavior.
| Assembly | Typical Installed R-range | Moisture resilience | DIY friendliness | Relative cost |
|---|---|---|---|---|
| 2x6 cavity + 1–2" polyiso | R-20 to R-28 | Good (with proper WRB) | High | Moderate |
| Double-stud + dense-packed cellulose | R-25 to R-35 | Moderate (needs rainscreen) | Moderate | Lower |
| Larsen truss + exterior CI | R-30 to R-45 | Very good | Moderate | Higher |
| ICF | R-20 to R-30 effective | Excellent | Low (requires forms) | Higher |
| Hempcrete hybrid | R-15 to R-25 | Good (breathable) | Low-Moderate | Moderate |
In mixed-dry climates, the vapor profile should favor drying outward. Avoid sealed polyethylene on the interior; instead use vapor-retarding paints or smart vapor retarders where needed. For window installation follow passive-house-compatible practices: a continuous air barrier, a properly sized sill pan, and taped or gasketed flashings. Practical sealing steps are in the window guide: how to seal windows for passive house standards.
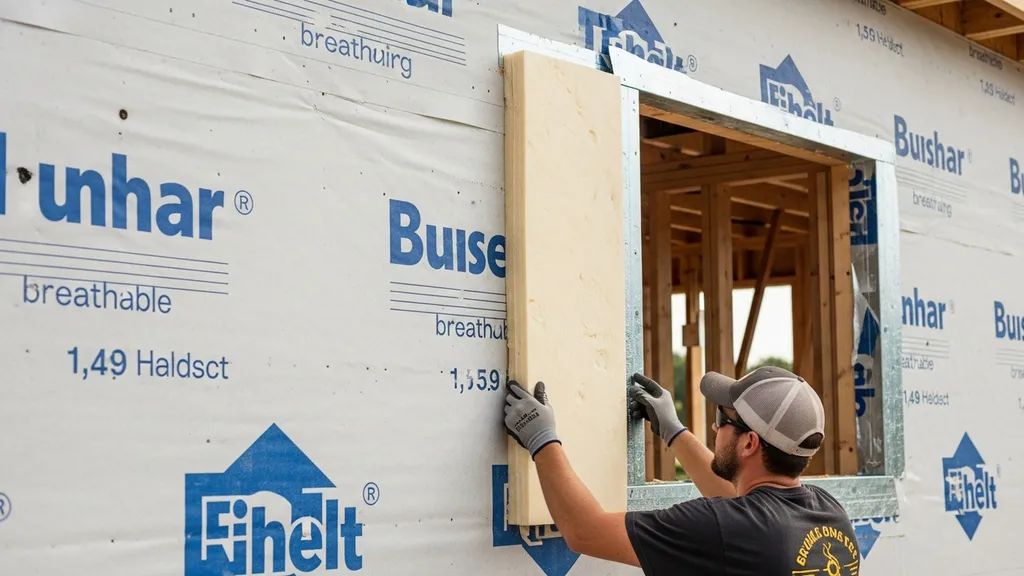
The wall assembly section includes a visual learning aid for builders and installers: viewers will learn how continuous exterior insulation, window flashings, and rainscreen details come together in a mixed-dry climate. Watch the video demonstration below before starting fieldwork:
For a visual demonstration, check out this video on continuous exterior insulation training (the perfect wall, design:
For help with installing exterior insulation, consult the detailed exterior insulation installation guide.
(Mention: secondary keyword "zone 4 insulation" used here for R guidance.)
Roof, Attic, and Ventilation Strategies for Zone 4
Choosing between a vented attic and an unvented (conditioned) attic depends on budget, duct placement, and risk tolerance. Vented attics are simpler and less costly: they keep the ceiling plane cold and rely on ventilation to move moisture out. Unvented attics place insulation along the roof deck (spray foam or rigid CI) and treat attic space as conditioned; this protects ducts and HVAC equipment and simplifies mechanical ventilation routing.
Attic insulation targets for comfort and efficiency in zone 4 commonly fall between R-50 and R-60 in the ceiling plane. If placing insulation at the roof deck, aim for continuous insulation equivalent to those R-values or combine cavity plus exterior to reach the target. Air-sealing at the ceiling plane is the single most effective measure for reducing heat loss and preventing moist air from reaching cold surfaces where it can condense.
Condensation control: shoulder seasons can create dew-point swings. Practical steps include:
- Create a continuous air barrier at the ceiling plane with taped drywall-to-top-plate junctions, gaskets, or sealed sheathing.
- Install baffles at eaves/soffits to maintain airflow in vented attics and prevent insulation blocking intake vents.
- Seal penetrations (recessed lights, chimneys, plumbing vents) and use airtight fixtures when possible.
Industry discussion recommends keeping HVAC equipment out of roof cavities when using vented attics; read relevant practices on Green Building Advisor: advice about vented vs unvented attics and equipment placement. In hot summer months a cool roof or reflective surface can reduce cooling loads; see local codes and product guidance before specifying finishes.
When ducts are present, seal all joints with mastic and use foil-backed tape approved for HVAC use. Installing ducts within conditioned space (either a conditioned attic or inside the thermal envelope) reduces losses and improves system performance.
Foundations, Slabs, and Crawl Space Details for Mixed-dry Climates
Slab-on-grade construction in zone 4 usually benefits from perimeter insulation, a capillary break under the slab, and a well-sealed vapor barrier. Two common cost-effective approaches are:
- Insulated slab edge: place rigid foam around the slab perimeter to reduce heat loss through the slab edge.
- Under-slab insulation: add rigid foam under the slab in colder spots or for higher-performance projects; this increases cost but improves continuous thermal performance.
Crawl spaces can be vented or sealed (conditioned). In mixed-dry climates, sealed conditioned crawl spaces with insulation on the walls and a continuous ground vapor barrier often perform better for moisture control and HVAC efficiency. Seal vents, install a continuous 6-mil or thicker vapor retarder on the ground, and condition the space or supply limited conditioned air.
Frost and soil: some zone 4 areas have shallow frost depths while others are deeper. Check local code for footing depths. Where frost is a concern, consider frost-protected shallow foundations where permitted, and consult the frost-protected foundation notes for when this method applies.
Practical tips for DIYers:
- Always include a capillary break (gravel or polyethylene) under slabs.
- Seal sill plates to the foundation with an approved sill sealer and mechanical anchors.
- Consider termite and rodent mitigation when placing foam at or below grade — use treated sill plates and follow local pest-control rules.
For a quick reference to IECC values and common practices for zone 4 insulation requirements, see this crosswalk of code requirements: IECC Climate Zone 4 insulation guide.
Heating, Cooling, and Ventilation Systems That Pair Well with Tight Envelopes
Tighter envelopes reduce heating loads dramatically, enabling smaller, more efficient systems. In zone 4, heat pumps (air-source or mini-split ductless) are often the best pairing for efficient heating and cooling. Right-sizing is critical: once the envelope is improved, calculate loads with a Manual J or simplified sizing tool and avoid rule-of-thumb oversizing.
Ductless mini-splits:
- Pros: Zoned comfort, no ducts required, high seasonal efficiency (SEER/HSPF ratings matter).
- Cons: Multiple indoor units can be visually intrusive; installer skill affects performance.
Central heat pumps with ducts:
- Keep ducts inside the conditioned envelope when possible.
- Seal ducts with mastic and insulate to reduce distribution losses.
ERV vs HRV: In mixed-dry climates, an ERV (energy recovery ventilator) often makes sense because it transfers a portion of sensible and latent heat, helping control indoor humidity without losing energy. HRVs exchange heat only and are best where indoor humidity is low or mechanical dehumidification is used. Local winter and summer humidity patterns determine the better choice; compare device specs and consult product literature. For guidance comparing heat-based systems, see the heat pump vs furnace comparison.
For off-grid or backup considerations, pair a primary heat pump with a small electric resistance backup or a propane backup installed to code. The off-grid heating solutions article offers troubleshooting for reliability in remote projects.
Simple DIY-friendly system tips:
- Right-size the heat pump after envelope improvements — often 30–50% smaller than pre-upgrade estimates.
- Use programmable thermostats and install zoning where feasible for big load variation rooms.
- Keep ventilation ducts short and inside the thermal envelope; if long runs are unavoidable, insulate and seal them well.
(Secondary keyword "passive house zone 4" mentioned in context of airtightness targets above.)
Moisture-risk Checklist and Build Details to Avoid Common Failures
A focused checklist stops the most common moisture failures found on DIY builds. High-risk details include window sills, roof-to-wall transitions, deck-to-cladding junctions, and below-grade interfaces.
Checklist highlights:
- Flashing: Install a full sill pan at windows, extend flashing over the sheathing and tie into the WRB.
- WRB and shingling: Use shingle-lapped WRB techniques and tape seams at sheathing penetrations.
- Rainscreen: Provide a ventilated 1/8"–3/8" gap behind cladding or install furring strips for a rainscreen to promote drying.
- Drainage plane: Ensure cladding and flashing details slope away from the structure and that water has a clear path off the wall.
- Interior sequencing: Allow wet trades to dry before closing walls; avoid installing impermeable finishes over damp substrates.
Actionable instructions:
- For window transitions, apply a self-adhered sill flashing, then tape the jambs to the WRB and set the window on the sill pan. Check the window sealing for passive standards for step-by-step methods.
- For cladding, a ventilated rainscreen with a vertical furring strip creates a capillary break and allows airflow; technical steps are in the rainscreen wall assembly guide.
- Use a water hose test on installed window flashings: gently spray the window head and sill to verify water sheds and flashing routes water away from the interior.
Small checks that prevent big problems:
- Confirm WRB continuity at corners and transitions before cladding.
- Maintain 6" minimum clearance between soil and siding, more for wood siding.
- Route roof drip edges, kick-out flashings, and gutters to keep water away from walls.
Cost-effective Materials and DIY-friendly Techniques for Zone 4 Builds
When budget is limited, prioritize measures with the best performance per dollar: air-sealing, attic insulation, and targeted continuous insulation at problematic thermal-bridge locations (corners, cantilevers, rim joists). A simple upgrade sequence with strong ROI:
- Air-seal the building envelope and add attic insulation.
- Seal and insulate rim joists and band joists.
- Add 1–2 inches of continuous exterior insulation if budget allows.
- Install balanced mechanical ventilation.
Material Trade-offs:
- Mineral wool: fire-resistant, vapor open, easy to install in cavities.
- Cellulose: low-cost, good thermal and acoustic performance, DIY dense-packing possible with rental machines.
- Polyiso: high R per inch, but performance drops in cold; suitable as exterior CI in mixed-dry climates.
- ICF/hempcrete: higher upfront cost but may reduce long-term maintenance and provide hygrothermal buffering.
Consider natural or hybrid builds:
- Adobe and earth options work well in drier pockets of zone 4 but need protection from bulk water; read the adobe building methods guidance for suitability.
- Earthbag construction offers low cost but requires raised foundations and cladding to avoid moisture wicking; see earthbag low-cost method.
Look for incentives to offset upgrades: consult the incentives and tax credits article to identify rebates for heat pumps, insulation, and energy-recovery ventilation in 2026.
For a broad list of sustainable materials and product choices, consult the sustainable materials guide.
The Bottom Line
In climate zone 4 (mixed-dry), control bulk water first, build a continuous air and thermal barrier that dries to the exterior, and provide balanced mechanical ventilation to manage indoor humidity. Prioritize air-sealing and attic insulation as the best first steps; then add continuous exterior insulation and an ERV for durable, efficient performance.
Frequently Asked Questions
Is a vapor barrier necessary in seasonally mixed-dry climates?
For mixed-dry zone 4, a full interior polyethylene vapor barrier is usually not recommended because it can trap moisture in wall assemblies. Instead, use a continuous air barrier (taped sheathing, sealed drywall at junctions) and consider a smart vapor retarder that changes permeability with humidity. This approach lets assemblies dry to the exterior while still limiting inward air leakage that carries moisture. Industry guidance and hygrothermal analysis show that drying capacity to the exterior reduces long-term risk.
What R-values should I aim for in walls and attics?
Target whole-wall effective R-values around R-20 to R-30 for walls and R-50 to R-60 for attics as practical performance goals in zone 4. Achieve wall targets with combinations like a 2x6 cavity plus 1–2 inches of continuous exterior rigid insulation, or a deep double-stud filled with dense-pack cellulose. Attic numbers depend on whether insulation is at the ceiling plane or roof deck; always prioritize air-sealing before adding significant insulation.
Should I use a vented or unvented attic?
Either can work in zone 4. Vented attics are simpler and less expensive, but require careful air-sealing at the ceiling plane and well-protected ducts if HVAC equipment is located there. Unvented conditioned attics (insulation at the roof deck) keep ducts in conditioned space and simplify HVAC performance. Choose unvented attics when placing equipment up there or when higher-performance roof assemblies are practical; otherwise, vented attics remain a cost-effective option with proper detailing.
Can natural materials like hempcrete or adobe be used in mixed-dry zone 4?
Natural materials can work, but they need protection from bulk moisture. Hempcrete provides breathable walls that buffer humidity and resist mold if detailed with a rainscreen and high-quality foundation drainage. Adobe and earth systems perform well in drier pockets of zone 4 but require elevated foundations, good roof overhangs, and durable exterior finishes to prevent wetting. Review material-specific guides such as the adobe and earthbag articles before committing.
How do I decide between an ERV and an HRV?
Choose an ERV when you need to control both sensible heat and moisture transfer, which is often useful in mixed-dry climates where summer humidity and winter dryness vary. An HRV is preferable when indoor humidity is low and only sensible heat recovery is needed. Compare manufacturer specifications for sensible and latent transfer efficiencies, and base the choice on local winter and summer humidity trends plus the building's anticipated internal moisture loads.