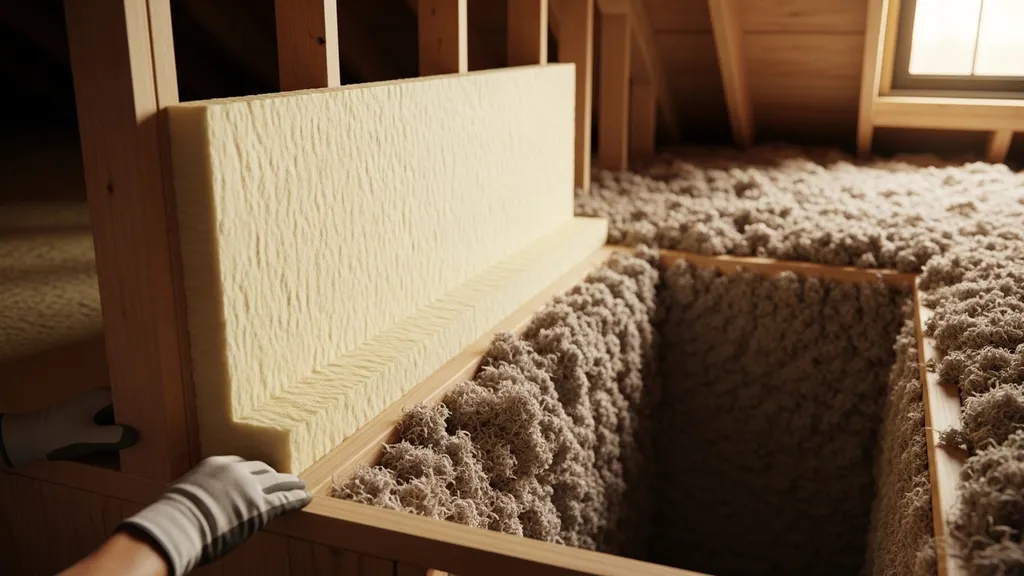
Compare R-21 and R-38 insulation for walls and attics — performance, thickness, costs, installation, and choosing by climate and budget.
R-21 vs R-38 Insulation: Which Do You Need?
Choosing between R-21 vs R-38 insulation starts with one simple question: where in your building envelope do you need the resistance to heat flow? This article compares the two R-values for practical DIY and self-build situations so you can pick the right material, thickness, and installation approach for walls, attics, and outbuildings. The comparison covers typical assemblies, R-per-inch ranges, cost drivers, retrofit strategies, and scenario-based recommendations for mild to cold climates.
TL;DR:
- R-21 fits most 2x6 wall cavities (about 5.5–6" of batt or dense-packed cellulose); good for mild climates or when combined with continuous exterior insulation.
- R-38 is a common attic target (roughly 10–13" of fiberglass/cellulose) and is recommended for colder zones or when attic heat loss is the main issue.
- Prioritize air sealing and thermal break strategies before adding thickness; often a mix of cavity fill + continuous insulation yields better value than just deeper batts.
R-21 vs R-38 Insulation: Quick Overview and TL;DR
What This Comparison Covers
R-value measures a material's resistance to conductive heat flow. Higher R means better insulation for the same area. Homebuilders often compare R-21 and R-38 because R-21 is a typical target for 2x6 wall cavities while R-38 is a common attic/ceiling target under many codes and energy-efficiency guides. This piece explains where each R-value is appropriate, how to achieve it with different materials, the thickness you'll need, and the trade-offs for retrofit and new-build projects.
Research-based guidance on recommended home insulation by assembly and climate is available from Energy Star; see the recommended home insulation R–values guide for baseline targets and regional guidance. For mandatory code thresholds, the International Energy Conservation Code includes ceiling/attic requirements and options for compliance; see the 2018 IECC chapter on residential energy efficiency for examples of ceiling R-value rules and alternatives.
R-21 vs R-38: Comparison Table (performance, Thickness, Cost Factors)
Below is a compact comparison to see the main differences at a glance. Watch the short video to visualize thickness and installation differences before reading the full details.
This video compares the options to help you decide:
| Application | Typical cavity depth or assembly | Common materials available at that R | Approx. thickness required (range) | Relative cost driver | Typical energy-saving role |
|---|---|---|---|---|---|
| Exterior walls (framed) | 2x6 stud cavity (5.5–6") | Fiberglass batts, mineral wool, dense-pack cellulose, open-cell spray | R-21: 5–6" (batts), 4.5–6" (dense-pack) | Low–medium (material cost) | Baseline wall insulation, reduces heat loss through walls |
| Attic/ceiling (vented) | Attic floor with joists or deep bays | Blown cellulose, fiberglass batts, layered batts, spray foam | R-38: 10–13" fiberglass/cellulose; thicker for low-density products | Medium–high (blown-in labor, access) | Major reduction in heat transfer through roof, high energy savings in cold climates |
| Retrofit deepening | Top-up over existing insulation | Blown cellulose or fiberglass; add batts or continuous insulation | Add 6–12" depending on existing R | Medium (access & prep) | High return for poorly insulated attics; faster payback |
| Continuous exterior | Exterior rigid insulation over sheathing | Polyiso, XPS, mineral wool board | Varies by product; 1–2" polyiso ≈ R-6–R-12 | High (material & install) | Reduces thermal bridging and may allow thinner cavity insulation |
Note: The DOE Building Technologies Office provides framing and assembly guidance for energy-efficient builds; see the Department of Energy's building technologies resources for codes and efficiency programs. For readers considering higher attic targets, compare R-38 vs R-60 or intermediate comparisons like R-19 vs R-38 comparisons to see how additional inches affect savings.
R-21 Insulation: What It Is, Strengths, Weaknesses, Best For
Overview: Assemblies and Where You Find R-21
R-21 is a practical target for most 2x6 framed exterior walls and some floor assemblies. Common products sold as R-21 include fiberglass batts sized for 2x6 studs, mineral wool batts, and dense-packed cellulose installed into thicker cavities or into retrofit stud bays. Typical R-per-inch values:
- Fiberglass batts: about 2.6–3.3 per inch (product dependent)
- Mineral wool: about 3.0–3.3 per inch
- Dense-packed cellulose: about 3.2–3.8 per inch (installed density matters)
A 2x6 cavity (nominal 5.5" to 6") usually accepts R-21 batts, making R-21 the practical ceiling for standard 2x6 framing without adding furring or exterior continuous insulation.
Strengths
- Fits 2x6 framing without changing stud depth. That keeps costs down and simplifies framing decisions; see our comparison of 2x6 vs 2x8 walls for when deeper cavities make sense.
- Lower material cost per bay compared with thicker assemblies. Batts are inexpensive and fast to install for DIYers.
- Multiple retrofit options: you can dense-pack cellulose into existing cavities rather than remove finishes, which often yields a better fill and reduces air movement.
Weaknesses
- Lower total insulation than attic R-targets like R-38, so walls insulated to R-21 may still be the biggest heat loss path in cold climates, especially where thermal bridging through studs is significant.
- Wall R-value is only part of the picture; air leakage, window performance, and continuous insulation strongly influence real-world heat loss. If the goal is higher envelope performance, adding 1–2" of exterior insulation may outperform simply increasing cavity R.
Best For: Use Cases and Quick Examples
- New builds on a budget in mild climates where heating loads are modest.
- Accessory buildings, garages converted to conditioned space, and tiny homes where wall thickness and interior floor area matter.
- Retrofit where removing interior finishes is impractical—dense-pack cellulose into 2x6 cavities is often the most cost-effective route. For attic-specific questions tied to R-21 use, our attic insulation guide explains when attic upgrades matter more than wall upgrades.
R-38 Insulation: What It Is, Strengths, Weaknesses, Best For
Overview: Where R-38 is Typically Used
R-38 is a common target for attic floors and uninsulated ceilings, particularly in temperate and cold climates. It often corresponds to about 10–13" of fiberglass or cellulose at typical R-per-inch values. Achieving R-38 in walls would require very deep cavities or exterior continuous insulation; in practice, builders aim R-38 at the attic because that is the largest area of heat transfer.
Strengths
- Large energy-saving potential: adding R-38 in the attic frequently yields quicker payback because attics represent a big share of heat loss. DOE and installers often recommend R-30 to R-38 as the minimal attic target in many regions. Blown-in cellulose or fiberglass is efficient to install in attics and can be layered over existing insulation.
- Flexible material choices: blown cellulose or fiberglass, layered batts, or combinations with air-sealing give access to different budget and performance points. For roof assemblies aiming for very high R-values, consider exterior insulation strategies discussed in exterior roof options.
Weaknesses
- Thickness: reaching R-38 requires significant depth (10–13" typical), which may not fit inside rafter bays in old houses without supplemental solutions.
- Higher labor and access costs for blown-in insulation, especially if attic access is cramped or requires moving ducts and wiring.
- In some passive-house level designs, designers prefer continuous exterior insulation plus thinner cavities to better manage thermal bridging; R-38 alone may not achieve target whole-wall performance.
Best For: Use Cases and Quick Examples
- Cold-climate attics where heating dominates energy use—bumping attic insulation from R-19 to R-38 often produces measurable energy savings. Compare higher attic options like R-38 vs R-49 if pursuing deeper upgrades.
- New builds targeting improved energy performance where attic depth is available and the budget allows blown-in or layered installations.
R-21 vs R-38: Cost, Material Choices, and Thickness Needed
Material Comparison: Fiberglass, Mineral Wool, Cellulose, Spray Foam
Each material has a different R-per-inch, cost, and installation profile:
- Fiberglass batts: R≈2.6–3.3 per inch, low material cost, DIY-friendly for cavities and attic batts.
- Mineral wool (rock wool): R≈3.0–3.3 per inch, better fire and sound characteristics, slightly higher cost.
- Dense-packed cellulose: R≈3.2–3.8 per inch installed, good air infiltration resistance, moderate cost; ideal for retrofits and attic top-up. See our comparison of spray foam vs cellulose for trade-offs on air sealing and moisture.
- Spray polyurethane foam (closed/open-cell): R-per-inch varies—closed-cell ~6–7, open-cell ~3.5; higher cost and requires professional install, but offers both R and air-sealing. For lower-toxicity options, see spray foam safety alternatives.
Thickness and R-per-inch for Common Materials
Approximate thickness ranges to reach each R-value (product and installation quality change results):
- To reach R-21: Fiberglass batts ~6" (R-21), mineral wool batts ~6", dense-pack cellulose ~5.5–6" depending on density.
- To reach R-38 (attic): Blown cellulose or fiberglass ~10–13"; open-cell spray foam would need ~11–12" (less practical); closed-cell would need less thickness but cost is much higher.
For a quick comparison of how mid-range R-values relate, see R-13 vs R-38 trade-offs.
Cost Drivers to Consider (materials, Labor, Access, Disposal)
- Material price per bag or roll. Batts are cheapest per installed R for walls.
- Labor and equipment: blown-in cellulose requires a blower and time; spray foam needs licensed crew and specialized gear. Check our insulation tools list for DIY kit options and rental gear.
- Access complexity: attic obstructions, HVAC, and wiring increase installation time and cost. Disposal of old insulation or vapor-damaged materials adds cost.
- Long-term value: attic upgrades to R-38 often yield faster energy savings than increasing wall cavity R alone.
When Layered Approaches Make Sense
Layering cavity insulation with continuous exterior insulation is a commonly recommended strategy: a 2x6 wall with R-21 cavity plus 1–2" of rigid exterior foam reduces thermal bridging and often outperforms a thicker cavity-only wall. Layering is also how many retrofits achieve high attic R without raising rooflines: add blown-in insulation over existing batts or use insulated roof sheathing. For embodied carbon and materials choice guidance, consider our natural vs synthetic insulation.
R-21 vs R-38: Installation and Framing Considerations
Framing Depth: 2x6 Walls vs Deeper Cavities
R-21 typically fits standard 2x6 studs. Achieving R-38 in a cavity alone would demand 10–12" stud depth—this is why R-38 is an attic target. If you need wall R higher than R-21, either use deeper studs (2x8 framing), built-out interior or exterior furring, or add continuous exterior insulation. See our 2x6 vs 2x8 walls article for framing trade-offs.
Retrofit vs New Build: How Depth and Access Change the Choice
- Retrofit: Dense-pack cellulose into stud bays avoids removing drywall and can get you close to R-21 in many 2x6 walls. Attics are usually the easiest retrofit location—adding blown-in insulation over existing material is fast and cost-effective. Check the practical steps in our attic insulation guide.
- New build: Plan cavity depth and continuous insulation up front. Exterior continuous insulation reduces thermal bridging and can allow thinner cavities to meet the same whole-wall performance.
Air Sealing and Thermal Bridging: Why R-value Alone Isn't the Full Story
Air leakage and thermal bridges through studs and framing can cut effective performance. Focus on:
- Sealing gaps at top plates, sill plates, rim joists, and around penetrations using appropriate sealants and gaskets. Our air sealing tips covers common methods and materials.
- Breaking thermal bridges with exterior insulating sheathing or a rainscreen and insulated cladding—see the rain screen assembly guide for details. A well-sealed assembly with moderate R often outperforms a leaky assembly with higher nominal R-value.
Attic-specific Installation Notes (vented vs Unvented Assemblies)
- Vented attics: Keep a clear ventilation path from soffit to ridge; insulation sits on the attic floor. For R-38, ensure baffles (rafter vents) maintain airflow past eaves when adding insulation depth. Follow attic ventilation guidance in the DOE resources linked earlier.
- Unvented roof assemblies: Use closed-cell spray foam or well-detailed exterior insulation to control condensation risk. For high-performance roofs, examine exterior options covered in exterior roof options. Tools and gear for attic work are listed in our insulation tools list.
R-21 vs R-38: Which Should You Choose? Scenario-based Recommendations
Budget Beginner Self-build: Cost-conscious Choices
Recommendation: Use R-21 in walls (2x6 batts or dense-packed cellulose) and prioritize getting attic to at least R-38 if budget allows. Steps:
- Install R-21 batts in 2x6 walls.
- Air seal top plates and rim joists before insulating.
- Add blown cellulose to the attic to hit R-38 when possible—this gives the best bang for buck.
If funds are tight, aim for R-21 walls and R-38 attic in stages.
Cold-climate Retrofit: Prioritize Performance
Recommendation: Focus on attic to R-38 or higher, add exterior continuous insulation to walls, and seal air leaks. Steps:
- Top up attic insulation to R-38 or higher depending on local IECC/DOE guidance and your heating bills; compare bigger attic targets in R-38 vs R-49 comparison.
- Add 1–2" continuous exterior insulation to reduce thermal bridging rather than trying to get R-38 inside walls.
- Address ventilation and mechanical ventilation needs if tightening the envelope.
Passive-house or Deep Retrofit Goals
Recommendation: Move beyond simple R-targets to whole-wall and whole-roof performance. Steps:
- Combine cavity insulation with continuous exterior insulation and airtight detailing to meet PHIUS or Passive House metrics. External insulation plus smaller cavity R often wins for thermal bridging. See DOE and passive-house resources when setting targets.
- Use air-permeability testing (blower door) to verify results.
Tiny Houses, Workshops, and Outbuildings: When R-21 Can Be Enough
Recommendation: For small spaces or intermittently used buildings, R-21 walls with modest attic insulation may be appropriate. Steps:
- For heated tiny homes, use R-21 in walls and focus on airtight doors and windows.
- For unheated workshops, R-21 may be sufficient if you’re not conditioning the space continuously; see how to insulate a shed floor for related guidance on small structure priorities.
The Bottom Line
R-21 is the practical choice for 2x6 wall cavities and budget-conscious builds; R-38 is the right target for attics in colder zones and where attic heat loss dominates. Focus first on air sealing and addressing thermal bridging—then choose materials and thickness so your assembly delivers the effective performance the math promises.
Frequently Asked Questions
How does climate zone affect whether to choose r-21 or r-38?
Climate drives recommended R-values. In mild climates, R-21 walls and R-30 to R-38 attics can be sufficient, while cold climates often require higher attic R (R-38 or more) and may benefit from exterior wall insulation to reduce thermal bridging. Check regional targets from Energy Star and your local code; the [Energy Star recommended R–values guide](https://www.energystar.gov/saveathome/seal_insulate/identify-problems-you-want-fix/diy-checks-inspections/insulation-r-values) is a convenient starting point.
Can I use r-21 in an attic if I air seal well?
R-21 in an attic is lower than typical recommendations for many regions. Air sealing reduces convective losses and improves performance, but the attic often needs R-30 to R-38 to meaningfully cut conductive heat transfer. If you must choose, prioritize air sealing first, then add insulation until you reach the regional attic target listed by DOE/IECC guidance.
Is it better to add continuous exterior insulation than thicker cavity insulation?
Often yes. Continuous exterior insulation reduces thermal bridging through studs and can raise whole-wall performance more effectively than simply increasing cavity thickness. A 2x6 wall with R-21 cavity plus 1–2" exterior rigid board can outperform a much deeper cavity alone when you account for framing thermal bridges.
How do I calculate [how much](https://usainsulation.net/blog/how-much-insulation-do-i-need-in-my-attic) insulation I need for my attic or wall?
Start by measuring existing depth and identifying the product type (batts, blown cellulose, etc.). Use R-per-inch estimates from manufacturers (or typical ranges: fiberglass ~2.6–3.3, cellulose ~3.2–3.8) to compute required thickness. For code compliance or precise payback analysis, consult the IECC chapter on residential energy (see the [2018 IECC chapter 4](https://codes.iccsafe.org/content/iecc2018/chapter-4-re-residential-energy-efficiency)) and consider using an energy model or an online calculator.
What are common mistakes when choosing between r-21 and r-38?
Common mistakes include focusing only on nominal R-value and ignoring air leakage, thermal bridging, and moisture control; assuming thicker batts always beat continuous insulation; and underestimating attic access costs and ventilation needs. Plan for air sealing and consult assembly-level guidance (attic ventilation, rainscreen details) before buying insulation materials.